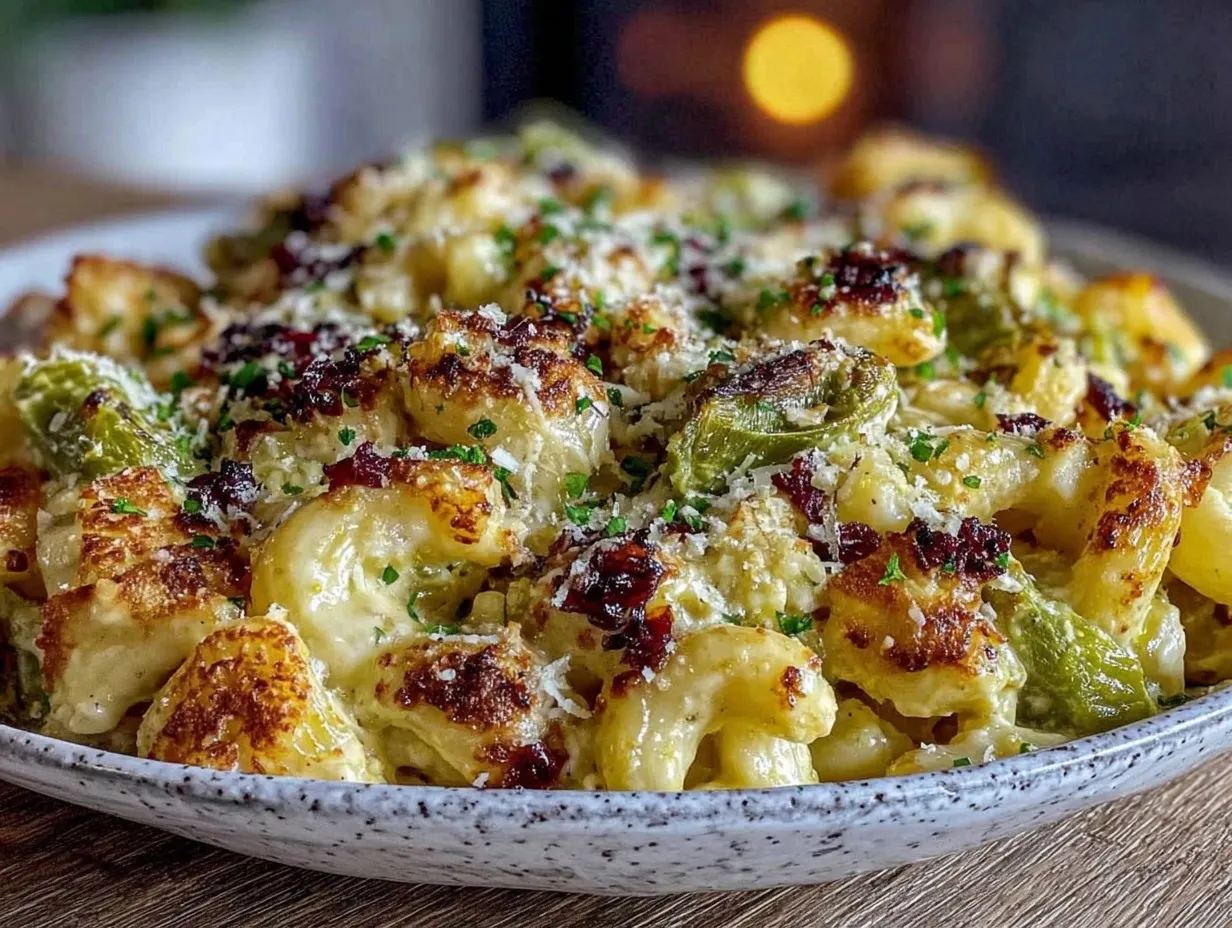
Third time in one week and the kitchen still smells like that smoky, spicy warmth that only Hatch green chiles can bring. By the fourth batch, I was no longer just cooking mac and cheese—I was chasing that perfect creamy balance, the one where the heat from the chiles tickles your tongue just right without stealing the spotlight. It’s weird how something so simple can pull you back again and again, each time with just a tiny tweak—less cheese here, more slow stir there—until it felt like the dish finally clicked. Honestly, I didn’t expect to get this hooked on mac and cheese, but the subtle bite and earthy sweetness of Hatch green chiles made it feel like a whole new comfort food. The way the cheese curls around each elbow pasta, melting into a velvety sauce, paired with those roasted chiles? It’s a combo I didn’t know I needed, but now I can’t imagine a cozy night without it.
There’s this satisfying crackle when you bite into a piece with a chile surprise tucked inside, and that smoky aroma lingers long after the last forkful. I found myself making it every Friday night for a month—just because it felt like the perfect way to wind down. It’s not fancy or complicated, but it’s got layers of flavor that keep you guessing and coming back for more. Somehow, this creamy Hatch green chile mac and cheese recipe became my little obsession, and I’m convinced it’ll be yours too, once you taste that first silky, spicy bite. No hype, just honest, cozy, slightly addictive comfort food that sticks.
Why You’ll Love This Recipe
After countless trials and tweaks, this creamy Hatch green chile mac and cheese recipe stands out for a bunch of reasons that I can vouch for personally:
- Quick & Easy: Ready in about 30 minutes, this recipe is perfect for those hectic weeknights when you want comfort without the wait.
- Simple Ingredients: No need for specialty shopping trips. Most items are pantry staples, with the star being Hatch green chiles, which you can find canned or fresh in many stores.
- Perfect for Cozy Dinners: Whether it’s a chilly evening or a laid-back weekend meal, this mac and cheese brings warmth and a little kick.
- Crowd-Pleaser: Kids and adults alike love the creamy texture combined with just enough heat. It’s always a hit when friends drop by unexpectedly.
- Unbelievably Delicious: The creamy cheese sauce with the smoky, slightly spicy Hatch chiles gives this dish a unique depth that makes it anything but ordinary.
This recipe isn’t just about melting cheese and pasta; it’s about getting the seasoning just right so the Hatch green chiles shine without overpowering. I blend sharp cheddar with creamy Monterey Jack for a smooth, rich sauce that clings perfectly to every noodle. The secret? Slow melting and a touch of cream to keep things luscious. Plus, roasting the chiles yourself (if you have the time) adds a fresh, smoky dimension that canned versions can’t quite match. Honestly, this version is my best by far, and I think you’ll notice the difference right away.
What Ingredients You Will Need
This recipe uses simple, wholesome ingredients to deliver bold flavor and satisfying texture without the fuss. Most of these are pantry staples, and the Hatch green chiles bring the unique character.
- Elbow macaroni – 12 ounces (340 grams), the classic choice for mac and cheese for its perfect bite and sauce-holding shape.
- Unsalted butter – 4 tablespoons (57 grams), for a rich roux base.
- All-purpose flour – 3 tablespoons (25 grams), to thicken the sauce.
- Whole milk – 2 cups (480 ml), room temperature for smooth blending.
- Heavy cream – 1 cup (240 ml), adds extra creaminess and silkiness.
- Sharp cheddar cheese – 2 cups (200 grams), shredded. I prefer Cabot for its deep flavor and great melting quality.
- Monterey Jack cheese – 1 cup (100 grams), shredded for a mellow, melty balance.
- Roasted Hatch green chiles – 1 cup chopped (about 4-5 mild to medium heat pods), fresh or canned. If fresh, roast and peel for best flavor. In summer, swapping in fresh Hatch chiles is a treat!
- Garlic powder – 1 teaspoon, for subtle depth.
- Onion powder – 1 teaspoon, rounds out the seasoning.
- Smoked paprika – ½ teaspoon, to enhance that smoky vibe.
- Salt and freshly ground black pepper – to taste.
- Optional: A handful of panko breadcrumbs for a crunchy topping if you want to bake it.
For substitutes, you can swap almond milk for a dairy-free twist, or use gluten-free flour blends to make this mac and cheese gluten-free without losing creaminess. I haven’t tried vegan cheese blends here, but I’ve heard they can work with a bit of extra seasoning.
Equipment Needed
- Medium to large pot: for boiling pasta. A wide pot makes stirring easier.
- Medium saucepan: to make the cheese sauce. A heavy-bottomed pan helps prevent scorching.
- Whisk: essential for smoothing out the roux and sauce.
- Colander: for draining the pasta.
- Cutting board and sharp knife: to chop the Hatch chiles.
- Cheese grater: if shredding block cheese yourself, which I recommend for melt quality.
- Baking dish (optional): if you want to bake the mac and cheese for a crispy topping.
If you don’t have a whisk, a sturdy spoon works, but you might get lumps if you’re not careful. For roasting fresh Hatch chiles, a grill pan or broiler works fine, though an outdoor grill adds the best smoky char. I keep a dedicated sharp paring knife just for chiles to make cleanup easier.
Preparation Method
- Cook the pasta: Bring a large pot of salted water to a boil. Add 12 ounces (340 g) of elbow macaroni and cook according to package instructions until just al dente, about 7-8 minutes. Stir occasionally to prevent sticking. Drain and set aside, reserving about ½ cup (120 ml) of pasta water.
- Prepare the cheese sauce base: In a medium saucepan over medium heat, melt 4 tablespoons (57 g) of unsalted butter. Once melted and bubbling, whisk in 3 tablespoons (25 g) all-purpose flour. Keep whisking constantly for about 1-2 minutes to cook out the raw flour taste; the mixture should turn a light golden color and smell nutty.
- Add milk and cream: Slowly pour in 2 cups (480 ml) whole milk and 1 cup (240 ml) heavy cream, whisking constantly to avoid lumps. Bring the mixture to a gentle simmer (don’t let it boil), stirring often until the sauce thickens enough to coat the back of a spoon—about 5 minutes.
- Incorporate cheese and seasonings: Lower the heat to low and gradually stir in 2 cups (200 g) sharp cheddar and 1 cup (100 g) Monterey Jack cheese, shredded. Stir until melted and smooth. Then add 1 cup chopped roasted Hatch green chiles, 1 teaspoon garlic powder, 1 teaspoon onion powder, ½ teaspoon smoked paprika, salt, and pepper to taste. Stir well to combine and taste for seasoning. If the sauce feels too thick, add a splash of reserved pasta water.
- Combine pasta and sauce: Add the drained macaroni to the cheese sauce and stir to coat every piece in creamy goodness. Heat through for about 2 minutes, allowing the flavors to meld. If you like it extra creamy, a little more cream or milk can be stirred in now.
- Optional baking step: For a crispy top, preheat your oven to 350°F (175°C). Transfer the mac and cheese to a greased baking dish, sprinkle with panko breadcrumbs, and bake uncovered for 15-20 minutes until golden and bubbling.
A quick tip: don’t rush the roux—getting it to the right color and cooking out the flour taste is key to a smooth, flavor-packed sauce. Also, adding cheese off-heat prevents it from breaking or getting grainy. And seriously, don’t skip that slow melt step.
Cooking Tips & Techniques
The magic of this creamy Hatch green chile mac and cheese lies in the sauce. Here’s what I’ve learned from many batches:
- Perfecting the Roux: Cook the butter and flour mixture long enough to lose the raw taste but not so long it browns. A pale golden color is ideal.
- Slow Cheese Melting: Add cheese gradually off the heat to keep the sauce silky. If it overheats, it can seize and get grainy.
- Roasting Hatch Chiles: If you’re using fresh, roast until the skin blisters, then peel and seed. This removes bitterness and adds smoky flavor. If using canned, drain well to avoid watery sauce.
- Adjusting Spice Level: Hatch chiles range from mild to medium heat. If you prefer less heat, remove the seeds before chopping.
- Multitasking Tip: Boil pasta while prepping sauce ingredients to save time. Have cheese shredded and chiles chopped before starting the roux.
- Consistency Checks: The sauce should coat the back of a spoon thickly but still pour slowly. If too thin, simmer a bit more; if too thick, thin with milk or reserved pasta water.
My biggest mistake was rushing the sauce and adding cheese too fast, which left me with clumpy cheese bits and a sad dry mac. Slow and steady wins here every time.
Variations & Adaptations
This creamy Hatch green chile mac and cheese recipe is a great base for mixing things up. Here are some ways I’ve switched it around to keep it fresh:
- Spicy Kick: Add diced jalapeños or a dash of cayenne pepper for extra heat.
- Vegetable Boost: Stir in sautéed spinach, roasted corn, or caramelized onions for texture and flavor.
- Protein Add-Ins: Toss in cooked bacon bits (try crispy bacon-wrapped dates for a sweet-savory combo), shredded rotisserie chicken, or browned ground beef for a heartier meal.
- Dairy-Free Version: Substitute almond or oat milk and use a dairy-free cheese alternative, though the texture won’t be quite as silky.
- Gluten-Free Option: Use gluten-free flour or cornstarch for the roux and gluten-free pasta.
One favorite variation I tried recently was mixing in some smoky chorizo and topping with crushed tortilla chips for a Tex-Mex twist that had everyone asking for seconds.
Serving & Storage Suggestions
This creamy Hatch green chile mac and cheese is best served hot and fresh for the ultimate creaminess. I like to spoon it straight onto warm plates and garnish with a sprinkle of fresh chopped cilantro or scallions for a pop of color and freshness.
It pairs beautifully with crisp, refreshing drinks—something like the sparkling champagne punch adds a festive contrast to the rich, spicy flavors. For a more savory side, consider crispy prosciutto-wrapped asparagus bites to balance the creamy texture.
Leftovers keep well in the refrigerator for up to 3 days, stored in an airtight container. Reheat gently in a saucepan over low heat, adding a splash of milk to bring back creaminess. You can also microwave in short bursts, stirring in between. Freezing isn’t ideal since the cheese sauce can separate, but if you must, thaw slowly and stir well before reheating.
Fun fact: the flavors actually deepen after a day as the Hatch chile infuses the sauce more. So, if you can wait, leftovers might even taste better!
Nutritional Information & Benefits
This recipe provides roughly 450-500 calories per serving, depending on portion size. It’s rich in protein and calcium thanks to the cheese, with healthy fats from the butter and cream providing satisfying energy.
Hatch green chiles add more than flavor—they are a good source of vitamins A and C and antioxidants, which support immune health. Plus, the capsaicin in chiles can boost metabolism and add a gentle natural heat without needing added salt.
For those watching carbs or gluten, swapping pasta for a low-carb alternative or using gluten-free flour keeps this dish adaptable. Just be mindful of dairy if you’re lactose intolerant.
Conclusion
This creamy Hatch green chile mac and cheese recipe is one of those dishes that feels like a warm hug on a plate—simple, satisfying, and just a little bit spicy. It’s a recipe I keep coming back to because it has that perfect balance of creamy comfort and smoky heat that’s hard to find anywhere else. Feel free to make it your own—add extra chiles, toss in veggies, or try baking it with a crunchy topping. I love how versatile and forgiving it is.
Whether you’re cooking for yourself, family, or friends, this recipe promises a comforting meal that sticks with you long after the last bite. I’d love to hear how you make it yours or any twists you come up with, so drop a comment below and share your story!
Frequently Asked Questions
Can I use canned green chiles instead of fresh Hatch chiles?
Yes! Canned Hatch green chiles work well and save time. Just drain them well to avoid watering down the sauce. Roasting fresh chiles adds extra smoky depth but isn’t required.
What cheeses work best in this mac and cheese?
A mix of sharp cheddar for flavor and Monterey Jack for meltiness is ideal. You can also experiment with Colby or Gouda for different textures and tastes.
Can I make this recipe vegan or dairy-free?
Swap milk and cream for plant-based alternatives like almond or oat milk and use vegan cheese shreds. The texture will differ, but it’s still tasty.
How spicy is Hatch green chile mac and cheese?
Hatch chiles are usually mild to medium heat. Removing seeds lowers spice. If you want hotter, add jalapeños or cayenne.
Can I prepare this recipe ahead of time?
You can make the cheese sauce and pasta separately and combine just before serving. Leftovers reheat well, and flavors improve after a day in the fridge.
Pin This Recipe!

Creamy Hatch Green Chile Mac and Cheese

A creamy, smoky mac and cheese featuring Hatch green chiles for a perfect balance of heat and comfort. This easy homemade recipe is ready in about 30 minutes and perfect for cozy dinners.
- Prep Time: 10 minutes
- Cook Time: 20 minutes
- Total Time: 30 minutes
- Yield: 6 servings 1x
- Category: Main Course
- Cuisine: American
Ingredients
- 12 ounces elbow macaroni
- 4 tablespoons unsalted butter
- 3 tablespoons all-purpose flour
- 2 cups whole milk, room temperature
- 1 cup heavy cream
- 2 cups sharp cheddar cheese, shredded
- 1 cup Monterey Jack cheese, shredded
- 1 cup roasted Hatch green chiles, chopped (about 4–5 pods)
- 1 teaspoon garlic powder
- 1 teaspoon onion powder
- ½ teaspoon smoked paprika
- Salt and freshly ground black pepper, to taste
- Optional: handful of panko breadcrumbs for topping if baking
Instructions
- Bring a large pot of salted water to a boil. Add elbow macaroni and cook until just al dente, about 7-8 minutes. Stir occasionally to prevent sticking. Drain and set aside, reserving about ½ cup pasta water.
- In a medium saucepan over medium heat, melt unsalted butter. Whisk in all-purpose flour and cook for 1-2 minutes until light golden and nutty smelling.
- Slowly pour in whole milk and heavy cream, whisking constantly to avoid lumps. Bring to a gentle simmer and cook until sauce thickens enough to coat the back of a spoon, about 5 minutes.
- Lower heat to low and gradually stir in sharp cheddar and Monterey Jack cheeses until melted and smooth. Add chopped roasted Hatch green chiles, garlic powder, onion powder, smoked paprika, salt, and pepper. Stir well and adjust seasoning. If sauce is too thick, add reserved pasta water.
- Add drained macaroni to the cheese sauce and stir to coat. Heat through for about 2 minutes, adding more cream or milk if desired for extra creaminess.
- Optional: Preheat oven to 350°F. Transfer mac and cheese to a greased baking dish, sprinkle with panko breadcrumbs, and bake uncovered for 15-20 minutes until golden and bubbling.
Notes
Do not rush the roux; cook until light golden to avoid raw flour taste. Add cheese gradually off heat to prevent graininess. Roasting fresh Hatch chiles adds smoky depth but canned chiles work well if drained. Adjust spice by removing chile seeds or adding jalapeños/cayenne for heat. Leftovers taste better after a day and reheat gently with added milk.
Nutrition
- Serving Size: 1 cup
- Calories: 475
- Sugar: 6
- Sodium: 550
- Fat: 28
- Saturated Fat: 16
- Carbohydrates: 38
- Fiber: 2
- Protein: 18
Keywords: mac and cheese, Hatch green chile, creamy, comfort food, easy recipe, cheesy pasta, smoky, spicy


