I was staring at a half-empty bag of marshmallows and a box of Rice Krispies, wondering what to bring to the Super Bowl party. The clock was ticking—I had maybe twenty minutes before I needed to walk out the door. My friend had texted me that morning: “Bring something fun, but nothing fancy. We’re eating on the couch.”
So there I was, butter melting in a pot, thinking about how every other party platter would be chips and dip. I wanted something different. Something that looked like I tried, without actually trying too hard. And then it hit me—football-shaped treats. Not just any treats, but these easy mini football-shaped Rice Krispie treats that practically scream game day.
I grabbed my little football-shaped cookie cutter (don’t judge, I have a drawer full of seasonal cutters) and got to work. Twenty minutes later, I walked into that party with a tray of adorable little footballs, and honestly, they disappeared before the halftime show even started. People kept asking where I bought them, and I just smiled.
That’s the thing about these treats. They look like you spent hours, but the whole process takes less than half an hour. The marshmallow- butter mixture comes together in minutes, the Rice Krispies fold right in, and the football shape does all the heavy lifting for presentation. No frosting, no decorating, no stress.
These little guys have become my signature party contribution. Every time someone texts me about a gathering, I already know what I’m bringing. There’s something satisfying about watching people’s faces light up when they see a tray of these. And the best part? They’re just as easy to make on a random Tuesday when you need a little fun in your life.
Why You’ll Love This Recipe
Listen, I’ve made a lot of party food over the years. Some of it was complicated, some of it was messy, and some of it just didn’t hit the way I wanted. These mini football Rice Krispie treats are different. They’re the kind of recipe that makes you look like a kitchen hero without breaking a sweat.
Here’s why these treats are about to become your new go-to:
Super Quick: From start to finish, you’re looking at about 20 minutes of active time. The marshmallow mixture melts fast, the Rice Krispies fold in easily, and the shaping takes just a few minutes. Perfect for those “I forgot about the party” moments we all have.
Minimal Ingredients: You probably have everything in your pantry right now. Butter, marshmallows, Rice Krispies cereal, and a little vanilla extract. That’s it. No fancy baking supplies, no specialty stores, no stress.
Perfect for Game Day: These football-shaped treats are basically made for Super Bowl parties, tailgates, and any sports-watching event. They fit the theme without being cheesy, and they’re easy to grab and eat while watching the game.
Crowd Favorite: I’ve brought these to parties with kids and adults, and everyone goes for them. There’s something about the combination of crispy, chewy, and sweet that just works. Plus, the shape makes people smile.
No Baking Required: You don’t even need to turn on your oven. Everything happens on the stovetop, which means your kitchen stays cool and you save time. Just melt, mix, press, and cut.
What makes these treats different from regular Rice Krispie treats is the attention to detail. I’ve tested this recipe multiple times to get the perfect marshmallow-to-cereal ratio. Too many marshmallows and they’re gooey and hard to cut. Too few and they fall apart. This version hits that sweet spot where each bite is chewy but holds its shape beautifully.
I’ve also added a tiny pinch of salt to the butter-marshmallow mixture. Trust me on this one. It balances the sweetness and makes the flavors pop. You won’t taste the salt directly, but you’ll notice the difference in how rich and satisfying each bite is.
These treats are the kind of thing that makes people think you put in way more effort than you actually did. And honestly, that’s my favorite kind of recipe.
What Ingredients You Will Need
This recipe keeps things simple. You only need a handful of ingredients, and they’re all easy to find at any grocery store. Here’s what you’ll need and why each ingredient matters:
Butter (3 tablespoons, unsalted): I prefer unsalted butter because it lets me control the salt level. The butter adds richness and helps the marshmallows melt smoothly. If you only have salted butter, just skip the extra pinch of salt later. I use Land O’Lakes for consistent results, but any brand works fine.
Marshmallows (10 ounces, standard size): This is about one standard bag. The marshmallows are the glue that holds everything together. I’ve tried using mini marshmallows and they melt a little faster, but standard ones work perfectly. Jet-Puffed is my go-to brand because they melt consistently without getting grainy.
Rice Krispies Cereal (6 cups): The star of the show. Rice Krispies give these treats that signature crunch and light texture. Make sure you’re using fresh cereal—stale cereal won’t give you that satisfying snap. I’ve tried generic versions, and honestly, the original Kellogg’s Rice Krispies really do work best here. They hold their shape better and stay crisp longer.
Vanilla Extract (1 teaspoon, pure): This is optional but highly recommended. Pure vanilla extract adds warmth and depth to the marshmallow mixture. Imitation vanilla works in a pinch, but pure vanilla gives a cleaner, more natural flavor. I add it right after the marshmallows melt, before folding in the cereal.
Salt (¼ teaspoon, fine sea salt): Don’t skip this. A tiny amount of salt balances the sweetness and makes the butter and vanilla flavors stand out. Fine sea salt dissolves easily into the warm marshmallow mixture. If you use kosher salt, you might need a little more since the crystals are bigger.
Nonstick Cooking Spray: You’ll need this for greasing your hands, the spatula, and the baking sheet. Trust me, this stuff is a lifesaver. Rice Krispie treats are sticky, and the spray makes everything so much easier. I use a neutral oil spray like canola or vegetable.
Optional: White Chocolate or Candy Melts (for laces): If you want to take these treats to the next level, you can pipe little football laces on top using melted white chocolate or candy melts. This is totally optional but adds a fun touch. I’ll include instructions in the variations section.
That’s it. Seven ingredients (or six if you skip the laces) and you’re ready to go. No complicated baking science, no hard-to-find items. Just simple, honest ingredients that come together to make something special.
Equipment Needed
You don’t need a professional kitchen to make these treats. Here’s what you’ll need:
Large Saucepan (4-quart): You need a pot big enough to hold all the marshmallows and cereal. A 4-quart saucepan is perfect. If you use a smaller pot, the mixture will overflow when you stir in the cereal.
Wooden Spoon or Silicone Spatula: Wooden spoons are great for stirring the marshmallow mixture because they don’t conduct heat. Silicone spatulas work too, but make sure it’s heat-resistant. I prefer a wooden spoon for the initial mixing, then switch to a greased spatula for pressing.
9×13-inch Baking Pan or Rimmed Baking Sheet: You’ll press the mixture into a pan to set. A 9×13-inch pan gives you treats that are about ¾ inch thick. If you want thicker treats, use an 8×8-inch pan. I use a rimmed baking sheet for easier cutting later.
Parchment Paper: Line your pan with parchment paper for easy removal. Leave some overhang on the sides so you can lift the whole block out. This makes cutting so much easier.
Football-Shaped Cookie Cutter (2-3 inches): This is the key to the shape. You can find football cookie cutters online or at kitchen supply stores. If you don’t have one, you can use a small round cutter or even cut the treats into rectangles and round the edges. But the football shape really makes these special.
Sharp Knife: If you’re cutting the treats by hand, a sharp knife is essential. A dull knife will squish the treats instead of cutting cleanly.
Small Offset Spatula (optional): Great for spreading the mixture evenly in the pan. I use mine all the time for this recipe.
Piping Bag or Small Ziploc Bag: If you’re adding white chocolate laces, you’ll need something to pipe with. A small piping bag with a round tip works perfectly. A ziploc bag with the corner snipped off works just as well.
Most of these items are probably already in your kitchen. The football cutter is the only specialty item, and it’s worth the few dollars. I’ve had mine for years and use it for everything from cookies to sandwiches.
Preparation Method
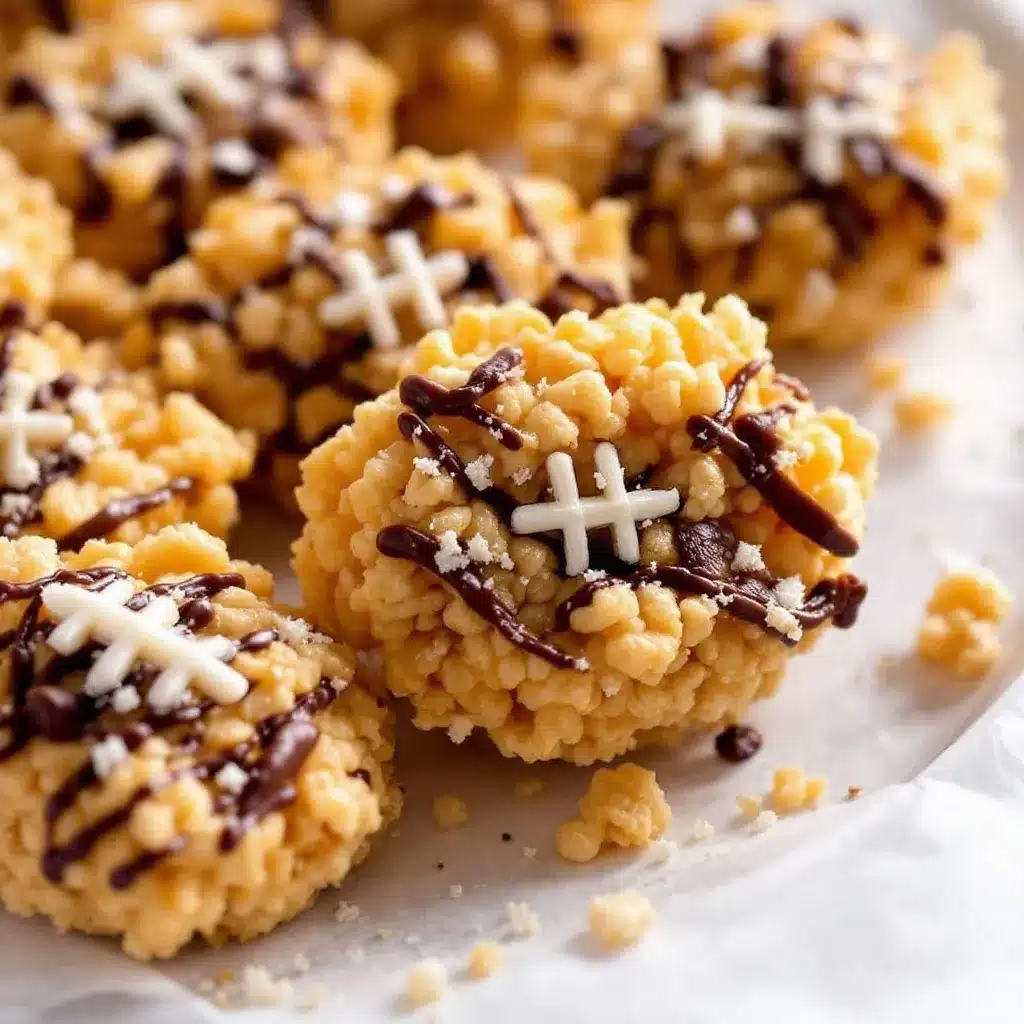
Let’s get cooking. Follow these steps and you’ll have perfect mini football Rice Krispie treats in no time.
- Prep Your Pan: Line a 9×13-inch baking pan or rimmed baking sheet with parchment paper. Make sure the paper overhangs on two opposite sides—this creates handles for lifting the treats out later. Lightly spray the parchment with nonstick cooking spray.
- Melt the Butter: Place your large saucepan over medium-low heat. Add the 3 tablespoons of unsalted butter and let it melt slowly. Swirl the pan occasionally to help it melt evenly. Don’t rush this step—medium-low heat prevents the butter from browning. You want it melted, not browned.
- Add the Marshmallows: Once the butter is fully melted, add the 10 ounces of marshmallows to the pot. Stir constantly with your wooden spoon. The marshmallows will start to soften and melt into the butter. Keep stirring until the mixture is completely smooth and glossy. This takes about 3-4 minutes.
- Season the Mixture: Remove the pot from the heat. Stir in the ¼ teaspoon of fine sea salt and 1 teaspoon of pure vanilla extract. The mixture will sizzle a little when you add the vanilla—that’s normal. Stir until everything is well combined. Taste the mixture if you want (careful, it’s hot!) to check the sweetness level.
- Add the Cereal: Pour the 6 cups of Rice Krispies cereal into the pot. Fold the cereal into the marshmallow mixture using a gentle folding motion. Start from the bottom and work your way up. Don’t stir too aggressively or you’ll crush the cereal. You want the cereal to be evenly coated but still intact.
- Transfer to the Pan: Scrape the mixture into your prepared pan. Use a rubber spatula (sprayed with cooking spray) to spread it evenly. Don’t press too hard—you want the treats to be compact but not dense. Gentle pressure is all you need.
- Let It Set: Let the mixture cool at room temperature for about 15-20 minutes. It needs to be firm enough to hold its shape but not rock hard. If you’re in a hurry, you can pop it in the fridge for 10 minutes. Just don’t leave it too long or it’ll be too hard to cut.
- Cut the Treats: Once the treats are set, lift the whole block out of the pan using the parchment paper handles. Place it on a cutting board. Use your football-shaped cookie cutter to press into the treats. Press straight down and wiggle slightly to release. If the cutter sticks, spray it with cooking spray between cuts. You should get about 12-16 footballs depending on the size of your cutter.
- Add Laces (Optional): If you’re adding white chocolate laces, melt a small amount of white chocolate or candy melts according to package directions. Transfer to a piping bag or ziploc bag and snip a tiny corner. Pipe a small line down the center of each football, then add short cross lines. Let the chocolate set for about 10 minutes before serving.
A few things to watch for during this process. If the marshmallow mixture starts to get too stiff while you’re stirring in the cereal, it means it’s cooling too fast. Work quickly and don’t overmix. If the mixture is too sticky to press into the pan, spray your hands with cooking spray—it’ll make a huge difference.
The first time I made these, I pressed too hard and ended up with dense, hard treats. They still tasted good, but they weren’t the light, chewy texture I wanted. Now I know: gentle hands, light pressure, and let the mixture do its thing.
Cooking Tips & Techniques
After making these treats more times than I can count, I’ve picked up some tricks that make the process smoother and the results better.
Use Fresh Marshmallows: This matters more than you’d think. Old marshmallows get hard and don’t melt as smoothly. Check the expiration date on your bag. Fresh marshmallows create a silky, even mixture that coats the cereal perfectly.
Low and Slow for Melting: Keep your heat on medium-low when melting the butter and marshmallows. High heat can scorch the marshmallows, turning them brown and giving the treats a burnt flavor. Patience here pays off.
Don’t Overmix the Cereal: Once you add the cereal, fold it gently until just combined. Overmixing crushes the cereal and creates dense, tough treats. You want each piece of cereal to be coated but still maintain its shape.
Grease Everything: Spray your spatula, your hands, and the cookie cutter with cooking spray. This prevents sticking and makes the whole process less frustrating. I learned this the hard way after spending ten minutes trying to get stuck treats out of a cutter.
Cut While Warm: Don’t let the treats cool completely before cutting. They’re easiest to cut when they’re still slightly warm and pliable. If they cool too much, they’ll be harder to cut and might crumble. Aim for about 15-20 minutes of cooling time.
Work in Batches: If you’re making a large batch, work in smaller portions. Press the mixture into the pan in sections rather than all at once. This keeps the mixture warm and pliable longer.
Store Properly: These treats stay fresh for about 3-4 days at room temperature. Store them in an airtight container with parchment paper between layers. Don’t refrigerate them—the cold air makes them hard and stale faster.
One mistake I made early on was trying to use a regular knife to cut the football shapes. It was a disaster. The cookie cutter is really the way to go. If you don’t have one, you can shape the treats by hand while they’re still warm. Just spray your hands with cooking spray and mold them into football shapes. It takes a little longer, but it works in a pinch.
Variations & Adaptations
This recipe is incredibly versatile. Here are some ways to make it your own:
Chocolate Footballs: Melt ½ cup of chocolate chips with the butter before adding the marshmallows. This creates a chocolate version that’s rich and decadent. Use dark chocolate for a less sweet option or milk chocolate for a classic taste. I’ve also tried adding a tablespoon of cocoa powder to the marshmallow mixture for a lighter chocolate flavor.
Peanut Butter Footballs: Stir in ¼ cup of creamy peanut butter after the marshmallows melt. The peanut butter adds protein and a savory-sweet balance that’s absolutely addictive. If you’re making these for a party with kids, this version is always a hit. Just make sure to check for peanut allergies first.
Gluten-Free Version: This recipe is naturally gluten-free as long as you use certified gluten-free Rice Krispies. The standard Rice Krispies are made with malt flavoring, which contains gluten. Look for the gluten-free version in the cereal aisle or use a generic gluten-free crispy rice cereal.
Vegan Option: Use vegan butter and vegan marshmallows. Dandies brand vegan marshmallows work really well—they melt smoothly and have a great texture. The treats will be slightly different in texture but still delicious. I’ve tested this version and it holds up beautifully.
Team Colors: Add a few drops of food coloring to the marshmallow mixture to match your favorite team’s colors. Stir it in after the vanilla extract. Gel food coloring works best because it doesn’t thin the mixture. I’ve made red and gold treats for a 49ers party and they were a huge hit.
Mini Bites: Instead of using a football cutter, press the mixture into a mini muffin tin for bite-sized treats. Spray the tin well with cooking spray and press a small amount of mixture into each cup. These are perfect for parties where people want to grab and go.
Spiced Version: Add ½ teaspoon of cinnamon and a pinch of nutmeg to the marshmallow mixture. This gives the treats a warm, cozy flavor that’s perfect for fall parties or Thanksgiving gatherings. I made these for a Friendsgiving and they disappeared quickly.
White Chocolate Drizzle: Instead of piping full laces, just drizzle melted white chocolate over the top of the treats. It gives them a beautiful finish without the precision work. Use a fork to drizzle for a rustic look.
The beauty of this recipe is that it’s a blank canvas. You can customize it to fit any occasion, dietary need, or flavor preference. Don’t be afraid to experiment—that’s how I discovered the peanut butter version, and now it’s one of my favorites.
Serving & Storage Suggestions
These treats are best served at room temperature. The texture is perfect—chewy but not sticky, crispy but not hard. Here’s how to serve and store them:
Serving Temperature: Take the treats out of the container about 15 minutes before serving. This lets them come to room temperature and softens slightly. If they’ve been in the fridge, they’ll be harder and less enjoyable.
Presentation Ideas: Arrange the footballs on a platter lined with green tissue paper or a green napkin to look like a football field. You can also place them in mini cupcake liners for easy grabbing. For a game-day spread, serve them alongside other finger foods like crispy prosciutto-wrapped asparagus bites for a sweet-savory combo that always works.
Complementary Drinks: These treats pair beautifully with a refreshing champagne punch for a festive touch. For non-alcoholic options, try cold milk, hot chocolate, or apple cider. The sweetness of the treats balances nicely with tart or bubbly drinks.
Storage Instructions: Store the treats in an airtight container at room temperature. Place parchment paper between layers to prevent sticking. They’ll stay fresh for 3-4 days. Don’t refrigerate them—the cold air makes them hard and stale.
Freezing Instructions: You can freeze these treats for up to 2 months. Place them in a single layer on a baking sheet and freeze until solid, then transfer to a freezer-safe bag or container. To thaw, leave them at room temperature for about 30 minutes. Don’t microwave them to thaw—it’ll make them soggy.
Reheating Tips: If the treats have gotten a little hard, you can revive them by placing them in a microwave for 5-10 seconds. This softens them without making them too warm. Just be careful not to overheat or they’ll melt.
Flavor Development: These treats actually taste better the next day. The flavors meld together and the texture becomes more uniform. So if you’re making them for a party, feel free to prepare them a day ahead. Just store them properly and they’ll be perfect.
For a party platter, I like to serve these alongside elegant caviar deviled eggs for a mix of sweet and savory. The contrast in textures and flavors makes the spread more interesting and keeps guests coming back for more.
Nutritional Information & Benefits
Here’s the nutritional breakdown for one mini football treat (based on 16 servings):
| Nutrient | Amount per Serving |
|---|---|
| Calories | 145 |
| Total Fat | 4g |
| Saturated Fat | 2.5g |
| Cholesterol | 10mg |
| Sodium | 135mg |
| Total Carbohydrates | 27g |
| Dietary Fiber | 0g |
| Sugars | 15g |
| Protein | 1g |
These treats are a treat, plain and simple. They’re not health food, but they do have some redeeming qualities. The Rice Krispies cereal is fortified with iron and B vitamins, so you’re getting a small nutritional boost. The butter adds a little calcium and vitamin A.
If you’re watching your sugar intake, you can reduce the marshmallows slightly, but it’ll change the texture. For a lower-sugar option, try using a sugar-free marshmallow alternative. The texture won’t be exactly the same, but it’s a decent substitute.
These treats are naturally nut-free, egg-free, and soy-free if you use the right ingredients. Always check labels if you’re serving people with allergies. The main allergens to watch for are dairy (from the butter) and gluten (from the cereal if not certified gluten-free).
From a wellness perspective, I see these treats as a celebration food. They’re for parties, game days, and special occasions. Enjoy them in moderation and pair them with healthier options on the snack table. A balanced approach to eating means you can enjoy treats like this without guilt.
Conclusion
These easy mini football-shaped Rice Krispie treats have become my go-to party contribution for a reason. They’re simple, they’re fun, and they always make people smile. The best part is how little effort they take—you can whip up a batch in under 30 minutes and look like you spent hours.
I love that this recipe is so adaptable. You can make it chocolate, peanut butter, or keep it classic. You can add team colors or keep it simple. The football shape makes them perfect for game day, but honestly, I’ve brought them to birthdays, picnics, and casual get-togethers too. They fit any occasion.
If you try this recipe, I’d love to hear how it goes. Leave a comment below and let me know if you made any variations. Did you add peanut butter? Did you try the chocolate version? Did your guests love them? Share your photos and tag me—I love seeing how these treats turn out in other people’s kitchens.
And if you’re looking for more game-day inspiration, check out the recipes section for more party-friendly ideas. From fluffy mini quiches to crispy bacon-wrapped dates, there’s something for every taste.
Happy cooking, and enjoy your game-day treats!
Frequently Asked Questions
Can I make these treats ahead of time?
Yes, absolutely. These treats actually taste better the next day. Make them up to 2 days in advance and store them in an airtight container at room temperature. Just add the white chocolate laces right before serving so they stay crisp.
Why are my Rice Krispie treats hard and dense?
This usually happens when you press the mixture too firmly into the pan or overmix the cereal. Use gentle pressure when pressing and fold the cereal just until combined. Also, make sure you’re not overcooking the marshmallow mixture—remove it from the heat as soon as it’s smooth.
Can I use a different cereal?
You can, but the texture will change. Cocoa Rice Krispies work great for a chocolate version. Fruity Pebbles add color and flavor. Avoid using heavy or dense cereals like granola—they won’t give you the same light, crispy texture.
How do I keep the treats from sticking to the cookie cutter?
Spray the cookie cutter with nonstick cooking spray before each cut. You can also dip the cutter in warm water and shake off the excess. Both methods work well. If the cutter starts sticking, just respray between cuts.
Can I double this recipe?
Yes, but use a larger pot. A 6-quart pot works well for a double batch. You’ll also need a larger pan—a half-sheet pan (18×13 inches) is perfect. The cooking time stays the same, but you might need to work a little faster to keep the mixture from cooling too much.
Pin This Recipe!
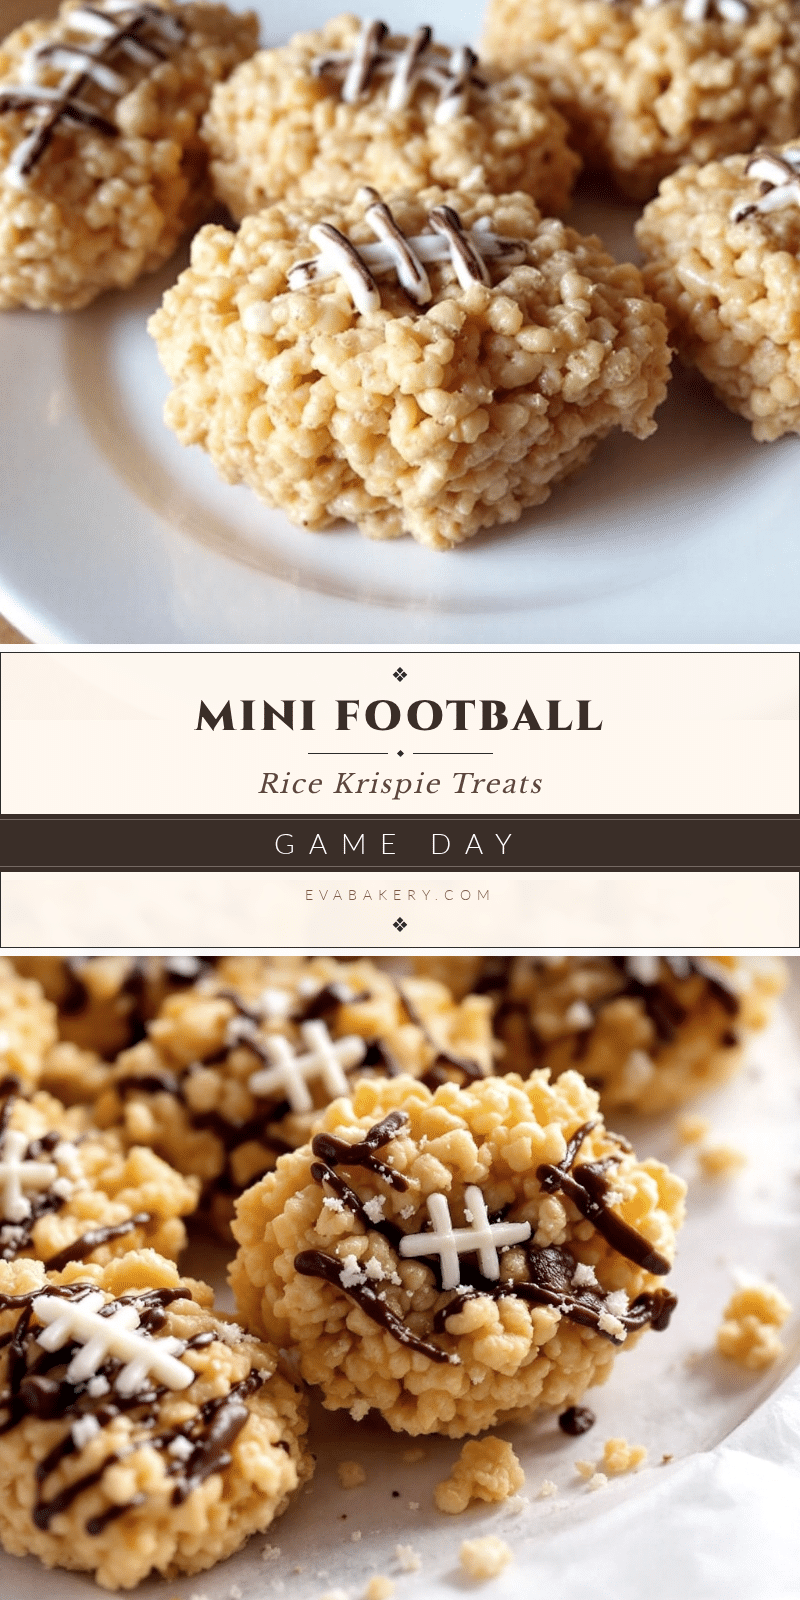
Easy Mini Football Rice Krispie Treats: Best Game-Day Snack

These easy mini football-shaped Rice Krispie treats are the perfect game-day snack. Quick to make with just a few ingredients, they look like you spent hours but come together in under 30 minutes.
- Prep Time: 10 minutes
- Cook Time: 10 minutes
- Total Time: 20 minutes
- Yield: 12-16 servings 1x
- Category: Dessert
- Cuisine: American
Ingredients
- 3 tablespoons unsalted butter
- 10 ounces marshmallows (standard size)
- 6 cups Rice Krispies cereal
- 1 teaspoon pure vanilla extract
- ¼ teaspoon fine sea salt
- Nonstick cooking spray
- Optional: white chocolate or candy melts for laces
Instructions
- Line a 9×13-inch baking pan or rimmed baking sheet with parchment paper, leaving overhang on two sides. Lightly spray with nonstick cooking spray.
- Place a large saucepan over medium-low heat. Add 3 tablespoons unsalted butter and melt slowly, swirling occasionally.
- Add 10 ounces marshmallows to the pot. Stir constantly with a wooden spoon until completely smooth and glossy, about 3-4 minutes.
- Remove pot from heat. Stir in ¼ teaspoon fine sea salt and 1 teaspoon pure vanilla extract until well combined.
- Pour 6 cups Rice Krispies cereal into the pot. Fold gently with a rubber spatula until evenly coated, being careful not to crush the cereal.
- Scrape mixture into prepared pan. Use a greased spatula to spread evenly with gentle pressure.
- Let cool at room temperature for 15-20 minutes until firm but not hard.
- Lift the block out using parchment handles. Place on a cutting board. Use a football-shaped cookie cutter to press into treats, spraying cutter with cooking spray between cuts. You should get about 12-16 footballs.
- Optional: Melt white chocolate or candy melts. Transfer to a piping bag or ziploc bag with a tiny corner snipped. Pipe a line down the center of each football, then add short cross lines. Let set for 10 minutes before serving.
Notes
Use fresh marshmallows for best results. Keep heat on medium-low to avoid scorching. Grease spatula, hands, and cookie cutter with cooking spray to prevent sticking. Cut treats while still slightly warm for cleanest cuts. Store in an airtight container at room temperature for 3-4 days. Do not refrigerate. Freeze for up to 2 months.
Nutrition
- Serving Size: 1 mini football trea
- Calories: 145
- Sugar: 15
- Sodium: 135
- Fat: 4
- Saturated Fat: 2.5
- Carbohydrates: 27
- Protein: 1
Keywords: Rice Krispie treats, football-shaped, game-day snack, Super Bowl, no-bake dessert, easy party food


