I ruined sourdough starter for three years before I figured out what I was doing wrong. Not the feeding part—that I could handle. It was the baking. I kept trying to force my stiff, cold starter into recipes that wanted bubbly, room-temperature activity, and the result was always the same: a brick. A beautiful, tangy, dense brick that looked like bread but felt like a weapon. So when I decided to try a maple pumpkin sourdough, I almost talked myself out of it. Pumpkin is heavy. Maple is sticky. Sourdough is already finicky. What was I thinking?
But here’s the thing about fall baking—it doesn’t care about your failures. It just keeps showing up with cool mornings, golden light, and the smell of cinnamon hanging in the air. I wanted something that tasted like October feels. Something that could sit on my counter next to a mug of coffee and not feel like a compromise. So I went back to the basics. I fed my starter twice a day for three days. I warmed my pumpkin puree to room temperature. I used real maple syrup—not the pancake kind, the good stuff from a farm stand upstate. And I let the dough tell me when it was ready, not the clock.
This maple pumpkin sourdough bread with pepitas is the result of all those mistakes. It’s soft enough to tear, sturdy enough for toast, and freckled with toasted pumpkin seeds that catch the light. It smells like a bakery in your kitchen, and it tastes like patience finally paid off. I’m not a professional baker. I’m just someone who kept burning things until they got good.
Why You’ll Love This Recipe
This isn’t your average pumpkin bread. It’s not a quick bread that relies on baking powder and sugar for structure. This is real sourdough—fermented, tangy, and alive—with the warmth of maple and pumpkin folded right into the dough. It’s a loaf that does double duty: impressive enough for a Thanksgiving table, simple enough for a Tuesday morning with butter.
- Real Sourdough, Real Flavor: This recipe uses an active sourdough starter for natural leavening and that signature tang. It’s not a quick bread in disguise. The fermentation adds depth you can’t fake.
- Perfectly Sweet, Not Overpowering: The maple syrup is subtle—just enough to complement the pumpkin without turning this into dessert bread. It’s breakfast-friendly, snack-worthy, and pairs beautifully with savory dishes too.
- Crunchy Pepita Crust: Toasted pepitas pressed into the top of the dough before baking create a textured, nutty crust that contrasts with the soft, tender crumb. It’s the kind of detail that makes people ask, “How did you do that?”
- Fall in a Loaf: Pumpkin puree keeps the crumb moist and tender, while cinnamon, nutmeg, and ginger add warmth without overwhelming the natural flavors. This bread tastes like autumn, not like a spice cabinet.
- Simple Ingredients, No Fuss: You don’t need specialty flours or hard-to-find items. Just bread flour, pumpkin puree, maple syrup, butter, salt, and your active starter. The pepitas are optional, but honestly, don’t skip them.
I’ve tested this recipe six times to get the hydration right. Pumpkin adds moisture in a way that can make sourdough gummy if you’re not careful. But this version? It’s light, open-crumbed, and holds its shape. The first time I sliced into a cooled loaf and saw the crumb structure, I actually said “oh thank god” out loud. That’s the level of relief we’re talking about here.
What Ingredients You Will Need
This recipe uses simple, wholesome ingredients to deliver bold flavor and satisfying texture without the fuss. Most of these are pantry staples, especially if you already keep a sourdough starter. Here’s what you’ll need and why each ingredient matters.
- Bread Flour (350g / 2 ¾ cups): Bread flour has higher protein content than all-purpose, which gives sourdough its structure and chew. I recommend King Arthur or Bob’s Red Mill for consistent results. If you only have all-purpose, you can use it, but the crumb will be slightly softer and less open.
- Active Sourdough Starter (100g / ½ cup): Use a starter that’s been fed within the last 4-6 hours and is bubbly and doubled in volume. A sluggish starter won’t lift this dough properly, especially with the added weight of pumpkin puree.
- Pumpkin Puree (120g / ½ cup): Not pumpkin pie filling. Make sure you’re using 100% pure pumpkin puree. Libby’s is reliable, but homemade works great too if you roast and blend your own. Let it come to room temperature before mixing—cold pumpkin can slow down fermentation.
- Pure Maple Syrup (80g / ¼ cup): Grade A dark amber is my preference for its robust flavor. Do not use pancake syrup or maple-flavored syrup. The real stuff makes a noticeable difference in both sweetness and moisture.
- Unsalted Butter (28g / 2 tablespoons): Softened to room temperature. Butter adds richness and tenderness to the crumb. You can substitute with coconut oil or vegan butter for a dairy-free version.
- Water (100g / ½ cup): Lukewarm, around 80°F. The total hydration of this dough is around 65%, which is manageable for most home bakers. Adjust slightly if your pumpkin puree is very wet or very dry.
- Salt (9g / 1 ½ teaspoons): Fine sea salt is best. It controls fermentation and enhances flavor. Don’t skip it or reduce it—sourdough without enough salt tastes flat.
- Ground Cinnamon (2 teaspoons): Warm, sweet spice that pairs perfectly with maple and pumpkin. Freshly ground is ideal, but pre-ground works fine.
- Ground Nutmeg (½ teaspoon): Adds a subtle, nutty warmth. Freshly grated nutmeg is noticeably more aromatic.
- Ground Ginger (½ teaspoon): A little goes a long way. It adds brightness and cuts through the richness of the pumpkin and butter.
- Pepitas (raw pumpkin seeds, 60g / ½ cup): For topping. Toast them lightly in a dry pan before pressing into the dough for extra flavor. They add crunch and visual appeal.
Ingredient quality matters here. I’ve made this with cheap maple syrup and generic pumpkin puree, and the difference was noticeable. The bread was still good, but it lacked that deep, caramelized sweetness that real maple syrup brings. Spend the extra dollar on the good stuff—your taste buds will thank you.
Equipment Needed
You don’t need a professional bakery setup to make this bread. But a few key tools will make the process smoother and more predictable.
- Digital Kitchen Scale: This is non-negotiable for sourdough. Measuring by volume is too inconsistent, especially with flour and pumpkin puree. A $15 scale from Amazon will change your baking life.
- Large Mixing Bowl: Glass or ceramic works best. Avoid metal bowls if you can—they conduct temperature changes too quickly.
- Bench Scraper: Useful for folding the dough and dividing it if you’re making multiple loaves. A plastic dough scraper is gentler on non-stick surfaces.
- Banneton or Proofing Basket (9-inch): A round banneton gives the dough structure during its final rise. If you don’t have one, line a colander with a floured kitchen towel. It works fine.
- Dutch Oven (5-6 quart): Essential for achieving that crispy, golden crust. The steam trapped inside mimics a professional bread oven. If you don’t have a Dutch oven, use a heavy baking sheet with a metal bowl inverted over the loaf.
- Parchment Paper: For easy transfer of the dough into the hot Dutch oven. Trust me, you don’t want to wrestle a sticky loaf into a 450°F pot without it.
- Razor Blade or Lame: For scoring the dough before baking. A sharp knife works in a pinch, but a lame gives cleaner cuts.
- Cooling Rack: Allows air to circulate around the loaf so the crust stays crisp. Don’t skip this—soggy bottoms are real.
I’ve baked sourdough in a cast iron skillet with a metal bowl on top, and it worked fine. The Dutch oven is ideal, but don’t let equipment stop you. Improvise where you need to.
Preparation Method
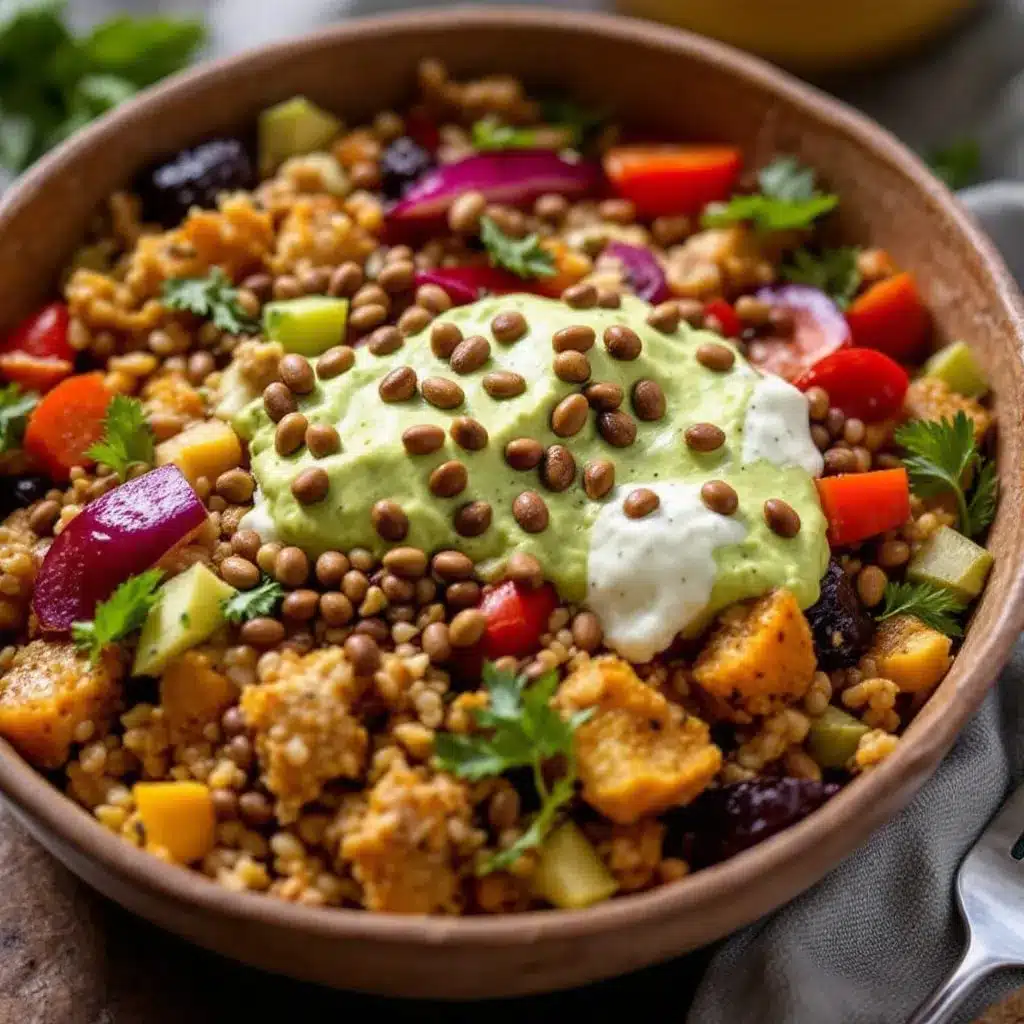
This recipe follows a standard sourdough timeline. I recommend starting in the morning for a same-day bake, or mixing the dough the night before and doing the bulk fermentation in the fridge. Both methods work, but the cold fermentation gives a more pronounced tang.
- Feed Your Starter (Morning, Day Before or Day Of): Feed your sourdough starter 4-6 hours before you plan to mix the dough. Use a 1:1:1 ratio (starter:flour:water). You need 100g of active, bubbly starter. It should pass the float test—drop a small spoonful in water; if it floats, it’s ready.
- Mix the Dough (Morning, Day Of): In a large bowl, combine 100g active starter, 100g lukewarm water, and 80g maple syrup. Stir until the starter is mostly dissolved. Add 120g pumpkin puree and stir again. Then add 350g bread flour, 9g salt, 2 teaspoons cinnamon, ½ teaspoon nutmeg, and ½ teaspoon ginger. Mix with your hands or a dough whisk until no dry flour remains. The dough will be shaggy and sticky—that’s normal. Cover with a damp towel and let it rest for 30 minutes (this is called autolyse).
- Add the Butter: After the rest, add 28g softened unsalted butter. Squeeze and fold the dough until the butter is fully incorporated. This takes about 2-3 minutes. The dough will feel silky and slightly less sticky. Cover and rest for 30 minutes.
- Bulk Fermentation with Stretch and Folds (3-4 Hours): Over the next 3-4 hours, perform 4 sets of stretch and folds at 30-minute intervals. To do a stretch and fold: wet your hand slightly, grab one side of the dough, stretch it up and fold it over the center. Rotate the bowl 90 degrees and repeat. Do this 4 times per set. The dough will become smoother and more elastic with each set. After the final set, let the dough rest undisturbed for the remaining bulk time. The dough should be puffy, slightly domed, and have visible bubbles on the surface.
- Pre-Shape (After Bulk Fermentation): Lightly flour your work surface. Turn the dough out gently—don’t deflate it. Using a bench scraper, shape the dough into a round by tucking the edges under toward the center. Let it rest, seam side down, for 20-30 minutes. This relaxes the gluten for the final shape.
- Final Shape: Flip the dough over so the seam side is up. Gently stretch it into a rectangle. Fold the top third down and the bottom third up, like a letter. Then roll it tightly from one short end to the other, creating a log shape. Pinch the seam closed. Place the dough seam-side up into a floured banneton.
- Cold Proof (Overnight, 12-16 Hours): Cover the banneton with a plastic bag or damp towel and place it in the refrigerator. The cold proof develops flavor and makes the dough easier to score. You can proof for as little as 8 hours, but overnight is best.
- Preheat and Prepare (Next Morning): Place your Dutch oven in the oven and preheat to 475°F (245°C) for at least 45 minutes. While it heats, remove the banneton from the fridge. Let it sit at room temperature for 20 minutes while the oven finishes preheating.
- Score and Add Pepitas: Turn the dough out onto a piece of parchment paper. Brush the top lightly with water or milk—this helps the pepitas stick. Press the toasted pepitas gently into the top of the dough. Using a razor blade or lame, score the dough with a single deep slash (about ½ inch deep) at a 45-degree angle. This is where the bread will expand.
- Bake: Carefully transfer the dough (on the parchment) into the hot Dutch oven. Cover with the lid and bake for 25 minutes. Remove the lid and bake for another 20-25 minutes, until the crust is deep golden brown and the internal temperature reaches 200°F (93°C). The pepitas should be toasted and fragrant.
- Cool Completely: Transfer the loaf to a cooling rack. Let it cool for at least 2 hours before slicing. I know it’s hard to wait, but cutting into hot bread ruins the texture. The crumb needs time to set.
Cooking Tips & Techniques
I’ve made every mistake you can make with this dough, so you don’t have to. Here are the things I wish someone had told me.
Don’t skip the autolyse. That 30-minute rest after mixing gives the flour time to absorb the liquid and develop gluten naturally. It reduces the amount of kneading you need and makes the dough more extensible. If you skip it, your dough will fight you during the stretch and folds.
Watch your dough temperature. Sourdough is temperature-sensitive. If your kitchen is cold (below 70°F), bulk fermentation will take longer—up to 5 or 6 hours. If it’s hot (above 80°F), it might finish in 2.5 hours. I keep a probe thermometer in my dough and aim for 78°F during bulk fermentation. It’s not necessary, but it helps with consistency.
Pumpkin puree can be tricky. Different brands have different moisture levels. If your dough feels too sticky after the first stretch and fold, resist the urge to add more flour. Instead, wet your hands slightly before handling it. The dough will absorb the moisture over time. If it’s too dry (unlikely with pumpkin, but possible), add a teaspoon of water at a time.
Score with confidence. A shallow score won’t give you the “ear” (that proud flap of crust that rises during baking). Go deep—about ½ inch—and cut at a 45-degree angle. If you hesitate, the blade will drag and tear the dough. Commit to the cut.
Steam is your friend. The Dutch oven traps steam from the dough, which keeps the crust soft during the first part of baking, allowing the bread to expand fully. If you don’t have a lid, spray the inside of the oven with water every 5 minutes for the first 15 minutes. It’s not as effective, but it helps.
Variations & Adaptations
This recipe is forgiving once you understand the hydration. Here are some ways to make it your own.
- Dairy-Free Version: Replace the butter with coconut oil (solid, not melted) or a high-quality vegan butter. The texture will be slightly less tender, but still delicious. Use the same amount by weight.
- Whole Wheat or Spelt Blend: Swap up to 50% of the bread flour with whole wheat or spelt flour. You’ll need to add an extra 10-15g of water, since whole grains absorb more liquid. The flavor will be nuttier and more rustic.
- Spice It Differently: Not a fan of nutmeg? Try cardamom or allspice instead. For a chai-inspired version, add ½ teaspoon of ground cardamom and ¼ teaspoon of black pepper. It’s unexpected and wonderful.
- Add Mix-Ins: Fold in 80g of dried cranberries or chopped pecans during the final stretch and fold. The sweetness of the cranberries pairs beautifully with the maple and pumpkin. Just make sure they’re evenly distributed.
- Savory Twist: Omit the maple syrup and spices, and add 2 teaspoons of fresh rosemary, 1 teaspoon of black pepper, and 80g of grated Parmesan cheese. The pumpkin still adds moisture, but the flavor profile shifts to savory and herbaceous. It’s incredible with soup.
I tried a version with chocolate chips once—don’t do it. The chocolate overpowers the delicate maple-pumpkin flavor. Some combinations sound good in theory but don’t work in practice. Learn from my mistake.
Serving & Storage Suggestions
This bread is at its best on day two. I know that sounds counterintuitive, but the flavors meld and deepen overnight. If you can resist slicing it the day you bake it, you’ll be rewarded.
Serving: Serve at room temperature or lightly toasted. A slice with salted butter and a drizzle of honey is heaven. It also pairs well with sharp cheddar cheese—the tangy bread contrasts beautifully with the creamy, salty cheese. For breakfast, try it with a fried egg and arugula. For dessert, toast it and top with mascarpone and a sprinkle of cinnamon.
Storage: Store the loaf cut-side down on a wooden cutting board, wrapped loosely in a kitchen towel. Do not store it in plastic—the crust will turn soft and rubbery. It will keep at room temperature for 3-4 days. If you live in a humid climate, it might get moldy faster. Keep an eye on it.
Freezing: This bread freezes beautifully. Slice it first, then wrap the slices tightly in plastic wrap and place them in a freezer bag. They’ll keep for up to 3 months. Toast directly from frozen—no need to thaw. The crust crisps up perfectly in the toaster.
Reheating: For a whole loaf, warm it in a 350°F oven for 10 minutes. For individual slices, a toaster or toaster oven works best. Microwaving will make the bread tough and chewy. Don’t do it.
Nutritional Information & Benefits
This bread is more nutrient-dense than your average sourdough, thanks to the pumpkin and pepitas. Here’s a rough estimate per slice (based on 12 slices per loaf):
- Calories: 210
- Total Fat: 5g
- Saturated Fat: 2.5g
- Carbohydrates: 36g
- Fiber: 3g
- Sugar: 8g (from maple syrup and natural pumpkin sugars)
- Protein: 6g
- Sodium: 290mg
Health Benefits: Pumpkin is rich in vitamin A (beta-carotene) and fiber, which supports eye health and digestion. Pepitas are a great source of magnesium, zinc, and healthy fats. The fermentation process in sourdough breaks down phytic acid, making the minerals in the flour more bioavailable. It’s also lower on the glycemic index than yeasted breads, thanks to the lactic acid produced during fermentation.
Dietary Considerations: This recipe is vegetarian and can be made dairy-free with a simple swap. It’s not gluten-free, but you can experiment with a gluten-free flour blend if needed. The maple syrup adds natural sweetness without refined sugar.
Conclusion
This maple pumpkin sourdough bread with pepitas is the kind of recipe that makes you feel like a real baker. Not because it’s complicated—it’s not—but because it asks you to pay attention. To feel the dough change under your hands. To wait for the right moment to score. To trust that the cold, slow fermentation will deliver something worth the patience.
I’ve made this loaf for Thanksgiving dinners, for quiet Sunday mornings, and for friends who showed up at my door with no warning. Every time, it disappears faster than I expect. There’s something about the combination of tangy sourdough, sweet maple, and crunchy pepitas that people can’t resist. It feels special without trying too hard.
If you make this bread—and I really hope you do—let me know how it turns out. Leave a comment below, tag me in your photos, or tell me about the variations you tried. Baking is better when we share it. And if your first loaf isn’t perfect? That’s okay. Mine wasn’t either.
Now go feed your starter. You’ve got bread to bake.
Frequently Asked Questions
Can I use canned pumpkin pie filling instead of pure pumpkin puree?
No, please don’t. Pumpkin pie filling contains added sugar, spices, and thickeners that will throw off the hydration and sweetness of the dough. Use 100% pure pumpkin puree. If you only have pie filling, you’ll need to adjust the sugar and spices in the recipe, and even then, the texture might not be right. Stick with puree.
My dough is very sticky. What am I doing wrong?
Sticky dough is normal for sourdough, especially with pumpkin added. Don’t panic. Wet your hands slightly before handling it, and use a bench scraper to help with folding. If it’s excessively sticky (like batter), your pumpkin puree might be very wet. Try reducing the water by 10-15g next time. For now, resist adding more flour—it will firm up during bulk fermentation.
Can I skip the cold proof and bake the same day?
Yes, but the flavor won’t be as developed. A same-day bake will still produce a good loaf, but it will be milder and less tangy. If you’re short on time, let the dough proof at room temperature for 2-3 hours after shaping, until it’s puffy and passes the poke test (an indentation springs back slowly). Then bake immediately.
Why didn’t my bread rise much?
Several possibilities: your starter wasn’t active enough, your dough was too cold during bulk fermentation, or you over-proofed it. Check that your starter is bubbly and passes the float test before mixing. Keep your dough in a warm spot (75-78°F) during bulk fermentation. And don’t let the final proof go too long—if the dough is overly puffy and collapses when you touch it, it’s over-proofed.
Can I make this recipe without a Dutch oven?
Absolutely. If you don’t have a Dutch oven, place a baking sheet on the bottom rack of your oven and preheat it. When you’re ready to bake, place the scored dough on a preheated baking stone or inverted baking sheet. Pour ½ cup of hot water into the preheated baking sheet on the bottom rack to create steam, then quickly close the oven door. Bake as directed, but check the crust after 30 minutes—it may brown faster without the Dutch oven lid.
Pin This Recipe!
Perfect Maple Pumpkin Sourdough Bread with Pepitas
A soft, tangy sourdough bread infused with real maple syrup and pumpkin puree, topped with crunchy toasted pepitas. Perfect for fall mornings or holiday tables.
- Prep Time: 30 minutes
- Cook Time: 45 minutes
- Total Time: 14 hours 15 minutes (includes fermentation and proofing)
- Yield: 12 servings 1x
- Category: Bread
- Cuisine: American
Ingredients
- 350g bread flour (2 ¾ cups)
- 100g active sourdough starter (½ cup)
- 120g pumpkin puree (½ cup)
- 80g pure maple syrup (¼ cup)
- 28g unsalted butter, softened (2 tablespoons)
- 100g lukewarm water (½ cup)
- 9g fine sea salt (1 ½ teaspoons)
- 2 teaspoons ground cinnamon
- ½ teaspoon ground nutmeg
- ½ teaspoon ground ginger
- 60g raw pepitas (½ cup), toasted
Instructions
- Feed your sourdough starter 4-6 hours before mixing; it should be bubbly and pass the float test.
- In a large bowl, combine 100g active starter, 100g lukewarm water, and 80g maple syrup. Stir until mostly dissolved. Add 120g pumpkin puree and stir again.
- Add 350g bread flour, 9g salt, 2 teaspoons cinnamon, ½ teaspoon nutmeg, and ½ teaspoon ginger. Mix until no dry flour remains. Cover and rest for 30 minutes (autolyse).
- Add 28g softened unsalted butter. Squeeze and fold until fully incorporated (2-3 minutes). Cover and rest 30 minutes.
- Perform 4 sets of stretch and folds at 30-minute intervals. After the final set, let the dough rest undisturbed for the remainder of bulk fermentation (3-4 hours total). The dough should be puffy and have visible bubbles.
- Lightly flour your work surface. Turn out the dough and shape into a round using a bench scraper. Rest seam-side down for 20-30 minutes.
- Flip dough seam-side up, stretch into a rectangle, fold top third down and bottom third up like a letter, then roll tightly into a log. Pinch seam closed. Place seam-side up in a floured banneton.
- Cover and refrigerate for 12-16 hours (cold proof).
- Place Dutch oven in oven and preheat to 475°F (245°C) for at least 45 minutes. Remove banneton from fridge and let sit at room temperature for 20 minutes.
- Turn dough onto parchment paper. Brush top lightly with water or milk, then press toasted pepitas into the top. Score with a single deep slash at a 45-degree angle.
- Transfer dough (on parchment) into hot Dutch oven. Cover and bake 25 minutes. Remove lid and bake 20-25 minutes more until deep golden brown and internal temperature reaches 200°F (93°C).
- Cool on a rack for at least 2 hours before slicing.
Notes
For best flavor, let the bread rest overnight before slicing. Store cut-side down on a wooden board wrapped in a kitchen towel for 3-4 days. Freeze sliced for up to 3 months.
Nutrition
- Serving Size: 1 slice
- Calories: 210
- Sugar: 8
- Sodium: 290
- Fat: 5
- Saturated Fat: 2.5
- Carbohydrates: 36
- Fiber: 3
- Protein: 6
Keywords: sourdough, pumpkin, maple, pepitas, fall bread, artisan bread, fermented bread


