The knobby knuckle — that first crooked bend you see as your hand emerges from a pile of freshly baked cookies — still makes me shiver, even though I made them myself. It was the almond sliver fingernail that did it. That pale, slightly translucent curve pressed into the dough looked so real I actually dropped the cookie back onto the baking sheet. My daughter, then five, let out this delighted cackle that echoed through the kitchen. That sound, the sight of those gnarled little fingers cooling on the rack, and the buttery vanilla scent hanging in the air — that was the moment our Halloween tradition was born.
I wasn’t trying to be fancy. I was just a mom who wanted something more than a store-bought bag of candy for the class party. Something that made the kids gasp. Something that felt like a little bit of magic. I’d seen the idea for witch finger cookies floating around, but the recipes always seemed too complicated. Too much chilling, too much fussing with individual shapes. I wanted a cookie that looked terrifying but came together without tears. So I simplified. I used my go-to sugar cookie dough — the one that holds its shape and tastes like pure butter — and focused all the creepy energy on the shaping.
Honestly, the first batch was a disaster. The fingers were too fat. The fingernails fell off. They looked more like sad little potatoes than witch fingers. But I learned. I figured out the right dough temperature, the trick for pressing the almond just deep enough, and how to get that crinkly old-witch knuckle without making the dough crack apart. Now, these cookies are the thing my kids request before the pumpkin even hits the porch. They’re not just cookies. They’re the official start of spooky season at our house. And if you want that same feeling — that perfect mix of creepy and delicious — you’ve come to the right place.
Why You’ll Love This Recipe
Let’s be real for a second. Halloween treats can be a pain. You spend hours decorating something cute, and the kids eat it in two seconds. These cookies are different. They look genuinely spooky, but they’re actually simple to make. Here’s why they work:
- Quick & Easy : The dough comes together in about 15 minutes. No complicated techniques, no special equipment. Just mix, chill, shape, and bake.
- Simple Ingredients : You probably have everything in your pantry right now. Butter, sugar, eggs, flour, vanilla, and a bag of whole almonds. That’s it.
- Perfect for Halloween : These are the star of any party, classroom event, or spooky movie night. They get the best reactions — people actually flinch before they bite.
- Crowd-Pleaser : Kids love the creepy factor. Adults love the buttery, melt-in-your-mouth texture. Everyone wins.
- Unbelievably Realistic : The almond sliver fingernail, the knuckle lines, the slightly jagged “break” at the end — they look like actual witch fingers. I’ve had people refuse to eat one because it looked too real. That’s the goal.
What makes this version different from the hundred other recipes out there? It’s the dough. I spent years tweaking my sugar cookie base to get it just right. It’s sturdy enough to hold the finger shape without spreading into blobs, but soft enough that each bite is tender and rich. The almond extract in the dough adds that subtle marzipan flavor that pairs perfectly with the almond fingernail. It’s not just a gimmick — it’s a genuinely good cookie.
And honestly? This recipe is about the feeling. That moment when you pull the baking sheet out of the oven and see a row of creepy fingers staring back at you. The laugh you share with your kids as you press the red jam into the “broken” end to look like blood. It’s not just baking. It’s making a memory. The kind that sticks.
What Ingredients You Will Need
This recipe uses simple, wholesome ingredients to create something that looks complicated but isn’t. Most of these are pantry staples, which makes this an easy last-minute Halloween project.
- Unsalted butter (1 cup, 2 sticks, softened) — I always use unsalted so I can control the salt level. Let it sit out for about 30 minutes before you start. You want it soft but not melty.
- Granulated sugar (1 cup) — Regular white sugar gives the cookies that classic crisp edge and tender center.
- Large egg (1, room temperature) — Helps bind the dough. If you forget to take it out of the fridge, just drop it in a bowl of warm water for 5 minutes.
- Vanilla extract (1 teaspoon) — Pure vanilla makes a difference. I use Nielsen-Massey, but any good brand works.
- Almond extract (½ teaspoon) — This is the secret ingredient. It adds that subtle, almost creepy marzipan flavor that makes these taste like something from a fairy tale.
- All-purpose flour (2 ½ cups) — Spoon and level it. Don’t scoop straight from the bag or you’ll end up with dry dough.
- Baking powder (½ teaspoon) — Just enough to give them a tiny lift without losing the shape.
- Salt (½ teaspoon) — Balances the sweetness.
- Whole almonds (about 40-50, blanched or raw) — These become the fingernails. Blanched almonds look more realistic because they’re pale, but raw almonds with the skin on work too. Just peel the skin off after baking.
- Red jam or food coloring (optional, for the “bloody” ends) — Strawberry jam works great. A little red gel food coloring mixed with corn syrup is even more dramatic.
Substitution notes: If you need a dairy-free version, use a high-quality vegan butter stick. I’ve had good results with Miyoko’s. For a gluten-free option, swap the all-purpose flour with a 1:1 gluten-free baking blend. The texture will be slightly more crumbly, so handle gently.
Equipment Needed
You don’t need much for these cookies. That’s the beauty of them. Here’s what you’ll want to have on hand:
- Electric mixer (stand or hand-held) — You can cream the butter and sugar by hand if you’re feeling strong, but a mixer makes it so much easier.
- Large mixing bowls — One for the wet ingredients, one for the dry.
- Baking sheets (2-3) — Line them with parchment paper or silicone baking mats. No greasing needed.
- Parchment paper — Prevents sticking and makes cleanup a breeze.
- Sharp knife or bench scraper — For cutting the dough into finger shapes.
- Small offset spatula (optional) — Helps transfer the delicate shaped cookies to the baking sheet.
- Toothpick or skewer — For making the knuckle lines and creases.
- Cooling rack — Essential for letting the cookies cool completely before you add the fingernails.
If you don’t have an offset spatula, don’t worry. I’ve used a butter knife in a pinch. It’s not pretty, but it works. And if you’re making these with kids, just accept that some fingers will look a little… chunky. That’s part of the charm.
Preparation Method
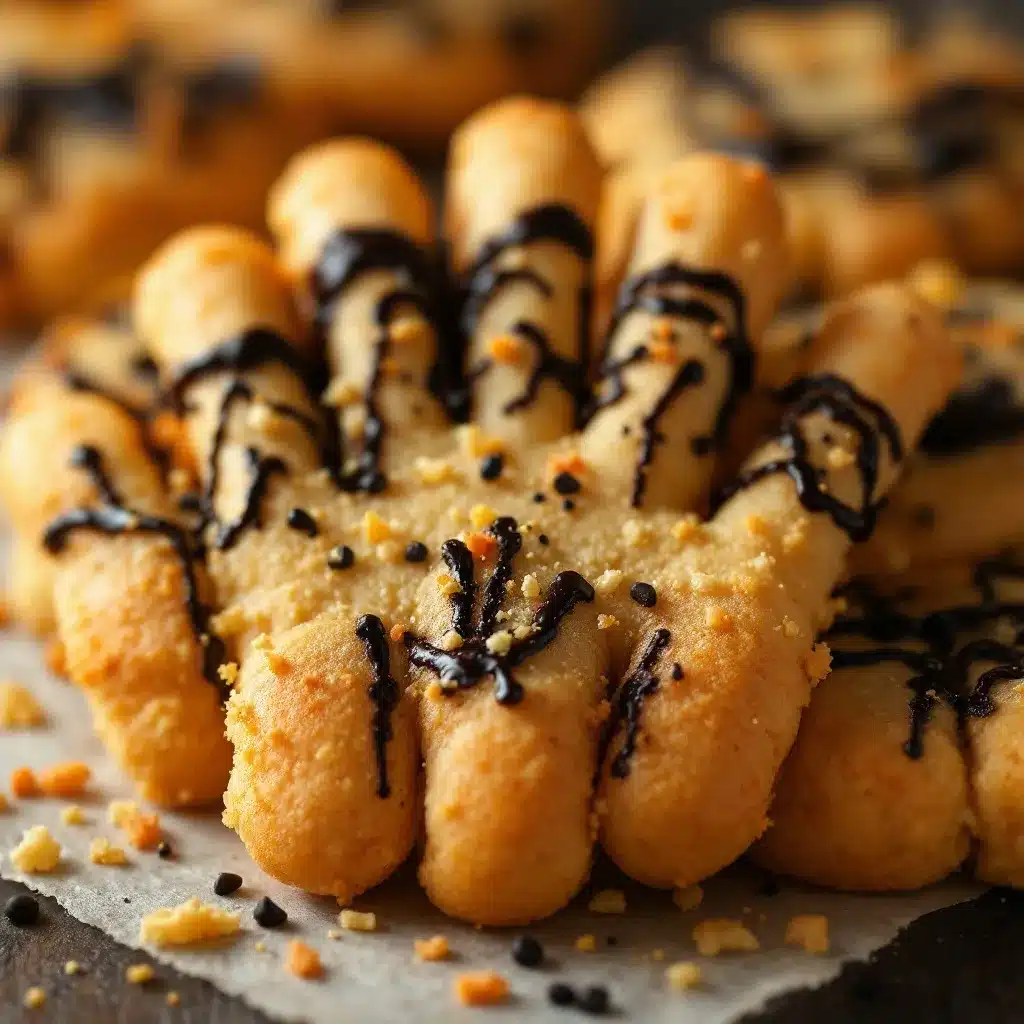
Let’s get to the good part. Follow these steps, and you’ll have a batch of the creepiest cookies on the block.
- Cream the butter and sugar. In a large mixing bowl, beat the softened butter and granulated sugar together until light and fluffy. This takes about 3-4 minutes with an electric mixer on medium speed. You want it pale yellow and airy. Scrape down the sides of the bowl once or twice.
- Add the wet ingredients. Beat in the egg, vanilla extract, and almond extract until fully combined. The mixture will look a little curdled at first — that’s normal. Keep mixing until it’s smooth and creamy.
- Combine the dry ingredients. In a separate bowl, whisk together the all-purpose flour, baking powder, and salt. This ensures the baking powder is evenly distributed so you don’t get weird puffy spots.
- Mix the dough. Gradually add the dry ingredients to the wet mixture, mixing on low speed. Stop as soon as the flour is incorporated. Overmixing makes tough cookies. The dough will be soft and slightly sticky — that’s perfect.
- Chill the dough. Divide the dough in half, flatten each half into a disc, wrap tightly in plastic wrap, and refrigerate for at least 30 minutes. This is non-negotiable. Chilled dough is way easier to shape, and it helps the cookies hold their finger shape instead of spreading into blobs. You can chill it for up to 3 days.
- Preheat the oven. Set your oven to 350°F (175°C). Line your baking sheets with parchment paper.
- Shape the fingers. Take one disc of dough out of the fridge. Pinch off a piece about the size of a walnut. Roll it into a log shape about 3-4 inches long. Then, using your fingers, taper one end slightly — that’s where the fingernail will go. Gently press the log to flatten it just a bit. You want it to look like a finger, not a tube. Place it on the prepared baking sheet.
- Create the knuckles. Use the back of a knife or a toothpick to press horizontal lines into the dough at the “knuckle” points. You want about two or three lines per finger. Don’t press too deep — you just want gentle indentations. For the “wrinkle” effect, lightly press the dough around the knuckles with your fingers.
- Add the fingernail. Take a whole almond and press it firmly into the tapered end of the finger. The almond should be pointing outward, like a nail. Press it in until it’s about halfway embedded. Don’t worry if a little dough squeezes out around the edges — that actually makes it look more realistic.
- Create the “break” end. For the fingers that look like they’ve been snapped off, cut the opposite end of the finger at a slight angle with a sharp knife. You can leave it flat or add a small dab of red jam for the “blood” effect after baking.
- Bake. Bake the cookies for 10-12 minutes, or until the edges are just barely golden. The centers should still look pale. They’ll firm up as they cool. Don’t overbake, or they’ll be hard instead of tender.
- Cool completely. Let the cookies cool on the baking sheet for 5 minutes, then transfer them to a wire rack to cool completely. This is important — if you try to move them too soon, they’ll break.
- Add the finishing touches. Once the cookies are completely cool, you can add a tiny dab of red jam to the “broken” end of some fingers. For extra realism, lightly dust the cookies with a little powdered sugar to make them look pale and creepy. Or leave them as-is — they’re already pretty convincing.
Cooking Tips & Techniques
I’ve made these cookies more times than I can count, and I’ve learned a few things along the way. Here are the tips that make the biggest difference.
Keep the dough cold. This is the number one rule. If the dough gets too warm, it becomes sticky and impossible to shape. Work with one disc at a time, and keep the other in the fridge. If your fingers (the ones on your hand) start to warm up the dough, pop the baking sheet in the fridge for 10 minutes before baking.
Don’t skip the almond extract. I know it’s a strong flavor, but it’s what makes these cookies taste like something special. It adds this subtle, almost mysterious note that pairs perfectly with the almond fingernail. If you really hate almond extract, you can use all vanilla, but it won’t be quite the same.
Make the fingernails stick. One of my early failures was watching almond fingernails fall off after baking. The trick is to press the almond in firmly before baking. The dough should grip it on all sides. If the almond is still loose after baking, you can glue it on with a tiny dab of royal icing or melted white chocolate.
Vary the finger shapes. Not all fingers should look the same. Make some long and skinny, some short and stubby. Bend a few slightly at the knuckle. Give them different angles. The more variety, the more realistic (and creepy) they look.
Watch the baking time. Ovens vary. Start checking at 10 minutes. The cookies should be just barely golden on the bottom edges. If they’re browning all over, they’re overdone. You want them pale and tender.
I once forgot to chill the dough and ended up with cookies that spread into flat, shapeless blobs. They still tasted good, but they looked like alien pancakes instead of witch fingers. Learn from my mistakes. Chill the dough.
Variations & Adaptations
These cookies are fun to play with. Here are some ways to make them your own.
Bloody Witch Fingers: After baking, brush a tiny bit of red gel food coloring mixed with a drop of corn syrup onto the “broken” end of the finger. It looks disturbingly realistic. I’ve also used strawberry jam thinned with a little water — it gives a more matte, dried-blood look.
Green Witch Fingers: Add a few drops of green gel food coloring to the dough before chilling. This gives them a classic witchy green tint. It’s subtle but effective. You can also add a drop of black food coloring for a darker, more gnarled look.
Gluten-Free Version: Use a 1:1 gluten-free baking flour blend. I like King Arthur’s. The dough will be a bit more delicate, so be extra gentle when shaping. Chill it for a full hour before rolling.
Chocolate Witch Fingers: Replace ¼ cup of the flour with unsweetened cocoa powder. The chocolate flavor pairs surprisingly well with the almond extract. These look like dark, twisted witch fingers — perfect for a more gothic Halloween.
Vegan Option: Use vegan butter and a flax egg (1 tablespoon ground flaxseed mixed with 3 tablespoons water, let sit for 5 minutes). The texture will be slightly more crumbly, but they still look and taste great.
My personal favorite variation? The “zombie” fingers. I add a drop of green food coloring to the dough and press a sliced almond into the “break” end to look like a bone sticking out. It’s gross in the best way.
Serving & Storage Suggestions
These cookies are best served at room temperature. Arrange them on a platter with the “broken” ends pointing outward for maximum creep factor. I like to scatter a few whole almonds around the plate to look like fallen fingernails — it’s a small detail, but it always gets a laugh.
Storage: Store the cookies in an airtight container at room temperature for up to 5 days. Layer them between sheets of parchment paper to prevent the fingernails from breaking off. Do not refrigerate — the fridge makes them lose their texture.
Freezing: You can freeze the unbaked shaped cookies on a baking sheet until solid, then transfer them to a freezer bag. Bake directly from frozen, adding 2-3 minutes to the baking time. Or freeze the baked cookies for up to 3 months. Thaw at room temperature before serving.
Reheating: If you want that just-baked warmth, pop the cookies in a 300°F oven for 3-4 minutes. But honestly, they’re perfect at room temperature.
The flavors actually get better after a day. The almond extract mellows out, and the cookies become even more tender. So feel free to make them a day ahead. They’ll taste even better — and they’ll still look just as creepy.
Nutritional Information & Benefits
Let’s be honest — these are cookies. They’re a treat. But here’s the approximate nutritional breakdown for one cookie (based on a batch of 40):
- Calories: 95
- Fat: 5g
- Carbohydrates: 12g
- Protein: 1g
- Sugar: 6g
The almonds add a small amount of healthy fats, vitamin E, and magnesium. So there’s that. And the butter? Well, butter makes everything better. I’d rather have one really good, homemade cookie than a handful of processed candy any day.
These cookies are vegetarian and can easily be made vegan or gluten-free with the substitutions I mentioned. They contain dairy, eggs, gluten (unless substituted), and tree nuts (almonds). If you’re serving them at a party, always label them clearly.
From a wellness perspective, I believe in balance. Halloween is one night. Make these cookies, enjoy them, and don’t stress about the numbers. The joy they bring is worth every single calorie.
Conclusion
These Spooky Witch Finger Sugar Cookies are more than just a Halloween treat. They’re a tradition in the making. The kind of thing your kids will remember years from now — the year Mom made those creepy finger cookies that everyone talked about. The year they helped press the almond fingernails into the dough and giggled at how gross it looked.
The recipe is forgiving. The ingredients are simple. And the result is genuinely impressive. Whether you’re bringing them to a Halloween party, making them for a classroom snack, or just baking for the fun of it, these cookies deliver. They’re buttery, tender, and just the right amount of creepy.
I’d love to see your version. Tag me when you make them. Tell me about the reactions you get. Did anyone refuse to eat one because it looked too real? That’s the highest compliment. And if you come up with a variation I haven’t tried, share it. I’m always looking for new ways to make these cookies even spookier.
Now go preheat that oven. Your witch fingers are waiting.
Frequently Asked Questions
Can I make the dough ahead of time?
Absolutely. The dough can be refrigerated for up to 3 days or frozen for up to 3 months. Just wrap it tightly in plastic wrap and then foil. Thaw overnight in the fridge before shaping.
Why did my cookies spread too much?
This usually means the dough wasn’t chilled long enough, or your butter was too soft. Next time, chill the dough for at least 45 minutes. If your kitchen is warm, pop the shaped cookies in the fridge for 10 minutes before baking.
Can I use slivered almonds instead of whole almonds?
Slivered almonds are too small and thin. They’ll burn before the cookie is done. Stick with whole almonds — they look more like real fingernails anyway. If you want smaller nails, use sliced almonds, but watch them closely during baking.
How do I get the fingernails to stay on?
Press the almond firmly into the dough before baking. The dough should grip it on all sides. If any nails fall off after baking, use a tiny dab of royal icing or melted white chocolate as glue. Let it set completely before serving.
Can I make these without almond extract?
Yes, but the flavor won’t be quite the same. The almond extract adds that subtle, almost mysterious flavor that makes these cookies special. If you really don’t like it, use an extra ½ teaspoon of vanilla extract instead. The cookies will still taste good — just different.
Pin This Recipe!

Spooky Witch Finger Sugar Cookies: Easy Halloween Treat

These buttery, tender sugar cookies are shaped like creepy witch fingers with almond sliver fingernails. They’re surprisingly simple to make and guaranteed to be the star of any Halloween party.
- Prep Time: 15 minutes
- Cook Time: 12 minutes
- Total Time: 57 minutes (includes 30 minutes chilling)
- Yield: 40 cookies 1x
- Category: Dessert
- Cuisine: American
Ingredients
- 1 cup (2 sticks) unsalted butter, softened
- 1 cup granulated sugar
- 1 large egg, room temperature
- 1 teaspoon vanilla extract
- ½ teaspoon almond extract
- 2 ½ cups all-purpose flour
- ½ teaspoon baking powder
- ½ teaspoon salt
- 40–50 whole almonds (blanched or raw)
- Red jam or food coloring (optional, for ‘bloody’ ends)
Instructions
- Cream the butter and sugar together in a large bowl until light and fluffy, about 3-4 minutes.
- Beat in the egg, vanilla extract, and almond extract until smooth and creamy.
- In a separate bowl, whisk together the flour, baking powder, and salt.
- Gradually add the dry ingredients to the wet mixture, mixing on low speed until just combined. Do not overmix.
- Divide the dough in half, flatten into discs, wrap in plastic wrap, and refrigerate for at least 30 minutes (up to 3 days).
- Preheat oven to 350°F (175°C). Line baking sheets with parchment paper.
- Take one disc of dough out of the fridge. Pinch off a walnut-sized piece and roll into a log about 3-4 inches long. Taper one end slightly and flatten gently to resemble a finger.
- Use the back of a knife or a toothpick to press 2-3 horizontal lines into the dough at the knuckle points. Lightly press around the knuckles for a wrinkled effect.
- Press a whole almond firmly into the tapered end of the finger, pointing outward, until about halfway embedded.
- For a ‘broken’ look, cut the opposite end of the finger at a slight angle with a sharp knife.
- Place shaped cookies on prepared baking sheets. Bake for 10-12 minutes, until edges are just barely golden. Centers should still look pale.
- Let cookies cool on the baking sheet for 5 minutes, then transfer to a wire rack to cool completely.
- Once cool, add a tiny dab of red jam to the ‘broken’ end of some fingers for a bloody effect, if desired. Optionally dust with powdered sugar.
Notes
Keep the dough cold for easier shaping. Press almonds firmly into the dough to prevent them from falling off after baking. For extra realism, vary the finger shapes and bend some slightly at the knuckle. The cookies can be stored in an airtight container at room temperature for up to 5 days.
Nutrition
- Serving Size: 1 cookie
- Calories: 95
- Sugar: 6
- Sodium: 50
- Fat: 5
- Saturated Fat: 3
- Carbohydrates: 12
- Protein: 1
Keywords: Halloween cookies, witch finger cookies, sugar cookies, spooky treats, easy Halloween recipe


