The remote control hit the floor. Not thrown, just… dropped. My brother-in-law, the guy who analyzes every play like he’s on the payroll, had actually stopped mid-chew to stare at the wing in his hand. “What did you do to these?” he asked, and the room went quiet for a second. That’s the moment you live for as the unofficial game-day cook. Not the compliments, but the stunned silence that follows the first bite. I just shrugged and said, “Baked them.” He didn’t believe me. Three people checked the oven before kickoff of the second game.
That was the first time I made these crispy baked chicken wings for football Sunday, and honestly, I was a little surprised myself. I had spent years ordering wings from the place down the street, accepting the sogginess that comes with delivery. I figured crispy wings required a deep fryer, a mess, and a level of commitment I didn’t have during a double-header. Turns out, I was wrong. This recipe for crispy baked chicken wings is the result of a few stubborn experiments and a deep desire to not miss a single touchdown while cooking. It gives you that shatteringly crisp skin and juicy meat without the grease splatter or the fryer. Let’s get into it.
Why You’ll Love This Recipe
Listen, I’ve tested a lot of wing methods. I’ve par-boiled, I’ve steamed, I’ve tried the baking powder trick with mixed results. This version is the one that finally stuck. It’s the one I make for every big game, and the one friends text me for before the playoffs start.
- Oven-Baked, Not Fried: You get that satisfying crunch without the heavy oil. Less mess, less guilt, more room for extra wings.
- Simple Ingredients: You probably have everything you need in your pantry right now. No buttermilk bath, no specialty flours.
- Perfect for Game Day: These hold up beautifully. They stay crispy even after sitting out on the coffee table for a quarter, which is a non-negotiable for football Sunday.
- Totally Customizable: The base method is perfect, but the sauce options are endless. Buffalo, BBQ, garlic parmesan—you name it, this wing can handle it.
- Foolproof Texture: The secret is in the drying and the high heat. It’s a technique that works every single time, giving you that crackly skin that makes you forget about fried wings entirely.
This isn’t just another baked wing recipe. It’s the one that uses a simple trick—a combination of a dry rub and a specific oven temperature curve—to get that deep-fried texture without the deep fryer. It’s the kind of recipe that makes you look like a hero in the kitchen while you’re actually just watching the pre-game show. And honestly, isn’t that the dream?
What Ingredients You Will Need
This recipe relies on a short list of pantry staples to deliver that big, bold flavor and that perfect, crispy skin. The magic is less about a long ingredient list and more about how you treat the main event: the chicken wings.
- Chicken Wings (3 lbs / 1.36 kg): Look for whole wings or party wings (already separated into drumettes and flats). I prefer party wings for convenience. Pat them super dry with paper towels—this is the most important step. If you can, leave them uncovered in the fridge for an hour or two to really dry out the skin.
- Baking Powder (2 tsp, 10g): This is the secret weapon. Not baking soda! Baking powder raises the pH of the skin and helps it brown and crisp up in the oven. Look for an aluminum-free brand to avoid any metallic aftertaste. I use Clabber Girl or Rumford.
- Cornstarch (1 tbsp, 8g): This adds another layer of crunch. It helps absorb any remaining moisture and creates a delicate, crackly crust. You can substitute with arrowroot powder if you prefer.
- Kosher Salt (1 ½ tsp, 9g): Use a good kosher salt like Diamond Crystal or Morton’s. It seasons the meat all the way through and helps draw out moisture from the skin. Don’t skip it or try to use table salt in the same amount—it’s much saltier by volume.
- Garlic Powder (1 tsp): Adds a savory, aromatic base note to the wings. Fresh garlic can burn at the high temperature we’re using, so stick with powder for this step.
- Onion Powder (1 tsp): Complements the garlic and adds depth to the overall flavor profile.
- Smoked Paprika (1 tsp): This gives the wings a beautiful color and a subtle smoky flavor that works perfectly with game day vibes. Regular paprika works too, but smoked is better.
- Black Pepper (½ tsp): Freshly cracked is best for a little bite.
- Your Favorite Wing Sauce (1 cup / 240ml): This is where you make it your own. For a classic Buffalo, mix ½ cup hot sauce (like Frank’s RedHot) with ¼ cup melted unsalted butter and a splash of Worcestershire sauce. For a BBQ version, use your favorite smoky-sweet sauce. For a dry rub, just skip the sauce and double the spice mix.
That’s it. No long list of weird ingredients. The star is the technique, and the ingredients are just there to support it. If you’re looking for a drink to pair with these, my refreshing champagne punch is always a hit on game day, or you can keep it classic with an ice-cold beer.
Equipment Needed
You don’t need a fryer or any fancy gadgets for this one. Just a few basic tools you probably already have.
- Large Baking Sheet (Half-Sheet Pan): A rimmed baking sheet is essential to catch any drips. Line it with aluminum foil for easier cleanup, then place a wire rack on top.
- Wire Rack: This is key for crispy wings. It lifts the chicken off the baking sheet so air can circulate all around, preventing the bottom from getting soggy. A cooling rack that fits inside your baking sheet works perfectly.
- Paper Towels: You will go through a lot of these. Patting the wings dry is the single most important step for crispiness.
- Large Mixing Bowl: For tossing the wings with the dry rub. A glass or stainless steel bowl works best.
- Tongs: For flipping the wings halfway through baking and for tossing them in sauce.
- Small Saucepan or Microwave-Safe Bowl: For making your sauce if you’re going the Buffalo route.
If you don’t have a wire rack, you can try flipping the wings more frequently, but the rack really does make a big difference. It’s a cheap investment for perfect wings every time. I also recommend having a good instant-read thermometer on hand to make sure the wings hit an internal temperature of 165°F (74°C), though with this method, they usually get there easily.
Preparation Method
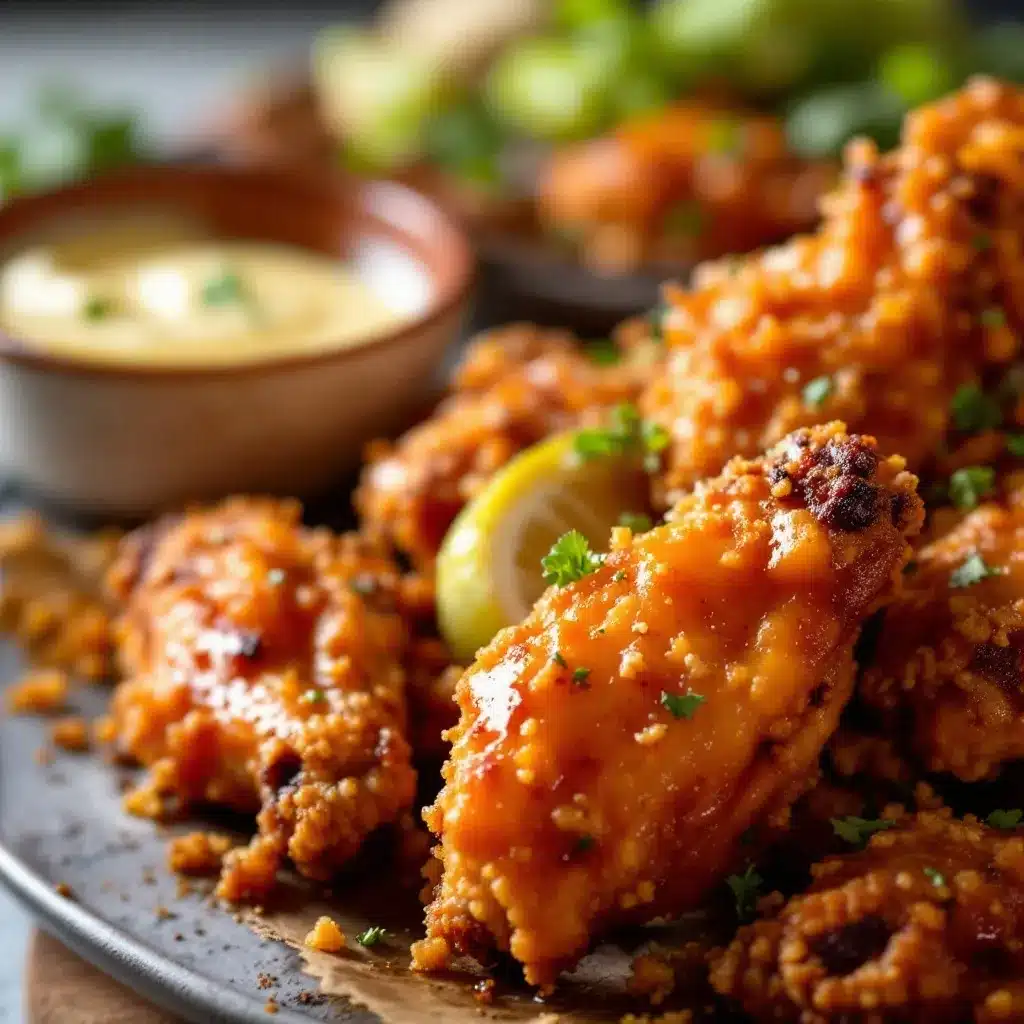
Alright, let’s get cooking. This method is all about patience and heat. Follow these steps, and you will have the crispiest baked wings of your life.
- Prep the Wings (15 minutes): If you bought whole wings, cut them at the joints. You’ll get a drumette, a flat, and a tip. Save the tips for making stock. Pat every single piece of chicken completely dry with paper towels. This is not a step to rush. The drier the skin, the crispier the result. Lay them out on a paper towel-lined tray while you work.
- Create the Dry Rub (5 minutes): In your large mixing bowl, whisk together the baking powder, cornstarch, kosher salt, garlic powder, onion powder, smoked paprika, and black pepper. Make sure there are no clumps of baking powder.
- Season the Wings (10 minutes): Add the dried chicken wings to the bowl with the dry rub. Use your hands (wash them first!) to toss and massage the mixture into every nook and cranny of the chicken. Make sure each piece is evenly coated. This is a messy job, but it’s worth it.
- Set Up the Baking Sheet (5 minutes): Line your baking sheet with foil for easy cleanup. Place the wire rack on top. Arrange the seasoned wings in a single layer on the rack. Make sure they aren’t touching—they need space for the hot air to circulate. If they’re crowded, they’ll steam instead of crisp.
- The Resting Period (Optional but Recommended, 1-24 hours): This is a pro move. Place the baking sheet with the wings, uncovered, in the refrigerator. This allows the skin to dry out even further, which guarantees maximum crispiness. If you don’t have time, don’t worry—you’ll still get great results. Just skip straight to baking.
- Preheat the Oven (20 minutes): About 30 minutes before you want to bake, preheat your oven to 250°F (120°C). Yes, you read that right. We start low to render out the fat slowly.
- Low and Slow (30 minutes): Put the wings in the preheated oven and bake at 250°F (120°C) for 30 minutes. This renders the fat under the skin, making it thin and ready to crisp up. You won’t see much browning here, and that’s fine.
- Crank the Heat (40-50 minutes): After 30 minutes, increase the oven temperature to 425°F (220°C). Don’t take the wings out! Let them continue baking at the high heat. This is where the magic happens. Bake for another 40-50 minutes, flipping the wings with tongs halfway through (after about 20 minutes). They are done when the skin is deep golden brown, crispy, and the internal temperature of the thickest part of a drumette reaches 165°F (74°C).
- Make the Sauce (During the last 10 minutes of baking): While the wings are finishing, make your sauce. For a classic Buffalo sauce, melt the butter in a small saucepan over low heat. Whisk in the hot sauce and a splash of Worcestershire sauce. Keep it warm.
- Toss and Serve (5 minutes): Once the wings are out of the oven, let them rest on the rack for 2-3 minutes. Transfer them to a large bowl, pour the warm sauce over them, and toss gently with tongs until every wing is coated. Serve immediately with celery sticks, carrot sticks, and blue cheese or ranch dressing.
If you’re planning a full spread, these wings pair beautifully with a side of crispy prosciutto-wrapped asparagus bites for a little something green and salty on the table.
Cooking Tips & Techniques
I’ve made a lot of mistakes with wings so you don’t have to. Here are the biggest lessons I’ve learned.
Don’t skip the drying step. I cannot stress this enough. Wet skin = soggy wings. Use a whole stack of paper towels and really press the moisture out. I once made the mistake of being in a hurry and just giving them a quick pat. The result was edible, but the skin was chewy, not crispy. Never again.
The baking powder trick is real, but use it right. Make sure it’s baking powder, not baking soda. Baking soda will leave a nasty, bitter, metallic taste on your wings. I learned this the hard way during a playoff game. The wings looked great but tasted awful. Trust me on this one.
Give them space. Crowding the pan is the enemy of crispiness. The wings need room to breathe. If you need to make a huge batch, use two baking sheets and rotate them between the racks halfway through the high-heat stage.
Timing is everything. The low-then-high heat method is non-negotiable for me now. The 250°F (120°C) stage renders the fat, and the 425°F (220°C) stage crisps the skin. Trying to just bake them at a constant high heat will give you a burnt outside and an under-rendered inside. Be patient.
Flip them. Flipping the wings halfway through the high-heat stage ensures even browning. It’s an extra step, but it takes 30 seconds and makes a noticeable difference in the final color and crunch.
Variations & Adaptations
One of the best things about this base recipe is how easy it is to change up. The method stays the same; you just swap the finish.
Classic Buffalo: The most popular version. Use the sauce recipe above. For extra heat, add a pinch of cayenne pepper to the butter sauce. For a milder version, use less hot sauce and more butter.
Honey Garlic Soy: Skip the Buffalo sauce. In a small bowl, whisk together ¼ cup soy sauce, ¼ cup honey, 2 cloves of minced garlic, and 1 tablespoon of sesame oil. Toss the baked wings in this mixture, then return them to the baking sheet and broil for 2-3 minutes until the sauce caramelizes. Sprinkle with sesame seeds and sliced green onions.
Lemon Pepper Dry Rub: Skip the wet sauce entirely. After the wings are baked, toss them in a mixture of 2 tablespoons of lemon pepper seasoning and 1 teaspoon of extra kosher salt. This is a game-day classic that lets the crispy skin shine.
Spicy Korean Gochujang: For a sweet and spicy kick, mix 3 tablespoons of gochujang (Korean chili paste) with 2 tablespoons of honey, 1 tablespoon of soy sauce, 1 tablespoon of rice vinegar, and a teaspoon of sesame oil. Toss the hot wings in this glaze. It’s sticky, spicy, and incredibly addictive.
Smoked Paprika & Brown Sugar: Add 1 tablespoon of brown sugar to the dry rub. After baking, brush the wings with a mixture of melted butter and extra smoked paprika. This gives a sweet, smoky, slightly caramelized finish that’s perfect for those who prefer BBQ-style flavors.
For a lighter appetizer option to go alongside these, you can’t go wrong with a batch of elegant caviar deviled eggs. It sounds fancy, but they’re surprisingly easy and add a touch of class to the snack table.
Serving & Storage Suggestions
These wings are best served immediately after tossing in the sauce, while the skin is still shatteringly crisp. But I know game-day spreads are a marathon, not a sprint.
Serving: Pile the hot wings on a large platter. Serve with classic celery and carrot sticks, and bowls of blue cheese dressing and ranch dressing for dipping. A sprinkle of fresh chopped parsley or chives on top adds a nice pop of color. For a full game-day menu, I love having a creamy new year’s cheesecake ready for dessert—it’s a great way to end the feast.
Storage: If you have leftovers (unlikely, but possible), let them cool completely. Store them in an airtight container in the refrigerator for up to 3 days. Keep in mind that the sauce will soften the skin over time.
Reheating: The key to reviving leftover wings is the oven, not the microwave. The microwave will turn them into a sad, soggy mess. Preheat your oven to 375°F (190°C). Place the wings on a wire rack over a baking sheet and bake for 10-15 minutes, or until heated through and the skin re-crisps. An air fryer works even better for this—just 5-6 minutes at 375°F (190°C) will do the trick.
Freezing: You can freeze the baked (but unsauced) wings. Let them cool completely, then lay them in a single layer on a baking sheet and freeze for 1-2 hours. Transfer the frozen wings to a freezer-safe bag or container. They will keep for up to 2 months. To reheat, bake directly from frozen at 375°F (190°C) for 20-25 minutes, then toss in your sauce.
Nutritional Information & Benefits
Wings are a treat, but they do have some redeeming qualities, especially when baked instead of fried. The nutritional information below is an estimate for one serving (about 5-6 wings) using the dry rub and no sauce. Adding a Buffalo sauce will add calories and fat from the butter.
| Nutrient | Amount Per Serving (approx.) |
|---|---|
| Calories | 350-400 |
| Protein | 35-40g |
| Fat | 22-26g |
| Saturated Fat | 6-8g |
| Carbohydrates | 2-3g |
| Sodium | 600-800mg |
Chicken wings are a good source of high-quality protein, which helps keep you full and satisfied. They also provide B vitamins, particularly niacin and vitamin B6, which are important for energy metabolism. By baking instead of frying, you significantly reduce the amount of unhealthy fats and overall calories. This method is also gluten-free (as long as your baking powder is certified gluten-free and your sauce is too), making it a great option for those with sensitivities.
Conclusion
These crispy baked chicken wings have become the unofficial MVP of every football Sunday at my house. They deliver that essential game-day crunch without the hassle of a deep fryer, and they let the natural flavor of the chicken shine through. The technique is simple, the ingredients are minimal, and the result is a platter of wings that will have your guests asking for the recipe before the fourth quarter even starts.
I encourage you to make this recipe your own. Play with the dry rub, experiment with different sauces, and find the combination that makes your game-day spread legendary. That’s the beauty of a great base recipe—it’s a starting point for your own creativity.
I’d love to hear how yours turn out! Drop a comment below and tell me your favorite sauce combination, or tag me in your photos on social media. Happy cooking, and enjoy the game!
Frequently Asked Questions
Can I use frozen chicken wings for this recipe?
Yes, you can, but you need to thaw them completely first. Pat them extremely dry after thawing, as frozen wings release a lot of water. The drying step is even more critical when starting from frozen.
Why are my baked chicken wings not crispy?
This usually happens for one of three reasons: the wings weren’t dried well enough, the baking sheet was overcrowded, or the oven temperature wasn’t high enough. Make sure to pat them very dry, give them space on the rack, and follow the low-then-high heat method.
Can I make these wings ahead of time for a party?
Absolutely! You can bake the wings completely through without sauce, let them cool, and store them in the fridge for up to 2 days. On game day, reheat them on a wire rack in a 375°F (190°C) oven for 10-15 minutes, then toss in your sauce. They’ll be just as crispy.
Is it better to use whole wings or pre-cut party wings?
Either works great. Party wings (already separated into drumettes and flats) save you a step and are more convenient. Whole wings are often cheaper but require you to cut them yourself. If you buy whole, save the wing tips for making chicken stock.
Can I use an air fryer instead of an oven?
Yes, this recipe adapts very well to an air fryer. Follow the same drying and seasoning steps. Cook at 250°F (120°C) for 15 minutes, then increase to 400°F (200°C) for another 15-20 minutes, shaking the basket halfway through. You may need to work in batches to avoid overcrowding.
Pin This Recipe!

Crispy Baked Chicken Wings – Perfect for Game Day

These oven-baked chicken wings are incredibly crispy and juicy, made with a simple dry rub and a special low-then-high heat method. Perfect for game day, they deliver that deep-fried texture without the mess of a deep fryer.
- Prep Time: 15 minutes
- Cook Time: 1 hour 10 minutes
- Total Time: 1 hour 25 minutes (plus optional resting time)
- Yield: 4 servings 1x
- Category: Appetizer
- Cuisine: American
Ingredients
- 3 lbs (1.36 kg) chicken wings (whole or party wings)
- 2 tsp (10g) baking powder (aluminum-free)
- 1 tbsp (8g) cornstarch
- 1 ½ tsp (9g) kosher salt
- 1 tsp garlic powder
- 1 tsp onion powder
- 1 tsp smoked paprika
- ½ tsp black pepper (freshly cracked)
- 1 cup (240ml) your favorite wing sauce (e.g., Buffalo, BBQ)
Instructions
- Prep the Wings (15 minutes): If using whole wings, cut at the joints into drumettes, flats, and tips (save tips for stock). Pat every piece completely dry with paper towels.
- Create the Dry Rub (5 minutes): In a large mixing bowl, whisk together baking powder, cornstarch, kosher salt, garlic powder, onion powder, smoked paprika, and black pepper until no clumps remain.
- Season the Wings (10 minutes): Add dried wings to the bowl with the dry rub. Use your hands to toss and massage the mixture into every piece until evenly coated.
- Set Up the Baking Sheet (5 minutes): Line a rimmed baking sheet with foil and place a wire rack on top. Arrange seasoned wings in a single layer on the rack, ensuring they are not touching.
- The Resting Period (Optional but Recommended, 1-24 hours): Place the baking sheet with wings, uncovered, in the refrigerator to further dry the skin. Skip if short on time.
- Preheat the Oven (20 minutes): About 30 minutes before baking, preheat oven to 250°F (120°C).
- Low and Slow (30 minutes): Bake wings at 250°F (120°C) for 30 minutes to render fat.
- Crank the Heat (40-50 minutes): Increase oven temperature to 425°F (220°C) without removing wings. Bake for another 40-50 minutes, flipping halfway through, until skin is deep golden brown and internal temperature reaches 165°F (74°C).
- Make the Sauce (During last 10 minutes of baking): Prepare your desired sauce. For classic Buffalo, melt ¼ cup unsalted butter, whisk in ½ cup hot sauce and a splash of Worcestershire sauce. Keep warm.
- Toss and Serve (5 minutes): Let wings rest on rack for 2-3 minutes. Transfer to a large bowl, pour warm sauce over, and toss gently with tongs. Serve immediately with celery, carrot sticks, and blue cheese or ranch dressing.
Notes
Pat wings extremely dry for maximum crispiness. Do not substitute baking soda for baking powder. Ensure wings are not crowded on the rack. For best results, use the optional resting period in the fridge. Reheat leftovers in oven or air fryer, not microwave.
Nutrition
- Serving Size: 5-6 wings
- Calories: 350400
- Sodium: 600800
- Fat: 2226
- Saturated Fat: 68
- Carbohydrates: 23
- Protein: 3540
Keywords: crispy baked chicken wings, game day wings, oven baked wings, buffalo wings, chicken wings recipe


