I ruined my first pumpkin roll the day before Thanksgiving. Not just a little crack—I mean a full-on, canyon-sized split right down the middle, with cream cheese filling oozing out like a volcanic eruption. I stood there, spatula in hand, staring at this beautiful disaster on my counter, wondering how something that looked so simple could go so wrong. That was ten years ago, and honestly, I’ve made more mistakes since then than I care to admit.
The thing is, a perfect pumpkin roll with cream cheese filling is a bit like a magic trick. It looks impossible when you see that tight, flawless spiral on the platter, but once you know the secret handshake, it becomes almost routine. I spent years chasing that perfect spiral—too dry, too wet, too cracked, too flat. I’ve had rolls that looked more like sad little slugs than elegant dessert logs.
What finally clicked for me wasn’t some fancy technique I learned in a pastry class. It was the day I stopped treating the cake like a sponge and started treating it like a blanket. That shift in thinking changed everything. The cake needs to be pliable, not just baked. It needs to be warm, not just cooled. It needs a little trust—and a lot of powdered sugar.
This recipe is the one I now bring to every fall gathering, every Friendsgiving, every holiday party where someone inevitably asks, “Did you make this from scratch?” And when I say yes, I don’t tell them about the ten years of cracked cakes and sweaty palms. I just smile and watch them take that first bite.
Why You’ll Love This Recipe
Let me tell you why this particular pumpkin roll with cream cheese filling has earned a permanent spot in my fall baking rotation. It’s not just another recipe—it’s the one I’ve tested, tweaked, and perfected until every single spiral comes out smooth.
- Foolproof Structure: This recipe uses a specific egg-to-flour ratio that creates a cake flexible enough to roll without cracking but sturdy enough to hold its shape. I’ve tested it at high altitude, in humid weather, and during dry winter months—it works every time.
- Real Pumpkin Flavor: We’re not hiding the pumpkin here. This cake actually tastes like pumpkin, not just spice. The cream cheese filling is tangy enough to cut through the sweetness, creating that perfect balance that keeps you coming back for “just one more slice.”
- Make-Ahead Magic: This is the kind of dessert you can make two days ahead and it actually gets better. The flavors meld, the texture softens slightly, and slicing becomes even easier. Perfect for when you’re hosting and need one less thing on your plate.
- Impressive Without the Stress: Let’s be honest—a rolled cake looks like you spent hours in a professional kitchen. But the active prep time is only about 20 minutes. The rest is just waiting and rolling. It’s the ultimate dinner party flex with minimal effort.
- Naturally Gluten-Free Adaptable: I’ve made this with a high-quality gluten-free flour blend, and you honestly can’t tell the difference. The pumpkin keeps it moist, and the filling hides any texture quirks.
This isn’t just a dessert—it’s the kind of thing that makes people close their eyes after the first bite. It’s comfort food that feels fancy, tradition that feels fresh, and honestly, it’s the one recipe that makes me feel like a real baker every single time.
What Ingredients You Will Need
This recipe uses simple, everyday ingredients to create something that tastes anything but ordinary. Most of these are probably already in your pantry, which is exactly how I like my baking projects.
For the Pumpkin Cake
- 3 large eggs, room temperature (cold eggs won’t whip up as fluffy)
- 1 cup granulated sugar (200g) – adds sweetness and structure
- 2/3 cup canned pumpkin puree (160g) – not pumpkin pie filling, just pure pumpkin
- 3/4 cup all-purpose flour (90g) – spoon and level for accuracy
- 1 teaspoon baking powder
- 1/2 teaspoon salt
- 2 teaspoons pumpkin pie spice – or make your own with cinnamon, ginger, nutmeg, and cloves
- 1 teaspoon ground cinnamon – because you can never have too much
- Powdered sugar for dusting – this is non-negotiable, trust me
For the Cream Cheese Filling
- 8 ounces cream cheese (226g), softened to room temperature (I prefer Philadelphia for consistent results)
- 1/4 cup unsalted butter (57g), softened
- 1 teaspoon vanilla extract
- 1 cup powdered sugar (120g), sifted if you’re feeling fancy
A quick note on the pumpkin puree—I’ve tried making this with fresh roasted pumpkin, and honestly, it’s not worth the effort for this recipe. Canned pumpkin has a consistent moisture content that’s crucial for getting the roll right. Libby’s is my go-to brand because it’s reliably thick and not watery. If you use a different brand and it seems runny, blot it with a paper towel before adding it to the batter.
For the cream cheese, please let it come to room temperature naturally. I know we all want to microwave it, but that leads to lumpy filling. Set it out an hour before you start baking. Your future self will thank you when you’re spreading that silky-smooth filling across the cake.
One more thing about the spices—fresh spices make a difference here. If your pumpkin pie spice has been sitting in the cabinet since last fall, it might be time for a fresh jar. Stale spices are the number one reason pumpkin desserts taste flat.
Equipment Needed
You don’t need a fancy bakery setup for this recipe, but a few specific tools make the process much smoother.
- 15×10-inch jelly roll pan – This specific size is important. Too big and the cake will be too thin and crack. Too small and it will be too thick to roll. I use a Nordic Ware natural aluminum pan because it heats evenly and doesn’t warp.
- Parchment paper – Regular wax paper will not work here. Get good parchment paper that won’t stick or tear.
- Electric mixer – A stand mixer with the whisk attachment is ideal, but a hand mixer works perfectly fine. You just need to whip those eggs until they’re thick and pale.
- Clean kitchen towel – A lint-free cotton towel is best. Terry cloth can leave fuzz on the cake. I use a thin flour sack towel specifically for rolling cakes.
- Spatula – An offset spatula makes spreading the batter and filling much easier, but a regular rubber spatula works too.
- Wire cooling rack – Essential for even cooling.
- Serrated knife – For clean slices without squishing the roll.
If you don’t have a jelly roll pan, you can use a standard 9×13 baking dish, but the cake will be thicker and you’ll need to adjust the baking time by a few minutes. The roll won’t be as tight, but it’ll still taste amazing.
Preparation Method
This is where the magic happens. Follow these steps carefully, and you’ll be rewarded with a perfect spiral every single time.
- Preheat and prepare. Preheat your oven to 375°F (190°C). Line your jelly roll pan with parchment paper, leaving about an inch of overhang on the long sides. Lightly spray the parchment with non-stick cooking spray. This extra step prevents any sticking disasters.
- Whip the eggs and sugar. In a large bowl, beat the eggs and granulated sugar together on high speed for about 3-4 minutes. You’re looking for a thick, pale mixture that falls in ribbons when you lift the beaters. This is where the cake gets its structure, so don’t rush it. The mixture should look like soft, billowy clouds.
- Add the pumpkin. Reduce the mixer speed to low and beat in the pumpkin puree until just combined. Don’t overmix here—you’ll deflate all that air you just whipped in.
- Combine the dry ingredients. In a separate bowl, whisk together the flour, baking powder, salt, pumpkin pie spice, and cinnamon. This ensures the spices are evenly distributed throughout the cake.
- Fold gently. Add the dry ingredients to the wet mixture in two additions, folding gently with a rubber spatula. Use a light hand here—fold until you can’t see any streaks of flour, then stop. Overmixing will make the cake tough and prone to cracking.
- Spread and bake. Pour the batter into the prepared pan and spread it evenly with your spatula. The batter will be thick, so take your time getting it into the corners. Bake for 12-14 minutes, or until the top springs back when lightly touched. The edges should be just starting to pull away from the pan.
- The crucial first roll. While the cake is still hot, run a knife around the edges to loosen it. Dust a clean kitchen towel generously with powdered sugar. Invert the cake onto the towel and carefully peel off the parchment paper. Starting from one short end, roll the cake and towel together into a tight log. Let it cool completely in this rolled position—about 45 minutes to an hour. This step trains the cake to hold its shape.
- Make the filling. While the cake cools, beat the softened cream cheese and butter together until smooth and creamy. Add the vanilla and powdered sugar, then beat on low until combined. Increase the speed and beat for about 2 minutes until light and fluffy. Don’t skip the beating time—it makes the filling spreadable and dreamy.
- Unroll and fill. Once the cake is completely cool, gently unroll it. It will want to curl back up, and that’s okay. Spread the cream cheese filling evenly over the cake, leaving about a 1-inch border on all sides. This prevents the filling from squeezing out when you roll it back up.
- The final roll. Carefully reroll the cake, this time without the towel. Use the towel to help guide the roll if needed. Wrap the finished roll tightly in plastic wrap and refrigerate for at least 2 hours, or overnight. Chilling makes slicing much cleaner.
One thing I learned the hard way—if your cake cracks during the first roll, don’t panic. Just keep rolling. The filling will hide most imperfections, and a dusting of powdered sugar covers the rest. Nobody will ever know.
Cooking Tips & Techniques
After years of trial and error, here are the things I wish someone had told me before I started making pumpkin rolls.
Don’t overbake the cake. This is the single most common mistake. A dry cake will crack like a desert floor. The cake should be just set—not golden brown, not pulling away from the pan dramatically. When you touch the center, it should spring back but still feel soft. If it feels firm, you’ve gone too far.
Use the towel method. I know some recipes say you can roll the cake in just parchment paper, but the towel absorbs excess moisture and prevents the cake from sticking to itself. The powdered sugar on the towel also keeps the cake from sticking to the fabric. I learned this trick from a pastry chef friend, and it was a game-changer.
Cool completely before filling. I know you’re excited, but warm cake plus cream cheese filling equals a melty mess. The cake needs to be at room temperature or cooler before you add the filling. If you’re in a hurry, pop the rolled cake in the fridge for 30 minutes after it’s cooled on the counter.
Trim the ends. Before serving, trim about 1/2 inch off each end of the roll. This reveals the beautiful spiral and removes any dry or uneven edges. It’s a small step that makes a huge visual difference.
Use a sharp knife for slicing. A serrated knife is best, and wipe it clean between each slice. This keeps the filling from smearing across the cut surface. I keep a damp paper towel nearby and wipe the blade after every single cut.
I once tried to rush the cooling process by putting the rolled cake in the freezer for 15 minutes. The outside froze while the inside stayed warm, and when I tried to unroll it, the cake tore in three places. Learn from my impatience—give it the full hour.
Variations & Adaptations
This recipe is surprisingly flexible, and I’ve tried several variations over the years. Here are my favorites:
Gluten-Free Version: Substitute the all-purpose flour with a high-quality 1:1 gluten-free baking flour blend (I like King Arthur Measure for Measure). Add 1/4 teaspoon xanthan gum if your blend doesn’t already include it. The texture will be slightly more delicate, so handle the cake gently during the rolling process.
Maple Pecan Twist: Add 1/2 cup finely chopped pecans to the cake batter along with the dry ingredients. For the filling, substitute 2 tablespoons of maple syrup for an equal amount of powdered sugar. The maple-pumpkin combination is absolutely divine for fall gatherings.
Chocolate Pumpkin Roll: Replace 2 tablespoons of the flour with unsweetened cocoa powder. The chocolate and pumpkin flavors complement each other beautifully, and the dark cake makes the cream cheese filling stand out visually. This version is always a hit at holiday parties.
Dairy-Free Adaptation: Use dairy-free cream cheese (I like Kite Hill or Violife) and vegan butter. The filling will be slightly softer, so chill the finished roll for at least 4 hours before slicing. The cake itself is naturally dairy-free if you use a non-dairy cooking spray for the pan.
Spiced Up Version: Add 1/4 teaspoon black pepper and a pinch of cayenne to the spice mixture. The heat is subtle but adds a warmth that makes the pumpkin flavor pop. I tried this on a whim one year and it’s become my secret-weapon version.
If you’re serving this at a party alongside other desserts, consider making a batch of creamy New Year’s cheesecake with festive pomegranate topping for variety. They make a beautiful dessert spread together.
Serving & Storage Suggestions
This pumpkin roll with cream cheese filling is best served cold, straight from the refrigerator. The filling firms up beautifully when chilled, making each slice clean and picture-perfect.
For presentation, I like to dust the top with a light snowfall of powdered sugar just before serving. Sometimes I’ll add a few candied pecans or a drizzle of caramel sauce on the plate for a restaurant-quality look. If you’re feeling extra festive, a sprinkle of cinnamon on top adds a warm color contrast.
This roll pairs beautifully with a hot cup of coffee, a spiced latte, or even a glass of cold milk. For a truly indulgent dessert spread, serve it alongside a perfect champagne glazed ham for a holiday meal that feels both elegant and comforting.
Storage Instructions:
- Refrigerator: Wrap tightly in plastic wrap and store for up to 5 days. The flavors actually improve after the first day as the pumpkin and cream cheese meld together.
- Freezer: Wrap the chilled, un-sliced roll in plastic wrap, then a layer of aluminum foil. Freeze for up to 3 months. Thaw overnight in the refrigerator before serving. Do not thaw at room temperature—the filling can become runny.
- Reheating: This dessert is meant to be served cold, but if you prefer it slightly softer, let it sit at room temperature for 10-15 minutes before slicing.
One thing to note—if you’re making this for a party, slice it just before serving. The cut edges can dry out if exposed to air for too long. I’ve learned to keep the roll whole until the last minute, then slice and arrange on a platter.
Nutritional Information & Benefits
Per slice (based on 10 servings):
- Calories: 285
- Total Fat: 14g
- Saturated Fat: 8g
- Cholesterol: 95mg
- Sodium: 220mg
- Total Carbohydrates: 36g
- Dietary Fiber: 1g
- Sugars: 28g
- Protein: 5g
This pumpkin roll is a treat, but it does offer some nutritional perks. Pumpkin is packed with vitamin A, which supports eye health and immune function. It’s also a good source of fiber and antioxidants. The cream cheese filling provides calcium and protein, though it’s definitely an indulgence.
For a slightly lighter version, you can use reduced-fat cream cheese and cut the sugar in the filling by a couple of tablespoons. The texture will be a bit softer, but the flavor is still fantastic.
If you’re watching your sugar intake, this dessert is perfect for special occasions where you want something truly satisfying. One slice is usually enough to curb that sweet tooth without going overboard.
Conclusion
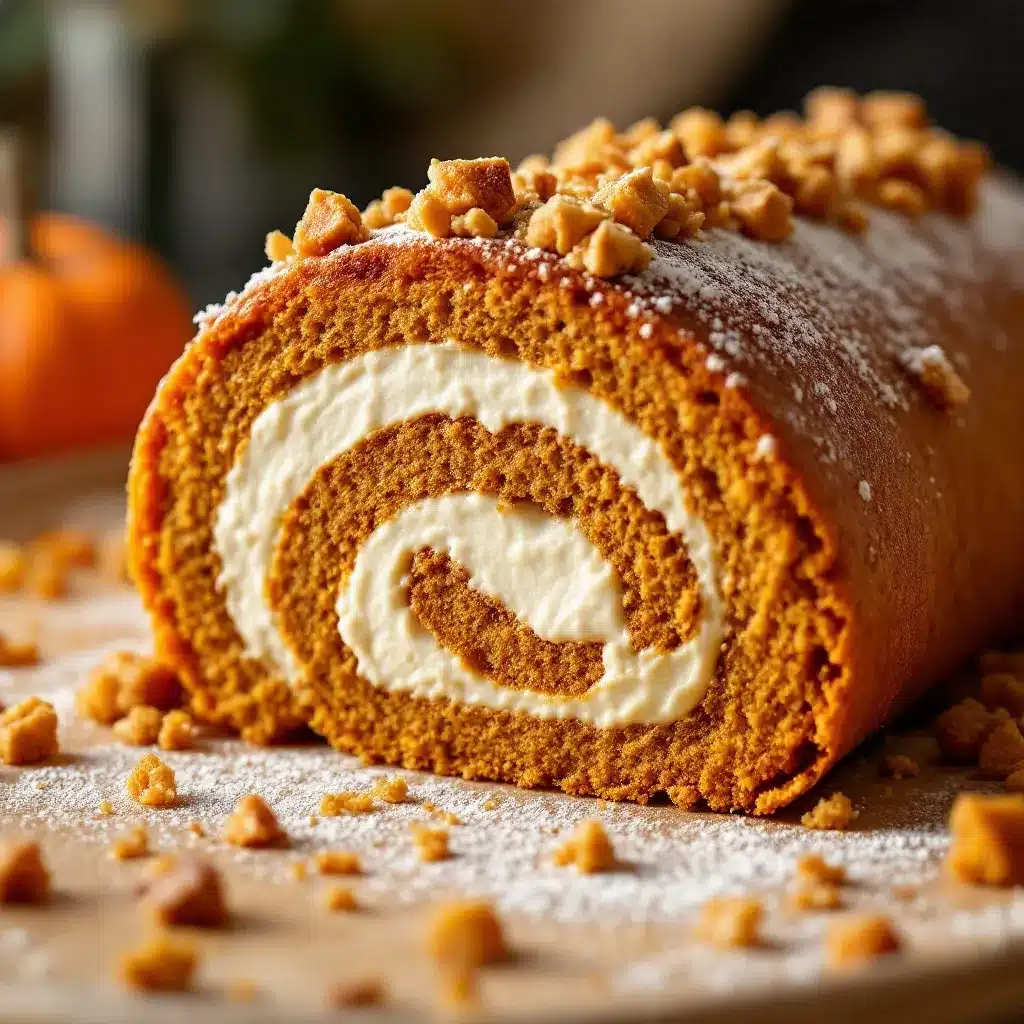
This perfect pumpkin roll with cream cheese filling has become my signature fall dessert, and I think it’s about to become yours too. It’s the kind of recipe that looks like you spent hours in a pastry kitchen, but really just requires a little patience and a few simple techniques.
I love this recipe because it captures everything I want in a fall dessert—warm spices, creamy filling, and that satisfying moment when you slice into it and reveal the perfect spiral. It’s tradition and comfort rolled into one beautiful package.
Make it for Thanksgiving, make it for a cozy Sunday afternoon, or make it just because you want to impress yourself. And when you do, I’d love to hear how it turned out. Drop a comment below and let me know if you tried any variations, or share a photo of your beautiful roll. Happy baking, friends—you’ve got this.
Frequently Asked Questions
Why did my pumpkin cake crack when I rolled it?
The most common reason is overbaking. A dry cake has no flexibility and will crack under pressure. Next time, pull the cake out of the oven when it’s just set and springs back lightly to the touch. Also, make sure you’re rolling it while it’s still warm—that first roll trains the cake to hold its shape.
Can I use fresh pumpkin instead of canned?
You can, but I don’t recommend it for this recipe. Fresh pumpkin puree has a higher water content than canned, which can make the cake too wet and prone to sticking. If you really want to use fresh, roast and drain the pumpkin thoroughly, then blot it with paper towels before adding it to the batter.
How far in advance can I make this pumpkin roll?
You can make it up to two days ahead and store it wrapped in plastic wrap in the refrigerator. The flavors meld beautifully over time. You can also freeze it for up to three months—just wrap it well and thaw overnight in the fridge before serving.
My cream cheese filling is lumpy. What went wrong?
This usually happens when the cream cheese isn’t fully softened before mixing. Let it sit at room temperature for at least an hour before you start. If you’re in a hurry, cut the cream cheese into small cubes and let it sit for 20 minutes. Beat it alone for a minute before adding the other ingredients to smooth out any lumps.
Can I make this recipe without a jelly roll pan?
You can use a 9×13 baking dish, but the cake will be thicker and you’ll need to bake it for a few extra minutes. The roll won’t be as tight, and you might get fewer slices, but it will still taste delicious. Just adjust your expectations for the visual spiral.
Pin This Recipe!
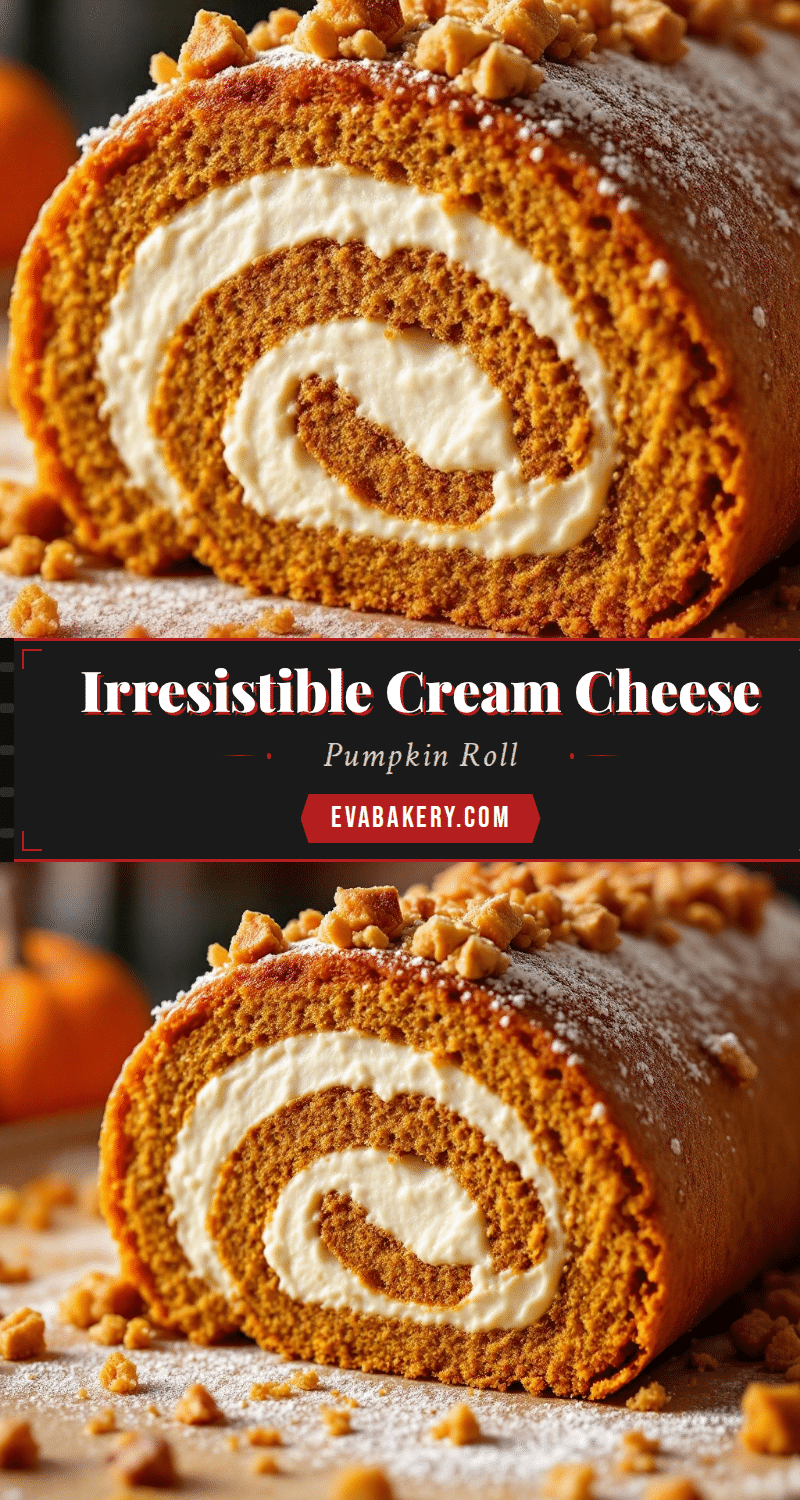
Perfect Pumpkin Roll with Cream Cheese Filling

A foolproof pumpkin roll with a tangy cream cheese filling that creates a beautiful spiral every time. This easy recipe uses simple ingredients and techniques to deliver a stunning fall dessert that tastes as good as it looks.
- Prep Time: 20 minutes
- Cook Time: 14 minutes
- Total Time: 3 hours 20 minutes (includes cooling and chilling)
- Yield: 10 servings 1x
- Category: Dessert
- Cuisine: American
Ingredients
- 3 large eggs, room temperature
- 1 cup granulated sugar (200g)
- 2/3 cup canned pumpkin puree (160g)
- 3/4 cup all-purpose flour (90g)
- 1 teaspoon baking powder
- 1/2 teaspoon salt
- 2 teaspoons pumpkin pie spice
- 1 teaspoon ground cinnamon
- Powdered sugar for dusting
- 8 ounces cream cheese (226g), softened
- 1/4 cup unsalted butter (57g), softened
- 1 teaspoon vanilla extract
- 1 cup powdered sugar (120g)
Instructions
- Preheat oven to 375°F (190°C). Line a 15×10-inch jelly roll pan with parchment paper, leaving overhang on long sides. Lightly spray parchment with non-stick cooking spray.
- In a large bowl, beat eggs and granulated sugar on high speed for 3-4 minutes until thick, pale, and ribbon-like.
- Reduce mixer speed to low and beat in pumpkin puree until just combined.
- In a separate bowl, whisk together flour, baking powder, salt, pumpkin pie spice, and cinnamon.
- Add dry ingredients to wet mixture in two additions, folding gently with a rubber spatula until no streaks of flour remain.
- Pour batter into prepared pan and spread evenly. Bake for 12-14 minutes until top springs back when lightly touched.
- While cake is hot, run a knife around edges to loosen. Dust a clean kitchen towel generously with powdered sugar. Invert cake onto towel and carefully peel off parchment paper.
- Starting from one short end, roll cake and towel together into a tight log. Let cool completely in rolled position, about 45 minutes to 1 hour.
- While cake cools, beat softened cream cheese and butter together until smooth and creamy. Add vanilla and powdered sugar, beat on low until combined, then increase speed and beat for 2 minutes until light and fluffy.
- Once cake is completely cool, gently unroll it. Spread cream cheese filling evenly over cake, leaving a 1-inch border on all sides.
- Carefully reroll cake without the towel. Wrap tightly in plastic wrap and refrigerate for at least 2 hours or overnight.
- Before serving, trim about 1/2 inch off each end. Slice with a serrated knife, wiping blade clean between cuts.
Notes
Don’t overbake the cake – it should be just set and spring back lightly. Roll the cake while still warm to train it to hold its shape. Cool completely before filling. If cake cracks during first roll, keep rolling – filling will hide imperfections. For best results, chill finished roll at least 2 hours before slicing. Use a serrated knife and wipe clean between cuts for clean slices.
Nutrition
- Serving Size: 1 slice
- Calories: 285
- Sugar: 28
- Sodium: 220
- Fat: 14
- Saturated Fat: 8
- Carbohydrates: 36
- Fiber: 1
- Protein: 5
Keywords: pumpkin roll, pumpkin dessert, cream cheese filling, fall dessert, Thanksgiving dessert, rolled cake, pumpkin cake