I need a butter that cuts through flour like sand. I need pumpkin puree that doesn’t taste tinny. And I need these tiny cookies to hold up in a treat bag without crumbling into a sad pile of pie dust. I want mini pumpkin pie cookies for Halloween treat bags, and I want them to actually work—not just look cute in staged photos.
I am standing in my kitchen, staring at a half-empty can of pumpkin puree left over from a breakfast smoothie experiment that went sideways. It’s late September. The air outside smells like damp leaves and the faint possibility of needing a sweater. My brain, however, is already in full October mode. I have a stack of orange treat bags sitting on the counter, leftover from last year’s Halloween party, and I am refusing to fill them with store-bought candy. Not because I am a martyr about homemade everything—let’s be real, I have bought plenty of candy bags in my time—but because I want something different. Something that surprises people when they reach into that bag expecting a Reese’s cup and pull out a tiny, buttery, spiced cookie instead.
So here is the thing about mini pumpkin pie cookies. They sound simple. They look simple. But getting them right is a specific kind of kitchen victory. You want the filling to taste like actual pumpkin pie filling—not a wet, gummy paste that slides off the crust. You want the crust to be sturdy enough to survive being tossed into a Halloween treat bag without disintegrating, but tender enough to melt in your mouth when someone bites into it. And you want the whole thing to come together in less time than it takes to watch a single episode of a true crime documentary. Because honestly? I don’t have the patience for fussy recipes when there are costumes to plan and spiderwebs to hang.
These cookies were born from that exact moment of stubborn practicality. I wanted the flavor of my grandmother’s pumpkin pie, but in a format that didn’t require a plate, a fork, or a clean surface to eat it on. I wanted something that could sit in a cellophane bag tied with orange ribbon and still look gorgeous the next day. And most importantly, I wanted something that made people stop and say, “Wait, you made these?” with genuine surprise in their voice.
After four test batches—some too crumbly, some too soft, one that I accidentally over-spiced to the point of tasting like a candle—I landed on this version. It’s the one that disappears fastest at parties. It’s the one that people ask for the recipe of, even when they are not usually bakers. And it’s the one that makes me feel like I have my October act together, even when the rest of my life is chaos.
These are not just cookies. These are tiny edible promises that fall tastes as good as it looks. And they are about to become your new favorite Halloween tradition.
Why You’ll Love This Recipe
Let me tell you why these mini pumpkin pie cookies are going to become your new go-to for Halloween treat bags, fall bake sales, and that random Tuesday when you just need something cozy to bake.
- Perfect for Halloween Treat Bags: These cookies are sturdy enough to survive being tossed into a goodie bag with a handful of candy corn and a plastic spider ring. They don’t crumble, they don’t get soggy, and they look adorable wrapped up in cellophane with a twist tie. I have personally tested this by dropping one on my kitchen floor, picking it up, and eating it anyway. It survived. So will yours.
- Simple Ingredients You Already Have: No trips to a specialty baking store. No hunting down obscure spices. You need butter, flour, sugar, pumpkin puree, eggs, and a few pantry staples. If you have made a basic cookie or a pie crust before, you already own everything required for this recipe. I promise.
- Comes Together in Under an Hour: From start to finish, these cookies take about 45 minutes. That includes chilling time. That includes rolling and filling. That includes the moment you stand back and admire your work before the kids descend like tiny hungry wolves. For a recipe that looks this impressive, the time investment is almost embarrassingly low.
- Crowd-Pleaser for All Ages: I have served these to toddlers who normally reject anything orange that isn’t cheese. I have served them to adults who claim they “don’t really like pumpkin desserts.” Both groups came back for seconds. There is something about the ratio of buttery crust to creamy spiced filling that just works on a primal level.
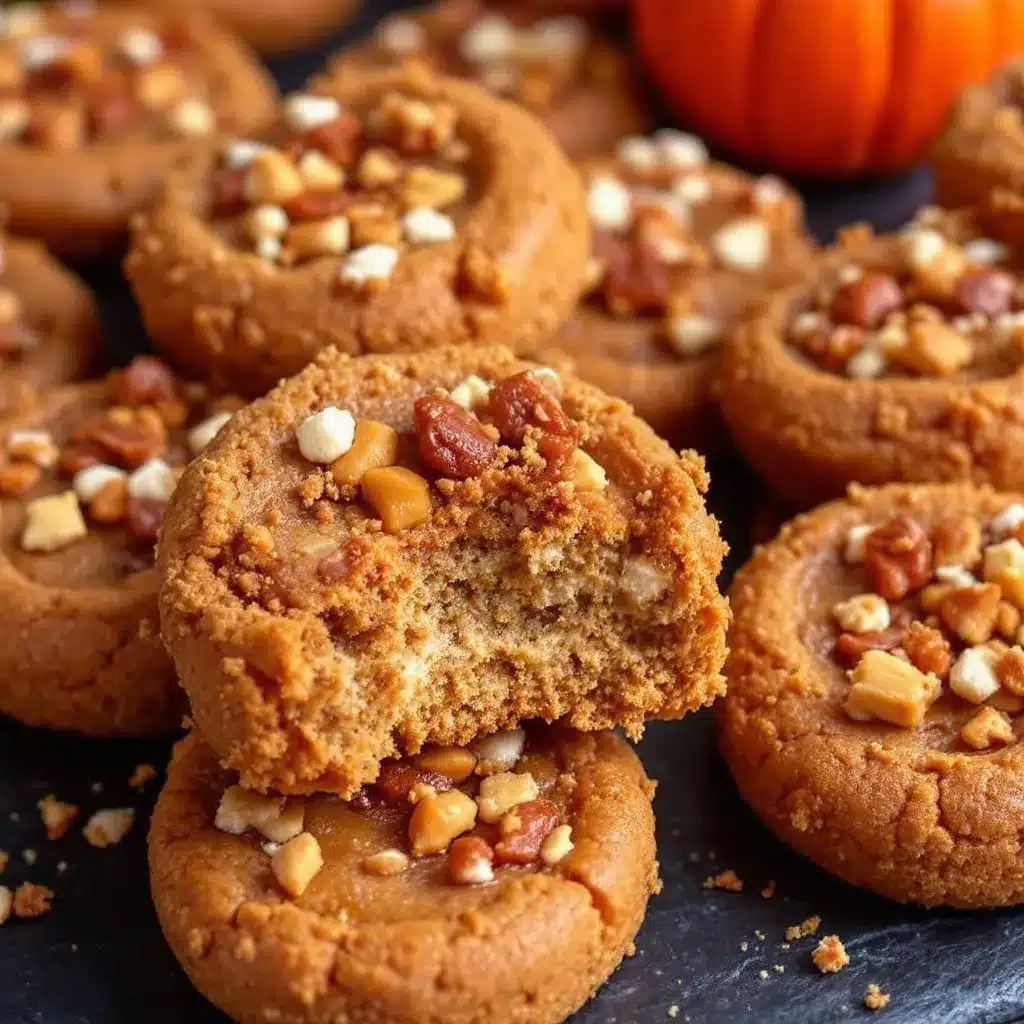
- Unbelievably Delicious: The texture here is the real star. The crust is firm enough to hold its shape but tender enough to shatter slightly when you bite into it. The filling is smooth, spiced just right, and not overly sweet. It tastes like the center slice of a perfect pumpkin pie, shrunk down to cookie size and made portable.
What makes this recipe different from all the other pumpkin cookie recipes floating around the internet? It’s the crust. Most recipes use a soft drop cookie base that turns into a muffin-top situation—delicious, sure, but not what I wanted here. I wanted a crust that actually tasted like pie crust. So I developed a shortbread-style base that you press into mini tart pans or muffin tins, then fill with a stabilized pumpkin filling that doesn’t turn watery. The result is a cookie that tastes like a miniature pie, not a pumpkin-flavored cake.
And honestly? This recipe is the kind that makes you close your eyes after the first bite. It is comfort food reimagined—faster, easier, and more portable, but with the same soul-soothing satisfaction as a full-size pie. Perfect for impressing Halloween party guests without stress, or turning a simple fall afternoon into something memorable.
What Ingredients You Will Need
This recipe uses simple, wholesome ingredients to deliver big flavor without the fuss. Most of these are pantry staples, and the ones that aren’t are easy to find at any grocery store during fall.
For the Crust:
- 1 ½ cups all-purpose flour (spooned and leveled—don’t scoop directly from the bag or you’ll end up with too much flour and a dry crust)
- ½ cup unsalted butter, cold and cut into small cubes (I use Kerrygold for the flavor, but any good unsalted butter works. The cold butter is crucial for a flaky texture)
- ¼ cup granulated sugar (adds just enough sweetness to balance the savory notes of the crust)
- ¼ teaspoon salt (don’t skip this—it makes the crust taste like actual pastry instead of bland dough)
- 2-3 tablespoons ice water (you might not need all of it; add one tablespoon at a time until the dough holds together when pinched)
For the Pumpkin Filling:
- ¾ cup pumpkin puree (not pumpkin pie filling—make sure you grab the plain stuff. I prefer Libby’s for consistent texture and flavor)
- ⅓ cup brown sugar, packed (light or dark both work; dark gives a deeper molasses flavor that I personally love)
- 1 large egg (room temperature, which helps the filling emulsify smoothly)
- ¼ cup heavy cream (adds richness and prevents the filling from becoming too dense. You can substitute half-and-half in a pinch)
- 1 teaspoon vanilla extract (pure, not imitation—you’ll taste the difference)
- 1 ½ teaspoons pumpkin pie spice (store-bought is fine, but I make my own with cinnamon, nutmeg, ginger, and a tiny pinch of cloves)
- ¼ teaspoon cinnamon (because you can never have too much cinnamon in a pumpkin recipe)
For Topping (Optional but Recommended):
- Whipped cream or coconut whipped cream (for serving, if you are not packing these into treat bags)
- Powdered sugar (for dusting—makes them look fancy with zero effort)
- Mini chocolate chips or chopped pecans (sprinkle on top before baking for texture contrast. I have done both, and the chocolate chip version disappears fastest)
Ingredient Selection Tips
When you are buying pumpkin puree, look for cans that say “100% pure pumpkin” on the label. Do not accidentally grab the pumpkin pie filling that already has sugar and spices mixed in—it will throw off the sweetness and texture of your filling completely. I learned this the hard way during batch number two, which ended up tasting like someone dumped a sugar bowl into a pumpkin.
For the butter, cold is non-negotiable. If your butter softens while you are cutting it, pop the cubes back in the fridge for ten minutes before mixing. Warm butter will give you a greasy, tough crust instead of that tender, flaky texture we are after.
And if you are feeling adventurous, try adding a pinch of black pepper to the filling. It sounds weird, I know. But black pepper has this magical ability to enhance the warm spices in pumpkin desserts without making them taste savory. My friend Sarah thought I was crazy until she tried it, and now she adds pepper to every pumpkin recipe she makes.
Equipment Needed
You do not need a professional bakery setup for these cookies, but having the right tools makes the process smoother and more enjoyable.
- Mini muffin tin or mini tart pans: I use a standard 24-cup mini muffin tin for most of my batches. The cups are the perfect size for these cookies—big enough to hold a satisfying amount of filling, small enough to fit three or four in a treat bag. If you only have a regular muffin tin, you can make larger versions and adjust the baking time by 3-5 minutes.
- Parchment paper: Not strictly necessary if you have a non-stick pan, but I always line my baking sheets with parchment when I am working with buttery dough. It makes cleanup effortless and prevents any sticking disasters.
- Rolling pin: Any rolling pin works. I use a simple wooden one with no handles because I like the control. If you don’t have a rolling pin, a clean wine bottle works in a pinch—I have done it, and the results were surprisingly good.
- Pastry cutter or food processor: For cutting the butter into the flour. A pastry cutter gives you more control and is cheaper, but a food processor does the job in about ten seconds. I use my food processor when I am in a hurry and my pastry cutter when I want to feel like a proper baker.
- Small cookie scoop or teaspoon: For portioning the filling evenly. A cookie scoop ensures each cookie gets the same amount of filling, which means they all bake at the same rate. I use a #60 scoop (about one tablespoon) for consistent results.
- Measuring cups and spoons: Accurate measurements matter more in baking than in any other type of cooking. Use dry measuring cups for dry ingredients and liquid measuring cups for wet ingredients. Yes, it makes a difference.
- Mixing bowls: You need at least two—one for the crust and one for the filling. Glass or stainless steel both work fine.
For budget-friendly options, skip the mini tart pans and use a standard mini muffin tin instead. They are cheaper, more versatile, and produce the same results. I bought my first mini muffin tin at a dollar store for three dollars, and it lasted me five years before the non-stick coating finally gave out.
Preparation Method
Let me walk you through this step by step. I have made these cookies more times than I can count, and I have learned exactly where things can go wrong and how to fix them.
Step 1: Make the Crust Dough (10 minutes)
In a large mixing bowl, whisk together the flour, sugar, and salt. Add the cold butter cubes and use a pastry cutter or your fingertips to work the butter into the flour until the mixture resembles coarse meal with some pea-sized butter pieces remaining. You want visible butter flecks—those are what create flaky layers in the baked crust.
Sprinkle 2 tablespoons of ice water over the mixture and stir with a fork until the dough starts to come together. If it seems dry, add the remaining tablespoon of water, one teaspoon at a time. The dough should hold together when you squeeze a handful of it, but it should not feel sticky.
Turn the dough out onto a lightly floured surface and gather it into a disk. Wrap it in plastic wrap and refrigerate for at least 20 minutes. This chill time is non-negotiable—warm dough is impossible to work with and will shrink in the oven. Trust me, I have tried to skip this step and ended up with crusts that looked like tiny deflated balloons.
Step 2: Prepare the Pumpkin Filling (5 minutes)
While the dough chills, make the filling. In a medium bowl, whisk together the pumpkin puree, brown sugar, egg, heavy cream, vanilla extract, pumpkin pie spice, and cinnamon until smooth. The mixture should be thick but pourable, like a slightly looser version of pancake batter.
Taste the filling. Yes, it has raw egg, but you can still dip a clean spoon in and take a tiny taste to check the seasoning. If you want more spice, add it now. If you want it sweeter, add another tablespoon of brown sugar. This is your chance to adjust before baking.
Set the filling aside while you work with the crust.
Step 3: Shape the Crusts (15 minutes)
Preheat your oven to 350°F (175°C). Lightly grease your mini muffin tin with butter or non-stick spray.
Remove the dough from the refrigerator. On a lightly floured surface, roll it out to about ⅛-inch thickness. If the dough cracks at the edges, let it sit at room temperature for 2-3 minutes to warm up slightly, then try again. Too-cold dough cracks; too-warm dough sticks. You are looking for that Goldilocks zone.
Use a 2 ½-inch round cookie cutter (or the rim of a glass) to cut out circles of dough. Gently press each circle into a mini muffin cup, making sure the dough comes up the sides evenly. If the dough tears, just press it back together with your fingers—it is forgiving dough, and no one will notice once it’s baked.
You should get about 24 crusts from one batch of dough. If you have extra dough scraps, gather them, re-roll, and cut more circles. I usually end up with 26-28 crusts, which means I have a couple of extra for snacking.
Step 4: Fill and Bake (20-22 minutes)
Spoon about 1 tablespoon of the pumpkin filling into each crust. Do not overfill—the filling will puff up slightly as it bakes, and you want it to stay inside the crust, not spill over the edges. Leave about ⅛ inch of space at the top of each crust.
Bake for 18-22 minutes, or until the crust edges are golden brown and the filling is set around the edges but still slightly jiggly in the very center. The filling will continue to set as it cools, so do not overbake it. Overbaked pumpkin filling gets dry and cracks—still tasty, but not as pretty.
Step 5: Cool Completely (30 minutes)
Let the cookies cool in the pan for 10 minutes. This is important because the filling needs time to firm up before you try to remove the cookies. After 10 minutes, gently run a thin knife around the edges of each cookie and lift them out of the pan. Transfer to a wire rack to cool completely.
Resist the temptation to eat one immediately. I know they smell amazing. I know the kitchen smells like fall in a bottle. But hot pumpkin filling will burn your mouth in a way that ruins the whole experience. Let them cool. I promise it is worth the wait.
Sensory Cues to Watch For
When the crust is ready to roll, it should feel smooth and pliable, like Play-Doh that has been warmed in your hands. When the filling is properly mixed, it should be a uniform orange color with no streaks of egg white visible. When the cookies are done baking, the edges of the crust should look like toasted shortbread—golden brown with slightly darker edges.
Cooking Tips & Techniques
I have made these cookies at least thirty times over the past two falls, and I have collected a few hard-won lessons along the way. Let me save you from repeating my mistakes.
Keep Everything Cold: The single biggest mistake people make with pie crust is letting the butter warm up. If your kitchen is warm, chill your mixing bowl and flour before you start. I have even frozen my butter for 15 minutes before grating it into the flour on particularly hot days. Cold butter equals flaky crust. Warm butter equals greasy sadness.
Don’t Overwork the Dough: When you are mixing the crust, stop as soon as the dough comes together. Overmixing develops gluten, which makes the crust tough instead of tender. You want barely-together dough, not a smooth ball. Think of it like making biscuits—less is more.
Blind Baking Isn’t Necessary Here: Because these cookies bake in a mini muffin tin with the filling added immediately, you do not need to pre-bake the crusts. The filling bakes at the same rate as the crust, and the crust stays crisp because it is thin enough to cook through completely. This saves you about 15 minutes of extra work.
Use Room Temperature Eggs: Cold eggs can make the filling seize up or separate. If you forgot to take your egg out of the fridge, place it in a bowl of warm water for 5 minutes before cracking it. This small step makes a noticeable difference in the smoothness of your filling.
Test for Doneness with a Toothpick: If you are unsure whether the filling is set, insert a toothpick into the center of one cookie. It should come out mostly clean with maybe a few moist crumbs attached. If it comes out wet with raw filling, bake for 2-3 more minutes and check again.
I once forgot to chill my dough and ended up with crusts that spread into weird, lopsided shapes. They still tasted good—I ate all of them while standing over the counter, which I am not proud of—but they looked nothing like the neat little cups I was going for. Now I set a timer on my phone for the chilling step because apparently I cannot be trusted to remember on my own.
Variations & Adaptations
One of the best things about this recipe is how customizable it is. Here are some variations I have tried and loved.
Gluten-Free Version: Substitute the all-purpose flour with a 1:1 gluten-free baking flour blend. I have used Bob’s Red Mill and King Arthur brands with excellent results. The crust will be slightly more crumbly, so handle it gently when pressing it into the muffin tin. Add an extra tablespoon of ice water if the dough feels too dry.
Vegan Version: Use vegan butter (I like Miyoko’s for baking) and replace the egg with ¼ cup of unsweetened applesauce or a flax egg (1 tablespoon ground flaxseed mixed with 3 tablespoons water, let sit for 5 minutes). Use full-fat coconut cream instead of heavy cream. The texture will be slightly denser, but the flavor is still fantastic.
Dairy-Free Version: Swap the butter with a high-quality vegan butter and use coconut cream or oat milk creamer instead of heavy cream. I have made this version for a friend with dairy sensitivity, and she said it was the first pumpkin dessert she had enjoyed in years. That comment alone made all the testing worth it.
Savory Twist: Reduce the sugar in both the crust and filling to 2 tablespoons each. Omit the pumpkin pie spice and instead add ½ teaspoon of smoked paprika, ¼ teaspoon of garlic powder, and a pinch of cayenne. Fill the crusts with a mixture of pumpkin puree, cream cheese, and shredded parmesan. Bake as directed and serve as an appetizer. Weird? Yes. Delicious? Also yes.
Chocolate Pumpkin Combination: Add 2 tablespoons of cocoa powder to the crust dough and reduce the flour by 2 tablespoons. Sprinkle mini chocolate chips over the filling before baking. The chocolate and pumpkin combination is underrated and deserves more attention. I first tried this on a whim when I had leftover cocoa powder on the counter, and now it is my secret weapon variation.
Spice It Up: Add ¼ teaspoon of cardamom to the filling along with the pumpkin pie spice. Cardamom has this warm, slightly floral quality that pairs beautifully with pumpkin. I discovered this combination while trying to replicate the flavor of a chai latte in cookie form.
Serving & Storage Suggestions
These cookies are versatile enough to work for multiple occasions, and how you serve them depends entirely on the vibe you are going for.
For Halloween Treat Bags: Let the cookies cool completely before packaging. Place each cookie in a mini cupcake liner to prevent sticking, then arrange them in cellophane treat bags. Tie the bags with orange or black ribbon and add a small tag with the cookie name. They stay fresh in the bags for up to 3 days at room temperature, which makes them perfect for pre-Halloween prep.
For Dessert Platters: Arrange the cookies on a platter and dust with powdered sugar just before serving. Add a bowl of whipped cream on the side for dipping. These are always the first thing to disappear at potlucks and dinner parties, so make extra if you want to have any left for yourself.
For Breakfast (No Judgment): Warm one up in the microwave for 10 seconds and eat it with a cup of coffee. The combination of pumpkin, warm spices, and caffeine is genuinely satisfying. I have done this more mornings than I care to admit during October.
Storage Instructions: Store the cookies in an airtight container at room temperature for up to 4 days. If you live in a humid climate, add a piece of bread to the container to absorb excess moisture—the bread will get stale, but your cookies will stay perfectly crisp. For longer storage, freeze the cookies in a single layer on a baking sheet, then transfer to a freezer-safe bag. They keep for up to 3 months in the freezer.
Reheating Tips: To refresh the cookies, place them on a baking sheet in a 300°F (150°C) oven for 5 minutes. This crisps up the crust and warms the filling without drying it out. If you are in a hurry, 10 seconds in the microwave works, but the crust will be softer.
Flavor Development: These cookies actually taste better the day after baking. The spices have time to meld with the pumpkin filling, and the crust absorbs just enough moisture from the filling to become perfectly tender. I always make mine a day ahead of when I plan to serve them.
Nutritional Information & Benefits
Here is the estimated nutritional breakdown for one cookie (based on 24 cookies per batch):
- Calories: 98
- Total Fat: 5g
- Saturated Fat: 3g
- Cholesterol: 22mg
- Sodium: 42mg
- Total Carbohydrates: 12g
- Dietary Fiber: 1g
- Sugars: 6g
- Protein: 2g
Health Benefits of Key Ingredients: Pumpkin is packed with vitamin A, which supports eye health and immune function. The beta-carotene that gives pumpkin its orange color is also a powerful antioxidant. Cinnamon has anti-inflammatory properties and can help regulate blood sugar levels. Even the butter, in moderation, provides fat-soluble vitamins that help your body absorb the nutrients from the pumpkin.
Dietary Considerations: These cookies are vegetarian and can easily be made gluten-free, vegan, or dairy-free with the substitutions listed above. They contain eggs and dairy in the standard version, so keep that in mind if you are baking for someone with allergies.
My Wellness Perspective: I believe in balance. These cookies are a treat, not a health food, and I think that is perfectly fine. Baking and sharing food with people you care about is good for your mental health, and that matters just as much as the nutritional content of what you are eating. Enjoy these cookies without guilt, and maybe take a walk afterward if you are feeling ambitious.
Conclusion
I have made a lot of pumpkin recipes over the years. Some were good. Some were forgettable. And some, like these mini pumpkin pie cookies, earned a permanent spot in my fall rotation.
What I love most about this recipe is how it delivers on every level. It looks impressive enough to serve at a Halloween party or a Thanksgiving gathering. It tastes like the best part of a pumpkin pie, condensed into a single perfect bite. And it is practical enough to actually use for treat bags, bake sales, and holiday gift exchanges. This is not a recipe that only works under ideal conditions with perfect lighting and a clean kitchen. This is a recipe that works when you are tired, when you are rushed, and when you have kids asking every three minutes if the cookies are done yet.
I want you to try these cookies. I want you to make them your own—add extra spice, throw in some chocolate chips, experiment with the crust until it feels like yours. Then I want you to share them with someone who needs a little fall magic in their day. Because that is what these cookies are, really. They are tiny, edible reminders that the best things in life are often the simplest.
If you make these, come back and tell me how they turned out. Leave a comment below, tag me in your photos, or send me a message telling me about the look on someone’s face when they pulled a mini pumpkin pie cookie out of their Halloween treat bag. I genuinely want to know.
Happy baking, friends. May your crusts be flaky, your filling be perfectly spiced, and your treat bags be full of joy.
Frequently Asked Questions
Can I use canned pumpkin pie filling instead of pumpkin puree?
I do not recommend it. Pumpkin pie filling already contains sugar and spices, which will make your cookies overly sweet and throw off the texture of the filling. Stick with 100% pure pumpkin puree for the best results. If you accidentally bought pumpkin pie filling, reduce the sugar in the recipe by half and omit the added spices.
How do I prevent the crust from shrinking during baking?
Crust shrinkage usually happens when the dough is overworked or not chilled enough. Make sure you refrigerate the dough for at least 20 minutes before rolling it out. Also, avoid stretching the dough when pressing it into the muffin cups—dough that is stretched will snap back during baking. Gently ease the dough into the cups instead of pulling it tight.
Can I make these cookies ahead of time for a party?
Absolutely. In fact, I recommend it. These cookies taste even better the day after baking because the flavors have time to meld. Bake them up to 2 days in advance and store them in an airtight container at room temperature. If you are making them more than 2 days ahead, freeze them and thaw at room temperature on the day of your event.
My filling turned out watery. What went wrong?
Watery filling usually happens for one of two reasons. Either you used pumpkin pie filling instead of puree (which has a different consistency), or your pumpkin puree had excess water content. To fix watery puree, spread it on a paper towel-lined plate and let it sit for 10 minutes before using. You can also cook the puree in a skillet over medium heat for 3-4 minutes to evaporate some of the moisture.
Can I double this recipe?
Yes, and I do it all the time. The recipe doubles beautifully. If you are making a double batch, mix the crust dough in two separate batches unless you have a very large food processor. Overloading your equipment can lead to uneven mixing. The filling can be doubled in one bowl without any issues. Just make sure you have enough mini muffin tins to bake everything at once, or plan to bake in batches.
Pin This Recipe!
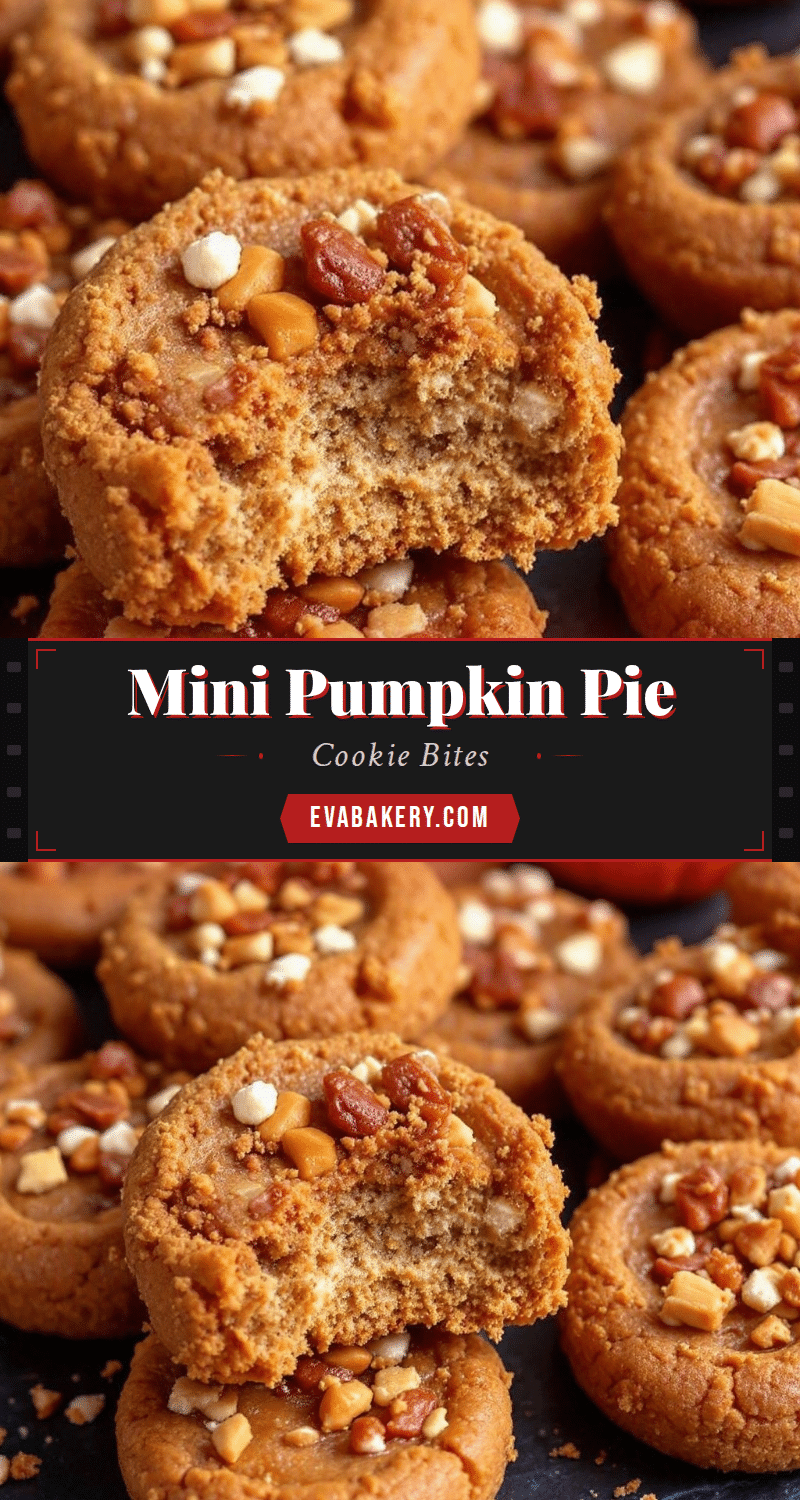
Easy Mini Pumpkin Pie Cookies for Halloween Treat Bags
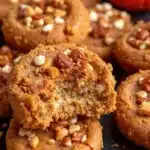
These mini pumpkin pie cookies are sturdy enough for Halloween treat bags, with a buttery shortbread crust and perfectly spiced pumpkin filling. They come together in under an hour and taste like the center slice of a perfect pumpkin pie, shrunk down to cookie size.
- Prep Time: 15 minutes
- Cook Time: 20 minutes
- Total Time: 45 minutes
- Yield: 24 cookies 1x
- Category: Dessert
- Cuisine: American
Ingredients
- 1 ½ cups all-purpose flour (spooned and leveled)
- ½ cup unsalted butter, cold and cut into small cubes
- ¼ cup granulated sugar
- ¼ teaspoon salt
- 2–3 tablespoons ice water
- ¾ cup pumpkin puree (not pumpkin pie filling)
- ⅓ cup brown sugar, packed
- 1 large egg (room temperature)
- ¼ cup heavy cream
- 1 teaspoon vanilla extract (pure)
- 1 ½ teaspoons pumpkin pie spice
- ¼ teaspoon cinnamon
- Whipped cream or coconut whipped cream (for serving, optional)
- Powdered sugar (for dusting, optional)
- Mini chocolate chips or chopped pecans (optional)
Instructions
- Make the Crust Dough: In a large mixing bowl, whisk together the flour, sugar, and salt. Add the cold butter cubes and use a pastry cutter or your fingertips to work the butter into the flour until the mixture resembles coarse meal with some pea-sized butter pieces remaining. Sprinkle 2 tablespoons of ice water over the mixture and stir with a fork until the dough starts to come together. If it seems dry, add the remaining tablespoon of water, one teaspoon at a time. The dough should hold togeth…
- Prepare the Pumpkin Filling: While the dough chills, in a medium bowl, whisk together the pumpkin puree, brown sugar, egg, heavy cream, vanilla extract, pumpkin pie spice, and cinnamon until smooth. The mixture should be thick but pourable. Set aside.
- Shape the Crusts: Preheat your oven to 350°F (175°C). Lightly grease a mini muffin tin with butter or non-stick spray. On a lightly floured surface, roll the dough out to about ⅛-inch thickness. Use a 2 ½-inch round cookie cutter (or the rim of a glass) to cut out circles of dough. Gently press each circle into a mini muffin cup, making sure the dough comes up the sides evenly. You should get about 24 crusts.
- Fill and Bake: Spoon about 1 tablespoon of the pumpkin filling into each crust, leaving about ⅛ inch of space at the top. Bake for 18-22 minutes, or until the crust edges are golden brown and the filling is set around the edges but still slightly jiggly in the very center.
- Cool Completely: Let the cookies cool in the pan for 10 minutes. After 10 minutes, gently run a thin knife around the edges of each cookie and lift them out of the pan. Transfer to a wire rack to cool completely.
Notes
Keep everything cold for a flaky crust. Don’t overwork the dough. Blind baking isn’t necessary. Use room temperature eggs. Test for doneness with a toothpick. These cookies taste better the day after baking. For gluten-free, use a 1:1 gluten-free flour blend. For vegan, use vegan butter, applesauce or flax egg, and coconut cream. For dairy-free, use vegan butter and coconut cream or oat milk creamer.
Nutrition
- Serving Size: 1 cookie
- Calories: 98
- Sugar: 6
- Sodium: 42
- Fat: 5
- Saturated Fat: 3
- Carbohydrates: 12
- Fiber: 1
- Protein: 2
Keywords: mini pumpkin pie cookies, Halloween treat bags, pumpkin cookies, fall baking, easy pumpkin recipe, mini tart cookies