The last fork scraped against the glass dish, and my cousin looked up with a face I will never forget. “Who made this?” she asked, already reaching for another corner piece. I had brought the cake to a family barbecue expecting the usual polite nods. Instead, the dish came back empty. That was the moment I knew this recipe was something special.
It is funny how the best recipes come from a simple craving. I wanted something that combined the rich, creamy texture of a poke cake with the unmistakable taste of Reese’s peanut butter cups. Honestly, I was tired of dry, boring chocolate cakes that promised the world but delivered a mouthful of disappointment. So I started experimenting in my kitchen, armed with a box of cake mix and a serious peanut butter obsession.
The first attempt was good. The second was better. But the third version? That was the one that made people close their eyes after the first bite. This Ultimate Reese’s Peanut Butter Cup Poke Cake is the result of those late-night baking sessions and a lot of taste testing. It is the kind of dessert that makes you wonder why you ever bothered with complicated recipes. Sometimes the best things come from a little curiosity and a whole lot of chocolate.
Why You’ll Love This Recipe
Let me be honest with you. I have tested this cake on family, friends, neighbors, and even my skeptical brother-in-law who claims he doesn’t like sweets. Every single person asked for the recipe. That is not a coincidence. This cake delivers on every level without requiring a culinary degree.
- Quick & Easy: From start to finish, this cake comes together in under an hour. Most of that time is hands-off baking, so you can prep other dishes or just relax.
- Simple Ingredients: You probably have most of these items in your pantry right now. No fancy baking chocolate or obscure extracts needed.
- Perfect for Any Occasion: Birthdays, potlucks, holiday dinners, or just a Tuesday night craving. This cake fits every scenario.
- Crowd-Pleaser: Kids love the chocolate-peanut butter combo. Adults appreciate the rich, moist texture. Everyone wins.
- Unbelievably Delicious: The combination of creamy pudding, sweetened condensed milk, and chopped Reese’s cups creates a texture that is almost sinful.
What makes this version different from the dozens of poke cake recipes out there? It is the balance. Too many poke cakes end up soggy or overly sweet. This one hits that perfect middle ground where every bite feels indulgent but not overwhelming. The secret is in the layering and the timing of when you add each ingredient. I figured this out through trial and error, and now you get the shortcut.
This is the kind of dessert that makes you feel like a hero without the stress. It is comfort food at its finest—rich, chocolatey, and loaded with peanut butter goodness. If you are looking for something to impress guests or just treat yourself, this is it.
What Ingredients You Will Need
This recipe relies on simple, everyday ingredients that work together to create something truly special. Most of these are pantry staples, so you might not even need a grocery run.
For the Cake Base
- 1 box chocolate cake mix (I recommend Duncan Hines or Betty Crocker for consistent results)
- Eggs, oil, and water (as called for on the cake mix box)
For the Poke Filling
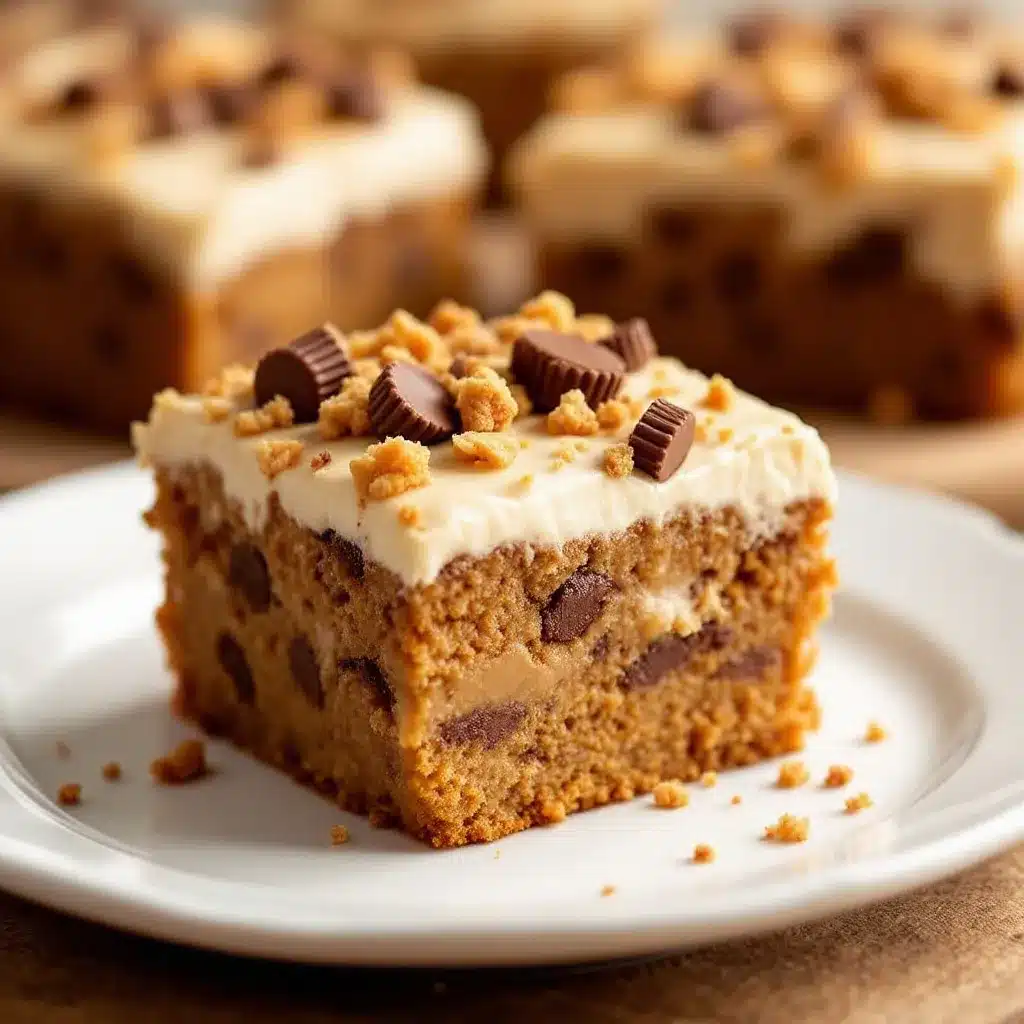
- 1 can (14 ounces) sweetened condensed milk (this is the magic ingredient that keeps the cake moist)
- 1 cup creamy peanut butter (use a brand you enjoy eating straight from the jar—I prefer Jif or Skippy)
- 1 teaspoon vanilla extract (pure, not imitation, if you have it)
For the Topping
- 1 box (3.9 ounces) instant chocolate pudding mix (not cook-and-serve)
- 2 cups cold milk (whole milk gives the richest texture, but 2% works fine)
- 1 container (8 ounces) frozen whipped topping, thawed (Cool Whip or store brand)
- 10-12 regular-sized Reese’s peanut butter cups, chopped (about 1.5 cups chopped)
- ¼ cup chocolate syrup (for drizzling, optional but recommended)
- ¼ cup peanut butter chips (for extra texture and visual appeal)
Ingredient Tips
For the peanut butter, avoid natural or oily varieties that separate. They can make the filling too runny. Stick with standard processed peanut butter for the best consistency. If you want a slightly less sweet cake, use natural peanut butter in the filling, but know the texture will be a bit different.
The chocolate cake mix is totally customizable. Devil’s food gives a richer flavor, while dark chocolate adds depth. Yellow cake mix? No, stick with chocolate here. Trust me on this one.
For the Reese’s cups, I recommend using regular cups rather than the miniatures. They chop more evenly and give better distribution throughout the topping. If you are feeling fancy, use the seasonal shapes like hearts or trees for a fun twist.
Equipment Needed
You do not need a professional bakery setup for this cake. Here is what you will need:
- 9×13-inch baking dish (glass or metal both work; glass gives a slightly more even bake)
- Large mixing bowls (one for the cake batter, one for the pudding)
- Whisk or electric mixer (hand whisk is fine for the pudding, mixer helps with cake batter)
- Wooden spoon or spatula (for poking holes—the handle end works perfectly)
- Measuring cups and spoons (accuracy matters, especially for the pudding)
- Cutting board and sharp knife (for chopping the Reese’s cups)
- Refrigerator space (this cake needs to chill for at least 4 hours, preferably overnight)
If you do not have a 9×13 dish, you can use two 8×8 pans, but adjust the baking time by about 5 minutes. I once made this in a disposable aluminum pan for a potluck, and it worked perfectly. Do not overthink the equipment—just make sure your dish is deep enough to hold the filling and topping without overflowing.
For the poking tool, I prefer the handle of a wooden spoon. It creates holes that are wide enough to absorb the filling but not so large that the cake falls apart. A chopstick works too, but the holes will be smaller, so you might need to poke more of them.
Preparation Method
Follow these steps carefully, and you will end up with a cake that disappears faster than you can say “peanut butter.”
Step 1: Bake the Cake
Preheat your oven to 350°F (175°C). Grease your 9×13 baking dish lightly with butter or nonstick spray. Prepare the chocolate cake mix according to the package directions—usually this means combining the mix with eggs, oil, and water. Mix until smooth, about 2 minutes. Pour the batter into the prepared dish and spread it evenly. Bake for 28-32 minutes, or until a toothpick inserted in the center comes out clean or with a few moist crumbs. Let the cake cool in the dish for about 10 minutes. You want it warm but not hot for the next step.
Step 2: Make the Filling
While the cake is cooling, make the peanut butter filling. In a medium bowl, combine the sweetened condensed milk, creamy peanut butter, and vanilla extract. Stir until completely smooth. This might take a minute or two of vigorous mixing. The mixture should be thick but pourable. If it seems too thick, microwave it for 10-15 seconds and stir again.
Step 3: Poke the Holes
Using the handle of a wooden spoon, poke holes all over the warm cake. Space the holes about 1 inch apart. Go all the way to the bottom of the cake but try not to poke through the bottom of the dish. You want the filling to soak into the cake, not pool underneath. This is the most satisfying step—there is something therapeutic about poking holes in a perfectly baked cake.
Step 4: Pour the Filling
Slowly pour the peanut butter mixture over the warm cake, making sure it gets into all the holes. Use a spatula to spread it evenly if needed. Do not worry if some sits on top—it will absorb as the cake cools. Let the cake sit at room temperature for about 15 minutes to allow the filling to soak in completely.
Step 5: Make the Pudding Layer
In a separate bowl, whisk together the instant chocolate pudding mix and cold milk. Whisk for about 2 minutes until the mixture thickens. It will be fairly thick right away—that is normal. Let it sit for 5 minutes to set up completely. Spread the pudding evenly over the cooled cake. Be gentle so you do not disturb the cake underneath.
Step 6: Add the Whipped Topping
Spread the thawed whipped topping over the pudding layer. Use an offset spatula or the back of a spoon to create an even layer. Make sure to go all the way to the edges so the pudding is completely covered. This creates a beautiful, creamy canvas for the toppings.
Step 7: Add the Toppings
Chop the Reese’s peanut butter cups into small pieces. You want some larger chunks for texture and some smaller bits for even distribution. Sprinkle the chopped cups evenly over the whipped topping. Drizzle chocolate syrup in a zigzag pattern across the top. Finally, sprinkle the peanut butter chips over everything for extra crunch and visual appeal.
Step 8: Chill
Cover the dish with plastic wrap or aluminum foil and refrigerate for at least 4 hours. Overnight is even better. This resting time allows all the flavors to meld together and the cake to become perfectly moist. The cake will slice cleaner and taste better after a full chill.
Cooking Tips & Techniques
I have made this cake more times than I can count, and I have learned a few things along the way. Here are my best tips for success.
Do not overbake the cake. A slightly underdone cake is better than a dry one. The poke filling needs a moist base to work with. If you overbake, the cake will be crumbly and won’t absorb the filling as well. Start checking at 28 minutes and go from there.
Poke holes while the cake is warm. This is crucial. Warm cake is more receptive to absorbing the filling. If you wait until the cake is completely cool, the filling will just sit on top and not penetrate as deeply. The warm cake also helps the peanut butter mixture stay liquid longer.
Let the filling soak in fully. Do not rush this step. Give the cake at least 15 minutes after pouring the filling before adding the pudding. If you add the pudding too soon, it might mix with the peanut butter filling and create a muddy texture. Patience pays off here.
Use cold milk for the pudding. Instant pudding needs cold milk to set properly. If your milk is room temperature, the pudding will be runny and won’t hold its shape. Pop the milk in the fridge for 15 minutes before starting if needed.
Chop the Reese’s cups right before serving. If you chop them too early, they can get sticky and clump together. For the best presentation, chop them just before you add them to the cake. If you are making this ahead, store the chopped cups in a sealed bag in the fridge.
One mistake I made early on: I used natural peanut butter in the filling because I thought it would be healthier. The filling separated and left oily spots on top of the cake. Stick with regular peanut butter for this recipe. Your taste buds will thank you.
Variations & Adaptations
This recipe is flexible enough to accommodate different tastes and dietary needs. Here are some variations I have tried and loved.
Peanut Butter Lover’s Version
Add ½ cup of peanut butter chips to the cake batter before baking. You can also swirl extra peanut butter into the pudding layer for an even more intense flavor. This version is not for the faint of heart—it is pure peanut butter heaven.
Chocolate Overload
Use a dark chocolate cake mix and add chocolate chips to the batter. Drizzle both chocolate and caramel syrup over the top instead of just chocolate. Top with chocolate shavings or cocoa nibs for extra crunch. This version is dangerously decadent.
Gluten-Free Option
Use a gluten-free chocolate cake mix. Most brands work well, but check the package for specific instructions. The rest of the ingredients are naturally gluten-free, so this is an easy swap. Just make sure your Reese’s cups are certified gluten-free if that is a concern.
Healthier Twist
Use a sugar-free cake mix and sugar-free pudding. Replace the sweetened condensed milk with a reduced-fat version. Use light whipped topping and reduce the amount of Reese’s cups. It will still taste amazing, just with fewer calories. I tried this version for a friend who was watching her sugar intake, and she could not tell the difference.
Seasonal Variations
For holidays, use themed Reese’s cups like hearts for Valentine’s Day or pumpkins for Halloween. You can also add festive sprinkles to the top for extra color. For summer, try adding a layer of fresh strawberries or raspberries between the pudding and whipped topping. The fruit cuts through the richness beautifully.
Serving & Storage Suggestions
This cake is best served cold, straight from the refrigerator. The chilled texture makes each bite creamy and satisfying. Let the cake sit at room temperature for about 5 minutes before slicing to make cutting easier. Use a sharp knife and wipe it clean between cuts for neat slices.
For presentation, serve each slice on a small plate with a dollop of extra whipped cream and a drizzle of chocolate syrup. A sprinkle of sea salt on top before serving enhances the chocolate flavor and balances the sweetness. If you are feeling extra fancy, add a whole mini Reese’s cup on top of each slice.
This cake pairs beautifully with a tall glass of cold milk or a hot cup of coffee. For adult gatherings, try serving it alongside a refreshing champagne punch for a delightful contrast. The bubbles cut through the richness of the cake perfectly.
Storage: Cover the dish tightly with plastic wrap or aluminum foil and store in the refrigerator for up to 5 days. The cake actually gets better after the first day as the flavors continue to meld. I have had slices on day four that tasted even better than day one.
Freezing: You can freeze this cake for up to 3 months. Wrap the entire dish in plastic wrap, then a layer of aluminum foil. Thaw overnight in the refrigerator before serving. Do not freeze the cake with the toppings if you plan to add them later—freeze the cake base and add toppings after thawing for the best texture.
Reheating: This cake is meant to be served cold, but if you prefer a warm dessert, microwave individual slices for 10-15 seconds. The chocolate will get slightly melty, and the peanut butter filling will become gooey. It is a completely different experience but equally delicious.
Nutritional Information & Benefits
Let’s be real—this is an indulgent dessert. But knowing what is in it helps you enjoy it mindfully. Here is the approximate nutritional breakdown per serving (based on 12 servings):
- Calories: 420-480
- Fat: 22-26g
- Carbohydrates: 52-58g
- Protein: 8-10g
- Sugar: 38-44g
- Fiber: 2-3g
On the positive side, peanut butter provides protein and healthy fats that help keep you satisfied. Dark chocolate (if you use a dark chocolate cake mix) contains antioxidants. The milk in the pudding and whipped topping adds calcium. Is this a health food? No. But it is a treat that brings joy, and that counts for something.
For those with dietary concerns, this recipe contains dairy, gluten, peanuts, and soy. It is not suitable for vegans or those with severe nut allergies. If you have specific dietary needs, check the variation section above for substitution ideas.
I believe in balance. Enjoy a slice of this cake after a healthy meal or share it with friends at a gathering. Food is about connection and pleasure, not guilt. This cake delivers both in spades.
Conclusion
This Ultimate Reese’s Peanut Butter Cup Poke Cake is more than just a dessert. It is the cake that gets requested for every birthday, the one that disappears at potlucks, and the recipe that makes people text you at 10 PM asking for the details. It is simple enough for a beginner baker but impressive enough for a holiday table.
I love this recipe because it reminds me that you do not need fancy techniques or expensive ingredients to create something memorable. Sometimes the best dishes come from a box of cake mix, a can of condensed milk, and a handful of peanut butter cups. It is honest food that delivers honest pleasure.
Try this recipe and make it your own. Add extra chocolate, swap the toppings, or double the peanut butter filling. The beauty of this cake is its flexibility. And when you bring it to your next gathering and watch people go back for seconds, you will understand why this recipe has a permanent spot in my kitchen.
If you love this cake, you might also enjoy my creamy cheesecake with pomegranate topping for another show-stopping dessert. Or check out my black and gold macarons for something a little more elegant. Whatever you choose, happy baking!
Have you tried this recipe? Leave a comment below and let me know how it turned out. Did you add your own twist? Share your variations! I love hearing how you make these recipes your own. And do not forget to pin this recipe for later—you will want to make it again and again.
Frequently Asked Questions
Can I use a different cake flavor?
Yes, absolutely. Yellow cake, vanilla, or even marble cake mix work well. Chocolate is the classic choice because it pairs perfectly with peanut butter, but feel free to experiment. If you use a lighter cake, consider adding chocolate chips to the batter for extra richness.
How far ahead can I make this cake?
You can make this cake up to 2 days in advance. In fact, it tastes better the next day. Just keep it covered in the refrigerator. If you are making it for an event, prepare it the day before and add any fresh toppings right before serving.
Can I use homemade whipped cream instead of Cool Whip?
Yes, but it will not hold up as well over time. Homemade whipped cream is less stable and can weep or deflate after a day in the fridge. If you use homemade, whip 1 cup of heavy cream with 2 tablespoons of powdered sugar until stiff peaks form. Use it within 24 hours for the best texture.
Why did my cake turn out dry?
This usually happens from overbaking. Check your cake at the minimum baking time and use the toothpick test. Also, make sure you are poking enough holes and pouring the filling while the cake is still warm. If the cake is dry, try adding an extra tablespoon of oil to the batter next time.
Can I freeze individual slices?
Yes! Wrap each slice tightly in plastic wrap, then place them in a freezer-safe bag. They will keep for up to 3 months. Thaw individual slices in the refrigerator overnight or at room temperature for about 30 minutes. This is perfect for portion control or having a treat ready whenever a craving hits.
Pin This Recipe!
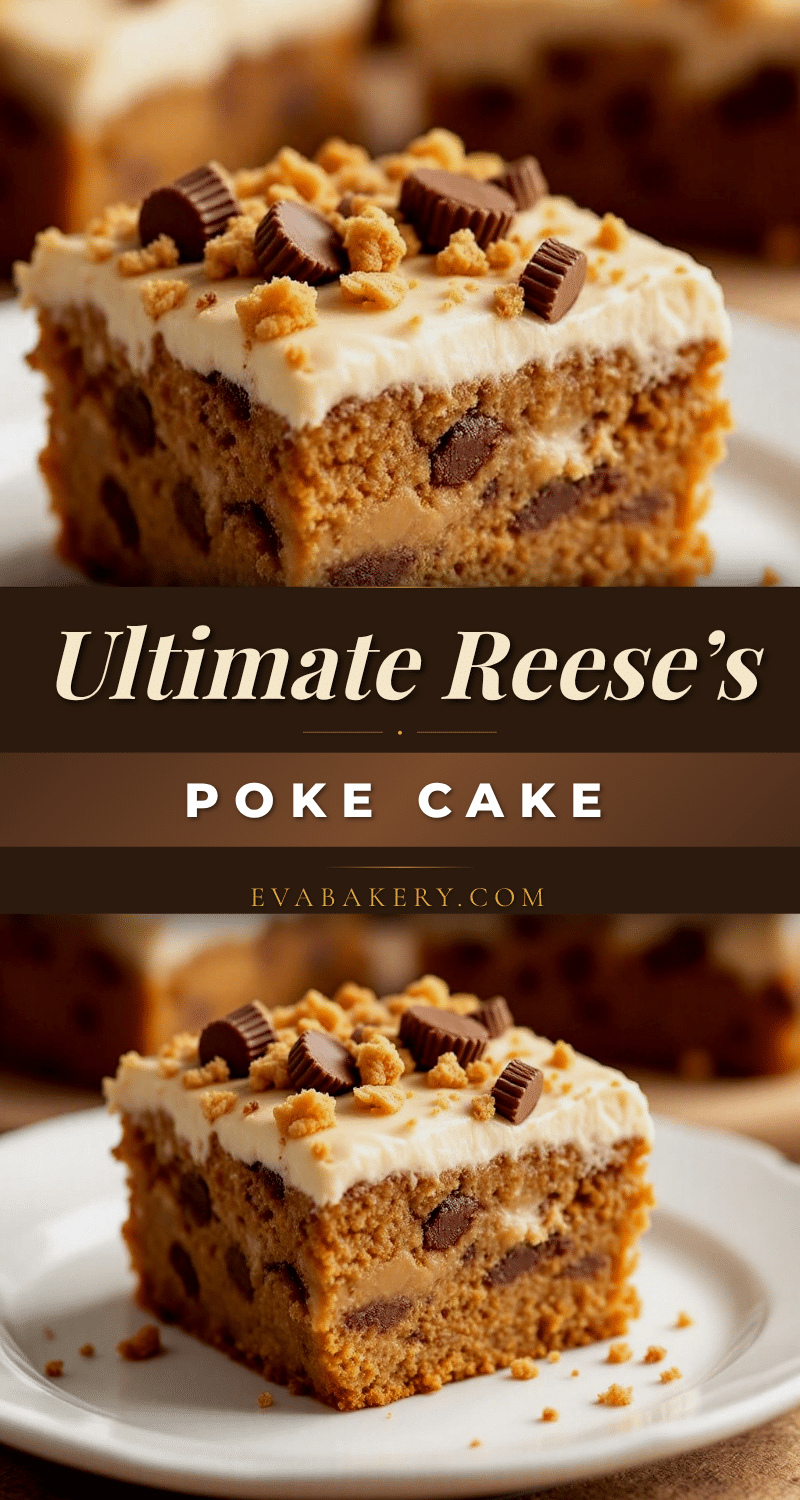
Ultimate Reeses Poke Cake: Perfect Easy Dessert

This Ultimate Reese’s Peanut Butter Cup Poke Cake is a rich, moist chocolate cake filled with a creamy peanut butter and sweetened condensed milk mixture, topped with chocolate pudding, whipped topping, and chopped Reese’s cups. It’s an easy, crowd-pleasing dessert that comes together in under an hour.
- Prep Time: 20 minutes
- Cook Time: 30 minutes
- Total Time: 50 minutes (plus 4 hours chilling)
- Yield: 12 servings 1x
- Category: Dessert
- Cuisine: American
Ingredients
- 1 box chocolate cake mix (Duncan Hines or Betty Crocker recommended)
- Eggs, oil, and water (as called for on the cake mix box)
- 1 can (14 ounces) sweetened condensed milk
- 1 cup creamy peanut butter (Jif or Skippy recommended)
- 1 teaspoon vanilla extract (pure preferred)
- 1 box (3.9 ounces) instant chocolate pudding mix (not cook-and-serve)
- 2 cups cold milk (whole milk preferred, 2% works)
- 1 container (8 ounces) frozen whipped topping, thawed (Cool Whip or store brand)
- 10–12 regular-sized Reese’s peanut butter cups, chopped (about 1.5 cups)
- ¼ cup chocolate syrup (optional, for drizzling)
- ¼ cup peanut butter chips (for extra texture)
Instructions
- Preheat oven to 350°F (175°C). Grease a 9×13-inch baking dish lightly with butter or nonstick spray.
- Prepare the chocolate cake mix according to package directions (usually combining mix with eggs, oil, and water). Mix until smooth, about 2 minutes. Pour batter into prepared dish and spread evenly.
- Bake for 28-32 minutes, or until a toothpick inserted in the center comes out clean or with a few moist crumbs. Let cake cool in dish for about 10 minutes (warm, not hot).
- While cake cools, make the filling: In a medium bowl, combine sweetened condensed milk, creamy peanut butter, and vanilla extract. Stir until completely smooth and thick but pourable. If too thick, microwave for 10-15 seconds and stir again.
- Using the handle of a wooden spoon, poke holes all over the warm cake, spacing them about 1 inch apart. Go to the bottom of the cake without poking through the dish.
- Slowly pour the peanut butter mixture over the warm cake, ensuring it gets into all holes. Use a spatula to spread evenly if needed. Let sit at room temperature for about 15 minutes to allow filling to soak in.
- In a separate bowl, whisk together instant chocolate pudding mix and cold milk for about 2 minutes until thickened. Let sit for 5 minutes to set completely. Spread pudding evenly over the cooled cake.
- Spread thawed whipped topping over the pudding layer, creating an even layer to the edges.
- Chop Reese’s peanut butter cups into small pieces (some larger chunks, some smaller bits). Sprinkle evenly over whipped topping. Drizzle chocolate syrup in a zigzag pattern. Sprinkle peanut butter chips over everything.
- Cover dish with plastic wrap or aluminum foil and refrigerate for at least 4 hours, preferably overnight. Serve cold.
Notes
Do not overbake the cake; a slightly underdone cake is better than a dry one. Poke holes while the cake is warm for better absorption. Let the filling soak in fully (at least 15 minutes) before adding pudding. Use cold milk for the pudding to set properly. Chop Reese’s cups right before serving to prevent stickiness. Avoid natural peanut butter in the filling as it can separate. The cake tastes better the next day. Store covered in refrigerator for up to 5 days. Freeze for up to 3 months.
Nutrition
- Serving Size: 1 slice (1/12 of cak
- Calories: 450
- Sugar: 41
- Sodium: 380
- Fat: 24
- Saturated Fat: 8
- Carbohydrates: 55
- Fiber: 2.5
- Protein: 9
Keywords: Reese's poke cake, peanut butter cup cake, chocolate poke cake, easy dessert, chocolate peanut butter cake, poke cake recipe


