I did not trust pumpkin seeds in a sweet application until I burned a batch of salted ones so badly my entire apartment smelled like a campfire for three days. That was the fall I decided to prove myself wrong about the whole concept—sweet, spiced, crispy pumpkin seeds that actually deserved to be eaten on purpose, not just picked out of a Halloween carving pile out of boredom.
The truth is, most pumpkin seed recipes disappoint. They either taste like burnt sugar, turn chewy instead of crispy, or the cinnamon just vanishes into the seed’s earthy flavor. I spent three weeks testing batches, tweaking temperatures, and frankly eating a lot of mediocre seeds before I landed on something that made me stop mid-chew and text my sister a photo. She didn’t reply, but I knew I had something.
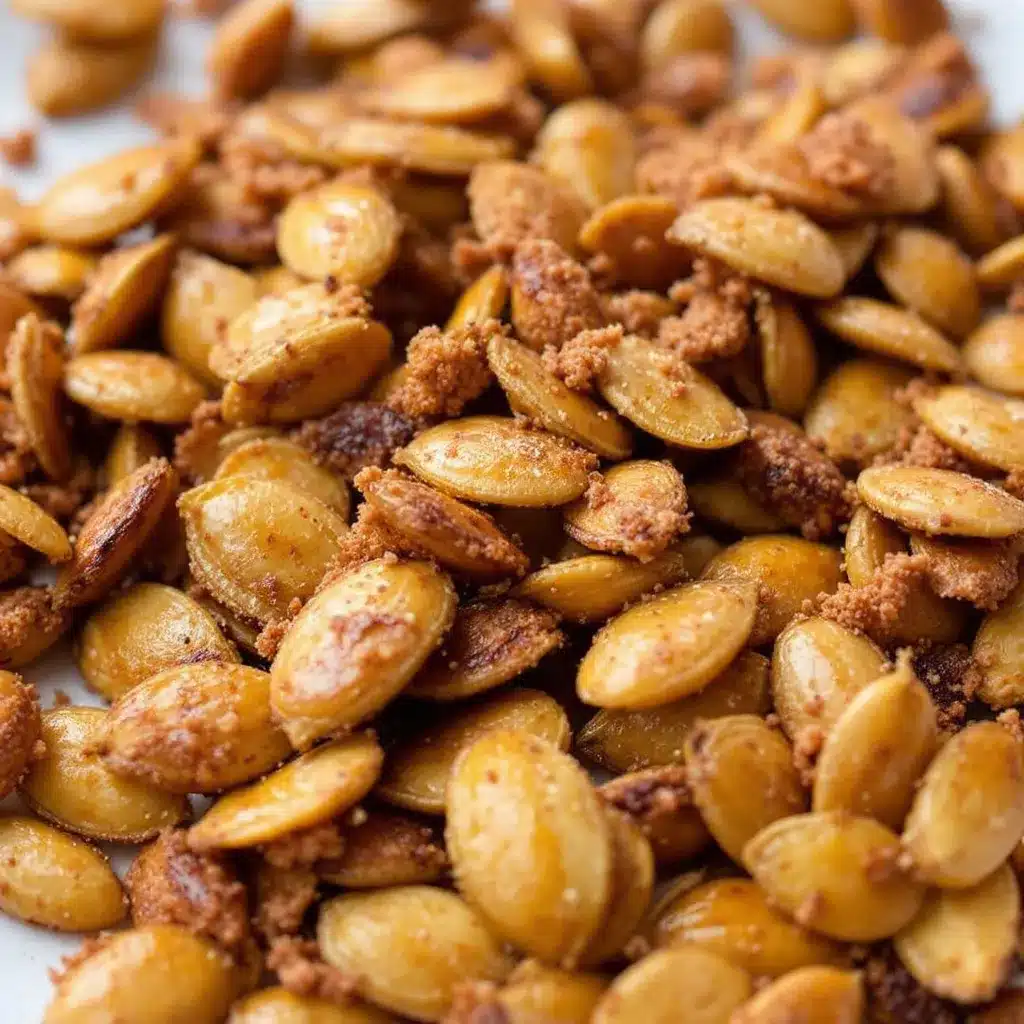
These crispy maple cinnamon roasted pumpkin seeds are that recipe. They come out of the oven shatteringly crisp, coated in a thin layer of maple syrup that caramelizes just enough without turning into sticky candy. The cinnamon sticks around, the salt balances everything, and somehow each seed tastes like a tiny autumn cookie that happens to be good for you. I start craving them the second the weather turns cool.
Why You’ll Love This Recipe
I have made these seeds for four different Thanksgivings now, and they disappear faster than the pie every single time. Here is why this version works when others fall flat:
- Perfectly Crispy Every Time : The secret is boiling the seeds first to remove that slimy coating, then roasting at the right temperature so they dry out completely without burning the sugar. No chewy, rubbery seeds here.
- Simple Pantry Ingredients : You only need pumpkin seeds, maple syrup, cinnamon, salt, and a little oil. If you have carved a pumpkin recently, you are already halfway there.
- Great for Fall Gatherings : These work for Halloween parties, Friendsgiving snacks, or just munching while you watch the leaves change. I have brought them to potlucks and watched people hover near the bowl.
- Actually Addictive : The sweet-salty-crunchy combo hits that snack craving hard. My husband claims he does not like pumpkin seeds, and I caught him eating these straight from the container at midnight last week.
- Healthier Than You Think : Pumpkin seeds are full of magnesium, zinc, and healthy fats. So when you eat half the batch in one sitting—and you will—you can at least feel slightly virtuous about it.
This recipe is not just another roasted seed situation. It is the one that makes you reconsider every sad, bland pumpkin seed you have ever eaten. The maple and cinnamon work together in a way that feels intentional, not like you just sprinkled sugar on something and hoped for the best. It is comfort food that actually delivers.
Ingredients You Will Need
This recipe uses straightforward ingredients, but each one plays a specific role in getting that perfect crispy, sweet, spiced result. Here is what you need and why each matters:
For the Seeds
- 1 cup raw pumpkin seeds (also called pepitas if they are hulled, but I prefer the green hulled ones here—they get crispier and you do not have to deal with the white shell). If you are using seeds straight from a pumpkin, you will need to clean and dry them first.
- 2 tablespoons pure maple syrup (the real stuff, not pancake syrup. Grade A dark amber works beautifully here because it has a stronger flavor that stands up to roasting).
- 1 tablespoon melted coconut oil or avocado oil (coconut oil adds a subtle sweetness that plays nicely with the maple, but avocado oil works if you want a neutral flavor).
- 1 teaspoon ground cinnamon (I use Ceylon cinnamon when I have it—it is milder and slightly sweeter than the standard cassia cinnamon, which can get a little sharp when roasted).
- ½ teaspoon fine sea salt (do not skip this—the salt is what makes the sweet pop and keeps the seeds from tasting flat).
Optional Add-Ins
- ¼ teaspoon nutmeg (freshly grated if you have it, for extra warm spice notes)
- Pinch of cayenne pepper (if you like a little heat with your sweet—honestly, this is amazing and I highly recommend trying it at least once)
- 1 tablespoon brown sugar (if you want a deeper, molasses-like sweetness alongside the maple)
I recommend using fresh cinnamon for this recipe. That jar of cinnamon you have had in your cabinet for three years? It has probably lost most of its punch. Buy a new bottle or grind your own if you are feeling fancy. The difference is noticeable when the cinnamon is the star of the show.
For the maple syrup, do not substitute honey or agave here. Maple has a thinner consistency that caramelizes differently, and its distinct flavor is what makes these seeds taste like autumn in a bowl. I have tried honey and it made the seeds sticky instead of crispy. Learn from my mistake.
Equipment Needed
- Baking sheet (a rimmed half-sheet pan works best—the edges keep seeds from rolling off when you stir them)
- Parchment paper or silicone baking mat (parchment makes cleanup infinitely easier, and silicone mats prevent sticking without adding extra oil)
- Small saucepan (for boiling the seeds if you are using fresh pumpkin seeds)
- Mixing bowl (medium-sized, for tossing seeds with the coating)
- Spatula or wooden spoon (for stirring the seeds halfway through roasting)
- Cooling rack (optional but helpful—letting seeds cool on a rack instead of the hot pan stops the cooking process and keeps them crispier)
If you do not have a silicone baking mat, just use parchment paper. I have made these seeds on both and honestly cannot tell a difference in the final result. Do not overthink the equipment. The oven does the real work here.
Preparation Method
Making these seeds is straightforward, but a few small steps make a big difference in the final texture. Follow these closely the first time, then adjust to your preference once you know how your oven behaves.
- Preheat your oven to 325°F (163°C). Line a baking sheet with parchment paper or a silicone mat. The lower temperature is intentional—higher heat will burn the maple syrup before the seeds have a chance to dry out completely.
- If using fresh pumpkin seeds, rinse them thoroughly in a colander under cold water. Pick out any pumpkin strings or bits of flesh that are still attached. This step is tedious but worth it. Then bring a small pot of water to a boil, add the seeds, and boil for 5 minutes. Drain and pat them very dry with a clean kitchen towel. This boiling step removes the slippery coating that can make roasted seeds chewy. If you are using store-bought hulled pepitas, skip this step.
- In a medium mixing bowl, combine the maple syrup, melted coconut oil, cinnamon, and salt. Whisk until the cinnamon is fully incorporated—you do not want clumps of dry spice hiding in the mixture. If you are adding nutmeg or cayenne, whisk those in now too.
- Add the pumpkin seeds to the bowl and stir until every seed is coated. Use a spatula to scrape the sides and bottom of the bowl. The mixture will look thin and wet, but that is exactly what you want. Let the seeds sit in the mixture for about 2 minutes so the flavors start to absorb.
- Spread the seeds in a single layer on the prepared baking sheet. Try to get them as evenly spaced as possible. Overlapping seeds will steam instead of roast, and you will end up with some crispy and some chewy. Use your spatula to spread them out, then shake the pan gently to settle them.
- Roast for 10 minutes, then remove the pan from the oven and stir the seeds with a spatula. This is important—the edges of the pan get hotter, so stirring redistributes the heat and prevents burning. The seeds will look wet and slightly bubbly at this point, and your kitchen will smell incredible.
- Return the pan to the oven and roast for another 8-12 minutes. Start checking at the 8-minute mark. The seeds are done when they are golden brown, the syrup has mostly dried, and they feel firm to the touch. They will continue to crisp as they cool, so do not wait until they look fully dry in the oven or they might over-bake.
- Remove the pan from the oven and let the seeds cool completely on the pan. Do not stir them during cooling. As they cool, the maple coating will harden into a thin, crisp shell. This takes about 15-20 minutes. If you try to eat them while they are still warm, they will seem soft—be patient, I promise they get crispy.
- Once cooled, break apart any clusters with your fingers. Some seeds will stick together in small groups, which is totally normal and actually kind of nice for snacking. Transfer to a bowl or storage container.
Pro tip : If your seeds come out chewy instead of crispy, they likely needed more oven time. The moisture from the maple syrup needs to evaporate fully, and every oven runs slightly differently. Next time, try extending the second roasting interval by 2-3 minutes and watch them closely.
Cooking Tips & Techniques
I learned most of these tips the hard way—through batches that were burnt, soggy, or just plain disappointing. Here is what I wish someone had told me before I started:
Do not overcrowd the pan. I know it is tempting to dump all the seeds on one pan and call it a day, but overcrowding traps steam. The seeds end up steaming instead of roasting, and you lose that shatteringly crisp texture. If you are doubling the recipe, use two pans and rotate them halfway through.
Watch the last few minutes closely. The line between perfectly caramelized and burnt is thin with maple syrup. The sugar in the syrup can go from golden to black in under a minute. I always set a timer for 2 minutes before the suggested end time and just hover near the oven, peeking through the window.
Let them cool completely. This is the number one mistake I see people make. Warm seeds feel soft and flexible, and it is easy to think they failed. But as they cool, the maple syrup hardens into a glassy, crisp coating. If you eat them warm, you will be disappointed. Wait the full 20 minutes.
Store them properly. These seeds will stay crispy for about 5 days in an airtight container at room temperature. Do not refrigerate them—the moisture in the fridge will soften the coating. If they do lose their crunch, you can re-crisp them in a 300°F oven for 3-4 minutes.
Season while warm. If you want to add a final sprinkle of flaky sea salt or extra cinnamon, do it right when the seeds come out of the oven while the coating is still tacky. The seasoning will stick better than if you wait until they cool.
Variations & Adaptations
Once you master the basic recipe, here are some ways to make it your own:
Spicy Maple Version : Add ¼ teaspoon cayenne pepper and ½ teaspoon smoked paprika to the maple mixture. The heat sneaks up on you after a few seeds, and the smoky paprika adds a depth that pairs beautifully with the sweet maple. This is my husband’s favorite variation.
Pumpkin Spice Blend : Replace the cinnamon with 1½ teaspoons pumpkin pie spice (or make your own with cinnamon, nutmeg, ginger, and allspice). This version tastes exactly like pumpkin pie filling, and I have been known to sprinkle it over vanilla ice cream.
Savory-Sweet Hybrid : Reduce the maple syrup to 1 tablespoon and add 1 tablespoon melted butter, ½ teaspoon garlic powder, and ¼ teaspoon black pepper. The result is less sweet and more complex—perfect for topping soups or salads. I love these on a bowl of roasted butternut squash soup.
Chocolate Drizzle : Once the seeds have cooled completely, melt ¼ cup dark chocolate chips and drizzle over the seeds. Let the chocolate set before breaking apart. This turns them into a dessert that feels fancy but takes almost no extra effort.
Nut-Free Option : These seeds are naturally nut-free, so they work great for school snacks or parties where allergies are a concern. Just double-check that your cinnamon and maple syrup are processed in nut-free facilities if that is a concern.
I have tried all of these variations, and honestly, the spicy maple version is the one I keep coming back to. Something about the heat and sweet together makes them impossible to stop eating.
Serving & Storage Suggestions
These seeds are incredibly versatile. Here is how I serve and store them:
Serving Temperature : Room temperature is ideal. The coating stays crisp and the flavors are most pronounced when the seeds are not warm or cold. If you make them ahead, just let them come to room temperature before serving.
Presentation Ideas : I serve them in a simple wooden bowl or a clear glass jar so the golden color shows through. For parties, I sometimes layer them with dried cranberries and dark chocolate chips for a festive snack mix. They also look beautiful sprinkled over a fall-themed cheese board alongside sharp cheddar and apple slices. If you are hosting a gathering, these seeds pair wonderfully with appetizers like crispy bacon wrapped dates for a sweet and savory snack spread.
Complementary Dishes : These seeds are fantastic on their own, but they also make a great topping for yogurt, oatmeal, or salads. I have crumbled them over roasted sweet potatoes and they added the perfect crunch. They also pair nicely with a refreshing champagne punch for a fall brunch or cocktail hour.
Storage Instructions : Store in an airtight container at room temperature for up to 5 days. Do not refrigerate—the moisture will make them soft. If you live in a humid climate, add a silica gel packet to the container to absorb excess moisture. I learned this trick from a friend who lives in Florida, and it works surprisingly well.
Freezing : You can freeze these seeds in a freezer-safe bag for up to 3 months. Thaw at room temperature for about 30 minutes before serving. They might lose a tiny bit of crunch after freezing, but a quick 3-minute reheat in a 300°F oven brings it back.
Reheating : If your seeds have softened, spread them on a baking sheet and warm them in a 300°F oven for 3-4 minutes. Let them cool completely before serving. This restores the crispiness almost perfectly.
Flavor Development : These seeds actually taste better the day after they are made. The flavors meld together overnight, and the maple-cinnamon coating sets fully. If you can resist eating them immediately, you will be rewarded with an even better snack the next day.
Nutritional Information & Benefits
These seeds are a snack that actually has some nutritional backbone. Here is the breakdown:
Estimated Nutrition (per ¼ cup serving) :
- Calories: 180
- Fat: 13g (mostly healthy unsaturated fats)
- Protein: 7g
- Carbohydrates: 10g
- Fiber: 2g
- Sugar: 6g (from maple syrup)
Health Benefits : Pumpkin seeds are packed with magnesium, which supports muscle function and sleep quality. They are also one of the best plant-based sources of zinc, which is great for immune health—especially relevant during cold and flu season. The healthy fats and protein make these seeds surprisingly satisfying, so a small handful actually keeps you full.
Dietary Considerations : This recipe is naturally gluten-free, dairy-free, and nut-free. It is vegetarian and can be made vegan by using coconut oil instead of butter (which I already recommend). The maple syrup is the only added sugar, and the amount per serving is modest compared to most sweet snacks.
Potential Allergens : None of the common allergens are present in this recipe, but always check your cinnamon and maple syrup labels if you have severe allergies, as some brands process them in facilities that also handle tree nuts or dairy.
I personally love that this snack feels indulgent but is actually pretty good for you. It is the kind of thing I can eat without guilt, and that makes it a staple in my fall rotation.
Conclusion
These crispy maple cinnamon roasted pumpkin seeds have become my go-to fall snack for a reason. They are easy enough to make on a random Tuesday, special enough to bring to a party, and delicious enough that people ask for the recipe every single time. The combination of sweet maple, warm cinnamon, and that perfect crunch is exactly what I want when the weather turns cool.
I encourage you to make these your own. Add more cinnamon if you love it, throw in some cayenne if you want heat, or drizzle chocolate on top for a dessert version. The base recipe is forgiving and adaptable, and every variation I have tried has been good in its own way. If you do try a creative twist, I would love to hear about it—drop a comment below and tell me how yours turned out.
Honestly, the best part of this recipe is how it makes your kitchen smell while the seeds are roasting. That maple-cinnamon aroma drifting through the house is worth making them even if you do not eat a single seed. But you will eat them. Probably the whole batch.
Happy snacking, and here is to a cozy, crunchy autumn.
Frequently Asked Questions
Can I use pepitas instead of fresh pumpkin seeds?
Yes, absolutely. Hulled pepitas (the green seeds) work perfectly for this recipe and actually get crispier than seeds with the white shell still on. You can skip the boiling step if using pepitas, just toss them directly in the maple mixture and roast.
Why did my seeds turn out chewy instead of crispy?
This usually means they needed more oven time or the oven temperature was too low. The maple syrup needs to evaporate fully to create that crisp coating. Try extending the roasting time by 2-3 minutes, and make sure your seeds are spread in a single layer so they dry evenly.
Can I make these in an air fryer?
Yes, you can. Cook them at 300°F for about 8-10 minutes, shaking the basket halfway through. Keep a close eye on them because air fryers run hot and the maple syrup can burn quickly. Let them cool completely before eating.
How long do these stay fresh?
Stored in an airtight container at room temperature, they stay crispy for about 5 days. If they soften, you can re-crisp them in a 300°F oven for 3-4 minutes. Do not refrigerate them, as the moisture will make them lose their crunch.
Can I double this recipe?
Yes, but use two baking sheets instead of one. Overcrowding the pan traps steam and prevents the seeds from getting crispy. Rotate the pans halfway through roasting for even browning.
Pin This Recipe!
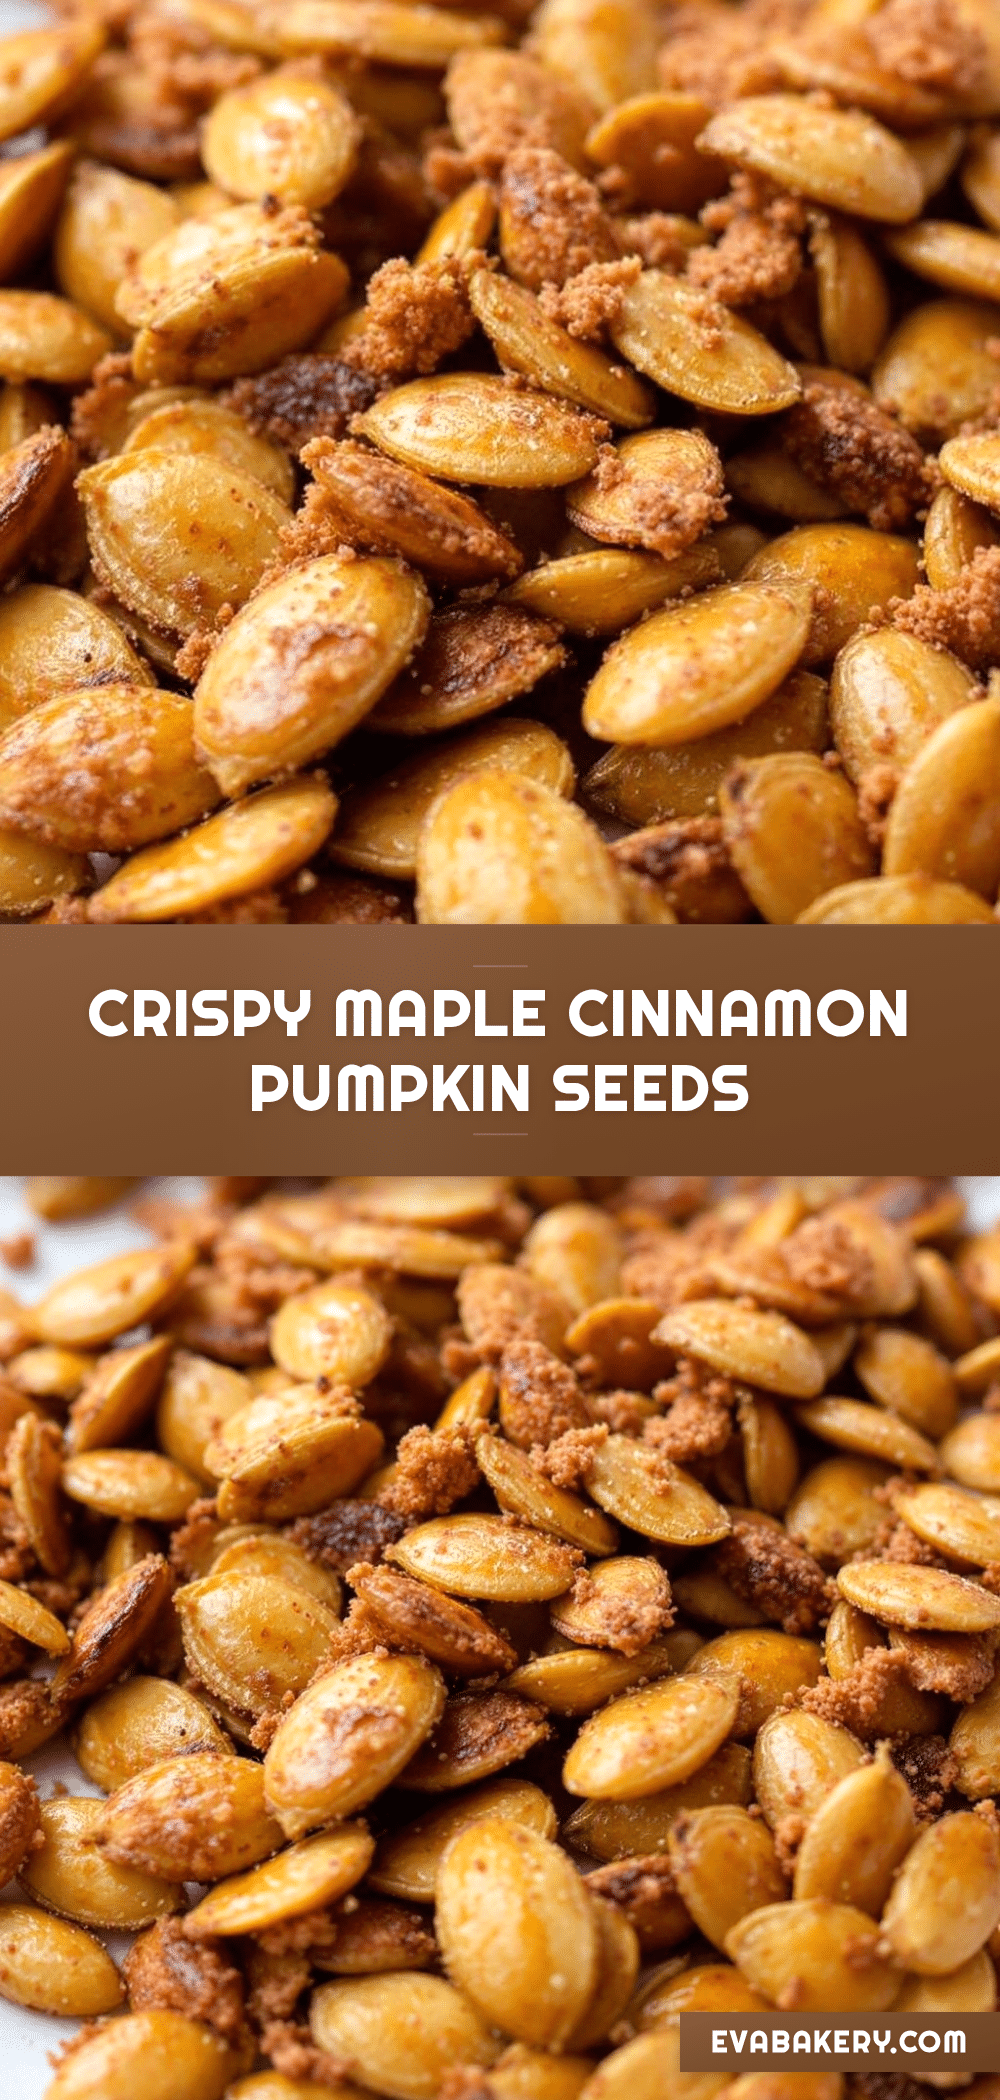
Crispy Maple Cinnamon Roasted Pumpkin Seeds | Easy Fall Snack
These crispy maple cinnamon roasted pumpkin seeds are shatteringly crisp, coated in a thin layer of maple syrup that caramelizes just enough without turning into sticky candy. The cinnamon sticks around, the salt balances everything, and each seed tastes like a tiny autumn cookie that happens to be good for you.
- Prep Time: 10 minutes
- Cook Time: 18-22 minutes
- Total Time: 28-32 minutes
- Yield: 4 servings 1x
- Category: Snack
- Cuisine: American
Ingredients
- 1 cup raw pumpkin seeds (hulled pepitas preferred)
- 2 tablespoons pure maple syrup (Grade A dark amber)
- 1 tablespoon melted coconut oil or avocado oil
- 1 teaspoon ground cinnamon (Ceylon preferred)
- ½ teaspoon fine sea salt
- ¼ teaspoon nutmeg (optional)
- Pinch of cayenne pepper (optional)
- 1 tablespoon brown sugar (optional)
Instructions
- Preheat your oven to 325°F (163°C). Line a baking sheet with parchment paper or a silicone mat.
- If using fresh pumpkin seeds, rinse them thoroughly in a colander under cold water. Pick out any pumpkin strings or bits of flesh. Bring a small pot of water to a boil, add the seeds, and boil for 5 minutes. Drain and pat them very dry with a clean kitchen towel. If using store-bought hulled pepitas, skip this step.
- In a medium mixing bowl, combine the maple syrup, melted coconut oil, cinnamon, and salt. Whisk until the cinnamon is fully incorporated. If adding nutmeg or cayenne, whisk those in now.
- Add the pumpkin seeds to the bowl and stir until every seed is coated. Let the seeds sit in the mixture for about 2 minutes so the flavors start to absorb.
- Spread the seeds in a single layer on the prepared baking sheet. Try to get them as evenly spaced as possible.
- Roast for 10 minutes, then remove the pan from the oven and stir the seeds with a spatula.
- Return the pan to the oven and roast for another 8-12 minutes. Start checking at the 8-minute mark. The seeds are done when they are golden brown, the syrup has mostly dried, and they feel firm to the touch.
- Remove the pan from the oven and let the seeds cool completely on the pan. Do not stir them during cooling. This takes about 15-20 minutes.
- Once cooled, break apart any clusters with your fingers. Transfer to a bowl or storage container.
Notes
Do not overcrowd the pan; use two pans if doubling. Watch the last few minutes closely to avoid burning. Let seeds cool completely before eating for maximum crispiness. Store in an airtight container at room temperature for up to 5 days. Do not refrigerate. To re-crisp, warm in a 300°F oven for 3-4 minutes. For best flavor, make a day ahead.
Nutrition
- Serving Size: ¼ cup
- Calories: 180
- Sugar: 6
- Sodium: 150
- Fat: 13
- Saturated Fat: 2
- Carbohydrates: 10
- Fiber: 2
- Protein: 7
Keywords: pumpkin seeds, maple cinnamon, roasted pumpkin seeds, fall snack, crispy seeds, healthy snack, gluten-free, dairy-free, nut-free, vegetarian, vegan


