The clock struck 7:15 PM on a Tuesday, which is usually when my brain turns to mush, but tonight it was panic that set in. My neighbor’s kids, two energetic seven-year-olds named Leo and Maya, had just appeared at my doorstep with their parents, claiming they were “just passing by” but definitely eyeing my kitchen like it was a candy store. I had zero cookies. Zero brownies. Zero anything that looked remotely festive or kid-approved. The fridge was a graveyard of half-used condiments and a lonely, sad-looking box of chocolate cake mix I’d bought three months ago and forgot about.
I stared at that cake mix, then at the bag of instant chocolate pudding mix sitting next to the milk, and finally at the open bag of gummy worms in my junk drawer. It wasn’t planned. It wasn’t elegant. It was a rescue mission born from desperation. I remember dumping the dry pudding into a bowl, ignoring the fact that I was using the same spoon I’d used to stir coffee earlier. You know how some recipes feel like they were written by a chef in a white coat? This one feels like it was written by a tired adult who just wanted to stop the crying.
I mixed the pudding until it looked like actual dirt. I crumbled the cake mix (which I quickly baked into a dense, fudgy base) until it turned into fine, dark crumbs. The layers went in, a bit unevenly, because honestly, who has time for perfect symmetry when you’re trying to keep kids entertained? I buried the gummy worms deep inside, leaving just their heads peeking out like they were trying to escape the soil. When I handed them those little plastic cups, the silence was deafening for exactly three seconds. Then, the digging began.
That moment stuck with me. Not because it was perfect, but because it worked. It turned a chaotic, unplanned afternoon into a memory of laughter and sticky fingers. I realized then that the best Halloween treats aren’t the ones that take hours to decorate; they’re the ones that let you be creative without stress. This recipe isn’t about culinary precision. It’s about the joy of making something silly and delicious with what you already have. It’s the kind of dessert that saves your sanity and makes you the hero of the neighborhood.
Why You’ll Love This Recipe
Let’s be honest for a second. Most Halloween desserts are either a nightmare to make or a sugar rush that ends in a meltdown. This dirt cups recipe hits that sweet spot—literally and figuratively. I’ve tested this version probably a dozen times, tweaking the ratio of pudding to cake crumbs until it was just right. It’s not just another pudding cup; it’s a textural experience that kids (and adults) can’t resist.
Here is why this recipe has earned a permanent spot in my rotation:
* **Quick & Easy:** You’re looking at about 5 minutes of active prep time. I know, it sounds too good to be true. But with instant pudding and store-bought cake mix, you’re skipping the baking drama. Perfect for busy weeknights or last-minute trick-or-treat prep.
* **Simple Ingredients:** No fancy grocery trips needed. You likely already have chocolate pudding mix, cake mix, and gummy worms in your pantry. It’s pantry-friendly comfort food.
* **Perfect for Parties:** Whether it’s a Halloween classroom party, a spooky sleepover, or just a Tuesday night treat, these cups are portable and mess-free.
* **Crowd-Pleaser:** Always gets rave reviews. I’ve served these to picky eaters who claim they “don’t like dessert,” and they always come back for seconds. The surprise of the gummy worm is the hook.
* **Unbelievably Delicious:** The texture combo is next-level. You get the creamy smoothness of the pudding, the crunch of the cake crumbs, and the chew of the worms. It’s comfort food reimagined for the spooky season.
What makes this version different from the rest? It’s the cake mix base. Most recipes just use crushed Oreos or plain cake crumbs, but baking the cake mix first creates a richer, fudgier flavor profile that stands up to the sweetness of the pudding. It’s not just a trick; it’s a flavor upgrade. And honestly, it’s the kind of recipe that makes you close your eyes after the first bite. It’s stress-free entertaining that actually tastes like you tried.
What Ingredients You Will Need
This recipe uses simple, wholesome ingredients to deliver bold flavor and satisfying texture without the fuss. The magic here is in the layering, so each component needs to be distinct. I like to keep things straightforward because, let’s face it, Halloween prep is chaotic enough without needing a specialty ingredient list.
**For the “Dirt” Base:**
* **Chocolate Cake Mix (1 box):** I recommend using a standard box mix like Duncan Hines or Betty Crocker. The chocolate flavor is robust and pairs perfectly with the pudding. Avoid “fudge” mixes if you want a lighter crumb, as they can be too dense.
* **Unsalted Butter (4 tablespoons):** Melted. This binds the cake crumbs together so they aren’t dry or powdery. It adds a richness that plain oil can’t match.
* **Water or Milk (as directed on box):** To bake the cake. Using milk instead of water makes the cake richer and more tender.
**For the “Mud” Pudding Layer:**
* **Instant Chocolate Pudding Mix (2 boxes):** Two boxes give you that thick, creamy consistency. I prefer Jell-O or similar brands for their reliable texture. Look for the “instant” variety, not the “cook-and-serve,” to save time.
* **Whole Milk (4 cups):** Cold milk is crucial. It helps the pudding set faster and gives you that thick, mousse-like texture. If you’re using dairy-free alternatives, oat milk works surprisingly well here.
* **Whipped Topping (1 container, 8 oz):** Cool Whip or a similar brand. This lightens the pudding, making it less dense and more airy. It’s the secret to that cloud-like top layer.
**For the “Garden” Toppings:**
* **Gummy Worms (1-2 bags):** The star of the show. Look for the long, squiggly ones. They hold up well in the pudding without getting soggy too quickly.
* **Chocolate Sprinkles or Crushed Cookies (optional):** For extra visual appeal. If you want to save money, crush up some chocolate sandwich cookies instead of buying sprinkles.
* **Candy Eyes (optional):** For a spooky touch. These add a fun, interactive element for kids.
*Substitution Note:* If you’re gluten-sensitive, you can use a gluten-free chocolate cake mix and ensure your pudding and toppings are GF-certified. For a dairy-free version, use a dairy-free cake mix, almond milk, and dairy-free whipped topping.
Equipment Needed
You don’t need a fancy kitchen to make these. Here is what you’ll need:
* **9×13 Inch Baking Pan:** To bake the cake base. A glass pan works best for even heating.
* **Wire Cooling Rack:** Essential for cooling the cake quickly. You don’t want warm cake melting the pudding.
* **Large Mixing Bowls (2-3):** One for the cake batter, one for the pudding, and one for crumbling the cake.
* **Electric Mixer or Whisk:** For beating the pudding and whipped topping together. An electric mixer makes this much faster and ensures no lumps.
* **Rolling Pin or Food Processor:** To crush the baked cake into fine crumbs. A food processor gives the most consistent “dirt” texture, but a rolling pin in a ziplock bag works if you’re doing this with kids.
* **Small Plastic Cups or Glasses:** Clear cups are best for showing off the layers. Shot glasses or small mason jars work great for portion control.
*Pro Tip:* If you’re making a large batch, have a large sheet pan ready to catch the cake crumbs as you crush them. It makes cleanup way easier. Also, keep your pudding bowls in the fridge while you work; cold pudding holds its shape better when you fold in the whipped topping.
Preparation Method
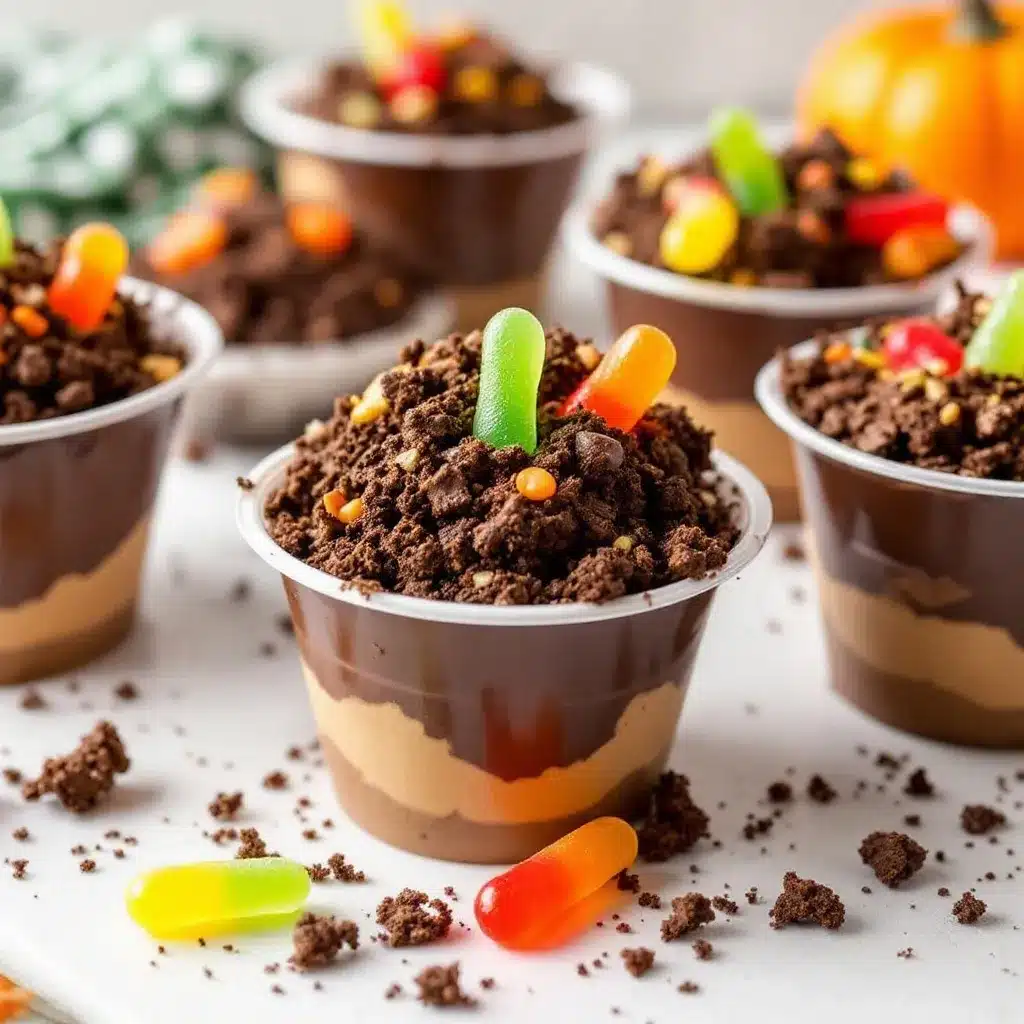
Here is how to pull this off without losing your mind. Follow these steps closely for the best texture.
1. **Bake the Cake Base (15-20 minutes prep + 30 minutes bake):**
Preheat your oven to 350°F (175°C). Prepare the chocolate cake mix according to the package directions, but use milk instead of water for a richer flavor. Pour the batter into your 9×13 inch baking pan. Bake for the time listed on the box, usually 25-30 minutes. You want it fully cooked but still moist. Let it cool completely in the pan on a wire rack. This is crucial. If the cake is even slightly warm, it will turn your pudding into soup.
2. **Crush the Cake (5 minutes):**
Once the cake is completely cool, break it into chunks. Place the chunks in a large ziplock bag or a food processor. Pulse or crush until you have fine, sand-like crumbs. You want small pieces, not large chunks. The texture should resemble moist soil. Transfer the crumbs to a large bowl.
3. **Add Butter to Crumbs (2 minutes):**
Melt the 4 tablespoons of butter. Pour it over the cake crumbs and toss until everything is evenly coated. This adds moisture and helps the “dirt” stick together slightly, preventing it from being too dry when you eat it. Set aside.
4. **Make the Pudding (5 minutes):**
In a large mixing bowl, whisk together the two boxes of instant chocolate pudding mix and the cold milk. Beat on medium speed for 2 minutes, or until thick. The pudding should be quite thick at this stage. If it’s too runny, your final dessert will be messy.
5. **Fold in Whipped Topping (3 minutes):**
Gently fold the entire container of whipped topping into the thickened pudding. Use a spatula and be gentle. You want to keep the air in the mixture so it stays light and fluffy. Don’t overmix, or you’ll deflate it. The result should look like chocolate mousse.
6. **Assemble the Cups (5 minutes):**
Take your small plastic cups. Add a layer of the cake crumbs to the bottom (about 1 tablespoon). Top with a layer of the chocolate pudding mixture (about 2 tablespoons). Repeat the layers until the cup is full. You want a nice contrast of dark crumbs and light pudding.
7. **Add the Worms (2 minutes):**
Take your gummy worms and push them into the top layer of pudding. Leave the heads poking out. It looks like they’re burrowing into the dirt. Add a sprinkle of chocolate sprinkles on top if you want extra visual flair.
8. **Chill (10 minutes):**
Place the cups in the fridge for at least 10 minutes before serving. This helps the layers set and makes the presentation look sharper.
Cooking Tips & Techniques
I’ve made my fair share of mistakes with these cups, so you don’t have to. Here are some pro tips to ensure success.
* **Cool the Cake Completely:** I cannot stress this enough. Warm cake + cold pudding = mess. If you’re in a rush, you can put the cake in the fridge for 20 minutes to speed up cooling, but don’t skip this step.
* **Use Cold Milk:** When making the pudding, keep the milk in the fridge until the last second. Cold liquid helps the starches in the pudding mix gel faster, giving you a thicker consistency.
* **Don’t Overmix the Whipped Topping:** When folding the whipped topping into the pudding, use a gentle hand. You’re trying to combine them, not beat them. Overmixing will deflate the whipped topping, making the final texture dense and heavy.
* **Crumb Size Matters:** If your cake crumbs are too big, they’ll be hard to eat and won’t look like dirt. Aim for a texture similar to coarse sand. If you’re using a rolling pin, it might take a bit of elbow grease, but it’s worth it for the authentic look.
* **Layering Strategy:** Don’t just dump everything in. Layering creates visual appeal and ensures every bite has a mix of textures. Aim for two or three layers per cup.
Variations & Adaptations
While the classic chocolate version is my go-to, there are plenty of ways to twist this recipe.
* **Pumpkin Spice Version:** Swap the chocolate cake mix for pumpkin spice cake mix. Use vanilla instant pudding instead of chocolate, and add a dash of pumpkin pie spice to the crumbs. Use orange gummy worms for a festive fall look.
* **Strawberry Dirt Cups:** Use strawberry cake mix and vanilla pudding. Top with crushed freeze-dried strawberries for a bright red “blood” effect. This is great for spring parties or Valentine’s Day.
* **Green Monster Cups:** Use white cake mix with green food coloring in the pudding. Use lime gummy worms and crushed pistachios for the “dirt.” It’s a fun, colorful twist that kids love.
* **Gluten-Free Adaptation:** Use a certified gluten-free chocolate cake mix and ensure your pudding and toppings are GF. The texture might be slightly different, but the flavor will still be spot on.
* **Dairy-Free Option:** Use a dairy-free cake mix, almond milk for the pudding, and a dairy-free whipped topping like So Delicious. It’s surprisingly creamy and satisfying.
I once tried making these with red velvet cake mix and cream cheese pudding. It was a bit too rich for my taste, but my kids loved the color. Experimentation is part of the fun, so don’t be afraid to try new combinations.
Serving & Storage Suggestions
These cups are best served chilled. The cold temperature enhances the flavor of the chocolate and keeps the pudding firm. They are perfect for Halloween parties, school treats, or as a late-night snack.
* **Presentation:** Serve them on a platter with a spooky label. You can tie a small piece of black ribbon around the cup for a polished look.
* **Complementary Drinks:** Pair these with a glass of cold milk or a spooky punch like our refreshing champagne punch for adults. For kids, chocolate milk is a classic choice.
* **Storage:** Store leftover cups in the refrigerator in an airtight container. They will keep for up to 3 days. The crumbs may soften slightly over time, but the flavor will remain good.
* **Freezing:** You can freeze these cups for up to 1 month. Thaw in the fridge overnight before serving. Note that the texture of the pudding may change slightly after freezing, becoming a bit icier.
* **Reheating:** Do not reheat these. They are meant to be served cold.
The flavors develop over time, with the crumbs absorbing some of the pudding’s moisture. This can be a pro or a con depending on your preference. I like them fresh, but some people prefer the soggy, cake-like texture that develops after a day in the fridge.
Nutritional Information & Benefits
While these are definitely a treat, they do offer some nutritional benefits. Chocolate contains antioxidants, and milk provides calcium and protein. However, they are high in sugar and calories, so enjoy in moderation.
* **Calories:** Approximately 250-300 calories per cup.
* **Sugar:** High sugar content from the cake mix, pudding, and gummy worms.
* **Fat:** Moderate fat content from the butter and whipped topping.
* **Dietary Notes:** Not suitable for vegans or those with severe dairy allergies unless substitutions are made. Gluten-free options are available.
I always try to balance these treats with a healthy meal earlier in the day. They’re a fun way to get kids excited about cooking, and letting them help with the assembly can make them more willing to try new foods. It’s all about creating positive associations with food.
Conclusion
These Easy Halloween Dirt Cups with Gummy Worms are more than just a dessert; they’re a stress-free solution for any spooky occasion. They’re cheap, easy, and always a hit. I love that you can make them in minutes and still impress everyone. Whether you’re hosting a party or just want a fun treat for your family, this recipe is a winner.
I encourage you to try your own variations. Add candy eyes, use different colored worms, or switch up the pudding flavor. Make it your own. I’d love to hear how you tweak this recipe. Leave a comment below with your favorite variation or a photo of your creation. Share this post with friends who need a quick Halloween dessert idea. Happy Halloween, and happy digging!
FAQs
Can I make these ahead of time?
Yes, you can assemble these up to 24 hours in advance. Store them in the refrigerator covered with plastic wrap. The flavors will meld together, which some people prefer.
What if I don’t have a cake mix?
You can use any leftover cake, baked and cooled. Just crush it into fine crumbs and toss with melted butter. Even brownie bits work well for a denser “dirt.”
How long do the gummy worms last in the pudding?
They hold up well for about 2-3 days. After that, they may start to dissolve or become too soft. It’s best to add them just before serving if you want them to retain their shape.
Can I use homemade pudding?
Yes, but homemade pudding is often thinner than instant pudding. You may need to add a bit more whipped topping or chill the pudding longer to thicken it before assembling.
Are there any nut-free options?
Yes, this recipe is naturally nut-free as long as you avoid cross-contamination. Check your cake mix and pudding labels to ensure they are made in a nut-free facility.
Pin This Recipe!
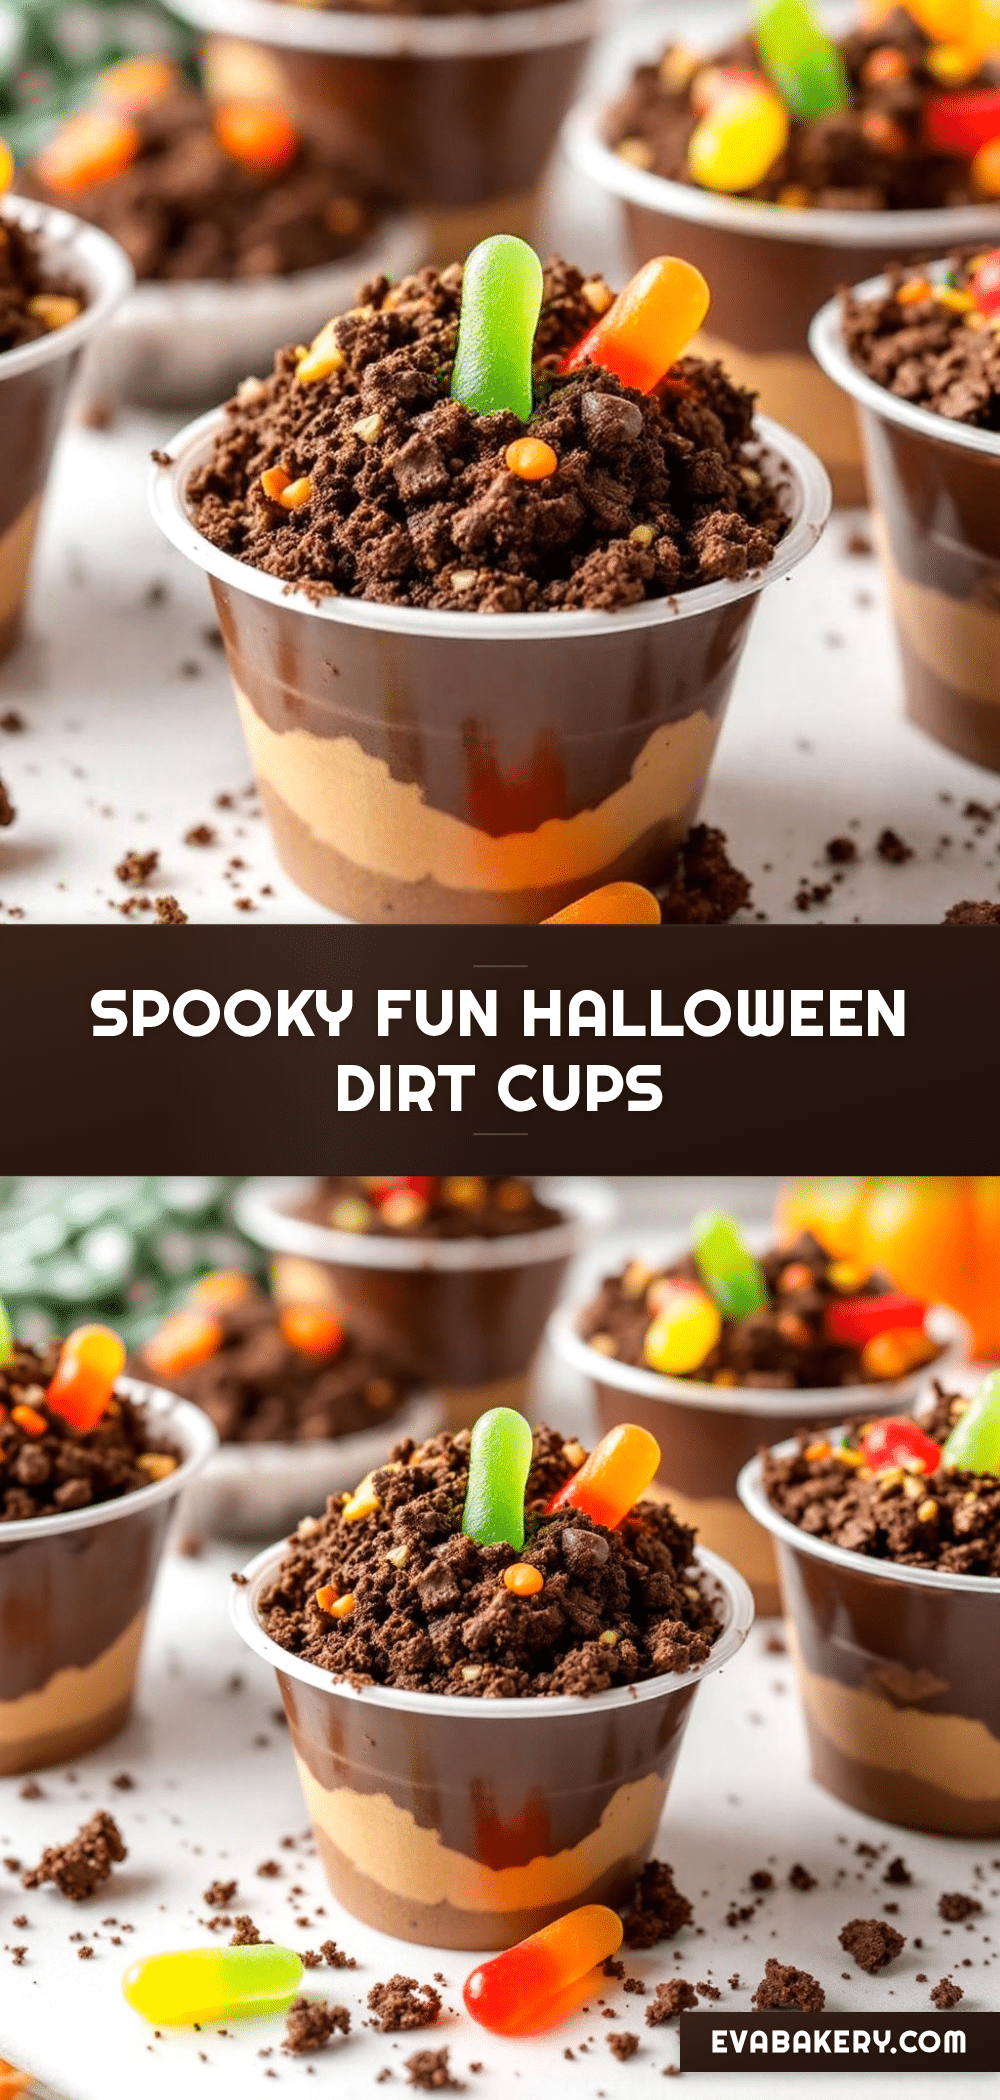
Easy Halloween Dirt Cups: 5-Minute No-Bake Dessert
A stress-free, kid-approved Halloween dessert featuring layers of chocolate cake crumbs, creamy instant pudding, and gummy worms. This no-bake treat is perfect for parties and requires minimal prep time.
- Prep Time: 15 minutes
- Cook Time: 30 minutes
- Total Time: 45 minutes
- Yield: 12 servings 1x
- Category: Dessert
- Cuisine: American
Ingredients
- 1 box chocolate cake mix
- 4 tablespoons unsalted butter, melted
- Water or milk (as directed on box)
- 2 boxes instant chocolate pudding mix
- 4 cups cold whole milk
- 1 container (8 oz) whipped topping (e.g., Cool Whip)
- 1–2 bags gummy worms
- Chocolate sprinkles or crushed cookies (optional)
- Candy eyes (optional)
Instructions
- Preheat oven to 350°F (175°C). Prepare chocolate cake mix according to package directions using milk instead of water. Pour into a 9×13 inch baking pan and bake for 25-30 minutes until fully cooked but moist.
- Let the cake cool completely in the pan on a wire rack. This step is crucial to prevent the pudding from melting.
- Once cool, break the cake into chunks and crush into fine, sand-like crumbs using a food processor or rolling pin in a ziplock bag.
- Transfer crumbs to a large bowl and toss with melted butter until evenly coated.
- In a large mixing bowl, whisk together the instant chocolate pudding mix and cold milk. Beat on medium speed for 2 minutes until thick.
- Gently fold the whipped topping into the thickened pudding until combined and airy.
- Assemble the cups by adding a layer of cake crumbs, followed by a layer of pudding mixture. Repeat until the cup is full.
- Push gummy worms into the top pudding layer, leaving heads poking out. Add sprinkles or candy eyes if desired.
- Chill in the refrigerator for at least 10 minutes before serving.
Notes
Ensure the cake is completely cool before crushing to avoid melting the pudding. Use cold milk to help the pudding set faster. Do not overmix the whipped topping to maintain a light texture. For gluten-free or dairy-free versions, use appropriate substitutes for cake mix, milk, and whipped topping.
Nutrition
- Serving Size: 1 cup
- Calories: 275
- Sugar: 30
- Sodium: 250
- Fat: 12
- Saturated Fat: 6
- Carbohydrates: 40
- Fiber: 1
- Protein: 4
Keywords: Halloween dessert, dirt cups, no-bake, kid-friendly, gummy worms, chocolate pudding, easy recipe, party treat


