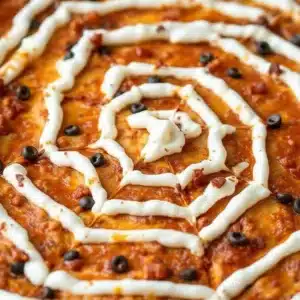
My eyes are glued to the clock, and the oven timer is still ten minutes away from going off. I want the spooky centerpiece ready now, but I have nothing but a bag of tortilla chips and a deep fear of undercooked meat. It’s a classic party panic, you know? The kind where you realize your “simple” appetizer plan is actually a logistical nightmare. I’m standing in my kitchen, staring at a skillet that looks way too empty for the crowd gathering at my door. Honestly, it’s stressful. But then I remember the spiderweb trick. It’s the one thing that turns a basic taco dip into something that looks like it took hours, when really, it’s just cheese and patience. Let’s face it, nobody wants to serve plain salsa and beef when Halloween is on the line. They want the drama. They want the web. I need that crispy, cheesy lattice to hold together so I can smile and pretend I planned this weeks ago. It’s about buying time and looking like a hero in the process.
This isn’t just about feeding people; it’s about creating that moment of awe when you pull the dish out of the oven. The steam rising, the crunch of the chips, the way the cheese stretches like a ghostly thread. It’s a specific kind of magic that only happens with this crispy spiderweb taco dip. I’ve made it for house parties, for school fairs, and even for last-minute date nights when I didn’t want to cook a whole meal. It always works. It’s reliable, it’s delicious, and it’s surprisingly easy to pull off even when you’re running around like a headless chicken. The secret isn’t in the ingredients—it’s in the layering. Once you get the hang of it, you’ll be making this for every holiday that comes around. It’s become my go-to trusty standby for any occasion that requires a little flair and a lot of flavor. I stick with it because it never fails to impress, even when I’m exhausted.
Why You’ll Love This Recipe
Let’s be real for a second. Most taco dips are just… warm salsa and beans. Boring. This recipe is different because it adds a structural element that changes everything. It’s the difference between a sandwich and a gourmet melt. I’ve tested this method over a dozen times, and the crispy spiderweb taco dip consistently wins over picky eaters. Here is why this specific version stands out from the crowd:
- Quick & Easy: You can have this ready in under 30 minutes. It’s perfect for busy weeknights or when you realize you forgot to buy appetizers until an hour before guests arrive.
- Simple Ingredients: No fancy grocery trips needed. You likely already have ground beef, cheese, tortillas, and salsa in your kitchen. It’s pantry-friendly comfort food.
- Perfect for Halloween: It’s the ultimate seasonal showstopper. The visual impact is huge, making it great for potlucks, haunted house parties, or cozy dinners.
- Crowd-Pleaser: Always gets rave reviews from kids and adults alike. Kids love dipping, and adults love the cheesy crunch. It’s a win-win.
- Unbelievably Delicious: The texture combo of crispy web, savory beef, and cool sour cream is next-level. It’s comfort food reimagined with a spooky twist.
What makes this recipe truly special is the technique. By using strips of tortilla to create a web, you aren’t just mixing ingredients; you’re building a dish. The cheese binds the web to the skillet, creating a golden, crispy crust that you literally have to break apart to eat. It’s interactive. It’s messy in the best way possible. It’s the kind of dish that makes you close your eyes after the first bite because the flavor is just that good. It’s not just food; it’s an experience. Whether you are impressing guests without stress or just treating yourself, this dip turns a simple meal into something memorable. It’s the kind of recipe that sticks with people.
What Ingredients You Will Need
This recipe uses simple, wholesome ingredients to deliver bold flavor and satisfying texture without the fuss. The magic here is in the balance of savory, spicy, and creamy. You don’t need exotic spices or hard-to-find items. Everything comes together to create that signature crispy spiderweb taco dip experience. Here is what you need to grab before you start cooking:
- Ground Beef: 1 pound of lean ground beef (90/10 ratio works best to avoid greasiness). You can substitute with ground turkey or chicken if you want a lighter option.
- Taco Seasoning: 1 packet of store-bought seasoning or 2 tablespoons of homemade mix (chili powder, cumin, paprika, garlic powder, onion powder, salt, and pepper). I recommend using a good quality packet like Old El Paso for consistent flavor.
- Salsa: 1 cup of medium or hot salsa. Look for a chunky style if you want more texture, or a smoother one if you prefer a saucier base.
- Monterey Jack Cheese: 1.5 cups, shredded. This cheese melts beautifully and has a mild flavor that lets the spices shine. For extra gooeyness, mix in half cheddar cheese.
- Flour Tortillas: 6 to 8 large flour tortillas. These need to be pliable so you can cut them into strips. Do not use corn tortillas; they won’t stretch or crisp up the same way.
- Sour Cream: 1 cup, for the drizzle. Full-fat is best for stability and flavor, but light works in a pinch.
- Green Onions: 2 stalks, thinly sliced. These add a fresh, sharp bite that cuts through the richness of the cheese and meat.
- Black Olives: 0.5 cup, sliced. Optional, but they add a nice salty contrast and look great against the white sour cream.
- Vegetable Oil: 1 tablespoon, for greasing the skillet. Or use cooking spray to save on calories.
- Guacamole: 0.5 cup, for serving. Adds creaminess and a pop of green color that looks festive.
When shopping for cheese, look for blocks and shred them yourself. Pre-shredded cheese often contains cellulose, which can prevent it from melting as smoothly. If you are in a rush, pre-shredded is fine, but the texture won’t be quite as silky. For the salsa, if you are making this in the summer, you might swap in fresh pico de gallo for a brighter taste. In the winter, a jarred salsa works perfectly. The key is to keep it simple and let the flavors do the talking.
Equipment Needed
You don’t need a fancy kitchen to make this. The main tool you need is a 10-inch cast iron skillet. Cast iron is essential here because it holds heat well, which helps the tortilla strips crisp up evenly. If you don’t have cast iron, a heavy-bottomed stainless steel skillet will work, but the results might be slightly less crispy. Avoid non-stick skillets if you can, as the cheese can stick and burn more easily.
You will also need a sharp chef’s knife and a cutting board for slicing the tortillas and green onions. A rubber spatula is helpful for spreading the meat and salsa evenly. For the sour cream drizzle, a small squeeze bottle works wonders for creating neat web lines, but a ziplock bag with the corner snipped off works just as well. Finally, have a large spoon or spatula ready for serving. You’ll be breaking up the web, so you need something sturdy. If you are making this for a large group, consider having a second skillet or a larger 12-inch one to ensure everyone gets a good portion.
Preparation Method
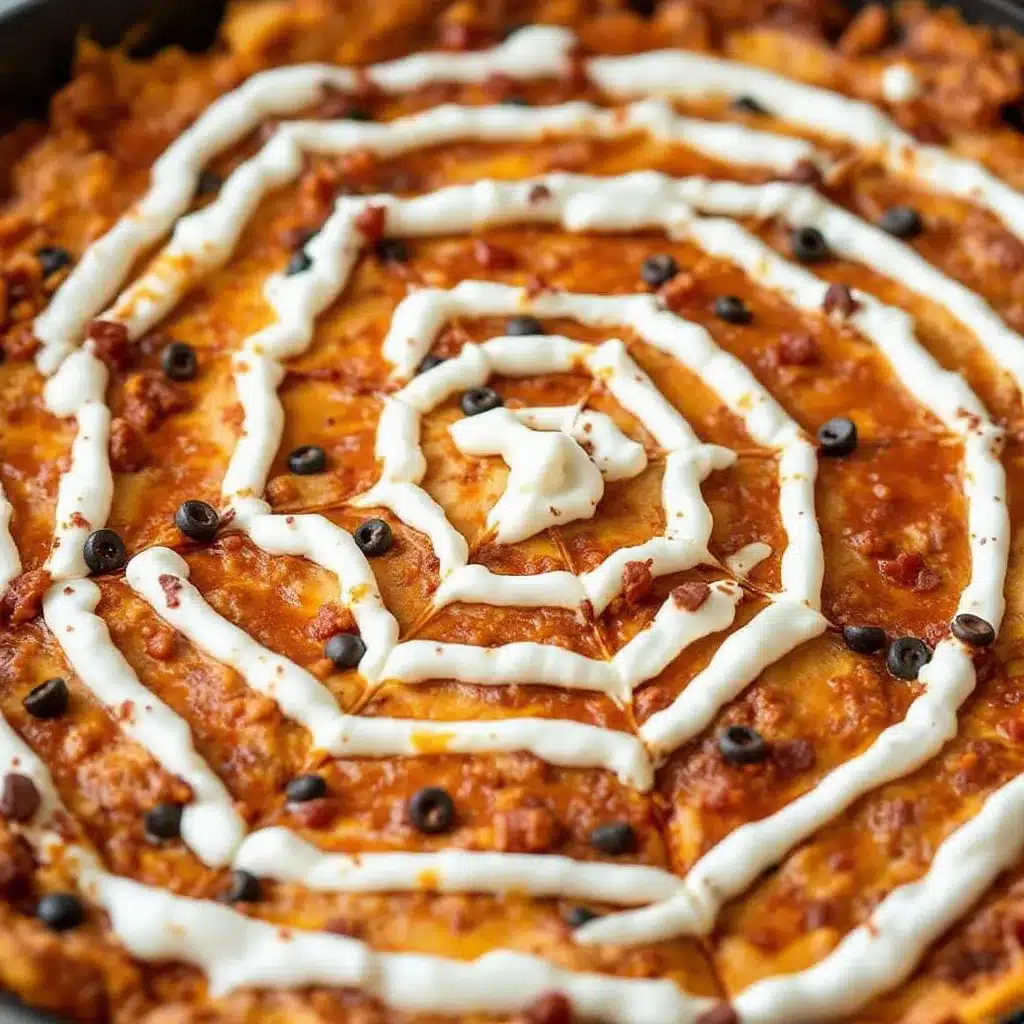
Let’s get cooking. This process is straightforward, but timing is everything. Follow these steps carefully to ensure your crispy spiderweb taco dip turns out perfect every time.
- Prepare the Meat Base (10 minutes): Heat your 10-inch cast iron skillet over medium-high heat. Add a splash of oil if the pan is dry. Add the ground beef and cook until browned, breaking it up with a spoon. Drain any excess grease. Stir in the taco seasoning and 1/4 cup of water. Simmer for 2-3 minutes until the liquid evaporates and the sauce thickens. Remove from heat and spread the meat evenly across the bottom of the skillet.
- Add the Salsa Layer (2 minutes): Spoon the salsa over the meat layer. Spread it out gently to cover the beef. You want an even layer so every bite has a bit of tang. Set this aside while you prepare the tortillas.
- Cut the Tortilla Strips (5 minutes): Stack the flour tortillas on top of each other. Cut them into thin strips, about 1/2 inch wide. You want them long enough to reach across the skillet. Try to keep the strips uniform so they bake evenly.
- Create the Web (5 minutes): This is the fun part. Take the tortilla strips and lay them across the top of the skillet in a crisscross pattern. Overlap them slightly to create a lattice or web effect. Don’t worry about making it perfect; rustic looks better. Tuck the ends of the strips under the edge of the skillet so they stay in place.
- Add the Cheese (1 minute): Sprinkle the shredded cheese generously over the tortilla web. Make sure you cover the edges and the center. The cheese acts as the glue that holds the web together and creates that golden crust.
- Bake the Dip (15 minutes): Preheat your oven to 375°F (190°C). Place the skillet in the oven and bake for 15 minutes. You are looking for the cheese to be fully melted and the tortilla strips to be golden brown and crispy. If you want extra crispiness, broil for the last 1-2 minutes, but watch it closely so it doesn’t burn.
- Prepare the Sour Cream Web (5 minutes): While the dip is baking, mix the sour cream with a teaspoon of water to thin it out slightly. Put it in a squeeze bottle or a ziplock bag with the corner cut off.
- Assemble and Serve (2 minutes): Remove the skillet from the oven. Let it cool for 2-3 minutes so the cheese sets slightly. Drizzle the sour cream in a web pattern over the top. Garnish with sliced green onions and black olives. Serve immediately with tortilla chips on the side.
Keep an eye on the oven during the last few minutes. Every oven is different. You want that deep golden color, not black. If the cheese is browning too fast, you can tent the pan with foil.
Cooking Tips & Techniques
I’ve learned a few things the hard way while making this dish. First, don’t skimp on the cheese. The cheese is what binds the tortilla web to the meat. If you use too little, the web might fall apart when you scoop it. Second, make sure your meat isn’t too wet before adding the salsa. If there’s excess liquid, the tortillas can get soggy instead of crispy. That’s why draining the grease and simmering the seasoning is crucial.
Another common mistake is cutting the tortilla strips too thick. They need to be thin to crisp up properly. Think of them like pasta strands, not noodles. Also, when you lay the strips, don’t overlap them too much in one spot. You want air circulation so they bake evenly. If you pile them up, you’ll get soft spots.
For consistency, use the same brand of tortillas every time. Some brands are thicker and hold up better to baking. I’ve found that store-brand flour tortillas work well, but premium brands like Mission are even more reliable. Finally, let the dip rest for a few minutes after baking. This allows the cheese to set, making it easier to scoop without everything sliding off the spoon. It’s a small step that makes a big difference in presentation.
Variations & Adaptations
This recipe is incredibly versatile. You can adapt it to fit different dietary needs or taste preferences. Here are a few variations I’ve tried:
- Vegetarian Version: Swap the ground beef for black beans or a plant-based ground meat substitute. Season it just the same. It holds together well and provides a similar texture.
- Chicken Taco Dip: Use shredded rotisserie chicken instead of ground beef. Toss the chicken with the taco seasoning and lay it over the salsa. It’s leaner and cooks faster.
- Spicy Kick: Add diced jalapeños to the meat layer or use a habanero salsa. For extra heat, sprinkle cayenne pepper over the cheese before baking.
- Gluten-Free Option: Use corn tortillas instead of flour. Note that corn tortillas are more brittle, so handle them gently when creating the web. They will still crisp up nicely, but the structure might be slightly different.
- Loaded Version: Add diced tomatoes, corn kernels, or refried beans to the meat layer for extra bulk and flavor.
I once tried this with sweet potato slices instead of tortillas, and it was surprisingly good, but the web effect was lost. Stick to tortillas for the classic look. You can also swap the sour cream for Greek yogurt for a protein boost, though it won’t be as tangy.
Serving & Storage Suggestions
This dip is best served hot and fresh from the oven. The contrast between the hot, crispy web and the cool sour cream is key. Serve it with sturdy tortilla chips that won’t break under the weight of the dip. You can also serve it with lettuce cups for a low-carb option, though that changes the experience significantly.
For storage, any leftovers can be covered and refrigerated for up to 3 days. The tortilla web will lose its crispiness in the fridge, so it’s best eaten within the first day. To reheat, place individual portions in the oven at 350°F for 10 minutes to restore some crispiness. Microwaving will make it soft and soggy, so avoid that if you can. You can also freeze the unbaked dip, but the tortillas might become gummy after thawing. It’s really best made fresh.
Pair this with a refreshing beverage to cut the richness. A cold beer or a spicy margarita works well. If you want to keep it festive, serve it alongside a batch of sparkling jello shots for a complete Halloween spread. The colors and flavors complement each other nicely.
Nutritional Information & Benefits
This dip is rich in protein from the beef and calcium from the cheese. A typical serving (about 1 cup) contains approximately 450 calories, 25g of protein, and 30g of fat. It’s a hearty appetizer, so keep portions in mind. The salsa adds vitamins A and C, while the green onions provide a small amount of vitamin K. It’s not a light dish, but it’s balanced enough to be part of a larger meal. For those watching sodium, use low-sodium taco seasoning and salsa. The recipe is naturally gluten-free if you use corn tortillas, making it accessible for many guests. It’s a comforting, satisfying dish that feels indulgent but is relatively simple to make.
Conclusion
This crispy spiderweb taco dip is more than just food; it’s a party starter. It’s easy to make, looks amazing, and tastes even better. I love this recipe because it takes the stress out of entertaining. You can prep the meat ahead of time and assemble it right before guests arrive. It’s reliable, delicious, and always a hit. I encourage you to try it and make it your own. Add your favorite toppings, switch up the cheese, or make it spicy. The possibilities are endless. Share your creations on social media and tag me—I’d love to see your spooky dips. Let me know in the comments if you tried the vegetarian version or if you added extra jalapeños. Thanks for reading, and happy cooking!
FAQs
Can I make this dip ahead of time?
You can prepare the meat and salsa layers ahead of time and refrigerate them. Assemble the tortilla web and cheese right before baking to ensure the best texture. If you assemble it too early, the tortillas might absorb moisture and become soggy.
What kind of cheese melts best for this recipe?
Monterey Jack and Cheddar are the best choices. Monterey Jack melts smoothly and has a mild flavor, while Cheddar adds a sharper taste and golden color. You can use a blend of both for the perfect balance.
Can I use corn tortillas instead of flour?
Yes, but they are more brittle. You’ll need to handle them gently when creating the web. They will crisp up well, but the structure might not be as flexible as flour tortillas. For a gluten-free option, corn is your best bet.
How do I keep the sour cream from running off?
Drizzle the sour cream over the dip after it has baked and cooled for a few minutes. The cheese will have set slightly, providing a better surface for the sour cream to stick to. If you drizzle it while it’s piping hot, it might melt into the cheese too quickly.
What can I serve with this dip besides chips?
Try serving it with sturdy pita chips, veggie sticks like carrots and celery, or even as a topping for baked potatoes. It’s versatile and pairs well with many sides. For a festive touch, serve it alongside sparkling sangria for a complete party experience.
Pin This Recipe!
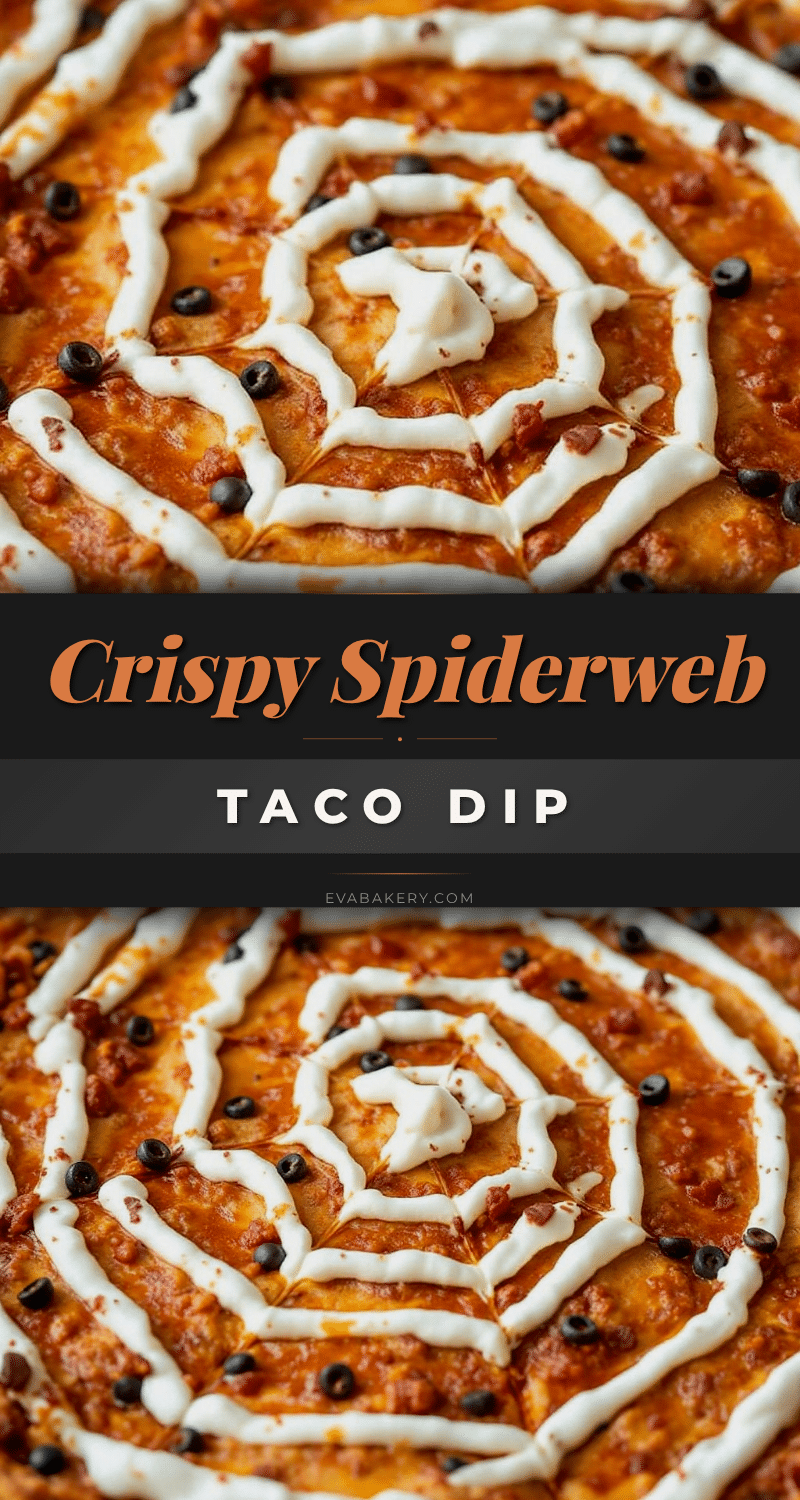
Crispy Spiderweb Taco Dip: Easy Halloween Party Appetizer
A spooky and delicious Halloween appetizer featuring a crispy tortilla web lattice over seasoned ground beef and salsa, topped with melted cheese and a sour cream drizzle.
- Prep Time: 22 minutes
- Cook Time: 15 minutes
- Total Time: 37 minutes
- Yield: 6 servings 1x
- Category: Appetizer
- Cuisine: Mexican
Ingredients
- 1 pound lean ground beef (90/10 ratio)
- 1 packet taco seasoning (or 2 tbsp homemade mix)
- 1 cup medium or hot salsa
- 1.5 cups shredded Monterey Jack cheese
- 6 to 8 large flour tortillas
- 1 cup sour cream
- 2 stalks green onions, thinly sliced
- 0.5 cup sliced black olives (optional)
- 1 tablespoon vegetable oil
- 0.5 cup guacamole (for serving)
Instructions
- Heat a 10-inch cast iron skillet over medium-high heat. Add ground beef and cook until browned, breaking it up with a spoon. Drain excess grease.
- Stir in taco seasoning and 1/4 cup water. Simmer for 2-3 minutes until liquid evaporates. Spread meat evenly across the bottom of the skillet.
- Spoon salsa over the meat layer and spread gently to cover the beef.
- Stack flour tortillas and cut into thin strips, about 1/2 inch wide.
- Lay tortilla strips across the top of the skillet in a crisscross pattern to create a web effect. Tuck ends under the edge of the skillet.
- Sprinkle shredded cheese generously over the tortilla web.
- Preheat oven to 375°F (190°C). Bake for 15 minutes until cheese is melted and tortillas are golden brown. Optionally broil for 1-2 minutes for extra crispiness.
- While baking, mix sour cream with a teaspoon of water to thin slightly. Place in a squeeze bottle or ziplock bag with corner cut off.
- Remove skillet from oven and let cool for 2-3 minutes. Drizzle sour cream in a web pattern over the top.
- Garnish with sliced green onions and black olives. Serve immediately with tortilla chips.
Notes
For best results, shred cheese from blocks rather than using pre-shredded cheese to ensure smooth melting. Ensure meat is not too wet before adding salsa to prevent soggy tortillas. Let the dip rest for a few minutes after baking to allow cheese to set. Leftovers can be refrigerated for up to 3 days; reheat in oven at 350°F to restore crispiness.
Nutrition
- Serving Size: 1 cup
- Calories: 450
- Sugar: 3
- Sodium: 600
- Fat: 30
- Saturated Fat: 12
- Carbohydrates: 25
- Fiber: 2
- Protein: 25
Keywords: Halloween appetizer, taco dip, spiderweb dip, crispy tortilla dip, party food, easy dip, ground beef recipe, cheese dip