For a while, I just accepted that autumn dessert tables weren’t going to taste like a cozy cabin in October.
You know how it goes. You walk into a holiday gathering or a casual fall party, and the spread is heavy. There are dense cheesecakes, sticky pies, and bowls of nuts that no one actually touches. It’s all so serious. So heavy. You leave feeling stuffed but not satisfied.
I had been looking for something light, crisp, and undeniably sweet that didn’t require a fork and knife to enjoy. Something you could graze on while standing by the fireplace. Honestly, most “fruit platters” are just an afterthought. They sit there, brown and sad, looking like an apology for not making a real dessert.
I wanted the nostalgia of caramel apples but without the mess. You know how frustrating it is to deal with sticks and sticky fingers at a cocktail party? It’s a nightmare for hosting. I tried making them the traditional way, and let’s face it, the chocolate shells cracked, the apples got soggy, and the whole thing felt more like a chore than a treat.
So I stopped trying to replicate the candy store version. I started thinking about texture. I thought about what makes a charcuterie board work. It’s variety. It’s contrast. It’s the ability to pick up something with your hands and enjoy it immediately.
It took a few tries to get the caramel dipping just right. I needed something that set quickly but stayed chewy. I needed apples that stayed crisp for hours. The breakthrough came when I combined fresh, firm apples with a homemade caramel glaze that hardened instantly upon cooling, paired with salty, crunchy elements to balance the sugar.
This isn’t a fancy, multi-layered dessert that takes all day to assemble. It’s simple. It’s bright. It brings that specific autumn flavor without the heaviness. And once you serve it, you’ll see why it sticks around. People love it because it feels indulgent but looks effortless.
Why You’ll Love This Crispy Caramel Apple Charcuterie Board
Let’s be honest for a second. Most dessert spreads are a logistical headache. You spend hours baking, cooling, and plating, only for the food to sit out and lose its appeal. This crispy caramel apple charcuterie board flips that script entirely. It’s designed for the host who wants to look like a genius without spending the entire evening in the kitchen.
Here is why this setup wins every time:
- Quick & Easy: You can have this entire board assembled in under 20 minutes. No baking required. No oven preheating. Just fresh apples, quick-set caramel, and your favorite toppings. It is perfect for last-minute guests or busy weeknight cravings.
- Simple Ingredients: You likely already have most of this in your pantry and fridge. Apples, caramel sauce, nuts, chocolate chips. No fancy grocery trips needed. It relies on pantry staples that taste gourmet when combined correctly.
- Perfect for Fall Gatherings: Whether it’s a Thanksgiving side, a Halloween party, or a cozy dinner party, this fits the season perfectly. It screams autumn without being cliché.
- Crowd-Pleaser: Kids love the sweetness. Adults appreciate the balance of salt and crunch. It gets rave reviews from everyone because it’s customizable. You can pick exactly what you want in each bite.
- Unbelievably Delicious: The texture combo is next-level. You get the snap of the apple, the chew of the caramel, and the crunch of the nuts. It’s comfort food reimagined—lighter, faster, but with the same soul-soothing satisfaction.
What makes this recipe different from the rest? It’s the technique. Traditional caramel apples are often too sweet and too hard. By using a diluted caramel sauce and adding a layer of crushed nuts or chocolate chips, you create a surface that is easier to bite into and more interesting to eat. Plus, arranging them on a board turns them into a centerpiece. It’s not just a snack; it’s a visual statement.
This recipe isn’t just good—it’s the kind that makes you close your eyes after the first bite. It’s perfect for impressing guests without stress. You can set it out an hour before they arrive, and it will still look pristine.
What Ingredients You Will Need
This recipe uses simple, wholesome ingredients to deliver bold flavor and satisfying texture without the fuss. The beauty of this board is that it relies on high-quality basics. You don’t need exotic spices or hard-to-find items. Just good produce and a few pantry staples.
Here is what you need to build the perfect board, grouped by function to make your shopping trip a breeze.
For the Base (The Apples)
- Fuji Apples: 4 large apples. I recommend Fuji for their natural sweetness and firm crunch. They hold up better than Gala or Red Delicious.
- Granny Smith Apples: 2 large apples. For those who prefer a tart contrast to the sweet caramel, these are essential.
- Lemon Juice: 1 tablespoon. To prevent the cut apples from browning before you serve them.
For the Caramel Coating
- Caramel Sauce: 1 cup. I personally prefer Smucker’s or a high-quality store-bought jar for consistency, but homemade works too if you have time. Look for a thick, pourable consistency.
- Heavy Cream: 2 tablespoons. Optional, but stirring this into warm caramel makes it smoother and easier to dip.
For the Toppings (The Crunch & Flavor)
- Mini Chocolate Chips: ½ cup. Semi-sweet or milk chocolate both work well. The mini chips stick easier than regular ones.
- Crushed Pretzels: ½ cup. Adds a necessary salty crunch that cuts through the sugar.
- Chopped Pecans: ½ cup. Toasted pecans add a warm, nutty flavor that pairs perfectly with apple.
- Sea Salt Flakes: A small pinch. Essential for elevating the flavor profile.
- White Chocolate Chips: ¼ cup. For visual contrast and a milder sweetness.
For the Board Presentation
- Assorted Nuts: Almonds, walnuts, or cashews. Scatter these around the board for extra texture.
- Dried Fruits: Cranberries or apricots. Adds a chewy element and bright color.
- Brie or Cheddar Cheese Cubes: 1 cup. A savory element balances the sweet apples beautifully.
- Crackers: Water crackers or graham crackers. Great for scooping or eating alongside the cheese.
If you need substitutions, you can use almond flour instead of crushed pretzels for a gluten-free option. Swap heavy cream with coconut milk if you’re dairy-free, though the texture will be slightly different. For the nuts, pecans can be swapped for walnuts or hazelnuts depending on what you have on hand.
Equipment Needed
You don’t need a lot of fancy gear for this. In fact, keeping the equipment minimal is part of the appeal. Here is what you’ll need to get this done efficiently.
- Large Serving Board: A wooden slab, slate, or even a large ceramic platter. Wood adds warmth, while slate looks modern. Make sure it’s big enough to hold the apples without them touching too much.
- Baking Sheet: One large sheet lined with parchment paper. This is crucial for dipping the apples. You need space for the coated apples to set without sticking to anything.
- Parchment Paper: Extra sheets for lining the baking sheet and for handling the sticky apples.
- Two Forks or Dipping Tools: You need two separate forks or skewers. One for dipping, one for placing. This prevents double-dipping and keeps your caramel sauce clean.
- Bowl for Caramel: A deep, narrow bowl makes dipping easier. A wide bowl spills more. I use a tall glass measuring cup or a deep ramekin.
- Small Bowls for Toppings: Prep bowls for your nuts, chocolate chips, and pretzels. Keep them close to your dipping station.
- Kitchen Knife: A sharp knife for washing and trimming the apple stems. Do not cut the apples yet; you want to keep the skin intact for structure.
If you don’t have a large baking sheet, you can use a flat cookie sheet or even a clean cutting board lined with parchment. The key is having a flat, non-stick surface for the apples to dry. For budget-friendly options, standard parchment paper works just as well as silicone mats, though silicone is easier to clean later.
Preparation Method
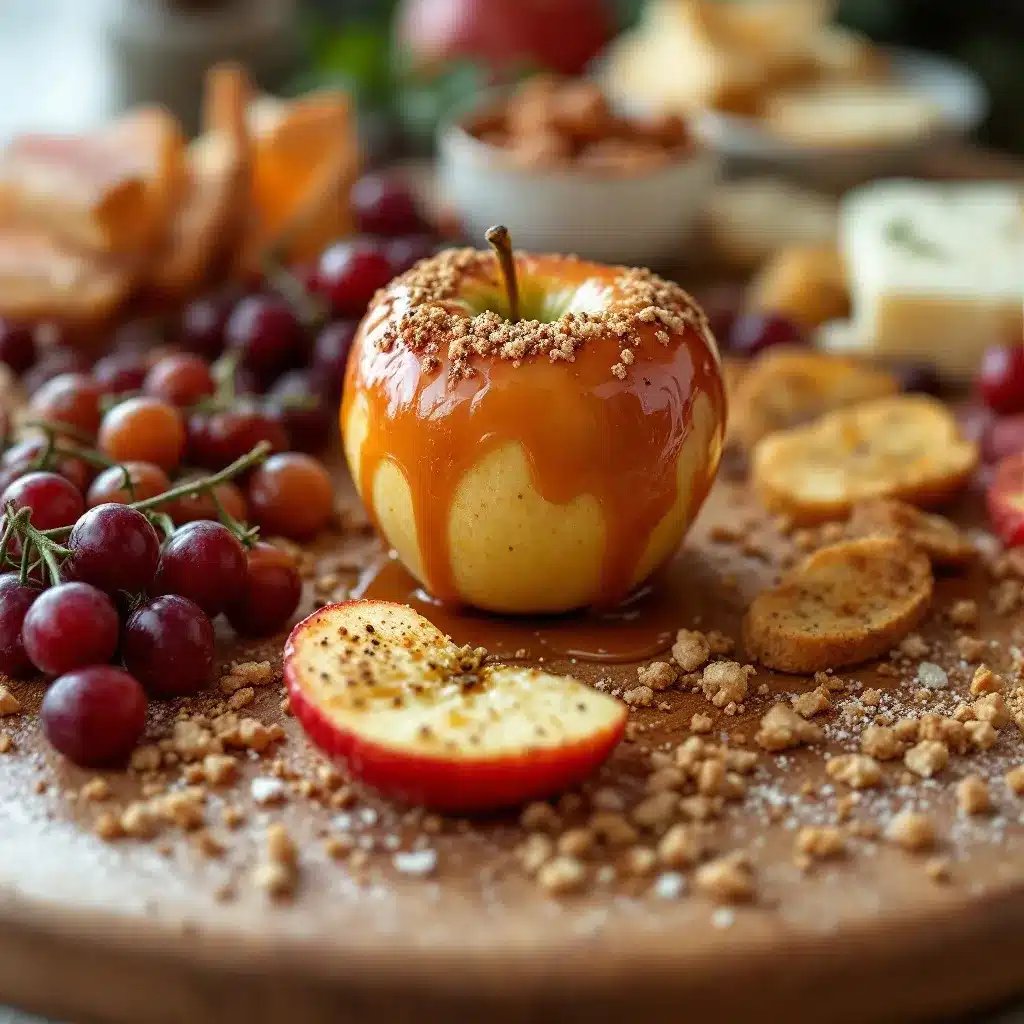
Getting this board together is surprisingly simple. The secret is organization. Have all your toppings ready before you touch the caramel. Here is how to execute it step-by-step.
- Prep Your Station (5 minutes): Line your baking sheet with parchment paper. Place your small bowls of toppings (nuts, chocolate chips, pretzels) in a row near your dipping area. Pour the caramel sauce into your deep dipping bowl. If the caramel is cold, microwave it for 15-20 seconds to make it pourable. Stir in the heavy cream if you are using it.
- Wash and Dry Apples (5 minutes): Wash your apples thoroughly. Dry them completely with a towel. This is critical. Any water on the skin will cause the caramel to slide off. Trim the stems slightly if they are long and awkward, but leave them intact for handling.
- Dip the Apples (10 minutes): Hold an apple by the stem. Dip it into the caramel, swirling it to coat about two-thirds of the apple. Let the excess drip off for a few seconds. Do not rush this, or you’ll have drips everywhere. Use your second fork to gently lift any excess caramel off the bottom.
- Add Toppings (10 minutes): While the caramel is still wet, immediately roll the dipped part of the apple in your chosen topping. Press gently to help it stick. You can also sprinkle toppings over the top with your fingers for a more rustic look. Place the coated apple on the parchment-lined baking sheet.
- Set the Apples (15 minutes): Let the apples sit at room temperature for about 15 minutes. The caramel will firm up slightly but remain chewy. If you want them harder, you can put them in the fridge for 10 minutes, but room temp is best for texture.
- Arrange the Board (5 minutes): Take your large serving board. Place the caramel apples in the center or along one side. Arrange the cheese cubes, crackers, and dried fruits around the apples. Fill in any empty spaces with loose nuts and extra chocolate chips. Sprinkle a tiny bit of sea salt over the apples for that gourmet touch.
- Serve Immediately: This board is best served within 2 hours of assembly. The apples may start to soften slightly after that, so it’s best to eat them fresh.
Troubleshooting tip: If the caramel is too thick, it will clump on the apple. Thin it with a teaspoon of warm water or cream if needed. If the toppings aren’t sticking, the caramel has started to set too fast. Work in smaller batches.
Cooking Tips & Techniques
There are a few tricks to making this look professional and taste even better. I’ve learned these the hard way through trial and error.
- Temperature Matters: Make sure your caramel is warm but not hot. If it’s too hot, it can burn your fingers and make the apple skin slippery. If it’s too cold, it won’t coat evenly.
- Work in Batches: Don’t try to dip all six apples at once. Dip one, top it, place it, then move to the next. This ensures every topping sticks properly.
- Use Room Temperature Ingredients: Cold apples can cause the caramel to seize up faster. Let the apples sit out for 10 minutes after washing to take the chill off.
- Don’t Skip the Salt: A little sea salt on top of the caramel transforms the flavor. It balances the sweetness and makes the nuts pop.
- Prep Toppings First: Have your bowls lined up before you start dipping. Caramel sets fast, and you don’t want to be scrambling for the pretzels while your apple is dripping.
A common mistake is over-dipping. You don’t need a thick layer of caramel. A thin, even coat is better for texture and flavor balance. Also, avoid using apples that are too large. Medium to large apples are easier to handle and eat.
Variations & Adaptations
This recipe is highly adaptable. You can tweak it to fit different dietary needs or flavor preferences.
- Dairy-Free Option: Use dairy-free caramel sauce and dairy-free chocolate chips. Swap the cheese for a vegan alternative or omit it entirely. The nuts and fruit remain the same.
- Gluten-Free Option: Skip the pretzels and use crushed gluten-free cookies or extra nuts. Ensure your caramel sauce is certified gluten-free, as some brands use thickeners with gluten.
- Lower Sugar Option: Use sugar-free caramel sauce and dark chocolate chips with 70% cocoa or higher. The tartness of the Granny Smith apples helps balance the reduced sugar.
- Flavor Twist: Try dipping the apples in white chocolate instead of caramel. Sprinkle with crushed peppermint candy for a winter vibe, or cinnamon sugar for a classic twist.
- Savory Balance: Add slices of prosciutto-wrapped melon or spicy jalapeño slices to the board to cut through the sweetness. I tried adding a few spicy nuts once, and it was a huge hit.
You can also change the fruit. Pears work similarly to apples but are softer, so handle them gently. Grapes can be skewered and dipped, though they require a different approach.
Serving & Storage Suggestions
This board is best served at room temperature. Cold caramel can be too hard, and room temp allows the flavors to meld. Present it on a wooden board for a rustic look or a marble slab for elegance.
For storage, keep the board covered in the fridge if you need to prep ahead. However, the apples should be dipped no more than 2 hours before serving to maintain crunch. If you have leftovers, store the dipped apples in an airtight container in the fridge for up to 2 days. They will soften slightly, so let them come to room temp before eating.
Complementary beverages include sparkling cider, warm apple cider, or a crisp white wine. For a non-alcoholic option, try a refreshing champagne punch or a sparkling sangria.
Flavors develop over time, so if you make it the night before, the caramel may meld with the apple juices slightly, creating a more intense flavor. It’s still delicious, just different.
Nutritional Information & Benefits
This board offers a mix of nutrients. Apples provide fiber and vitamin C. Nuts offer healthy fats and protein. Cheese adds calcium and protein. However, the caramel and chocolate chips add sugar and saturated fat.
Each apple provides about 95 calories, plus the toppings. A typical serving of one apple with toppings might range from 250-350 calories depending on the amount of caramel and nuts used.
For dietary considerations, this board can be made gluten-free and dairy-free. It is not low-carb due to the fruit and caramel, but it can be modified for lower sugar intake.
From a wellness perspective, this is a great way to include fruit in a dessert setting. It feels indulgent but includes whole foods. It’s a balanced approach to sweet treats.
Conclusion
This crispy caramel apple charcuterie board is worth trying because it combines ease with elegance. It’s a recipe that lets you enjoy the flavors of fall without the hassle of baking. It’s perfect for sharing, customizing, and enjoying with friends.
I love this recipe because it brings people together. It’s interactive. It’s fun. And it always disappears fast.
Try it out and customize it to your taste. Add your favorite nuts, swap the chocolate, or change the fruit. Let me know how it turns out in the comments below. Share your photos or tag me if you post them online.
Enjoy the process, and don’t forget to save the extra caramel for dipping strawberries next time.
Frequently Asked Questions
Can I make this board ahead of time?
You can prep the apples and toppings ahead, but it’s best to dip and assemble the board within 2 hours of serving to keep the apples crisp and the caramel fresh.
What type of apples work best?
Fuji and Granny Smith apples are the best choices. They are firm, crisp, and hold up well to caramel. Avoid soft apples like Red Delicious or McIntosh.
How do I store leftover caramel apples?
Store them in an airtight container in the refrigerator for up to 2 days. Let them come to room temperature before eating for the best texture.
Can I use homemade caramel sauce?
Yes, homemade caramel works great. Just make sure it is cooled slightly but still pourable. It may take longer to set than store-bought versions.
What drinks pair well with this board?
Sparkling cider, warm apple cider, crisp white wines like Pinot Grigio, or a light red wine like Pinot Noir pair beautifully with the sweet and salty flavors.
Pin This Recipe!
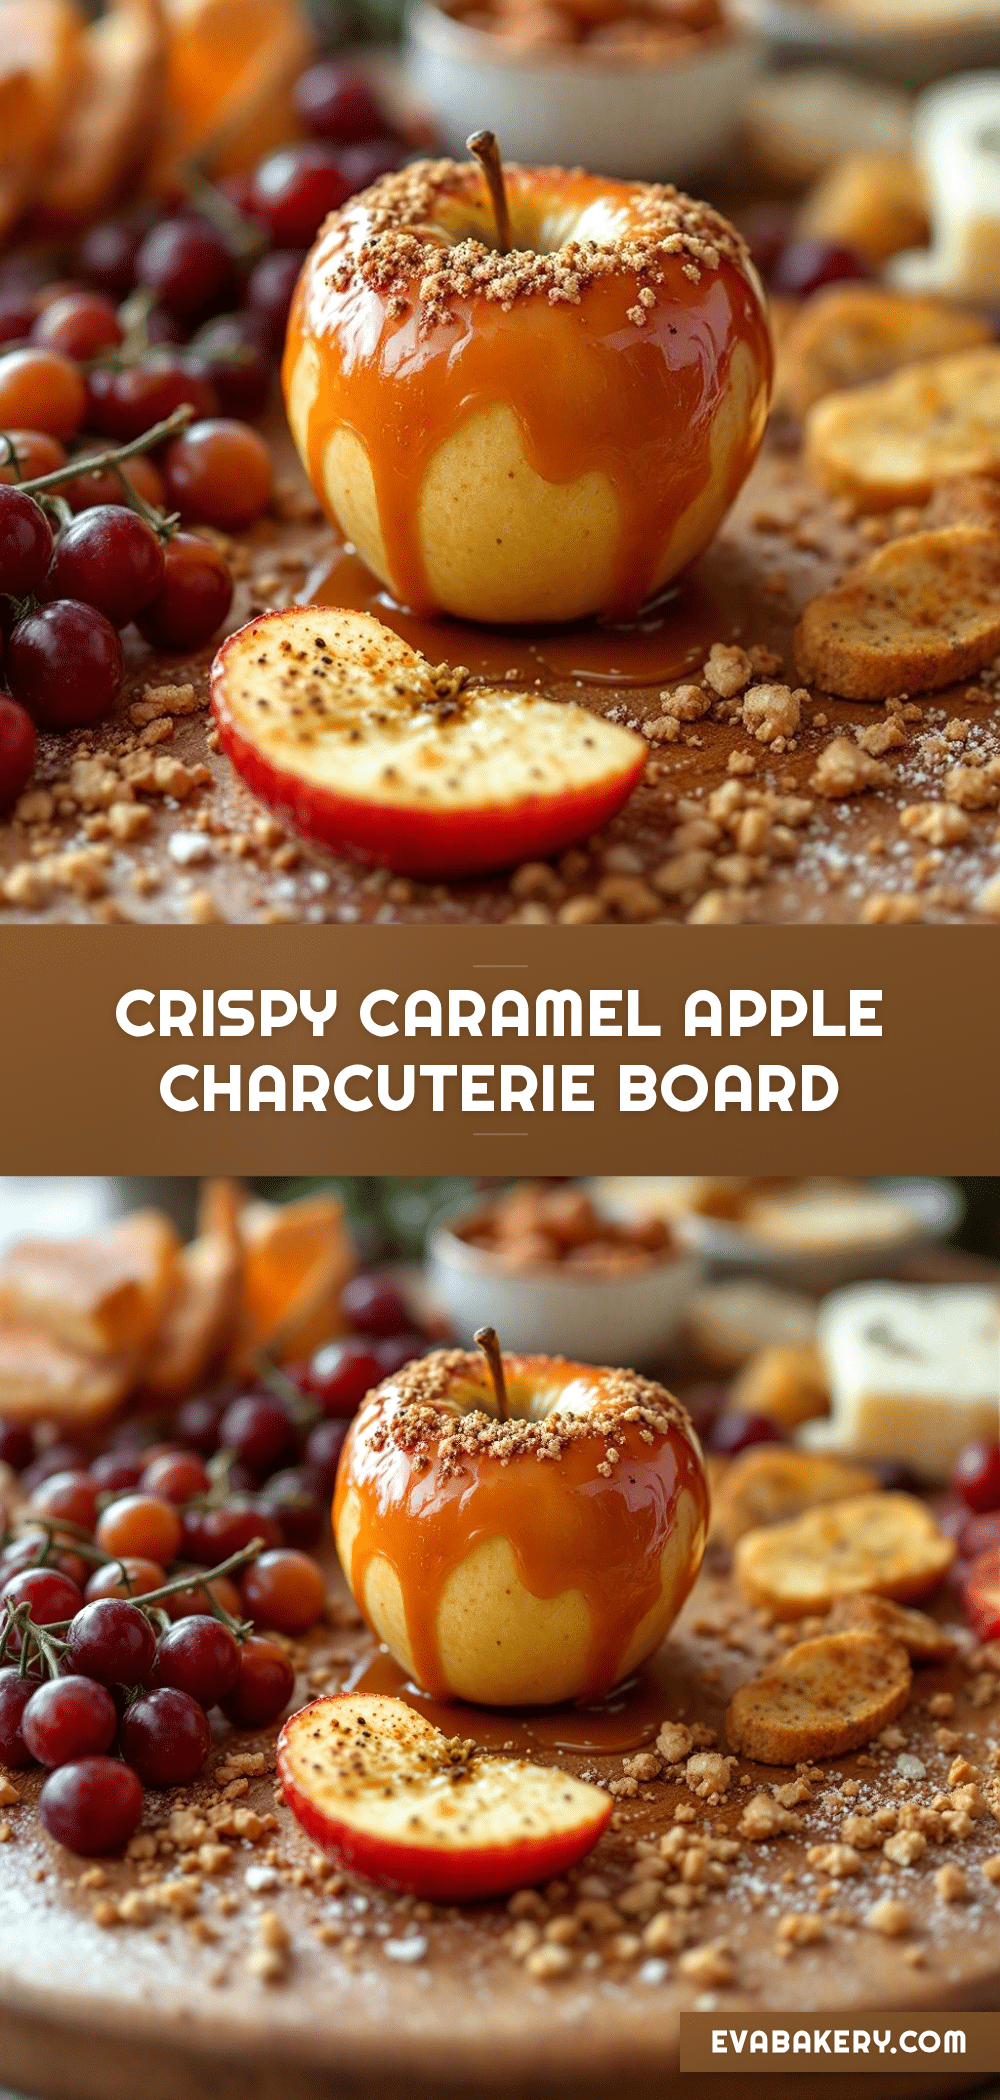
Crispy Caramel Apple Charcuterie Board

A light, crisp, and undeniably sweet autumn dessert board featuring fresh apples dipped in a quick-set caramel glaze and topped with crunchy nuts, chocolate, and pretzels. It offers the nostalgia of caramel apples without the mess, perfect for grazing at parties.
- Prep Time: 20 minutes
- Cook Time: 0 minutes
- Total Time: 20 minutes
- Yield: 6 servings 1x
- Category: Dessert
- Cuisine: American
Ingredients
- 4 large Fuji apples
- 2 large Granny Smith apples
- 1 tablespoon lemon juice
- 1 cup caramel sauce
- 2 tablespoons heavy cream (optional)
- ½ cup mini chocolate chips (semi-sweet or milk)
- ½ cup crushed pretzels
- ½ cup chopped toasted pecans
- Pinch of sea salt flakes
- ¼ cup white chocolate chips
- Assorted nuts (almonds, walnuts, cashews)
- Dried fruits (cranberries or apricots)
- 1 cup Brie or Cheddar cheese cubes
- Water crackers or graham crackers
Instructions
- Line a large baking sheet with parchment paper and place small bowls of toppings (nuts, chocolate chips, pretzels) in a row near your dipping area.
- Pour caramel sauce into a deep, narrow bowl. If cold, microwave for 15-20 seconds to make it pourable. Stir in heavy cream if using.
- Wash apples thoroughly and dry them completely with a towel. Trim stems slightly if needed, but leave them intact for handling.
- Hold an apple by the stem and dip it into the caramel, swirling to coat about two-thirds of the apple. Let excess drip off.
- While the caramel is still wet, immediately roll the dipped part of the apple in your chosen topping or sprinkle toppings over the top.
- Place the coated apple on the parchment-lined baking sheet.
- Let the apples sit at room temperature for about 15 minutes to set the caramel.
- Arrange the caramel apples on a large serving board. Place cheese cubes, crackers, and dried fruits around the apples.
- Fill empty spaces with loose nuts and extra chocolate chips. Sprinkle a tiny bit of sea salt over the apples.
- Serve immediately for best texture.
Notes
Ensure apples are completely dry before dipping to prevent caramel from sliding off. Work in batches to ensure toppings stick properly. The board is best served within 2 hours of assembly. Leftovers can be stored in an airtight container in the fridge for up to 2 days.
Nutrition
- Serving Size: 1 apple with topping
- Calories: 300
- Sugar: 30
- Sodium: 150
- Fat: 15
- Saturated Fat: 6
- Carbohydrates: 40
- Fiber: 4
- Protein: 4
Keywords: caramel apple, charcuterie board, fall dessert, autumn party food, easy dessert, no bake, gluten-free option, dairy-free option