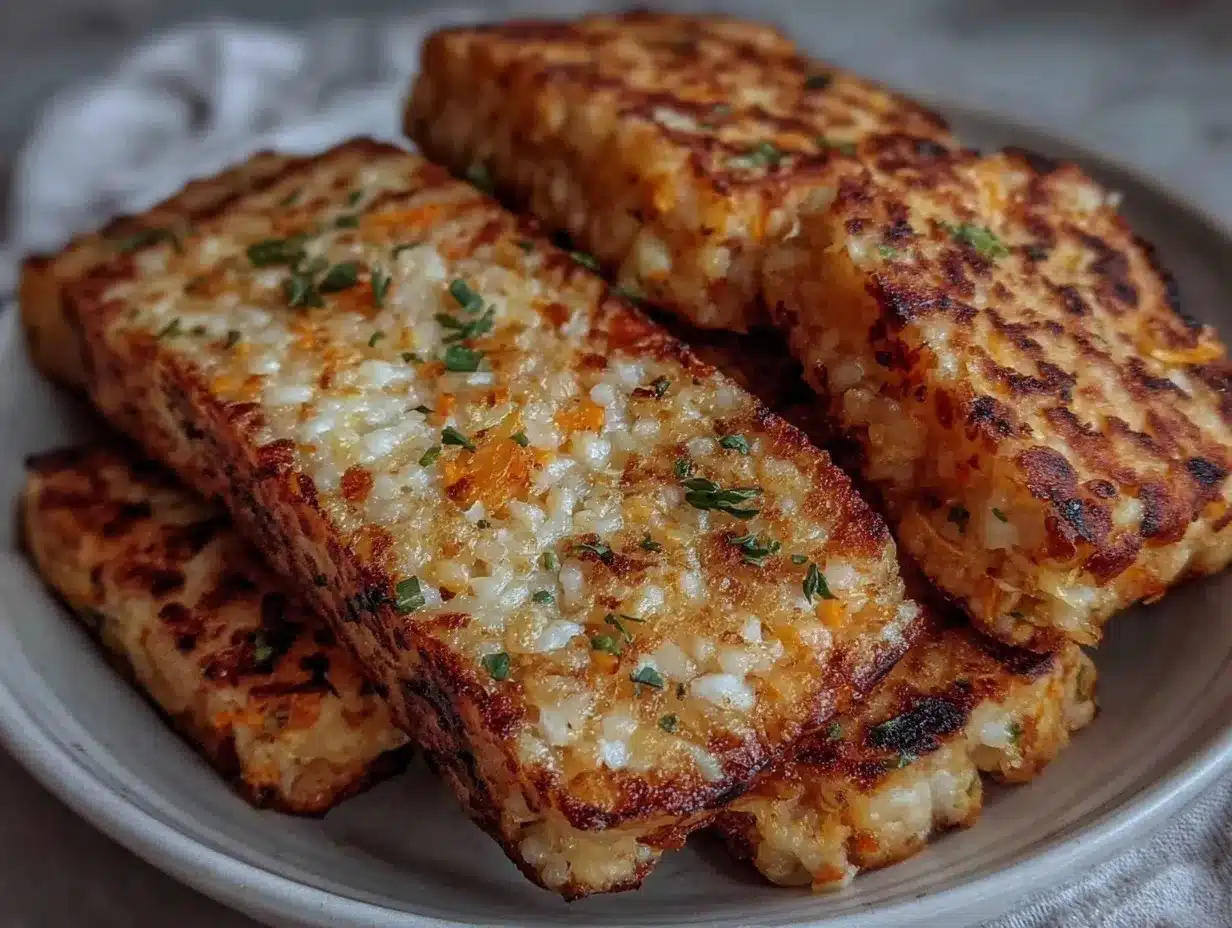
Let me tell you, the scent of sizzling turnip cake wafting from my skillet is enough to make anyone’s mouth water. The golden crust crackles under your fork, giving way to a soft, savory interior bursting with umami. The first time I made this crispy turnip cake, I was instantly hooked—the kind of moment where you pause, take a deep breath, and just smile because you know you’re onto something truly special. It reminds me of rainy weekends spent in my grandma’s kitchen when I was knee-high to a grasshopper, watching her expertly flip these little savory squares with such care and love.
Back then, turnip cake was a mysterious dim sum delight I only got to taste at special family gatherings. Now, years later, I’m so glad I stumbled upon this easy homemade turnip cake recipe for beginners, which brings those nostalgic flavors right into my own kitchen. My family couldn’t stop sneaking them off the cooling rack (and I can’t really blame them). Honestly, this recipe is dangerously easy and offers pure, nostalgic comfort, perfect for brightening up your Pinterest cookie board or impressing guests at your next potluck.
After testing this recipe multiple times (in the name of research, of course), it has become a staple for family gatherings and gifting. If you’re looking for a crispy turnip cake recipe with a tender, flavorful interior that feels like a warm hug, you’re going to want to bookmark this one.
Why You’ll Love This Recipe
This crispy turnip cake recipe has been tried, tested, and family-approved more times than I can count. Whether you’re a dim sum devotee or a newbie to turnip cake, here’s why this recipe stands out:
- Quick & Easy: Comes together in under 90 minutes, perfect for busy weeknights or last-minute cravings.
- Simple Ingredients: No fancy grocery trips needed; you likely already have most items in your pantry or fridge.
- Perfect for Any Occasion: Great for brunch, potlucks, cozy dinners, or even as a snack with tea.
- Crowd-Pleaser: Always gets rave reviews from kids and adults alike—trust me, they’ll ask for seconds.
- Unbelievably Delicious: The contrast of the crispy exterior and tender, flavorful interior is next-level comfort food.
What makes this recipe different? It’s all about the technique—grating the turnip just right, gently folding in savory bits like dried shrimp and Chinese sausage, and pan-frying with a splash of oil for that perfect crunch. Plus, I add a touch of white pepper and a hint of oyster sauce that balances everything beautifully. This isn’t just another turnip cake; it’s your best homemade version that’s authentically tasty but beginner-friendly.
This recipe isn’t just good—it’s the kind that makes you close your eyes after the first bite. It’s comfort food that feels like a warm kitchen hug, without the fuss. If you want to impress guests without stress or treat yourself to something truly satisfying, this homemade turnip cake recipe is your new go-to.
What Ingredients You Will Need
This recipe uses simple, wholesome ingredients to deliver bold flavor and satisfying texture without the fuss. Most are pantry staples or easy to find at your local Asian market. Here’s what you’ll need:
- Chinese White Radish (Daikon): About 1.5 pounds (700g), peeled and grated. This is the star ingredient that gives the cake its tender body.
- Rice Flour: 1 cup (130g). I recommend using a fine, high-quality rice flour like Bob’s Red Mill for the best texture.
- Tapioca Starch: 2 tablespoons (16g), adds chewiness to the cake’s interior.
- Water: 2 cups (480ml), to mix with the flours and grated radish.
- Chinese Sausage (Lap Cheong): 2 links, finely diced. Adds a sweet, savory punch.
- Dried Shrimps: 2 tablespoons, soaked and chopped. Optional but highly recommended for authentic flavor.
- Shallots: 2 medium, finely minced. Gives a subtle sweetness and aroma.
- Garlic: 2 cloves, minced.
- Oyster Sauce: 1 tablespoon, for depth of flavor.
- Soy Sauce: 1 teaspoon, to season.
- White Pepper: 1/2 teaspoon, freshly ground if possible.
- Vegetable Oil: For frying the cake slices.
- Scallions: 2 stalks, thinly sliced for garnish (optional).
If you want a gluten-free option, just double-check your oyster sauce and soy sauce labels or use tamari. For a vegetarian twist, swap the dried shrimp and Chinese sausage for shiitake mushrooms. In summer, sometimes I swap the daikon for shredded zucchini for a lighter take—though it won’t be quite the same, it’s still tasty!
Equipment Needed
- Large Mixing Bowl: For combining your grated radish with the flours and seasonings.
- Grater or Food Processor: To grate the daikon finely. I prefer a box grater for better texture, but a food processor works if you’re in a hurry.
- Steaming Setup: A large steamer basket or bamboo steamer with a lid. If you don’t have one, a metal colander over a pot with a lid works just fine.
- Loaf Pan or Round Cake Pan: To steam the batter evenly. I use an 8×4-inch (20×10 cm) loaf pan for easy slicing.
- Non-Stick Skillet or Cast Iron Pan: For pan-frying the turnip cake slices crisp. Cast iron gives the best golden crust, but non-stick is fine too.
- Spatula or Fish Turner: To flip the cakes gently without breaking.
Budget-friendly tip: If you don’t have a steamer, a large pot with a lid and a heatproof plate on a rack works wonders. Keeping your tools clean and dry is key, especially your skillet, as any moisture can prevent that perfect crispy crust.
Preparation Method
- Prepare the radish: Peel and grate the daikon using the large holes of a box grater or pulse in a food processor. Transfer the grated radish to a fine mesh sieve or cheesecloth and squeeze out excess liquid into a bowl. Reserve the liquid as it contains flavor and starch; let it settle for 10 minutes to separate the starch at the bottom.
- Mix the batter: Carefully pour off the clear liquid on top, leaving the starch sediment at the bottom (you’ll want about 2 tablespoons). In a large bowl, combine rice flour and tapioca starch. Add the reserved radish starch, grated radish, and 2 cups (480ml) water. Stir to form a smooth batter.
- Cook the aromatics: Heat a small pan over medium heat with a teaspoon of vegetable oil. Sauté minced shallots, garlic, diced Chinese sausage, and soaked dried shrimp until fragrant and lightly browned (about 3–4 minutes). Let cool slightly.
- Combine all: Fold the cooked aromatics into the radish batter along with oyster sauce, soy sauce, and white pepper. Mix well to distribute flavors.
- Steam the cake: Lightly grease your loaf pan. Pour the batter in and smooth the surface. Place the pan in a steamer over boiling water, cover, and steam for 45–50 minutes or until the cake is firm and a toothpick inserted comes out clean.
- Cool and set: Remove the cake from the steamer and let it cool completely at room temperature, then refrigerate for at least 2 hours or overnight to fully set. This step is key for easy slicing.
- Slice and fry: Cut the chilled cake into 1/2-inch (1.3 cm) thick slices. Heat 2 tablespoons vegetable oil in a skillet over medium-high heat. Fry the slices until golden and crispy on both sides, about 3–4 minutes per side. Avoid overcrowding the pan to keep the crust crisp.
- Serve: Garnish with sliced scallions, serve hot with chili sauce or soy dip.
Tip: If your batter seems too runny, add a little more rice flour. If too thick, stir in a splash of water. The texture before steaming should be pourable but thick enough to hold shape.
Cooking Tips & Techniques
Getting that crispy turnip cake just right takes a bit of practice, but here are some pro tips I learned the hard way:
- Don’t skip squeezing the radish: Too much liquid makes the cake soggy. Letting the starch settle and adding it back improves the texture dramatically.
- Use a heavy pan for frying: Cast iron or stainless steel with a thick base helps maintain even heat and creates the best crust.
- Patience when frying: Resist the urge to flip too soon. Wait until the edges look golden and the slice releases easily from the pan.
- Keep the cake chilled: Cold slices fry up crispier and hold together better.
- Multitask while steaming: Use this time to prep dipping sauces or chop garnishes—turnip cake waits for no one!
Once, I fried the slices straight from steaming without chilling—and let’s just say it fell apart spectacularly. Lesson learned: cooling is essential. Also, a little extra oil in the pan is a good thing here; it helps get that irresistible crunch.
Variations & Adaptations
Want to mix things up? Here are some fun ways to customize your crispy turnip cake:
- Vegetarian Version: Omit dried shrimp and Chinese sausage, add finely chopped shiitake mushrooms and firm tofu for umami and texture.
- Spicy Kick: Add a teaspoon of chili flakes or chopped fresh chili to the batter for a subtle heat that wakes up the flavors.
- Gluten-Free: Confirm your oyster and soy sauces are gluten-free, or swap with tamari and gluten-free oyster sauce alternatives.
- Seasonal Twist: In fall, try adding diced cooked chestnuts or water chestnuts for a crunchy surprise inside.
- Cooking Method: Instead of pan-frying, you can bake slices at 400°F (200°C) for 15 minutes per side for a less oily version, though it won’t be quite as crispy.
Personally, I once made a version with smoked tofu and a splash of sesame oil that was a hit with my vegan friends. It’s a great base recipe to experiment with!
Serving & Storage Suggestions
Serve your crispy turnip cake slices hot, straight from the pan, with a side of soy sauce mixed with a little chili oil or fresh sliced chili. It pairs wonderfully with jasmine tea or a light lager if you’re in a casual mood.
Leftovers? No worries! Store them in an airtight container in the refrigerator for up to 3 days. To reheat, pan-fry them again for a couple of minutes on each side or use a toaster oven to bring back the crispness. Avoid microwaving unless you don’t mind losing that crunch.
Flavors actually deepen the next day, so if you plan ahead, slice and refrigerate the cake and fry fresh when serving for the best texture and taste.
Nutritional Information & Benefits
This crispy turnip cake recipe offers a modest calorie count per serving (around 150-180 calories per slice, depending on size and oil used). The key ingredient, daikon radish, is low in calories and high in vitamin C and fiber, which aids digestion. The use of rice flour keeps it gluten-free, and the protein from dried shrimp and Chinese sausage adds a nice balance.
For those watching sodium intake, opt for low-sodium soy sauce and limit oyster sauce. This recipe is a great option for a gluten-free diet and can be adjusted for vegetarian or vegan needs easily. I love how this recipe combines simple ingredients into a comforting dish that’s both satisfying and nourishing.
Conclusion
If you’re after a crispy turnip cake recipe that’s easy enough for beginners but full of authentic flavor, this one’s got you covered. From the golden, crunchy exterior to the tender, savory inside, it brings a little taste of dim sum delight right into your kitchen. Feel free to tweak the ingredients to suit your taste or dietary needs—that’s the beauty of homemade cooking.
Honestly, this recipe holds a special place in my heart, reminding me of family, comfort, and those cozy kitchen moments. Give it a try, and I bet it’ll become a favorite in your home too. Don’t forget to share your tweaks or questions in the comments—I love hearing how you make this recipe your own!
Happy cooking, and here’s to many crispy, flavorful bites ahead!
FAQs About Crispy Turnip Cake
How do I know when the turnip cake is fully cooked?
Insert a toothpick into the center after steaming; it should come out clean with no wet batter. The cake will also be firm to the touch and pull slightly away from the pan edges.
Can I freeze turnip cake before frying?
Yes! After steaming and cooling, slice the cake and freeze in a single layer on a tray. Once frozen, transfer to a freezer bag. Fry slices directly from frozen, adding a minute or two to cooking time.
What’s the best way to grate daikon for this recipe?
A box grater with medium-to-large holes works best for a nice texture. Avoid grating too finely or using a processor blade that makes it mushy.
Can I make this recipe vegan?
Absolutely! Omit dried shrimp and Chinese sausage, and replace oyster sauce with a vegan mushroom-based sauce or soy sauce. Add mushrooms or tofu for extra flavor.
Why is my turnip cake soggy or falling apart?
Most likely too much liquid or not enough starch. Make sure to squeeze out excess moisture from the grated radish and add the reserved radish starch back into the batter. Also, chilling the cake before slicing helps it hold together better.
Pin This Recipe!
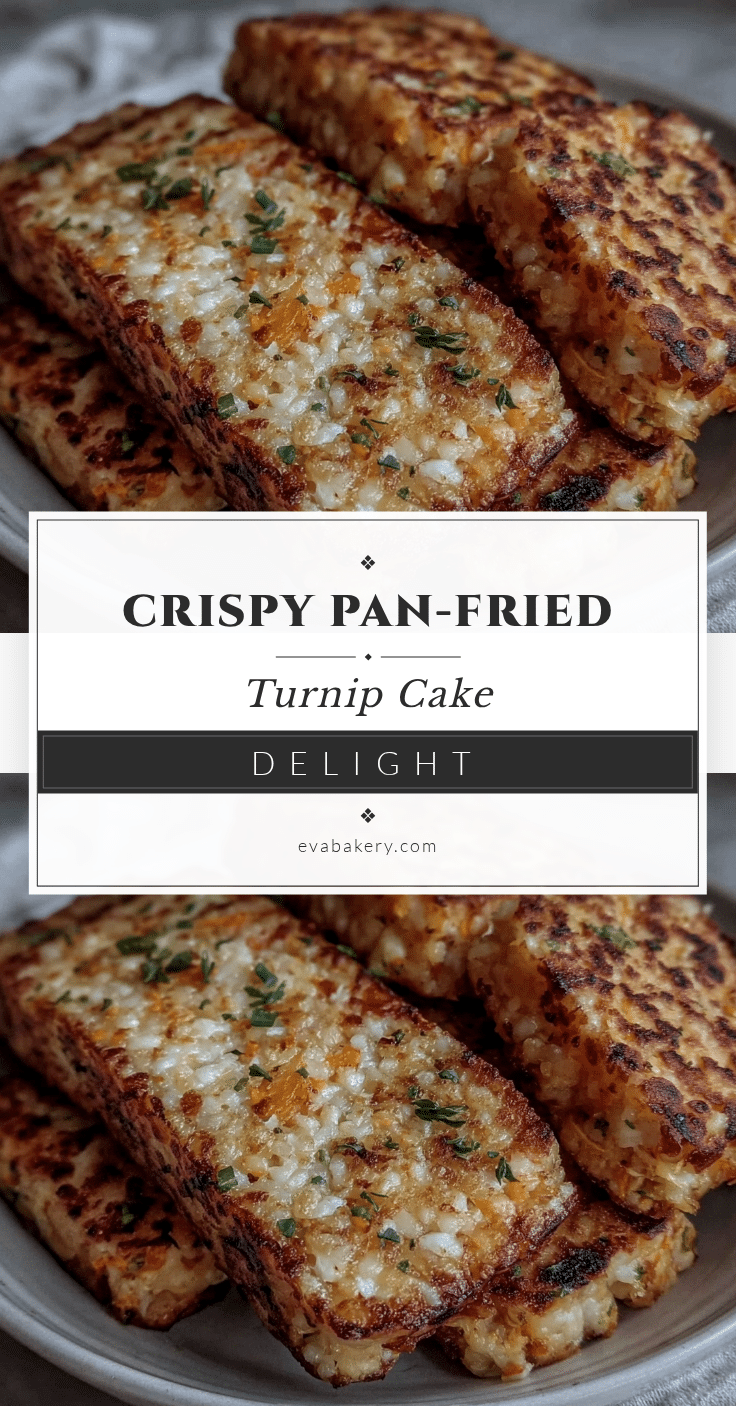
Crispy Turnip Cake Recipe Easy Homemade Turnip Cake for Beginners

A nostalgic and easy homemade turnip cake recipe featuring a crispy golden crust and tender, savory interior. Perfect for beginners and great for family gatherings or potlucks.
- Prep Time: 20 minutes
- Cook Time: 50 minutes steaming + 10 minutes frying
- Total Time: 1 hour 20 minutes
- Yield: 8 servings 1x
- Category: Main Course
- Cuisine: Chinese
Ingredients
- 1.5 pounds (700g) Chinese White Radish (Daikon), peeled and grated
- 1 cup (130g) rice flour
- 2 tablespoons (16g) tapioca starch
- 2 cups (480ml) water
- 2 links Chinese sausage (Lap Cheong), finely diced
- 2 tablespoons dried shrimps, soaked and chopped (optional)
- 2 medium shallots, finely minced
- 2 cloves garlic, minced
- 1 tablespoon oyster sauce
- 1 teaspoon soy sauce
- 1/2 teaspoon white pepper, freshly ground
- Vegetable oil, for frying
- 2 stalks scallions, thinly sliced for garnish (optional)
Instructions
- Peel and grate the daikon using a box grater or food processor. Transfer grated radish to a fine mesh sieve or cheesecloth and squeeze out excess liquid into a bowl. Let the liquid settle for 10 minutes to separate the starch.
- Carefully pour off the clear liquid on top, leaving about 2 tablespoons of starch sediment at the bottom.
- In a large mixing bowl, combine rice flour and tapioca starch. Add the reserved radish starch, grated radish, and 2 cups water. Stir to form a smooth batter.
- Heat a small pan over medium heat with a teaspoon of vegetable oil. Sauté minced shallots, garlic, diced Chinese sausage, and soaked dried shrimp until fragrant and lightly browned, about 3–4 minutes. Let cool slightly.
- Fold the cooked aromatics into the radish batter along with oyster sauce, soy sauce, and white pepper. Mix well.
- Lightly grease an 8×4-inch loaf pan. Pour the batter in and smooth the surface.
- Place the pan in a steamer over boiling water, cover, and steam for 45–50 minutes or until firm and a toothpick inserted comes out clean.
- Remove the cake from the steamer and let cool completely at room temperature, then refrigerate for at least 2 hours or overnight to fully set.
- Cut the chilled cake into 1/2-inch thick slices.
- Heat 2 tablespoons vegetable oil in a skillet over medium-high heat. Fry the slices until golden and crispy on both sides, about 3–4 minutes per side. Avoid overcrowding the pan.
- Garnish with sliced scallions and serve hot with chili sauce or soy dip.
Notes
Squeeze excess liquid from grated radish to avoid soggy cake. Chill the steamed cake before slicing and frying for best texture. Use a heavy pan like cast iron for a crispier crust. Adjust batter consistency with rice flour or water as needed. For gluten-free, use tamari and gluten-free oyster sauce. Vegetarian version can replace dried shrimp and sausage with shiitake mushrooms and tofu.
Nutrition
- Serving Size: 1 slice (about 1/2 i
- Calories: 150180
- Sugar: 2
- Sodium: 350
- Fat: 6
- Saturated Fat: 1.5
- Carbohydrates: 22
- Fiber: 2
- Protein: 4
Keywords: turnip cake, daikon cake, dim sum, crispy turnip cake, homemade turnip cake, Chinese sausage, dried shrimp, easy turnip cake recipe


