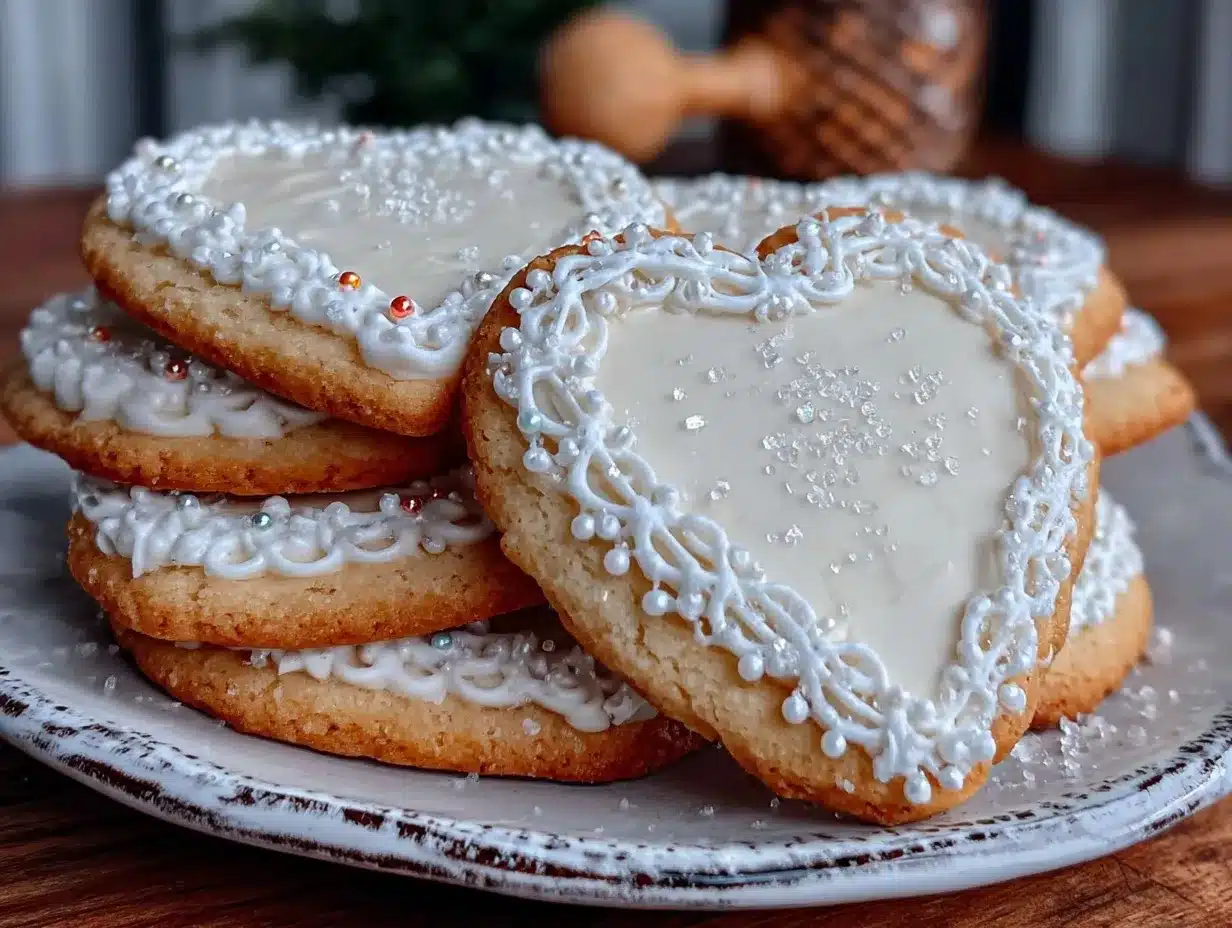
Let me tell you, the scent of vanilla and butter wafting from my oven while baking these Perfect Sweetheart Sugar Cookies is enough to make anyone’s mouth water. The first time I baked these charming treats, I was instantly hooked—the kind of moment where you pause, take a deep breath, and just smile because you know you’re onto something truly special. Years ago, when I was knee-high to a grasshopper, my grandma used to hand me a plate of sugar cookies decorated with royal icing, and honestly, nothing compares to that nostalgic comfort.
I stumbled upon this recipe on a rainy weekend, trying to recreate those sweet memories, and wow, what a game-changer. My family couldn’t stop sneaking them off the cooling rack (and I can’t really blame them). These Perfect Sweetheart Sugar Cookies with Elegant Royal Icing have become a staple for family gatherings and gift-giving. You know what? They’re dangerously easy to make and offer pure, nostalgic comfort wrapped in a pretty bow.
Perfect for Valentine’s Day, baby showers, or simply brightening up your Pinterest cookie board, these cookies deliver that sweet, buttery crunch with a smooth, glossy icing finish. After testing this recipe multiple times (in the name of research, of course), I can confidently say you’re going to want to bookmark this one.
Why You’ll Love This Recipe
Honestly, this isn’t just any sugar cookie recipe. It’s been tried, tested, and family-approved, crafted to bring out the best of both cookie and icing worlds. Here’s why you’ll want to keep this recipe handy:
- Quick & Easy: Comes together in under 30 minutes, perfect for busy weeknights or last-minute celebrations.
- Simple Ingredients: No fancy trips to specialty stores; likely everything’s already sitting in your pantry.
- Perfect for Special Occasions: Ideal for Valentine’s Day, birthday parties, or those sweet little moments that call for a heartfelt treat.
- Crowd-Pleaser: Kids and adults alike rave about the tender crumb and the elegant look that impresses right away.
- Unbelievably Delicious: The buttery sweetness combined with that melt-in-your-mouth royal icing makes every bite feel like a little celebration.
What sets this recipe apart? The secret lies in the buttery cookie base that holds its shape perfectly for detailed decorating, plus the royal icing that dries smooth and snaps just right. Whether you’re piping delicate borders or flooding the cookies with color, these cookies handle it all like a pro. It’s comfort food with a creative twist—simple yet sophisticated, fast yet satisfying.
After all, this recipe isn’t just good—it’s the kind where you close your eyes after the first bite and smile. It’s a sweet treat that makes you feel like you put in way more effort than you actually did. If you’re looking to impress guests without the stress or just want to treat yourself to something pretty and tasty, this Perfect Sweetheart Sugar Cookies recipe has got your back.
What Ingredients You Will Need
This recipe uses simple, wholesome ingredients to deliver bold flavor and satisfying texture without the fuss. Most of these are pantry staples, and the royal icing ingredients are easy to find or already on hand if you’ve done any baking before.
- For the Sugar Cookies:
- All-purpose flour (2 ¾ cups / 345 g) – provides the perfect structure
- Baking powder (1 teaspoon) – helps the cookies rise just enough
- Salt (½ teaspoon) – balances sweetness
- Unsalted butter (1 cup / 227 g), softened – adds richness and tenderness (I prefer using Kerrygold for that creamy texture)
- Granulated sugar (1 ½ cups / 300 g) – for that classic sweet bite
- Large eggs (2), room temperature – binds everything together
- Pure vanilla extract (1 teaspoon) – the soul of the cookie
- For the Royal Icing:
- Powdered sugar (4 cups / 480 g), sifted – for smooth, lump-free icing
- Pasteurized egg whites (3 tablespoons) or meringue powder (2 tablespoons) with water – creates that perfect stiff but pipeable texture
- Fresh lemon juice (1 teaspoon) or clear vanilla extract – for flavor and slight tang
- Food coloring gels – use your favorite brands like AmeriColor for vibrant hues
- Water (as needed) – to adjust consistency
If you’re gluten-free, try swapping the all-purpose flour for a 1-to-1 gluten-free baking blend. For a dairy-free version, coconut oil can replace the butter, but note that the texture will be a bit different. And if you want to keep things simple, store-bought royal icing mix works fine, but homemade definitely wins on flavor and texture.
Equipment Needed
- Mixing bowls – medium and large sizes for batter and icing
- Electric hand mixer or stand mixer – makes creaming butter and mixing icing a breeze
- Measuring cups and spoons – accuracy is key for perfect cookies
- Rolling pin – essential for evenly rolling out dough (I like one with adjustable rings for thickness)
- Heart-shaped cookie cutters – various sizes for cute, uniform cookies
- Baking sheets lined with parchment paper or silicone mats – prevents sticking and aids even baking
- Cooling racks – to let cookies cool completely before decorating
- Piping bags and tips – small round tips (sizes #1 or #2) for outlining and flooding, or disposable bags with a tiny snip at the end
- Spatula or bench scraper – helps lift cookies without breaking
If you don’t have a stand mixer, a sturdy hand mixer works just fine. For budget-friendly piping bags, reusable silicone ones are a great option and easy to clean. Keeping your tools well-maintained, especially your rolling pin and piping tips, really makes a difference in the final cookie’s look.
Preparation Method
- Mix the Dry Ingredients: In a bowl, whisk together 2 ¾ cups (345 g) all-purpose flour, 1 teaspoon baking powder, and ½ teaspoon salt. Set aside.
- Cream Butter and Sugar: Using a mixer, beat 1 cup (227 g) softened unsalted butter and 1 ½ cups (300 g) granulated sugar on medium speed until light and fluffy, about 3-5 minutes. This step is key for tender cookies with that melt-in-your-mouth texture.
- Add Eggs and Vanilla: Beat in 2 large eggs, one at a time, then mix in 1 teaspoon pure vanilla extract until combined. Your batter should look creamy and smooth.
- Combine Wet and Dry: Gradually add the flour mixture to the wet ingredients, mixing on low speed. Stop when just combined — overmixing can make cookies tough.
- Chill the Dough: Shape dough into two disks, wrap in plastic wrap, and chill for at least 1 hour or overnight. This step helps the dough firm up, making rolling and cutting much easier.
- Preheat Oven and Prepare Baking Sheets: Preheat oven to 350°F (175°C). Line baking sheets with parchment paper or silicone mats.
- Roll Out and Cut: Lightly flour your work surface and rolling pin. Roll dough to about ¼ inch (6 mm) thickness. Use heart-shaped cookie cutters to cut shapes and transfer gently to baking sheets.
- Bake: Bake for 8-10 minutes, until edges just start to turn golden. The cookies will still be soft but will firm up as they cool. Don’t overbake! (I learned this the hard way—crispy edges are a no-go here.)
- Cool Completely: Transfer cookies to cooling racks. Make sure they’re fully cooled before decorating, or the icing might melt.
- Prepare Royal Icing: In a bowl, beat 4 cups (480 g) powdered sugar with 3 tablespoons pasteurized egg whites or 2 tablespoons meringue powder plus water, and 1 teaspoon lemon juice until stiff peaks form. Adjust consistency with water: thicker for outlines, thinner for flooding.
- Decorate: Use piping bags with small round tips for outlining the cookie edges, then flood the cookie interiors with thinner icing. Let each layer dry for about 15 minutes before adding details or colors.
- Let Icing Set: Allow decorated cookies to dry at room temperature for several hours or overnight. This helps the icing harden perfectly for that elegant look.
Tip: If your dough feels sticky, chill it a bit longer. When piping, keep a damp cloth over the icing to prevent drying out while you work. And if you mess up, no worries—just scrape off the icing gently and try again.
Cooking Tips & Techniques
Here are some tips I’ve picked up over the years to make your Perfect Sweetheart Sugar Cookies really shine:
- Don’t Skip Chilling: Chilling the dough is non-negotiable. It makes rolling easier and prevents cookies from spreading too much in the oven.
- Use Room Temperature Ingredients: Butter and eggs mix better when they’re not cold, giving you smoother dough and fluffier cookies.
- Measure Flour Correctly: Spoon and level your flour instead of scooping directly from the bag—too much flour leads to dry cookies.
- Practice Royal Icing Consistency: I’ve found that thicker icing is perfect for outlines, while a thinner “flooding” consistency fills the inside smoothly. Add water a teaspoon at a time to avoid over-thinning.
- Use Parchment or Silicone Mats: This prevents sticking and helps cookies bake evenly.
- Don’t Overbake: Cookies will look soft when you pull them out but firm up as they cool. Overbaking leads to crunchier cookies, which isn’t the goal here.
- Multitask Smartly: While cookies cool, prep your icing so you’re ready to decorate right away. This keeps the workflow smooth and icing fresh.
Believe me, my first tries were messy. I learned that patience and practice with royal icing make all the difference. Keep a damp towel over your icing bowls to prevent drying and don’t be afraid to experiment with piping techniques to find what feels comfortable for you.
Variations & Adaptations
This recipe is quite versatile, so feel free to tweak it to suit your needs or occasion:
- Dietary Adjustments: Swap all-purpose flour with almond or coconut flour for gluten-free options, but reduce quantity slightly as these flours behave differently. Use dairy-free butter alternatives and egg substitutes like flax eggs to make it vegan-friendly.
- Flavor Twists: Add citrus zest like lemon or orange to the cookie dough for a bright, fresh flavor. Cinnamon or almond extract also pairs beautifully with the vanilla base.
- Seasonal Themes: Change the shape cutter for holidays—pumpkins for fall, snowflakes for winter. You can also swap the royal icing colors accordingly.
- Alternative Icing: If royal icing feels intimidating, try a simple glaze with powdered sugar and milk for a quicker, softer finish.
- Personal Favorite Variation: I once added a thin layer of raspberry jam between two cookies before icing for a surprise fruity center—total crowd-pleaser!
Serving & Storage Suggestions
These Perfect Sweetheart Sugar Cookies are best served at room temperature, allowing the buttery flavor to shine through. For a pretty presentation, arrange them on a decorative platter or tie a few in a clear bag with a ribbon for gifting.
They pair wonderfully with a hot cup of tea, coffee, or even a glass of cold milk for the kids. If you want to create a cookie platter, add a few fresh berries or edible flowers for a touch of elegance.
Store cookies in an airtight container at room temperature for up to 5 days. If you need longer storage, freeze them without icing for up to 3 months. To freeze after decorating, make sure the royal icing is fully hardened, then separate layers with parchment paper to avoid sticking.
When reheating, avoid microwaves as they can soften the icing too much. Instead, let frozen cookies thaw at room temperature overnight. The flavors actually mellow and develop beautifully after a day or two stored.
Nutritional Information & Benefits
Each cookie (approximate 3-inch heart) contains around 150-180 calories, depending on icing thickness. The main ingredients—unsalted butter, sugar, and flour—offer energy but are best enjoyed in moderation.
Vanilla extract adds natural flavor without calories, while egg whites in the royal icing provide protein and help reduce fat content compared to buttercream. This recipe is gluten-friendly if you swap the flour accordingly, but contains eggs and dairy.
From a wellness perspective, making these cookies at home means you control the ingredients—no preservatives or artificial additives. Plus, the joy of baking and sharing these cookies adds a little boost of happiness, which is always good for the soul!
Conclusion
So, why should you try these Perfect Sweetheart Sugar Cookies with Elegant Royal Icing? Because they bring together the best of buttery, tender cookies and that glossy, dreamy icing that looks as good as it tastes. You can customize colors, flavors, and shapes to fit any occasion or mood.
I love this recipe because it reminds me of cozy family moments and gives me a chance to get creative with decorating, even on busy days. Plus, it’s hard to beat the smiles they bring to my loved ones’ faces.
Give it a go, share your cookie creations, and don’t hesitate to tweak it to your heart’s content. I’d love to hear your decorating tips or favorite flavor twists in the comments below. Happy baking, and remember—it’s all about fun and sharing a little sweetness!
FAQs
Can I make the cookie dough ahead of time?
Absolutely! The dough can be wrapped tightly and refrigerated for up to 3 days or frozen for up to 3 months. Just thaw before rolling out.
How do I fix royal icing that’s too runny?
Add powdered sugar a tablespoon at a time until it thickens to your desired consistency. If it’s too thick, add a few drops of water carefully.
Can I use powdered egg whites instead of fresh?
Yes, powdered meringue mix is a safe and convenient alternative that works well for royal icing.
Why did my cookies spread too much?
Most likely the dough was too warm or not chilled enough. Make sure to chill the dough well and avoid overworking it.
How long does royal icing take to dry?
It usually takes a few hours to dry to the touch, but for best results, let decorated cookies rest overnight at room temperature.
Pin This Recipe!
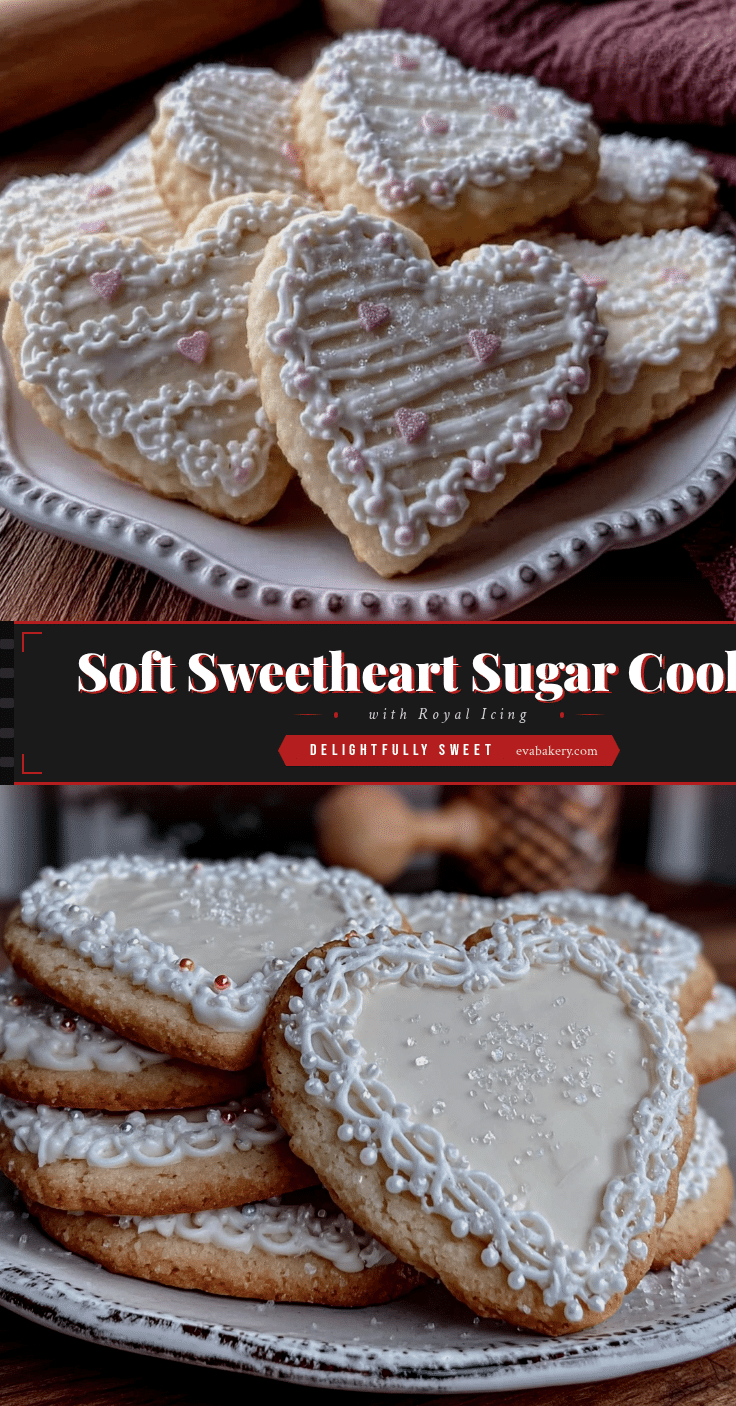
Perfect Sweetheart Sugar Cookies with 5 Easy Royal Icing Tips for Elegant Decorating

These Perfect Sweetheart Sugar Cookies offer a sweet, buttery crunch with a smooth, glossy royal icing finish, perfect for special occasions like Valentine’s Day or baby showers. The recipe is quick, easy, and family-approved, delivering tender cookies ideal for detailed decorating.
- Prep Time: 20 minutes
- Cook Time: 10 minutes
- Total Time: 1 hour 30 minutes
- Yield: 24 cookies 1x
- Category: Dessert
- Cuisine: American
Ingredients
- 2 ¾ cups (345 g) all-purpose flour
- 1 teaspoon baking powder
- ½ teaspoon salt
- 1 cup (227 g) unsalted butter, softened
- 1 ½ cups (300 g) granulated sugar
- 2 large eggs, room temperature
- 1 teaspoon pure vanilla extract
- 4 cups (480 g) powdered sugar, sifted
- 3 tablespoons pasteurized egg whites or 2 tablespoons meringue powder with water
- 1 teaspoon fresh lemon juice or clear vanilla extract
- Food coloring gels (optional)
- Water (as needed)
Instructions
- Mix the Dry Ingredients: In a bowl, whisk together 2 ¾ cups (345 g) all-purpose flour, 1 teaspoon baking powder, and ½ teaspoon salt. Set aside.
- Cream Butter and Sugar: Using a mixer, beat 1 cup (227 g) softened unsalted butter and 1 ½ cups (300 g) granulated sugar on medium speed until light and fluffy, about 3-5 minutes.
- Add Eggs and Vanilla: Beat in 2 large eggs, one at a time, then mix in 1 teaspoon pure vanilla extract until combined.
- Combine Wet and Dry: Gradually add the flour mixture to the wet ingredients, mixing on low speed until just combined.
- Chill the Dough: Shape dough into two disks, wrap in plastic wrap, and chill for at least 1 hour or overnight.
- Preheat Oven and Prepare Baking Sheets: Preheat oven to 350°F (175°C). Line baking sheets with parchment paper or silicone mats.
- Roll Out and Cut: Lightly flour your work surface and rolling pin. Roll dough to about ¼ inch (6 mm) thickness. Use heart-shaped cookie cutters to cut shapes and transfer gently to baking sheets.
- Bake: Bake for 8-10 minutes, until edges just start to turn golden. Remove and let cool slightly on baking sheets.
- Cool Completely: Transfer cookies to cooling racks and let cool completely before decorating.
- Prepare Royal Icing: In a bowl, beat 4 cups (480 g) powdered sugar with 3 tablespoons pasteurized egg whites or 2 tablespoons meringue powder plus water, and 1 teaspoon lemon juice until stiff peaks form. Adjust consistency with water as needed.
- Decorate: Use piping bags with small round tips for outlining cookie edges, then flood interiors with thinner icing. Let each layer dry about 15 minutes before adding details or colors.
- Let Icing Set: Allow decorated cookies to dry at room temperature for several hours or overnight for best results.
Notes
Chill dough for at least 1 hour or overnight to prevent spreading and make rolling easier. Use room temperature butter and eggs for best texture. Practice royal icing consistency by adjusting water gradually. Let decorated cookies dry overnight for a perfect finish. Store cookies in an airtight container at room temperature for up to 5 days or freeze uniced dough for up to 3 months.
Nutrition
- Serving Size: 1 cookie (approx. 3-
- Calories: 165
- Sugar: 16
- Sodium: 90
- Fat: 7
- Saturated Fat: 4.5
- Carbohydrates: 25
- Fiber: 0.5
- Protein: 2
Keywords: sugar cookies, royal icing, Valentine's Day cookies, decorated cookies, easy sugar cookies, buttery cookies, cookie decorating


