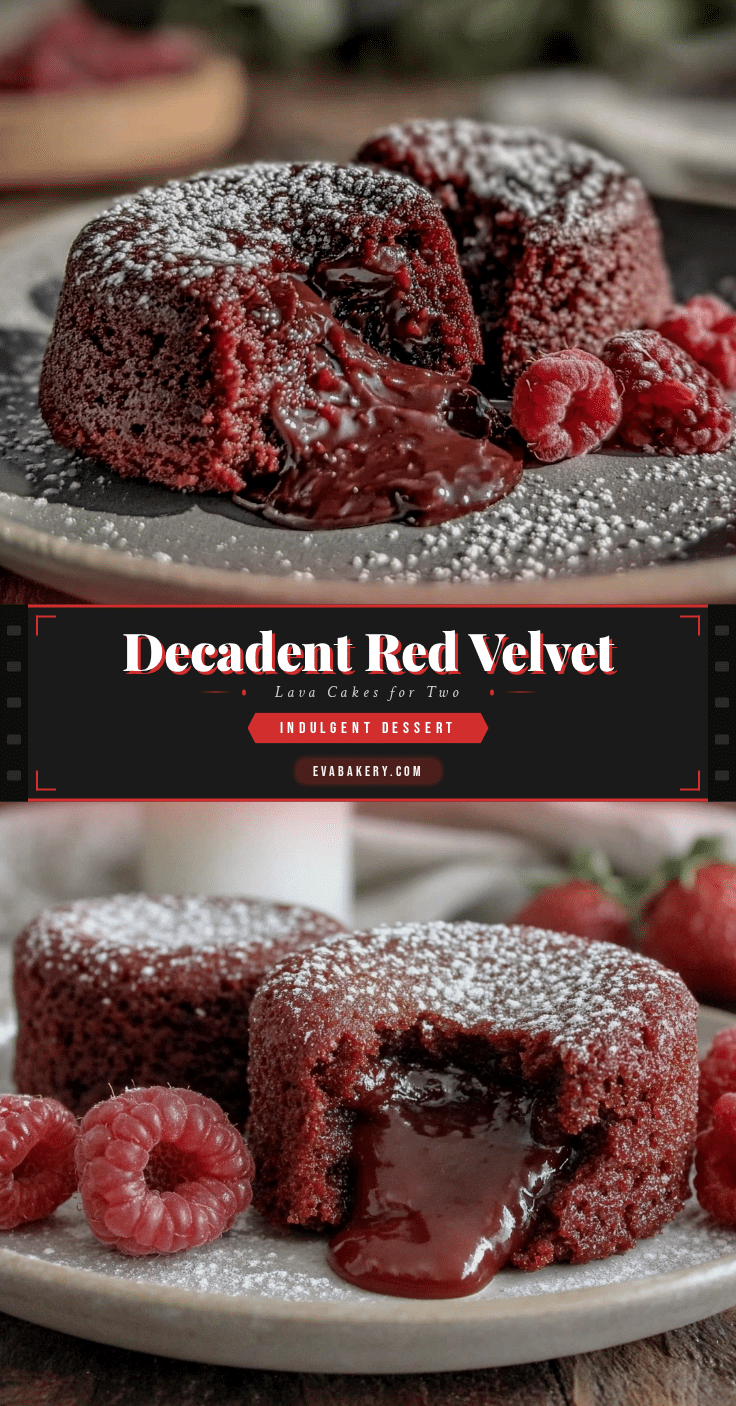
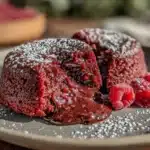
Let me tell you, the sight of molten red velvet lava oozing out of a warm cake is enough to make anyone stop in their tracks. The moment I pulled these decadent red velvet lava cakes from the oven, the rich aroma of cocoa and vanilla mingled with a subtle hint of tangy cream cheese—it was like a little love letter to my taste buds. The first time I baked these delightful treats for two, I was instantly hooked. It was one of those rare moments where you pause, take a deep breath, and just smile because you know you’re onto something truly special.
Years ago, when I was knee-high to a grasshopper, my grandma used to make chocolate lava cakes for family dinners, but I never imagined that a red velvet twist could bring that same nostalgic comfort with a fresh new vibe. Honestly, I wish I had discovered this recipe way sooner! My family couldn’t stop sneaking these cakes off the cooling rack (and I can’t really blame them). This recipe is dangerously easy and delivers pure, nostalgic comfort — perfect for a cozy date night or a sweet treat that feels like a warm hug on a chilly evening.
You know what? These decadent red velvet lava cakes for two aren’t just your average dessert; they’re a little slice of indulgence that’s perfect for potlucks, special occasions, or simply brightening up your Pinterest cookie board. I’ve tested this recipe multiple times (in the name of research, of course), and it has become a staple for family gatherings, gifting, and those moments when you want to impress without the fuss. You’re going to want to bookmark this one.
Why You’ll Love This Recipe
Having made these decadent red velvet lava cakes several times, I can vouch this recipe checks all the boxes. It’s not just indulgent—it’s thoughtfully crafted to deliver maximum flavor with minimal effort. Here’s why it stands out:
- Quick & Easy: Ready in under 30 minutes, perfect for busy weeknights or last-minute dessert cravings.
- Simple Ingredients: You probably have everything in your pantry—no fancy shopping needed.
- Perfect for Romance or Solo Treats: Designed for two, making it ideal for date nights or a personal indulgence.
- Crowd-Pleaser: Rich, silky, and gooey—kids, adults, and even picky eaters give rave reviews.
- Unbelievably Delicious: The cream cheese center adds a tangy surprise that perfectly balances the sweet red velvet cake.
This isn’t just another lava cake recipe. The clever use of cream cheese filling combined with the classic red velvet cocoa flavor makes it irresistibly unique. Plus, the batter’s texture is feather-light but rich, thanks to a gentle folding technique I picked up from a pastry chef friend. After the very first bite, you’ll understand why this recipe feels like comfort food with a little extra soul—without the guilt of hours spent in the kitchen. Whether you want to impress guests without the stress or just treat yourself, these cakes deliver on all fronts.
What Ingredients You Will Need
This recipe uses simple, wholesome ingredients to deliver bold flavor and a satisfyingly gooey texture without any complicated steps. Most are pantry staples, and substitutions are easy if needed.
For the Red Velvet Batter:
- All-purpose flour – ½ cup (60g), sifted for a light texture
- Unsweetened cocoa powder – 2 tablespoons (preferably Dutch-processed for smooth flavor)
- Granulated sugar – ½ cup (100g)
- Unsalted butter – 4 tablespoons (57g), melted and slightly cooled (I recommend KerryGold for richness)
- Large egg – 1, room temperature (helps with batter consistency)
- Buttermilk – 3 tablespoons (45ml), or use plain yogurt thinned with a teaspoon of lemon juice
- Vanilla extract – ½ teaspoon (pure vanilla extract makes a difference)
- Red food coloring – 1 tablespoon (gel-based for vibrant color without thinning the batter)
- Baking powder – ¼ teaspoon
- Salt – a pinch, to balance sweetness
For the Cream Cheese Lava Filling:

- Cream cheese – 4 tablespoons (60g), softened (Philadelphia brand is my go-to)
- Powdered sugar – 2 tablespoons (to sweeten the filling gently)
- Vanilla extract – ¼ teaspoon
Ingredient Notes: If you want to try a dairy-free option, swap butter for coconut oil and use dairy-free cream cheese. For gluten-free, almond flour can replace all-purpose flour, but the texture will be slightly different (still delicious!). Freshly sifted cocoa powder ensures no lumps, making the batter silky smooth.
Equipment Needed
- Two 6-ounce ramekins (or small oven-safe bowls) – Perfect for individual servings and easy cleanup. You can find budget-friendly ceramic options at most kitchen stores.
- Mixing bowls – One for wet ingredients, one for dry.
- Whisk and spatula – A whisk for combining ingredients smoothly and a rubber spatula for folding the batter without deflating.
- Measuring cups and spoons – Precise measurements make a huge difference in lava cakes.
- Oven mitts – Safety first! These cakes come out piping hot.
- Baking sheet – To place ramekins on for easy handling.
If you don’t have ramekins, small oven-safe coffee mugs work as an alternative, but be sure they’re heatproof. Personally, I like using ceramic ramekins because they retain heat evenly, leading to that perfect molten center. Pro tip: lightly butter and dust ramekins with cocoa or flour to help the cake release effortlessly.
Preparation Method
- Preheat your oven to 425°F (220°C). Position a rack in the center. Lightly butter and dust two 6-ounce ramekins with cocoa powder, tapping out the excess. This helps the cakes release easily after baking. (Approx. 10 minutes)
- Prepare the cream cheese filling: In a small bowl, combine 4 tablespoons softened cream cheese, 2 tablespoons powdered sugar, and ¼ teaspoon vanilla extract. Mix until smooth and creamy. Refrigerate while preparing the batter to keep it firm. (5 minutes)
- Mix dry ingredients: In a medium bowl, sift together ½ cup all-purpose flour, 2 tablespoons cocoa powder, ¼ teaspoon baking powder, and a pinch of salt. Set aside. (3 minutes)
- Combine wet ingredients: In another bowl, whisk ½ cup granulated sugar and 4 tablespoons melted butter until smooth. Add 1 large egg and whisk thoroughly until slightly fluffy, about 1 minute. Stir in 3 tablespoons buttermilk, ½ teaspoon vanilla extract, and 1 tablespoon red food coloring until uniformly red. (5 minutes)
- Fold dry into wet: Gently fold the dry ingredients into the wet mixture using a spatula. Do this carefully to keep the batter light—overmixing will toughen the cake. The batter should be smooth, thick, and velvety. (2–3 minutes)
- Fill the ramekins: Spoon a tablespoon of batter into each ramekin, followed by a heaping tablespoon of the cream cheese filling in the center. Cover with the remaining batter, making sure the filling is well enclosed. The ramekins should be about ¾ full. (5 minutes)
- Bake: Place the ramekins on a baking sheet and bake for 12–14 minutes. The edges should be set, but the center will look slightly jiggly—this is key for that molten lava effect. (Keep an eye from 11 minutes onward to avoid overbaking.)
- Rest and serve: Let the cakes cool for 3 minutes. Run a knife around the edges and invert each ramekin onto a dessert plate. The cake should slide out easily, revealing the luscious cream cheese lava center. Serve immediately with a dusting of powdered sugar or a scoop of vanilla ice cream if you like. (3 minutes)
Pro tip: If your cakes aren’t releasing easily, pop them in the oven for an extra 30 seconds, or run your knife around the edges again gently.
Cooking Tips & Techniques
Making decadent red velvet lava cakes for two isn’t rocket science, but a few tricks really make the difference between “meh” and “wow.”
- Don’t overmix the batter: Folding ingredients gently ensures a tender crumb and keeps the cake from turning dense. I learned this after a few failed batches that turned out too heavy.
- Watch the baking time carefully: Lava cakes go from molten to dry in a blink. Start checking at 11 minutes, especially if your oven tends to run hot.
- Chill the cream cheese filling: This step helps the filling stay intact and gooey rather than melting away into the batter.
- Prep ramekins well: Butter and dust with cocoa powder instead of flour to avoid white residue on your cakes and support that rich color.
- Multitasking tip: While the cakes bake, clean up your prep area or set the table—those few minutes go fast, and it makes serving easier.
Honestly, the first time I tried these, I didn’t chill the filling and ended up with a cakey center—lesson learned! Now, with these tips, I get that perfect molten flow every time.
Variations & Adaptations
Ready to switch things up? Here are some tasty ways to customize your decadent red velvet lava cakes for two:
- Dietary swap: Use almond flour and dairy-free butter for a gluten-free, dairy-free treat. Coconut cream cheese works well for the filling.
- Seasonal twist: Stir in fresh raspberries or chopped strawberries into the batter for a fruity surprise that complements the red velvet flavor beautifully.
- Flavor boost: Add a pinch of cinnamon or espresso powder to the batter for a deeper, more complex flavor profile.
- Different filling: Swap the cream cheese filling for Nutella or peanut butter for a rich, nutty center. I tried this once, and it was dangerously good!
- Microwave shortcut: If you’re in a rush, you can microwave the batter and filling in a mug for 45–60 seconds, but watch carefully to avoid overcooking.
Feel free to experiment with what you have on hand—this recipe’s forgiving nature means it adapts well to your kitchen creativity.
Serving & Storage Suggestions
These decadent red velvet lava cakes for two are best served warm, right out of the ramekins. The molten center is the star, and it’s most luscious when it’s still gooey and hot. I like to dust them lightly with powdered sugar or top with a scoop of vanilla bean ice cream or whipped cream for that extra indulgence.
Pair with a cup of strong coffee or a glass of cold milk for a comforting combo. If you’re sharing, grab a few fresh berries or mint leaves for garnish—they add a pop of color and a fresh contrast to the rich cake.
Leftovers? While these cakes are best fresh, you can store them covered in the refrigerator for up to 2 days. To reheat, pop them in a 300°F (150°C) oven for about 5–7 minutes or microwave on medium power for 20–30 seconds. Just be careful not to overheat, or you’ll lose that molten texture.
Fun fact: letting the cakes sit a bit after baking allows flavors to meld, making the cream cheese center even more luscious and balanced.
Nutritional Information & Benefits
Each decadent red velvet lava cake serving (one ramekin) roughly contains:
| Calories | Approx. 350 kcal |
|---|---|
| Fat | 22g (mostly from butter and cream cheese) |
| Carbohydrates | 35g |
| Protein | 5g |
| Sugar | 25g |
Key health notes: The recipe includes antioxidants from cocoa powder and a moderate protein boost from eggs and cream cheese. Using buttermilk adds a slight tang and richness without excess fat. For those watching carbs, almond flour substitution lowers carb content while keeping texture delightful.
Keep in mind, this dessert is definitely an indulgence, but a small portion packs a lot of satisfaction, making it easier to enjoy without overdoing it. Sharing with someone special helps, too!
Conclusion
Honestly, these decadent red velvet lava cakes for two are a game changer. They bring that perfect balance of rich, gooey, and tender all in one small, shareable package. Whether you’re looking to impress a special someone, treat yourself after a long day, or just crave a dangerously easy homemade dessert, this recipe delivers the goods every single time.
Feel free to tweak the ingredients or try the variations I shared—this recipe is like a blank canvas for your sweet tooth. I love how it brings warmth and joy with minimal effort, and I think you will too. If you try it, don’t forget to leave a comment or share your favorite twist—you know I love hearing from you!
Now go ahead, get baking, and enjoy every molten, luscious bite.
FAQs
Can I make these red velvet lava cakes ahead of time?
You can prepare the batter and filling up to a day ahead and keep them refrigerated. Bake right before serving for best molten results.
What if I don’t have buttermilk?
No worries! Just mix 3 tablespoons of milk with 1 teaspoon of lemon juice or vinegar, let it sit 5 minutes, and use that as a buttermilk substitute.
How do I know when the cakes are done?
The edges should look set and firm, but the center will still jiggle slightly when you gently shake the ramekin. This means the lava center is ready.
Can I double the recipe for more servings?
Definitely! Just double all ingredients and use more ramekins. Keep an eye on baking time, as it may vary slightly with more ramekins in the oven.
Is it okay to use natural cocoa powder instead of Dutch-process?
You can, but natural cocoa powder is more acidic and might affect the red velvet’s color and flavor subtly. Dutch-process gives that smooth, rich taste that pairs beautifully with the cream cheese filling.
Pin This Recipe!
Decadent Red Velvet Lava Cakes for Two
These decadent red velvet lava cakes feature a rich cocoa and cream cheese molten center, perfect for a cozy date night or a personal indulgence. Ready in under 30 minutes with simple pantry ingredients, they deliver a luscious, gooey dessert experience.
- Prep Time: 15 minutes
- Cook Time: 14 minutes
- Total Time: 29 minutes
- Yield: 2 servings 1x
- Category: Dessert
- Cuisine: American
Ingredients
- ½ cup (60g) all-purpose flour, sifted
- 2 tablespoons unsweetened cocoa powder (preferably Dutch-processed)
- ½ cup (100g) granulated sugar
- 4 tablespoons (57g) unsalted butter, melted and slightly cooled
- 1 large egg, room temperature
- 3 tablespoons (45ml) buttermilk (or plain yogurt thinned with 1 teaspoon lemon juice)
- ½ teaspoon vanilla extract
- 1 tablespoon red food coloring (gel-based)
- ¼ teaspoon baking powder
- Pinch of salt
- 4 tablespoons (60g) cream cheese, softened
- 2 tablespoons powdered sugar
- ¼ teaspoon vanilla extract (for filling)
Instructions
- Preheat oven to 425°F (220°C). Position rack in the center. Lightly butter and dust two 6-ounce ramekins with cocoa powder, tapping out excess.
- Prepare cream cheese filling: In a small bowl, combine softened cream cheese, powdered sugar, and vanilla extract. Mix until smooth and creamy. Refrigerate while preparing batter.
- In a medium bowl, sift together flour, cocoa powder, baking powder, and salt. Set aside.
- In another bowl, whisk granulated sugar and melted butter until smooth. Add egg and whisk until slightly fluffy, about 1 minute. Stir in buttermilk, vanilla extract, and red food coloring until uniform.
- Gently fold dry ingredients into wet mixture using a spatula, being careful not to overmix. Batter should be smooth, thick, and velvety.
- Spoon a tablespoon of batter into each ramekin, add a heaping tablespoon of cream cheese filling in the center, then cover with remaining batter until ramekins are about ¾ full.
- Place ramekins on a baking sheet and bake for 12–14 minutes. Edges should be set but center slightly jiggly.
- Let cakes cool for 3 minutes. Run a knife around edges and invert each ramekin onto a dessert plate. Serve immediately with powdered sugar or vanilla ice cream if desired.
Notes
Do not overmix the batter to keep the cake tender. Watch baking time carefully to maintain a molten center. Chill the cream cheese filling to keep it intact. Butter and dust ramekins with cocoa powder for easy release. If cakes don’t release easily, warm in oven for 30 seconds or run knife around edges again.
Nutrition
- Serving Size: 1 ramekin (1 lava ca
- Calories: 350
- Sugar: 25
- Fat: 22
- Carbohydrates: 35
- Protein: 5
Keywords: red velvet lava cake, molten cake, cream cheese filling, easy dessert, date night dessert, homemade lava cake


