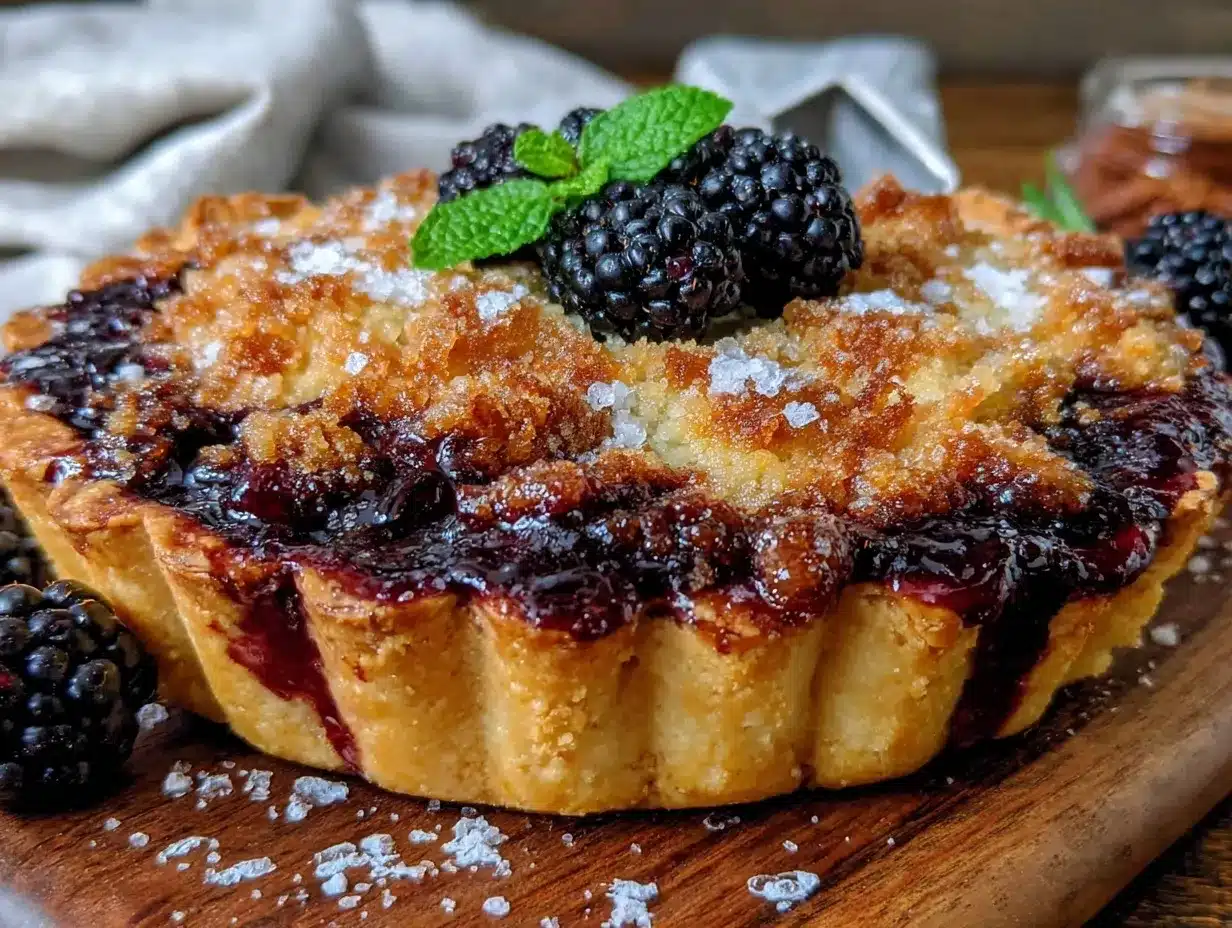
Let me tell you, the scent of fresh mulberries mingling with sweet cinnamon and buttery crumbs wafting from my oven is enough to make anyone’s mouth water. That first time I baked this crispy mulberry pie with irresistible crumb topping, I was instantly hooked. It was one of those rare moments where you pause, take a deep breath, and just smile because you know you’re onto something truly special. The kind of pie that feels like a warm hug on a lazy Sunday afternoon.
Years ago, when I was knee-high to a grasshopper, my grandma used to make fruit pies that could stop time. I never thought I’d recreate that magic until a rainy weekend nudged me to experiment with mulberries—those sweet-tart jewels bursting with summer sunshine. Honestly, this pie quickly became a staple for family gatherings and cozy evenings. My family couldn’t stop sneaking slices off the cooling rack (and I can’t really blame them!).
You know what makes this crispy mulberry pie recipe stand out? It’s dangerously easy, combines pure nostalgic comfort, and brightens up your Pinterest cookie board with its golden crumb topping. Perfect for potlucks, a sweet treat for your kids, or just a way to savor the season’s best berries. After testing this recipe multiple times—in the name of research, of course—it became my go-to dessert that always impresses without the fuss. Trust me, you’re going to want to bookmark this one.
Why You’ll Love This Recipe
Honestly, this crispy mulberry pie with irresistible crumb topping hits all the right notes. Here’s why it’s become a favorite in my kitchen:
- Quick & Easy: Comes together in under an hour, perfect for busy weeknights or last-minute dessert cravings.
- Simple Ingredients: No fancy grocery trips needed; you likely already have everything in your pantry and fridge.
- Perfect for Any Occasion: Whether it’s a casual family dinner or a festive potluck, this pie shines.
- Crowd-Pleaser: Kids adore the sweet-tart filling, and adults can’t get enough of that crunchy crumb topping.
- Unbelievably Delicious: The combo of the crisp crust, juicy mulberries, and buttery crumb is next-level comfort food.
What sets this mulberry pie apart? It’s the crumb topping—made with a mix of brown sugar, flour, and cold butter—that bakes up crispy and golden, adding texture that’s impossible to resist. Plus, the mulberries’ natural tartness balances the sweet crunch perfectly. This isn’t just another fruit pie; it’s the best version you’ll find, tested over and over to get that perfect harmony of flavors and textures.
This pie isn’t just good—it’s the kind that makes you close your eyes after the first bite and savor the moment. A little slice of comfort food that feels both nostalgic and fresh. Whether you’re impressing guests or just treating yourself, this recipe delivers every time.
What Ingredients You Will Need
This recipe uses simple, wholesome ingredients to deliver bold flavor and satisfying texture without the fuss. Most of these are pantry staples, and the star—fresh mulberries—adds that seasonal magic you’ll want to savor.
- For the Pie Crust:
- All-purpose flour – 2 ½ cups (312g), plus extra for dusting
- Unsalted butter, cold and cubed – 1 cup (226g) (I recommend Kerrygold for richness)
- Granulated sugar – 2 tablespoons
- Salt – ½ teaspoon
- Ice water – 6 to 8 tablespoons (chilled)
- For the Mulberry Filling:
- Fresh mulberries – 4 cups (about 600g), rinsed and drained
- Granulated sugar – ¾ cup (150g)
- All-purpose flour – 3 tablespoons (used as a thickener)
- Fresh lemon juice – 2 tablespoons (balances the tartness)
- Ground cinnamon – ½ teaspoon
- Vanilla extract – 1 teaspoon
- For the Irresistible Crumb Topping:
- All-purpose flour – 1 cup (125g)
- Brown sugar, packed – ½ cup (110g)
- Unsalted butter, cold and cubed – ½ cup (113g)
- Ground cinnamon – ¼ teaspoon
- Pinch of salt
If you can’t find fresh mulberries, frozen ones work too—just thaw and drain well to avoid soggy pie. Looking for a gluten-free option? Swap the all-purpose flour in the crust and topping with a 1:1 gluten-free flour blend. For dairy-free butter, coconut oil chilled until firm is a decent substitute, though the crumb may be slightly less crisp.
Equipment Needed
- 9-inch (23cm) pie dish (glass or ceramic works best for even baking)
- Mixing bowls (various sizes for crust, filling, and topping)
- Pastry blender or fork (for cutting butter into flour; a food processor works too)
- Measuring cups and spoons (accuracy matters here!)
- Rolling pin (a silicone one is easy to clean and non-stick)
- Whisk and wooden spoon (for mixing filling)
- Baking sheet (to catch spills under the pie dish)
- Cooling rack (to let the pie rest and crisp up)
If you don’t have a pastry blender, two forks can do the job, or you can pulse butter and flour in a food processor for a faster crumbly texture. For budget-friendly options, glass pie dishes heat evenly and are easier to spot golden crusts compared to metal pans. Keep your rolling pin and mixing bowls chilled for best crust results—trust me on this one!
Preparation Method
- Prepare the Pie Crust: In a large bowl, whisk together 2 ½ cups all-purpose flour, 2 tablespoons sugar, and ½ teaspoon salt. Add the cold cubed butter. Using a pastry blender or fork, cut butter into the flour until the mixture resembles coarse crumbs with pea-sized pieces. Slowly add ice water, 1 tablespoon at a time, mixing gently until dough just starts to come together. Don’t overwork it! Divide dough in half, shape into disks, wrap in plastic wrap, and chill for at least 1 hour.
- Make the Mulberry Filling: In a medium bowl, combine 4 cups fresh mulberries, ¾ cup sugar, 3 tablespoons flour, 2 tablespoons lemon juice, ½ teaspoon cinnamon, and 1 teaspoon vanilla extract. Gently toss to coat berries evenly. Set aside to let flavors meld while you roll out the crust.
- Roll Out the Bottom Crust: On a lightly floured surface, roll one dough disk into a 12-inch (30cm) circle. Carefully transfer to your 9-inch pie dish, gently pressing it to fit. Trim any excess dough, leaving a 1-inch overhang. Pop it back in the fridge to chill while you prepare the topping.
- Prepare the Crumb Topping: In a bowl, mix 1 cup flour, ½ cup packed brown sugar, ¼ teaspoon cinnamon, and a pinch of salt. Add cold cubed butter and use your fingers or a pastry blender to mix until the texture resembles coarse crumbs.
- Assemble the Pie: Pour the mulberry filling into the chilled pie crust, spreading evenly. Sprinkle the crumb topping generously over the berries, covering the surface completely.
- Bake the Pie: Place the pie on a baking sheet to catch drips. Bake in a preheated 375°F (190°C) oven for 45 to 55 minutes, or until the topping is golden brown and the filling is bubbling. If the topping browns too quickly, tent the pie loosely with foil halfway through baking.
- Cool and Serve: Let the pie cool on a wire rack for at least 2 hours before slicing. This resting time helps the filling set so you get clean slices. Serve warm or at room temperature, maybe with a scoop of vanilla ice cream if you’re feeling decadent.
Pro tip: If your pie filling seems too runny, sprinkle an extra tablespoon of flour or a teaspoon of cornstarch next time. And keep an eye on your crumb topping—those butter chunks can brown quickly, so don’t wander too far from the oven!
Cooking Tips & Techniques
Getting that crispy mulberry pie with irresistible crumb topping just right takes a little know-how. A few tips I’ve picked up over countless bakes:
- Keep Ingredients Cold: Cold butter and chilled dough are your best friends. They create flaky crust and crumb texture by keeping the fat from melting too soon.
- Don’t Overmix: When combining flour and butter for crust or topping, mix just until crumbly. Overworking can lead to tough, dense results.
- Use Lemon Juice: Mulberries can be sweet but also a bit bland; lemon juice brightens the filling and balances sweetness beautifully.
- Watch Your Oven: Every oven runs differently. If you notice the crumb topping browning too fast, tent with foil to prevent burning while the filling cooks through.
- Rest the Pie: Letting the pie cool for a couple of hours is key. Otherwise, the filling will runny and the slices won’t hold.
- Multitasking: While the pie bakes, clean your workspace or prepare a simple side like whipped cream. It keeps you efficient and your kitchen tidy!
My first few attempts ended with soggy bottoms or crumb topping that melted away—lesson learned: patience and cold ingredients make all the difference. Now, I never skip chilling steps or lemon juice additions. These small details bring this mulberry pie to the next level.
Variations & Adaptations
This crispy mulberry pie recipe is a fantastic base that welcomes your creativity. Here are some ways I’ve mixed things up:
- Seasonal Twist: Swap mulberries for fresh blackberries or blueberries in late summer for a berry medley.
- Dietary Adjustments: Use almond flour in the crust and topping for a gluten-free version. For dairy-free, replace butter with chilled coconut oil, but expect a slightly different crumb texture.
- Flavor Boost: Add a teaspoon of almond extract to the filling for a subtle nutty aroma that pairs beautifully with mulberries.
- Cooking Method: If you’re short on time, bake this pie in a convection oven at 350°F (175°C) for 40 minutes, checking frequently to prevent burning your crumb topping.
Personally, I once added a handful of chopped toasted pecans to the crumb topping—pure magic! The crunch and nutty flavor made the pie even more irresistible.
Serving & Storage Suggestions
This crispy mulberry pie is best served slightly warm or at room temperature. A scoop of vanilla ice cream or a dollop of freshly whipped cream complements the tart berries and crunchy topping perfectly. For a grown-up twist, try a drizzle of honey or a splash of bourbon over the slice.
Leftovers? Wrap the pie tightly in plastic wrap or foil and store in the refrigerator for up to 4 days. The crust and crumb topping will soften a bit but still taste fantastic. To refresh, warm slices in a 350°F (175°C) oven for 10 minutes to crisp things back up.
For longer storage, freeze the whole pie (well wrapped) for up to 3 months. Thaw overnight in the fridge, then bake at 350°F (175°C) for 15-20 minutes to restore that crumbly magic. Flavors actually deepen after resting, so sometimes a day-old slice tastes even better!
Nutritional Information & Benefits
One generous slice (1/8 of pie) roughly contains:
| Calories | 320 kcal |
|---|---|
| Carbohydrates | 45g |
| Fat | 14g |
| Protein | 3g |
| Fiber | 3g |
Mulberries are packed with antioxidants, vitamin C, and iron, making this pie a bit of a health hero under all that buttery crust. Using fresh berries keeps things vibrant and nutrient-rich. This recipe is naturally vegetarian and can be adapted to gluten-free or dairy-free diets as noted. Just be mindful of allergies to nuts if you add pecans or almond flour.
From a wellness perspective, this pie is a treat with a little nutritional boost from its fruity filling. It’s all about balance—enjoying delicious food made with care and real ingredients.
Conclusion
If you’re craving a pie that’s both crispy and bursting with fruit flavor, this crispy mulberry pie with irresistible crumb topping is your new best friend. It’s easy enough for weeknight baking but special enough for celebrations. Customize it to your liking and watch how it becomes a treasured recipe in your kitchen, just like it did in mine.
I love how this pie brings people together—there’s something about sharing that sweet-tart goodness surrounded by buttery crumbs that feels pure and joyful. So go ahead, give it a try, and let me know how it turns out! Share your twists, tips, or just the happy smiles it brings.
Happy baking, friends!
FAQs About Crispy Mulberry Pie with Irresistible Crumb Topping
Can I use frozen mulberries for this pie?
Absolutely! Just thaw and drain them well to avoid excess moisture that could make the pie soggy.
How do I prevent the crumb topping from burning?
If the topping starts browning too fast, loosely cover the pie with foil during the last 15-20 minutes of baking.
Can I make this pie ahead of time?
Yes, you can prepare and assemble the pie a day ahead. Keep it refrigerated and bake it the next day for fresh results.
Is there a gluten-free version of this pie?
Yes! Swap the all-purpose flour with a 1:1 gluten-free blend in both crust and topping for a tasty alternative.
How should I store leftover pie?
Wrap leftovers tightly and keep them in the fridge for up to 4 days. Reheat slices in the oven for best texture.
Pin This Recipe!
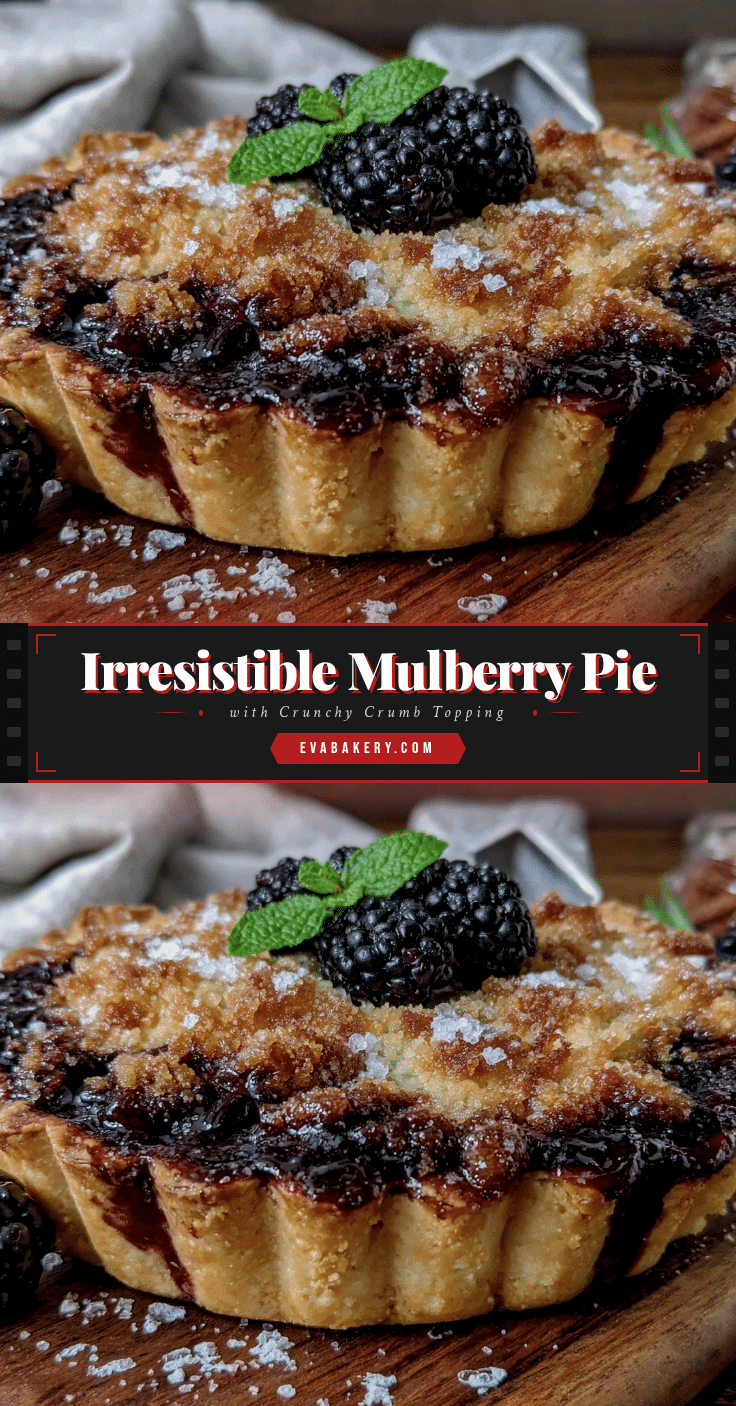
Crispy Mulberry Pie Recipe with Easy Irresistible Crumb Topping

A nostalgic and easy-to-make mulberry pie featuring a crispy crust, juicy mulberry filling, and a golden buttery crumb topping. Perfect for family gatherings and cozy evenings.
- Prep Time: 20 minutes
- Cook Time: 50 minutes
- Total Time: 1 hour 10 minutes
- Yield: 8 servings 1x
- Category: Dessert
- Cuisine: American
Ingredients
- 2 ½ cups (312g) all-purpose flour, plus extra for dusting
- 1 cup (226g) unsalted butter, cold and cubed
- 2 tablespoons granulated sugar
- ½ teaspoon salt
- 6 to 8 tablespoons ice water, chilled
- 4 cups (about 600g) fresh mulberries, rinsed and drained
- ¾ cup (150g) granulated sugar
- 3 tablespoons all-purpose flour
- 2 tablespoons fresh lemon juice
- ½ teaspoon ground cinnamon
- 1 teaspoon vanilla extract
- 1 cup (125g) all-purpose flour (for crumb topping)
- ½ cup (110g) packed brown sugar
- ½ cup (113g) unsalted butter, cold and cubed (for crumb topping)
- ¼ teaspoon ground cinnamon (for crumb topping)
- Pinch of salt (for crumb topping)
Instructions
- Prepare the Pie Crust: In a large bowl, whisk together 2 ½ cups all-purpose flour, 2 tablespoons sugar, and ½ teaspoon salt. Add the cold cubed butter. Using a pastry blender or fork, cut butter into the flour until the mixture resembles coarse crumbs with pea-sized pieces. Slowly add ice water, 1 tablespoon at a time, mixing gently until dough just starts to come together. Don’t overwork it! Divide dough in half, shape into disks, wrap in plastic wrap, and chill for at least 1 hour.
- Make the Mulberry Filling: In a medium bowl, combine 4 cups fresh mulberries, ¾ cup sugar, 3 tablespoons flour, 2 tablespoons lemon juice, ½ teaspoon cinnamon, and 1 teaspoon vanilla extract. Gently toss to coat berries evenly. Set aside to let flavors meld while you roll out the crust.
- Roll Out the Bottom Crust: On a lightly floured surface, roll one dough disk into a 12-inch (30cm) circle. Carefully transfer to your 9-inch pie dish, gently pressing it to fit. Trim any excess dough, leaving a 1-inch overhang. Pop it back in the fridge to chill while you prepare the topping.
- Prepare the Crumb Topping: In a bowl, mix 1 cup flour, ½ cup packed brown sugar, ¼ teaspoon cinnamon, and a pinch of salt. Add cold cubed butter and use your fingers or a pastry blender to mix until the texture resembles coarse crumbs.
- Assemble the Pie: Pour the mulberry filling into the chilled pie crust, spreading evenly. Sprinkle the crumb topping generously over the berries, covering the surface completely.
- Bake the Pie: Place the pie on a baking sheet to catch drips. Bake in a preheated 375°F (190°C) oven for 45 to 55 minutes, or until the topping is golden brown and the filling is bubbling. If the topping browns too quickly, tent the pie loosely with foil halfway through baking.
- Cool and Serve: Let the pie cool on a wire rack for at least 2 hours before slicing. This resting time helps the filling set so you get clean slices. Serve warm or at room temperature, optionally with a scoop of vanilla ice cream.
Notes
Keep ingredients cold for flaky crust and crumb topping. Don’t overmix dough or topping to avoid toughness. Use lemon juice to balance tartness. Tent pie with foil if topping browns too quickly. Let pie cool for at least 2 hours before slicing for best results. Frozen mulberries can be used if thawed and drained well. For gluten-free, substitute flour with gluten-free blend; for dairy-free, use chilled coconut oil instead of butter.
Nutrition
- Serving Size: 1 slice (1/8 of pie)
- Calories: 320
- Fat: 14
- Carbohydrates: 45
- Fiber: 3
- Protein: 3
Keywords: mulberry pie, crumb topping, fruit pie, dessert, easy pie recipe, summer berries, homemade pie


