Let me tell you, the smell of smoky spices mingling with simmering beef and beans over a crackling campfire is enough to make anyone’s mouth water. The first time I made this hearty campfire chili, I was knee-high to a grasshopper—well, at least that’s how it feels when you’re out in the wilderness trying to keep your dinner simple yet satisfying. I was instantly hooked, the kind of moment where you pause, take a deep breath, and just smile because you know you’re onto something truly special.
Years ago, on a chilly autumn camping trip with friends, I stumbled upon this recipe. It was a rainy weekend, and we wanted something warm, filling, and easy to cook on the open fire. My cast iron skillet became my best friend, and this chili recipe turned into a staple for every outing since. Honestly, I wish I’d discovered this sooner because my family couldn’t stop sneaking spoonfuls off the simmering pot (and I can’t really blame them).
Let’s face it, this hearty campfire chili is dangerously easy and delivers pure, nostalgic comfort in every bite. It’s perfect for those cozy nights around the fire, for potlucks, or even a sweet treat for your hungry kids after a day of hiking. You know what? This cast iron chili recipe has brightened up many Pinterest cookie boards (okay, maybe not cookies, but you get the idea) and will become your go-to for satisfying meals that feel like a warm hug.
I’ve tested this recipe more times than I can count—in the name of research, of course—and it’s now a family favorite for gatherings, gifting in a jar, or just an easy weeknight dinner that feels special. You’re going to want to bookmark this one, trust me.
Why You’ll Love This Recipe
This hearty campfire chili recipe isn’t just another chili—it’s the best version you’ll make in your cast iron skillet, and here’s why:
- Quick & Easy: Comes together in under an hour, perfect for busy weeknights or last-minute campfire cravings.
- Simple Ingredients: No fancy grocery trips needed; you likely already have everything in your kitchen or pantry.
- Perfect for Cozy Nights: Great for camping, chilly evenings, or anytime you need a comforting bowl of warmth.
- Crowd-Pleaser: Always gets rave reviews from kids and adults alike—trust me, I’ve seen it happen!
- Unbelievably Delicious: The blend of smoky spices and tender beef with hearty beans creates a flavor combo that tastes like pure comfort food.
What makes this recipe stand apart? It’s the cast iron magic that gives the chili a beautiful sear and depth of flavor you just can’t get in a regular pot. Plus, the seasoning mix is perfectly balanced—not too spicy but with just enough kick to keep you coming back for more. I like to add a pinch of cocoa powder or a dash of espresso powder sometimes—it’s a little secret trick I picked up to deepen the flavors without overpowering the chili’s heartiness.
Honestly, this recipe isn’t just good—it’s the kind that makes you close your eyes after the first bite, savoring that smoky, robust taste. It’s comfort food reimagined for the outdoors and your home kitchen alike. Whether you want to impress guests without breaking a sweat or just enjoy a simple meal that feels like a warm hug, this cast iron chili recipe has got you covered.
What Ingredients You Will Need
This recipe uses simple, wholesome ingredients to deliver bold flavor and satisfying texture without the fuss. Most of these are pantry staples, and you can swap a few things if you want to make it your own.
- 1 lb (450g) ground beef (I prefer 80/20 for a good fat balance)
- 1 medium onion, diced (adds sweetness and depth)
- 3 cloves garlic, minced (fresh is best for that punch)
- 1 can (14 oz / 400g) diced tomatoes (preferably fire-roasted for extra smokiness)
- 1 can (15 oz / 425g) kidney beans, drained and rinsed (or black beans if you prefer)
- 1 can (15 oz / 425g) pinto beans, drained and rinsed
- 1 cup (240 ml) beef broth (homemade or low-sodium store-bought)
- 2 tbsp chili powder (adjust to taste)
- 1 tsp smoked paprika (for that campfire feel)
- 1 tsp ground cumin (adds earthiness)
- 1/2 tsp dried oregano
- 1/4 tsp cayenne pepper (optional, for heat)
- Salt and freshly ground black pepper to taste
- 2 tbsp olive oil or vegetable oil (for sautéing)
- Optional: 1 tsp unsweetened cocoa powder (deepens flavors, trust me)
- Optional toppings: shredded cheese, sour cream, chopped green onions, cilantro, or jalapeños
For substitutions, you can use ground turkey or chicken for a leaner chili. If you want a vegetarian option, swap the meat for extra beans and add diced mushrooms for umami. Also, if you want gluten-free chili, just double-check your chili powder and broth labels.
Equipment Needed
- Cast iron skillet (10-12 inches): This is the star player here—retains heat well and gives a nice sear to the meat.
- Spoon or spatula: For stirring and scraping the skillet.
- Knife and cutting board: For dicing onions and mincing garlic.
- Measuring spoons and cups: To keep your seasoning balanced.
- Lid or aluminum foil: To cover the skillet while simmering (helps meld flavors and retain moisture).
If you don’t have a cast iron skillet, a heavy-bottomed Dutch oven works too—just be sure it’s oven-safe if you want to finish the chili in the oven. Personally, I prefer cast iron because it’s durable, heats evenly, and gets better with every use. A quick tip: keep your cast iron well-seasoned with a thin layer of oil to prevent sticking and rust.
Preparation Method
- Heat your cast iron skillet over medium-high heat for about 3-5 minutes until it’s hot but not smoking. Add 2 tablespoons of olive oil and swirl to coat the bottom.
- Add the diced onions and sauté for 4-5 minutes until they start to turn translucent and golden. This brings out their natural sweetness—don’t rush this step!
- Add the minced garlic and sauté for another 30-60 seconds until fragrant. Be careful not to burn it; burnt garlic tastes bitter.
- Add the ground beef and break it apart with your spatula. Brown the meat for 7-8 minutes, stirring occasionally until no pink remains and it’s nicely browned. This browning builds flavor.
- Sprinkle in the chili powder, smoked paprika, cumin, oregano, cayenne pepper (if using), salt, and pepper. Stir well to coat the meat and onions evenly with spices. Let it cook for 1-2 minutes to toast the spices; this step boosts the chili’s aroma.
- Add the diced tomatoes (with juices), kidney beans, pinto beans, and beef broth. Stir everything together until fully combined.
- Bring the mixture to a gentle simmer, then reduce heat to low. Cover the skillet with a lid or foil and let it cook for 25-30 minutes, stirring occasionally.
- About halfway through simmering, check the consistency. If it looks too thick, add a splash more broth or water. If too thin, uncover to reduce liquid slightly.
- Optional: Stir in 1 teaspoon of unsweetened cocoa powder for a subtle depth of flavor. It’s a little trick I picked up from campfire cooking pros.
- Taste and adjust seasoning, adding more salt, pepper, or chili powder if needed.
- Serve hot straight from your cast iron skillet topped with your favorite garnishes like shredded cheese, sour cream, or fresh herbs.
Pro tip: When browning the meat, resist the urge to stir constantly. Let it sit for a few minutes so it forms a nice crust—that’s where the flavor magic happens.
Cooking Tips & Techniques
One of the keys to great campfire chili is layering flavors slowly, especially when cooking outdoors where you can’t just crank up the heat. Here’s what I’ve learned:
- Don’t skip browning the meat: It adds caramelized richness that makes all the difference.
- Toast your spices: Adding them to hot oil or meat briefly releases essential oils, boosting aroma.
- Simmer low and slow: Rushing the simmer can lead to underdeveloped flavors or burnt bits. Give the chili time to marry.
- Keep an eye on liquid levels: Cast iron retains heat well, so liquids can evaporate faster. Add broth or water as needed to keep chili saucy.
- Use fresh garlic and onions: The difference is noticeable—skip pre-minced for better flavor.
- Multitask smartly: Prep your toppings while the chili simmers to save time.
My biggest cooking fail was once rushing the browning step and ending up with a bland chili. Lesson learned: patience pays off, especially with chili.
Variations & Adaptations
This hearty campfire chili recipe is pretty flexible and adapts well to different tastes and dietary needs.
- Vegetarian Version: Swap ground beef for extra beans, diced mushrooms, or lentils. Use vegetable broth instead of beef.
- Spice it Up: Add chopped fresh jalapeños or a splash of hot sauce if you like it fiery.
- Slow Cooker Option: Brown the meat and onions on the stove, then transfer everything to a slow cooker. Cook on low for 6-8 hours or high for 3-4 hours.
- Seasonal Twist: In fall, toss in diced butternut squash or roasted sweet potatoes for extra heartiness.
- Gluten-Free: This recipe is naturally gluten-free as long as your chili powder and broth are certified gluten-free.
Personally, I tried adding a splash of dark beer once, which gave it a nice malty undertone without overpowering the chili’s signature flavors. Feel free to experiment!
Serving & Storage Suggestions
Serve your hearty campfire chili hot, straight from the cast iron skillet if you can—that rustic presentation adds to the cozy vibe. Pair it with warm cornbread, tortilla chips, or a simple green salad for a balanced meal. A cold beer or a mug of hot cocoa also pairs beautifully, depending on the mood.
Leftovers store well in an airtight container in the refrigerator for up to 4 days. For longer storage, freeze in portioned containers for up to 3 months. When reheating, do it gently on the stovetop or microwave, adding a splash of broth or water to loosen the chili if it’s thickened too much.
Flavors actually deepen after a day or two, so if you can wait, your chili will taste even better the next day. Just reheat gently and stir well.
Nutritional Information & Benefits
This hearty campfire chili recipe offers a good balance of protein, fiber, and essential nutrients. A typical serving (about 1 ½ cups or 375 ml) provides roughly:
| Nutrient | Amount |
|---|---|
| Calories | 350-400 kcal |
| Protein | 25-30g |
| Fiber | 8-10g |
| Fat | 15-20g |
| Carbohydrates | 30-35g |
The beans provide heart-healthy fiber and plant protein, while the beef offers iron and zinc. The spices have anti-inflammatory properties, and the tomatoes add vitamin C and antioxidants. This recipe can fit well into a balanced diet, and with simple swaps, you can tailor it to various dietary needs.
Note: Contains beef and beans; not suitable for those with legume or meat allergies.
Conclusion
There’s something truly special about a bowl of hearty campfire chili made in a cast iron skillet. It’s easy to prepare, packed with flavor, and perfect for cozy nights—whether you’re camping under the stars or curled up at home. This recipe is worth trying because it brings together simple ingredients with a technique that brings out the best in every bite.
Feel free to customize it based on your preference—spice it up, make it vegetarian, or add your own twist. I love this chili because it’s reliably delicious and feels like a warm hug after a long day. If you try it out, drop a comment below with your favorite variations or any questions. And hey, don’t forget to share it with your friends who love good, comforting food!
Now, go on—get cooking and enjoy those cozy nights with a steaming bowl of this cast iron chili. You won’t regret it.
FAQs About Hearty Campfire Chili
Can I make this chili without ground beef?
Absolutely! You can substitute ground turkey, chicken, or go vegetarian by using extra beans, lentils, or diced mushrooms. Just adjust cooking times slightly for different proteins.
Is cast iron necessary for this recipe?
While cast iron adds a lovely sear and flavor, you can use a heavy-bottomed Dutch oven or regular skillet if needed. Just keep an eye on heat to avoid burning.
How spicy is this chili, and can I adjust the heat?
This recipe has mild to medium heat thanks to the chili powder and optional cayenne. You can easily dial it up or down by adjusting those spices or adding fresh peppers.
Can I prepare this chili ahead of time?
Yes! Chili flavors develop even more after sitting overnight in the fridge. Prepare a day ahead and gently reheat before serving.
What toppings do you recommend for the chili?
Classic toppings include shredded cheddar, sour cream, chopped green onions, fresh cilantro, jalapeños, or even a squeeze of lime for brightness.
PrintHearty Campfire Chili Recipe Easy Cast Iron Chili for Cozy Nights

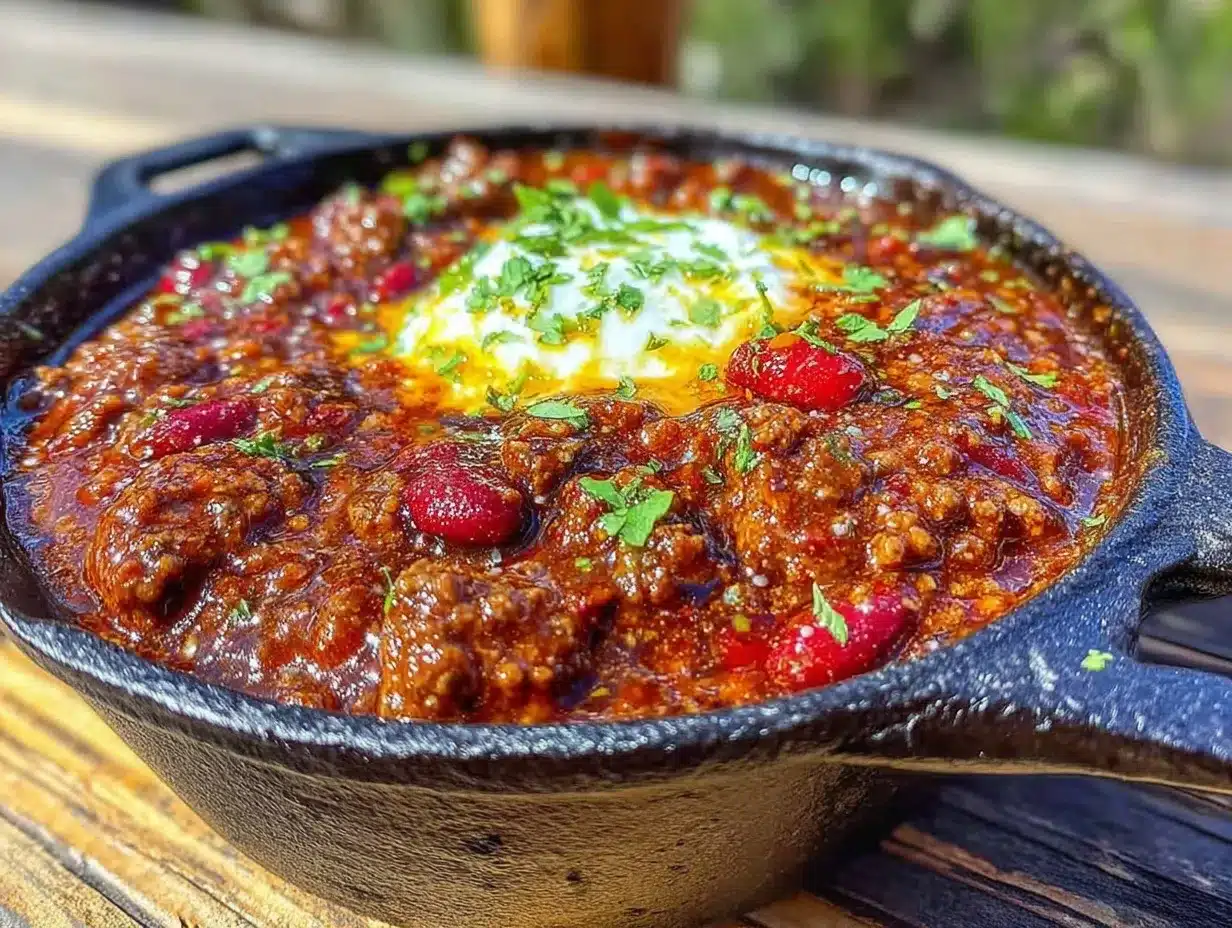
A smoky, flavorful chili made in a cast iron skillet, perfect for cozy nights around the campfire or at home. This easy recipe combines ground beef, beans, and a blend of spices for a comforting and satisfying meal.
- Prep Time: 10 minutes
- Cook Time: 40 minutes
- Total Time: 50 minutes
- Yield: 6 servings 1x
- Category: Main Course
- Cuisine: American
Ingredients
- 1 lb (450g) ground beef (80/20 preferred)
- 1 medium onion, diced
- 3 cloves garlic, minced
- 1 can (14 oz / 400g) diced tomatoes (preferably fire-roasted)
- 1 can (15 oz / 425g) kidney beans, drained and rinsed
- 1 can (15 oz / 425g) pinto beans, drained and rinsed
- 1 cup (240 ml) beef broth (homemade or low-sodium store-bought)
- 2 tbsp chili powder
- 1 tsp smoked paprika
- 1 tsp ground cumin
- 1/2 tsp dried oregano
- 1/4 tsp cayenne pepper (optional)
- Salt and freshly ground black pepper to taste
- 2 tbsp olive oil or vegetable oil
- Optional: 1 tsp unsweetened cocoa powder
- Optional toppings: shredded cheese, sour cream, chopped green onions, cilantro, jalapeños
Instructions
- Heat your cast iron skillet over medium-high heat for about 3-5 minutes until hot but not smoking. Add 2 tablespoons of olive oil and swirl to coat the bottom.
- Add the diced onions and sauté for 4-5 minutes until translucent and golden.
- Add the minced garlic and sauté for 30-60 seconds until fragrant, being careful not to burn it.
- Add the ground beef and break it apart with a spatula. Brown the meat for 7-8 minutes, stirring occasionally until no pink remains.
- Sprinkle in chili powder, smoked paprika, cumin, oregano, cayenne pepper (if using), salt, and pepper. Stir well and cook for 1-2 minutes to toast the spices.
- Add diced tomatoes with juices, kidney beans, pinto beans, and beef broth. Stir to combine.
- Bring the mixture to a gentle simmer, then reduce heat to low. Cover with a lid or foil and cook for 25-30 minutes, stirring occasionally.
- About halfway through simmering, check consistency and add more broth or water if too thick, or uncover to reduce liquid if too thin.
- Optional: Stir in 1 teaspoon of unsweetened cocoa powder for deeper flavor.
- Taste and adjust seasoning with salt, pepper, or chili powder as needed.
- Serve hot topped with your favorite garnishes such as shredded cheese, sour cream, or fresh herbs.
Notes
Do not stir the meat constantly while browning to allow a crust to form for better flavor. Toast spices briefly in the hot skillet to release essential oils. Adjust liquid levels during simmering to achieve desired chili consistency. Use fresh garlic and onions for best flavor. Leftovers taste better after a day and can be stored refrigerated for up to 4 days or frozen for up to 3 months.
Nutrition
- Serving Size: About 1 ½ cups (375
- Calories: 375
- Sugar: 6
- Sodium: 600
- Fat: 17.5
- Saturated Fat: 6
- Carbohydrates: 32.5
- Fiber: 9
- Protein: 27.5
Keywords: campfire chili, cast iron chili, easy chili recipe, hearty chili, cozy dinner, ground beef chili, smoky chili, camping food