“Are you seriously telling me to microwave a cake?” my friend asked, raising an eyebrow as I pulled out my favorite mug and a handful of simple ingredients. Honestly, I was a bit skeptical myself the first time I tried this easy moist red velvet microwave mug cake with cream cheese frosting. It started as one of those nights when I wanted something sweet, fast—like really fast—but didn’t want to wait for the oven or deal with a messy countertop full of bowls. The microwave seemed like a wild card, but I figured, why not?
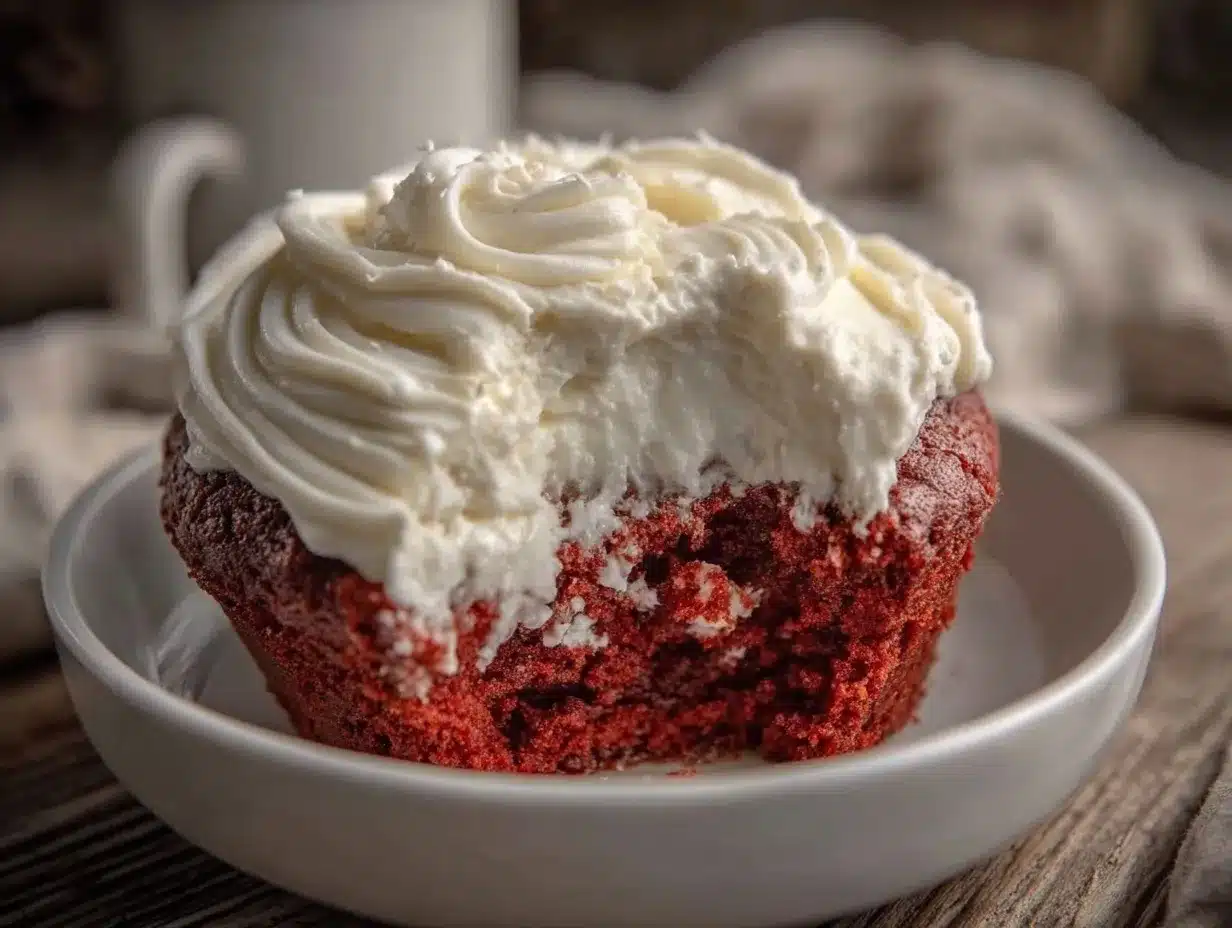
Within minutes, the kitchen filled with that unmistakable scent of cocoa and vanilla, followed by the vibrant red hue of the cake peeking out from the mug. The texture? Surprisingly tender and moist, not rubbery or dry like you might expect from microwave desserts. I topped it off with a quick cream cheese frosting—because, let’s face it, red velvet without cream cheese is just velvet. That first bite was a quiet revelation, the kind that makes you pause and realize a tiny indulgence like this can feel like a mini celebration in your own space.
Since then, this recipe has become my go-to for those late-night cravings or unexpected guests who need a sweet fix pronto. It’s simple, fast, and honestly, a little comforting. No fancy equipment, no fuss, just a mug, some pantry staples, and a moment to enjoy something sweet without the wait. This easy moist red velvet microwave mug cake with cream cheese frosting stuck around because it’s exactly what I need when I don’t have time or energy to bake but still want to feel like I’m treating myself.
Why You’ll Love This Recipe
After testing this recipe a handful of times (okay, maybe more than a handful), I’m convinced it hits all the right notes for a quick dessert that doesn’t skimp on flavor or texture. Here’s why you’ll want to have this easy moist red velvet microwave mug cake with cream cheese frosting bookmarked:
- Quick & Easy: Ready in under 5 minutes, perfect for those moments when you need dessert ASAP without pulling out a ton of gear.
- Simple Ingredients: Most are pantry staples you probably already have—no need for special trips or fancy items.
- Perfect for Any Occasion: Whether it’s a spontaneous treat after dinner or a solo indulgence during a quiet evening, this mug cake fits the bill.
- Crowd-Pleaser: I’ve served this to friends who usually turn their noses up at microwave desserts—they were surprised and impressed.
- Unbelievably Delicious: The cream cheese frosting adds that classic tangy sweetness, perfectly complementing the rich, moist cake.
This isn’t just another mug cake. The secret is in balancing the cocoa and buttermilk powder (yes, buttermilk powder!) to mimic that authentic red velvet flavor, plus a quick whip-up of cream cheese frosting that you can throw together while the cake cooks. I’ve tweaked the timing and ingredients based on what I’ve learned from other recipes, including my attempts at a fluffy mini quiche with buttery crusts, so this one really stands out for texture and taste.
Plus, it’s the kind of recipe that lets you feel like you’re treating yourself without the usual guilt or hassle—a little luxury in a mug.
What Ingredients You Will Need
This recipe uses simple, wholesome ingredients to deliver bold flavor and satisfying texture without the fuss. Most are pantry staples, but I’ve included a few tips for the best results and easy substitutions.
- All-purpose flour – 4 tablespoons (about 30 grams), forms the cake’s structure.
- Sugar – 3 tablespoons (about 38 grams), for sweetness.
- Cocoa powder – 1 tablespoon (unsweetened, like Hershey’s), adds that signature red velvet chocolate note.
- Baking powder – ¼ teaspoon, for lift.
- Salt – a pinch, to balance flavors.
- Buttermilk powder – 1 tablespoon, key for that authentic tang (can substitute with 1 tablespoon of plain yogurt mixed with 1 tablespoon milk if needed).
- Milk – 3 tablespoons (45 ml), use whole or 2% for best moisture.
- Vegetable oil – 2 tablespoons (30 ml), keeps the cake moist.
- Vanilla extract – ½ teaspoon, for aroma.
- Red food coloring – 1 teaspoon (liquid or gel), for that classic red velvet color.
- Cream cheese – 2 tablespoons (about 30 grams), softened, for the frosting.
- Powdered sugar – 2 tablespoons, to sweeten the frosting.
- Butter – 1 tablespoon, softened, adds richness to the frosting.
- Optional: A drop of lemon juice or a pinch of cinnamon for the frosting to add a slight zing.
Look for firm, full-fat cream cheese for frosting—it really makes the texture smooth and creamy. If you want a dairy-free option, try substituting with a vegan cream cheese and almond milk. In the summer, I sometimes toss in a few fresh raspberries on top for a fruity twist.
Equipment Needed
- Microwave-safe mug or ramekin: About 12 to 16 ounces capacity; I prefer ceramic mugs for even cooking.
- Measuring spoons and cups: For precise ingredient amounts.
- Small mixing bowl or the mug itself: Mixing directly in the mug saves time and dishes.
- Whisk or fork: To combine ingredients smoothly.
- Spatula or butter knife: For spreading the cream cheese frosting.
If you don’t have a microwave, a toaster oven or air fryer with baking capability can work but expect longer cook times. I once tried this with a glass mug and learned the hard way that ceramic absorbs heat better, resulting in a more evenly cooked cake. Budget-wise, any basic microwave-safe ceramic mug you already have will do just fine—there’s no need for anything fancy here.
Preparation Method
- Mix the dry ingredients: In your mug, combine 4 tablespoons all-purpose flour, 3 tablespoons sugar, 1 tablespoon unsweetened cocoa powder, ¼ teaspoon baking powder, a pinch of salt, and 1 tablespoon buttermilk powder. Stir well with a fork or small whisk until evenly blended. This step ensures the leavening and flavors are distributed.
- Add the wet ingredients: Pour in 3 tablespoons milk, 2 tablespoons vegetable oil, ½ teaspoon vanilla extract, and 1 teaspoon red food coloring. Stir gently but thoroughly until you get a smooth, thick batter with no lumps. It should coat the back of a spoon, not be runny.
- Microwave the cake: Place the mug in the microwave and cook on high for 60 to 70 seconds. The cake will rise but don’t be alarmed if it looks slightly wet on top—that’s normal. Avoid overcooking, or it’ll dry out quickly. (Tip: Microwaves vary, so start with 60 seconds and add 5 seconds if needed.)
- Check doneness: Insert a toothpick or skewer into the center; if it comes out mostly clean with a few moist crumbs, the cake is ready. If not, microwave for an additional 5-second burst and recheck.
- Prepare the cream cheese frosting: While the cake cooks, mix 2 tablespoons softened cream cheese, 1 tablespoon softened butter, and 2 tablespoons powdered sugar in a small bowl. Whip until smooth and creamy. Add a drop of lemon juice or a pinch of cinnamon for extra zing if you like.
- Frost and serve: When the cake has cooled slightly (about 2 minutes), spread the cream cheese frosting evenly on top. Enjoy straight from the mug or tip out onto a plate if you want to get fancy.
Pro tip: If you want a more intense red color, use gel food coloring instead of liquid—it’s more concentrated and less likely to alter the batter’s texture. Also, stirring gently but thoroughly is key to avoiding pockets of dry flour or clumps of cocoa.
Cooking Tips & Techniques
Microwaving cake can feel like a gamble, but a few tricks make this easy moist red velvet microwave mug cake foolproof every time. First, measure ingredients precisely—too much flour or baking powder and your cake will be dense or bitter.
Don’t skip the buttermilk powder; it’s the secret for that authentic tang without needing fresh buttermilk. If you don’t have it, plain yogurt mixed with milk works but changes the texture slightly.
When microwaving, start with the shortest time and add increments if needed. Overcooking leads to rubbery edges, which nobody wants. Also, using a ceramic mug helps with even cooking; glass or plastic can heat unevenly.
Mixing the batter directly in the mug saves dishwashing and minimizes mess. Just be sure to scrape the bottom and edges so no dry pockets remain. For the frosting, room temperature cream cheese and butter whip easier and blend smoother—cold ingredients will clump.
One lesson I learned the hard way: adding the frosting too soon when the cake is piping hot can cause it to melt and slide off. Let the cake rest a couple of minutes to firm up before frosting.
If you want to multitask, prepare the frosting first while gathering ingredients—that way you can frost immediately after cooking, speeding up the process.
Variations & Adaptations
This mug cake is quite versatile, and I’ve tried a few twists to keep things interesting:
- Gluten-free: Swap all-purpose flour for a gluten-free baking blend. The texture is slightly different but still delicious.
- Vegan: Use plant-based milk, vegan butter, and dairy-free cream cheese. Replace the egg with a flax egg (1 tablespoon flaxseed meal + 3 tablespoons water).
- Flavor twist: Add a teaspoon of instant espresso powder to the batter for a mocha red velvet flavor.
- Seasonal: In fall, sprinkle a pinch of cinnamon and nutmeg into the batter for warming spices.
- Cooking method: If you don’t have a microwave, bake the batter in a small ramekin at 350°F (175°C) for about 12-15 minutes, checking for doneness.
Personally, I once added a spoonful of peanut butter on top before microwaving for a quick peanut butter-red velvet combo that was surprisingly good—something to try if you like a nutty touch.
Serving & Storage Suggestions
This mug cake is best served warm, right after frosting. The cream cheese frosting is soft and creamy, melting slightly on the cake’s warmth, making each bite ultra comforting. For presentation, a dusting of cocoa powder or a few fresh berries on top adds a nice touch.
If you want to pair it with something, a simple glass of cold milk or a cup of black coffee complements the richness perfectly. For a festive occasion, I once served this alongside a sparkling champagne punch that matched the indulgence beautifully.
Storing leftover cake in the mug is fine—cover it with plastic wrap and refrigerate for up to 2 days. The frosting firms up in the fridge, so bring it back to room temperature or microwave for 10-15 seconds before eating. You can also scoop the cake out, wrap it tightly, and freeze it for up to a month. Thaw overnight in the fridge and reheat gently.
Flavors develop a bit more after sitting, especially the cream cheese frosting, which becomes tangier and richer. Just avoid microwaving too long on reheats or it gets tough.
Nutritional Information & Benefits
This easy moist red velvet microwave mug cake with cream cheese frosting isn’t exactly a health food, but it does have some redeeming qualities. Each serving has roughly 350-400 calories, 18 grams of fat, and 35 grams of carbs, depending on exact ingredients used.
The cream cheese adds a bit of protein and calcium, while the use of vegetable oil (instead of butter) keeps saturated fat slightly lower. Using buttermilk powder introduces a tangy complexity without extra liquid or calories.
For those with dietary needs, swapping flour for gluten-free blends or using dairy-free alternatives makes this recipe accessible to many. It’s a treat best enjoyed in moderation but feels less guilty since it’s portion-controlled and quick—no extra butter or sugar lurking from big batches.
I personally appreciate how this recipe satisfies sweet cravings quickly, helping avoid more indulgent snacking later.
Conclusion
There’s something quietly satisfying about a dessert that comes together in just a few minutes but still feels special. This easy moist red velvet microwave mug cake with cream cheese frosting fits that bill perfectly. It’s a recipe I keep coming back to when I want a sweet treat without fuss or waiting around.
You can customize it, tweak the flavors, or keep it classic—and it always delivers that soft, moist bite with the tangy frosting that makes red velvet so irresistible. Plus, it’s a little moment of joy in a mug, exactly what I need after a long day or when friends drop by unexpectedly.
If you try it, I’d love to hear how you make it your own or what variations you come up with. Sharing little kitchen wins like this feels like passing along a secret that anyone can pull off. So go ahead, treat yourself—the microwave is waiting.
Frequently Asked Questions
Can I make this mug cake without buttermilk powder?
Yes! You can substitute with 1 tablespoon plain yogurt mixed with 1 tablespoon milk or just use milk, but the tanginess will be milder.
How do I avoid overcooking the mug cake?
Start microwaving for 60 seconds, then check doneness. Add 5-second increments if needed. Overcooking makes it dry and rubbery.
Can I make this recipe vegan?
Absolutely. Use plant-based milk, vegan butter, dairy-free cream cheese, and a flax egg instead of regular egg for best results.
Is it possible to bake this in the oven?
Yes, bake in a small ramekin at 350°F (175°C) for about 12-15 minutes until a toothpick comes out clean.
How should I store leftovers?
Cover the mug with plastic wrap and refrigerate up to 2 days. Reheat gently in the microwave before eating to soften the frosting.
For more quick and tasty treats, you might enjoy the fluffy mini quiches with buttery crusts or the crispy prosciutto-wrapped asparagus bites—both perfect for when you want easy, crowd-pleasing recipes without fuss.
Pin This Recipe!
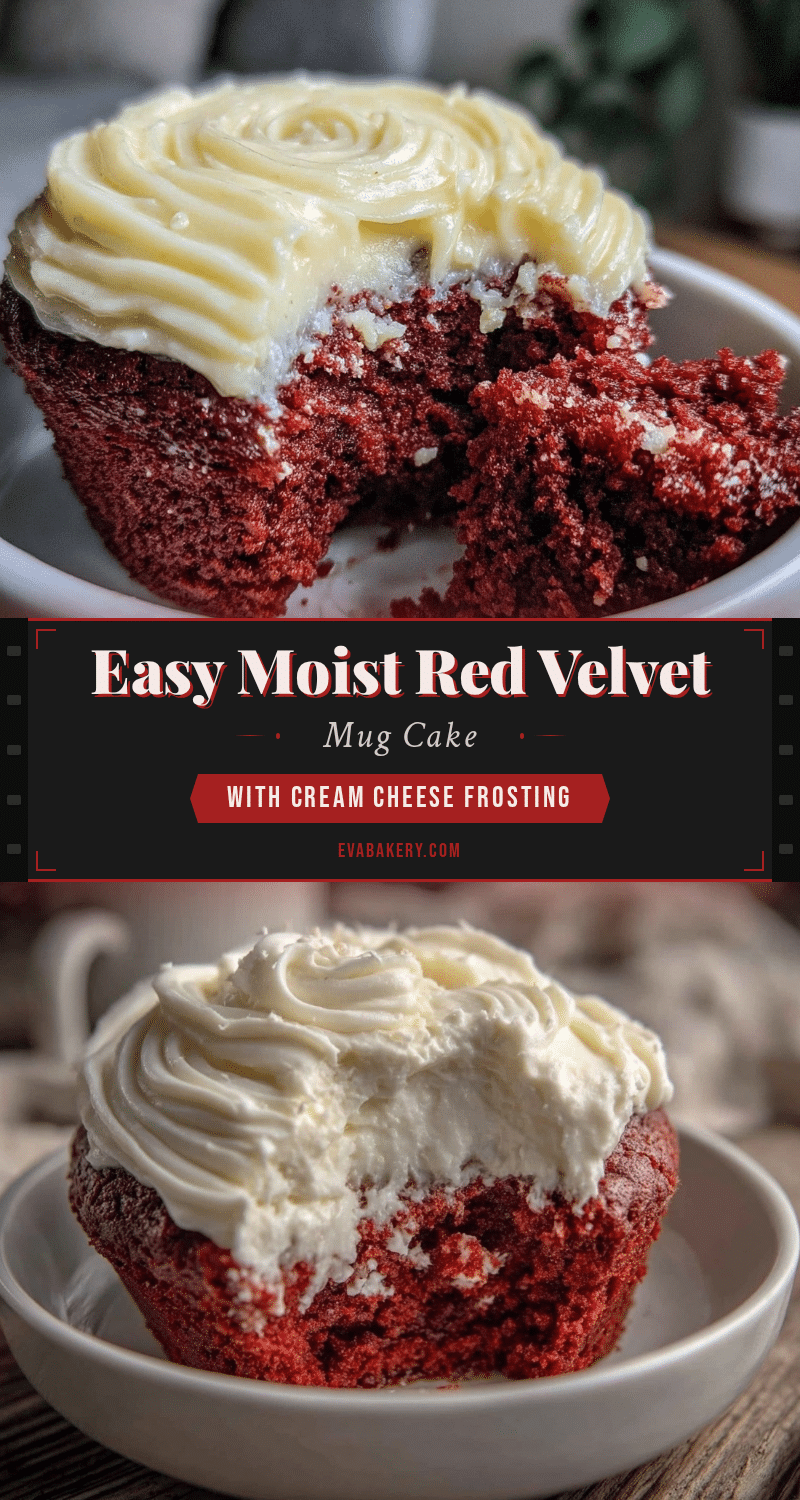
Easy Moist Red Velvet Microwave Mug Cake Recipe with Cream Cheese Frosting

A quick and easy red velvet mug cake made in the microwave, topped with a tangy cream cheese frosting. Perfect for a fast, moist dessert without the wait or mess.
- Prep Time: 5 minutes
- Cook Time: 1 minute 10 seconds
- Total Time: 6 minutes 10 seconds
- Yield: 1 serving 1x
- Category: Dessert
- Cuisine: American
Ingredients
- 4 tablespoons all-purpose flour (about 30 grams)
- 3 tablespoons sugar (about 38 grams)
- 1 tablespoon unsweetened cocoa powder
- 1/4 teaspoon baking powder
- Pinch of salt
- 1 tablespoon buttermilk powder (or substitute with 1 tablespoon plain yogurt mixed with 1 tablespoon milk)
- 3 tablespoons milk (whole or 2%)
- 2 tablespoons vegetable oil
- 1/2 teaspoon vanilla extract
- 1 teaspoon red food coloring (liquid or gel)
- 2 tablespoons softened cream cheese
- 2 tablespoons powdered sugar
- 1 tablespoon softened butter
- Optional: a drop of lemon juice or a pinch of cinnamon for frosting
Instructions
- In a microwave-safe mug, combine 4 tablespoons all-purpose flour, 3 tablespoons sugar, 1 tablespoon unsweetened cocoa powder, 1/4 teaspoon baking powder, a pinch of salt, and 1 tablespoon buttermilk powder. Stir well until evenly blended.
- Add 3 tablespoons milk, 2 tablespoons vegetable oil, 1/2 teaspoon vanilla extract, and 1 teaspoon red food coloring. Stir gently until smooth and thick with no lumps.
- Microwave on high for 60 to 70 seconds. The cake will rise and may look slightly wet on top.
- Check doneness by inserting a toothpick into the center; if it comes out mostly clean with a few moist crumbs, the cake is ready. If not, microwave for an additional 5 seconds and recheck.
- While the cake cooks, mix 2 tablespoons softened cream cheese, 1 tablespoon softened butter, and 2 tablespoons powdered sugar in a small bowl until smooth and creamy. Add lemon juice or cinnamon if desired.
- Let the cake cool for about 2 minutes, then spread the cream cheese frosting evenly on top. Serve warm.
Notes
Use gel food coloring for a more intense red color without altering batter texture. Start microwaving at 60 seconds and add time in 5-second increments to avoid overcooking. Let cake cool before frosting to prevent melting. For gluten-free, substitute flour with gluten-free baking blend. For vegan, use plant-based milk, vegan butter, dairy-free cream cheese, and a flax egg.
Nutrition
- Serving Size: One mug cake (about
- Calories: 375
- Sugar: 22
- Sodium: 220
- Fat: 18
- Saturated Fat: 5
- Carbohydrates: 35
- Fiber: 2
- Protein: 5
Keywords: red velvet, mug cake, microwave cake, quick dessert, cream cheese frosting, easy recipe, single serving


