The first time I made this Easter Bunny Cheese Ball Delight, it was a last-minute addition to our spring gathering when the usual veggie tray just didn’t feel festive enough. I remember setting it on the table and watching everyone’s faces light up—not just because it’s adorable, but because it tastes seriously good. No one expected a cheese ball to steal the spotlight, but this little bunny brought the party to life. It’s become my go-to for every spring celebration, from casual family brunches to fancy potlucks. Plus, it’s a perfect conversation starter and a total crowd-pleaser.
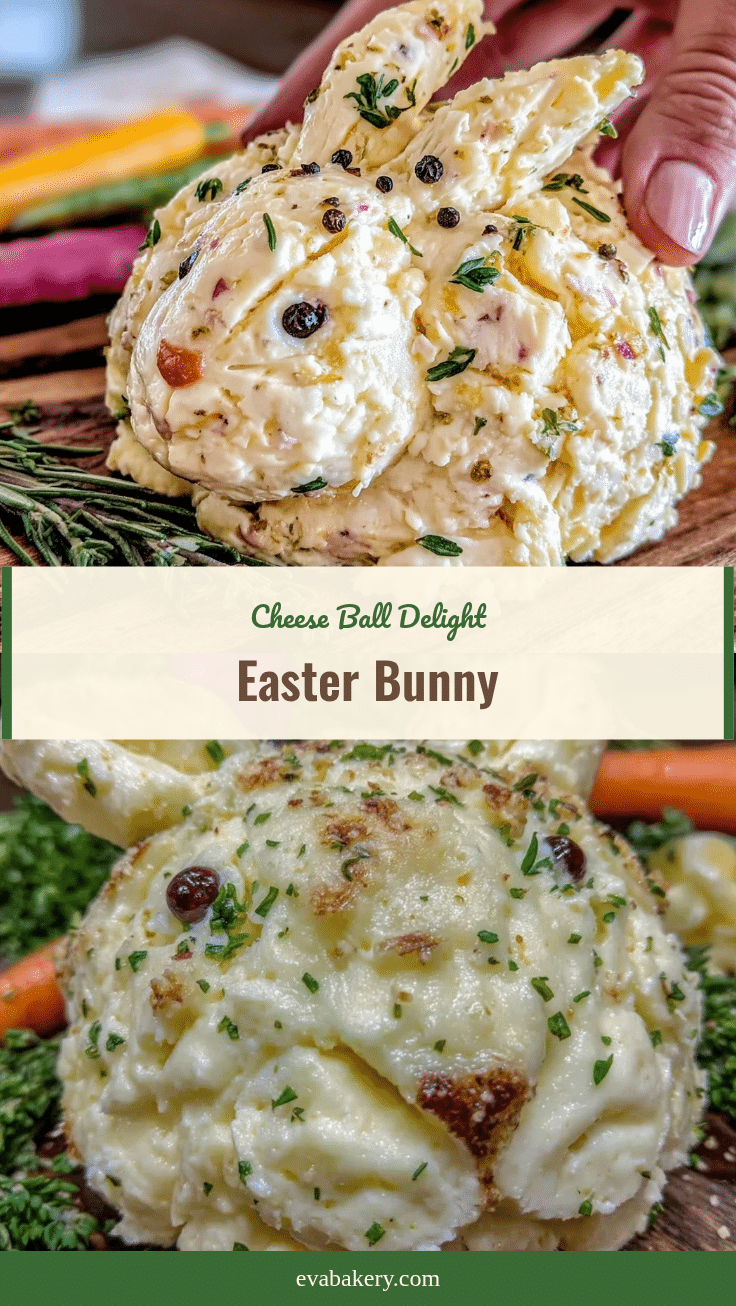
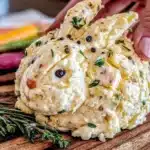
Here’s the thing: this isn’t your run-of-the-mill cheese ball. It’s shaped into an Easter bunny, complete with cute carrot ears and a playful tail, making it perfect for festive spring snacks. I’ve tested this recipe several times—sometimes rushing it, sometimes perfecting the details—and I can tell you, the key is in the balance of flavors and the fun presentation. Whether you’re hosting an Easter brunch or just want a spring-themed appetizer, this Easter Bunny Cheese Ball Delight will win hearts and taste buds alike.
Ready to bring some bunny magic to your table? Let’s hop right into it.
Why This Recipe Works
This recipe has completely changed how I think about cheese balls for festive gatherings. It’s not just a blob of cream cheese and herbs—it’s a showstopper that tastes as good as it looks.
- Festive and Fun Presentation — Shaping the cheese ball into a bunny makes it instantly eye-catching. Guests love the carrot ears and the cream cheese tail. It’s the kind of appetizer that gets selfies and compliments.
- Perfect Flavor Balance — The combination of sharp cheddar, tangy cream cheese, and a hint of garlic and herbs is spot on. I’ve made simpler cheese balls before, but this one hits all the right savory notes without being overpowering.
- Easy to Make Ahead — You can assemble it the day before your party and keep it chilled. This is a lifesaver on busy celebration days when every minute counts.
- Kid-Approved — My niece was skeptical at first but ended up eating half the bunny’s tail (the cream cheese dollop). The familiar cheese flavors make it approachable for little ones too.
- Customizable — Whether you want it milder, spicier, or more herbaceous, this base recipe adapts well. I’ve even added bacon bits for a smoky twist that was a hit at my last brunch.
This Easter Bunny Cheese Ball Delight isn’t just a recipe; it’s a festive tradition in the making. It brings people together with its charm and flavor, making every spring gathering a little more special.
Ingredients Breakdown
Here’s what I love about this recipe: most of the ingredients are pantry staples or easy-to-find basics at any grocery store. I’m picky about a couple of things, though—like the cheese quality and the freshness of the herbs—and I’ll tell you exactly why.
For the Cheese Ball Base:
- Cream cheese (8 oz / 225g, softened) — This is the creamy foundation. Use full-fat cream cheese for the best texture and flavor. Softening it properly (leave it out for 30 minutes) makes mixing easier and results in a smoother ball.
- Sharp cheddar cheese (1 cup / 115g, shredded) — Adds a rich, tangy bite and depth of flavor. I prefer freshly shredded cheddar because pre-shredded can be coated with starch that affects texture.
- Garlic powder (1 teaspoon) — Gives a gentle kick without overpowering. I’ve tried fresh garlic, but powder blends better and doesn’t create lumps.
- Onion powder (½ teaspoon) — Adds subtle sweetness and complexity.
- Fresh chives (2 tablespoons, finely chopped) — The fresh herbs brighten the whole cheese ball. Parsley works too if you prefer milder flavors.
- Worcestershire sauce (1 teaspoon) — A secret umami booster that takes this from good to great. You won’t taste it outright, just a deeper savory note.
- Lemon juice (1 teaspoon, freshly squeezed) — A little acidity to balance the richness.
- Salt and black pepper (to taste) — Essential for seasoning. Start light and adjust as you go.
For the Bunny Decoration:
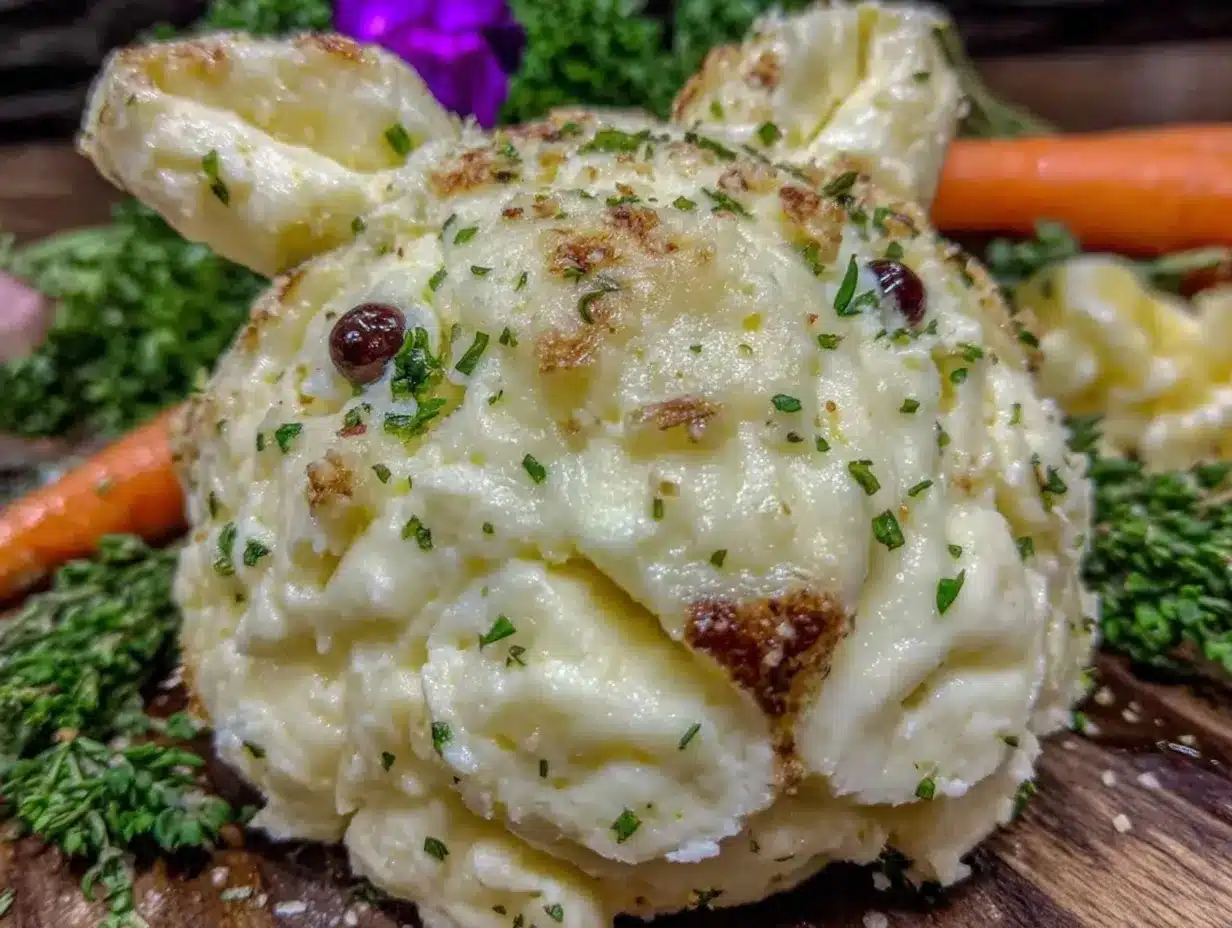
- Baby carrots (6-8) — For the bunny ears. Look for thin, uniform ones for the best effect.
- Black olives (2 small slices) — For the eyes. I slice them thinly and secure with toothpicks.
- Fresh parsley or dill sprigs — For the bunny’s tail. It adds a lovely pop of green and fresh aroma.
- Toothpicks — To hold the ears and eyes in place. I keep a box handy during assembly.
If you want to get fancy, you can add a handful of finely chopped nuts (pecans or walnuts) into the cheese ball mix for texture, or swap the cheddar for smoked gouda for a more robust flavor. I’ve also made a version with a hint of cayenne pepper for a subtle heat that pairs surprisingly well with the creamy base.
Equipment You’ll Need
You don’t need a fancy kitchen to pull this off. Here’s what I actually use:
- Mixing bowl — A medium to large bowl to combine the cheeses and seasonings. Any size works, as long as you can mix comfortably.
- Hand mixer or sturdy spoon — I use a hand mixer for speed and smooth texture, but a strong wooden spoon works fine if you don’t have one.
- Measuring spoons — For precise seasoning. Eyeballing garlic or lemon juice can throw off the balance.
- Shredding tool — A box grater or food processor shredder blade for the cheddar cheese.
- Plastic wrap or wax paper — For shaping and chilling the cheese ball.
- Serving platter — A nice plate or board to show off your bunny creation.
Optional but helpful:
- Small paring knife — For trimming carrots and olives.
- Food scale — If you like precision, but eyeballing works fine here.
Step-by-Step Instructions
- Prepare the base (10 minutes)
In your mixing bowl, combine the softened cream cheese and shredded cheddar. Use a hand mixer on medium speed or a sturdy spoon to blend until smooth and well combined. You want a uniform texture without pockets of cream cheese or cheese shreds. - Add flavorings (5 minutes)
Stir in garlic powder, onion powder, Worcestershire sauce, lemon juice, fresh chives, salt, and pepper. Taste the mixture and adjust seasoning as needed. It should taste bright, cheesy, and just a little tangy. - Shape the bunny (5 minutes)
Lay a large piece of plastic wrap on the counter. Spoon the cheese mixture onto the center and use the wrap to help form it into an oval shape resembling a bunny body. Smooth the surface with a spatula or the back of a spoon. Chill in the fridge for at least 1 hour to firm up. If you’re short on time, 30 minutes works but the shape is easier when chilled longer. - Assemble the bunny features (10 minutes)
Remove the cheese ball from the fridge and place it on your serving platter. Insert two baby carrots at the narrow end for ears, securing with toothpicks if needed. Add black olive slices for eyes. For the tail, attach a small sprig of parsley or dill at the opposite end using a toothpick or gently pressing it into the cheese. Feel free to add a tiny nose from a piece of red pepper or a small dot of paprika. - Serve and enjoy
Keep the cheese ball chilled until ready to serve. Provide crackers, sliced baguette, or fresh veggies alongside for dipping. Watch the bunny disappear bite by bite.
All told, you’re looking at about 20-30 minutes of hands-on time plus chilling. The payoff? A festive, tasty centerpiece that everyone talks about.
Expert Tips & Troubleshooting
Here’s everything I learned from making this Easter Bunny Cheese Ball Delight more times than I can count. These tips will save you from any hiccups.
- Softening the cream cheese properly is key. If it’s too cold, you’ll end up with lumps and the cheddar won’t mix evenly. Leave it out for at least 30 minutes or microwave in 10-second bursts if you’re in a rush.
- Don’t skip chilling. The cheese ball firms up in the fridge, making it easier to shape and less likely to fall apart when you add the decorations.
- Use fresh herbs. Dried herbs don’t give the same vibrant flavor or appearance. Fresh chives and parsley make a big difference.
- Secure the bunny ears and eyes well. Toothpicks are your friend here. If the carrots are thick, slice them lengthwise to make flatter ears that stay put better.
- Want a smoother texture? Use a hand mixer instead of stirring by hand. It incorporates air and makes the cheese ball lighter.
- If your cheese ball is too soft to shape, pop it back in the fridge for another 20 minutes and try again.
Common issues:
- Bunny falls apart: Probably too soft or not chilled enough.
- Too salty or bland: Taste and adjust seasoning before chilling. Remember, chilling dulls flavors slightly.
- Carrot ears slip off: Cut a small flat edge on the carrot base or use toothpicks to anchor them.
Variations & Substitutions
Once you’ve nailed the classic Easter Bunny Cheese Ball Delight, there’s plenty of room to play around.
- Herb Mix-Up: Swap chives for dill, basil, or tarragon for a fresh twist. I love dill for a springy, slightly tangy note.
- Cheese Swap: Use gouda, pepper jack, or smoked cheddar for different flavor profiles. Smoked gouda adds a cozy, deep flavor perfect for cooler spring evenings.
- Spicy Bunny: Add ½ teaspoon cayenne or hot sauce to the mix for a subtle kick that surprises guests.
- Nutty Texture: Fold in ¼ cup finely chopped toasted pecans or walnuts for crunch.
- Vegetarian Option: This recipe already fits vegetarian diets, but for a vegan twist, try a cashew cheese base (haven’t tested personally but I’ve read great reviews).
- Gluten-Free Pairing: Serve with gluten-free crackers or fresh veggie sticks.
- Muffin Tin Mini Cheese Balls: For individual servings, shape smaller bunnies or simple balls using a mini muffin tin. Fun for kids’ parties.
Need a festive drink to go with this? The champagne punch recipe I make for spring brunches pairs perfectly—light, bubbly, and bright.
Serving & Storage
I usually set the Easter Bunny Cheese Ball Delight out on a platter surrounded by crackers, sliced baguette, and fresh veggies like cucumber rounds and bell pepper strips. It’s a hit served slightly chilled but not rock cold—too cold dulls the flavor. About 10-15 minutes at room temperature before serving is perfect.
For festive brunches, I’ve also paired it with homemade mini quiches for a savory spread that’s hard to beat.
Storage: Wrap the cheese ball tightly in plastic wrap and refrigerate. It stays fresh for up to 4 days. If you want to prepare it way ahead, you can freeze it tightly wrapped for up to 2 months. Thaw overnight in the fridge before serving.
Leftovers? Spread it on toast for breakfast or dollop into scrambled eggs. No waste here.
Nutrition Information
| Nutrient | Per Serving (approx. 2 tbsp) |
|---|---|
| Calories | 100 |
| Protein | 4g |
| Total Carbohydrates | 1g |
| Total Fat | 9g |
| Saturated Fat | 5g |
| Sodium | 200mg |
This Easter Bunny Cheese Ball Delight is rich and indulgent, thanks to the cream cheese and cheddar, but it’s also packed with protein and low in carbs. Perfect for a festive snack that keeps you satisfied. Just keep an eye on portion size if you’re watching fat or sodium intake.
Final Thoughts
So that’s the story and the recipe for my Easter Bunny Cheese Ball Delight. I know I’ve gone on about it, but when something this simple brings so much joy and flavor to the table, you want to share it with everyone you know. It’s the perfect combination of festive fun and classic party food that works for all ages.
This recipe has become a staple in my spring entertaining arsenal. It’s easy, customizable, and just cute enough to make people smile before they even take a bite. Plus, it pairs beautifully with other favorites like crispy prosciutto-wrapped asparagus bites for a full-on spring appetizer spread.
Give it a try, make it your own with mix-ins or garnishes, and don’t forget to tell me how it turns out. Drop a comment below with your favorite bunny variations or any questions—you know I’m always around to help.
Happy spring snacking, and may your gatherings be as delightful as this bunny!
FAQs
- Can I make the Easter Bunny Cheese Ball ahead of time?
Absolutely! I recommend making it at least a few hours ahead, ideally the day before. Just keep it wrapped tightly and chilled. It actually tastes better after the flavors meld overnight. - What if I’m not good at shaping the bunny?
No worries! The shape doesn’t have to be perfect. Use plastic wrap as a guide and remember, the carrot ears and olive eyes do a lot of the “heavy lifting” in making it look like a bunny. - Can I use other cheeses?
Yes! I love sharp cheddar for flavor, but smoked gouda, pepper jack, or even a blend of cheeses works well. Just keep the total cheese amount the same. - How do I keep the carrot ears from falling off?
Slice a small flat spot on the base of the carrot piece or use toothpicks to anchor them securely. Chilling the cheese ball beforehand helps it stay firm. - Is this recipe suitable for kids?
Totally! The familiar cheese flavors and fun bunny shape make it a hit with kids. Just watch the toothpicks or swap them for edible decorations if you’re worried. - Can I freeze the cheese ball?
Yes, wrap it tightly in plastic wrap and then foil, freeze up to 2 months. Thaw overnight in the fridge before serving. The texture stays good, though fresh is always best. - What’s the best way to serve this cheese ball?
Serve slightly chilled with a variety of crackers, sliced baguette, and fresh veggies. It’s also fantastic paired with a sparkling drink like the champagne punch from my spring brunch recipes.
Pin This Recipe!
Easter Bunny Cheese Ball Delight
A festive and fun cheese ball shaped like an Easter bunny, perfect for spring gatherings and celebrations. It combines sharp cheddar, cream cheese, and herbs for a flavorful and crowd-pleasing appetizer.
- Prep Time: 20 minutes
- Cook Time: 0 minutes
- Total Time: 1 hour 20 minutes
- Yield: 8 servings 1x
- Category: Appetizer
- Cuisine: American
Ingredients
- 8 oz (225g) cream cheese, softened
- 1 cup (115g) sharp cheddar cheese, shredded
- 1 teaspoon garlic powder
- ½ teaspoon onion powder
- 2 tablespoons fresh chives, finely chopped
- 1 teaspoon Worcestershire sauce
- 1 teaspoon freshly squeezed lemon juice
- Salt and black pepper, to taste
- 6–8 baby carrots (for bunny ears)
- 2 small slices black olives (for eyes)
- Fresh parsley or dill sprigs (for bunny tail)
- Toothpicks (to hold ears and eyes in place)
Instructions
- Prepare the base (10 minutes): In a mixing bowl, combine the softened cream cheese and shredded cheddar. Use a hand mixer on medium speed or a sturdy spoon to blend until smooth and well combined.
- Add flavorings (5 minutes): Stir in garlic powder, onion powder, Worcestershire sauce, lemon juice, fresh chives, salt, and pepper. Taste and adjust seasoning as needed.
- Shape the bunny (5 minutes): Lay a large piece of plastic wrap on the counter. Spoon the cheese mixture onto the center and use the wrap to form it into an oval shape resembling a bunny body. Smooth the surface and chill in the fridge for at least 1 hour.
- Assemble the bunny features (10 minutes): Remove the cheese ball from the fridge and place it on a serving platter. Insert two baby carrots at the narrow end for ears, securing with toothpicks if needed. Add black olive slices for eyes. Attach a small sprig of parsley or dill at the opposite end for the tail using a toothpick.
- Serve and enjoy: Keep the cheese ball chilled until ready to serve. Provide crackers, sliced baguette, or fresh veggies alongside for dipping.
Notes
Softening the cream cheese properly is key to avoid lumps. Chill the cheese ball for at least 1 hour to firm up for easier shaping and decorating. Use fresh herbs for best flavor. Secure carrot ears and olive eyes with toothpicks. If the cheese ball is too soft to shape, chill longer. Can be made ahead and tastes better after flavors meld overnight. Freeze tightly wrapped for up to 2 months.
Nutrition
- Serving Size: Approximately 2 tabl
- Calories: 100
- Sodium: 200
- Fat: 9
- Saturated Fat: 5
- Carbohydrates: 1
- Protein: 4
Keywords: Easter, cheese ball, appetizer, spring snacks, festive, bunny shaped, cream cheese, cheddar, party food


