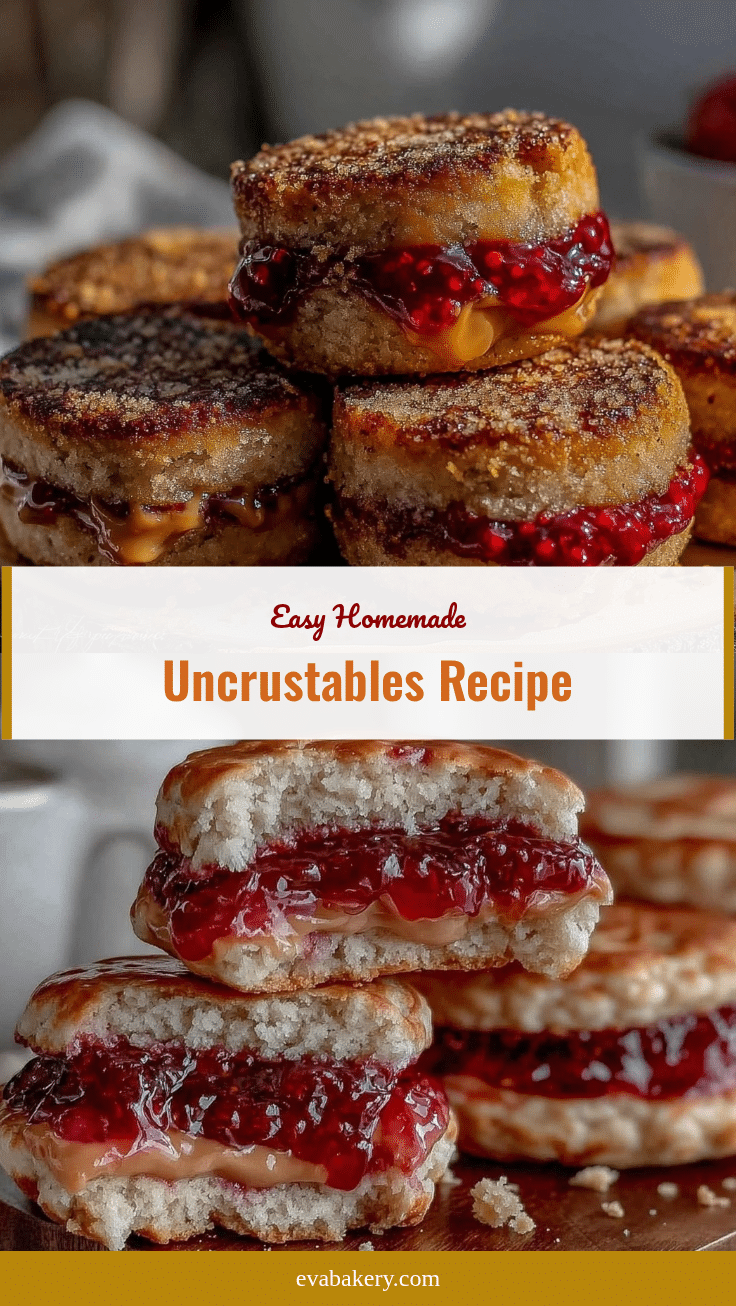
One rainy Saturday afternoon, I found myself staring at a half-empty jar of strawberry jam and a loaf of bread that was drying out faster than I wanted. I wanted something quick, kid-friendly, and snackable—but I was also sick of the usual peanut butter and jelly routine. That’s when the idea hit me: homemade Uncrustables. You know, those perfect little sealed sandwiches with no crust and a surprise filling inside? I’d seen them in the freezer aisle but never thought to make my own until that day.
After a couple of kitchen experiments (and a few sticky fingers later), I nailed a version that uses simple ingredients you probably already have, and best of all—it’s freezer friendly. I’ve now made these homemade Uncrustables so many times I could probably do it blindfolded. They’re a total game-changer for busy mornings, road trips, or just snack time when you want something tasty but fuss-free.
The best part? You control exactly what goes inside—no mystery preservatives or weird additives. Plus, they freeze beautifully, so you can stash a batch for whenever hunger strikes. Whether you’re packing lunches or just want a fun snack for yourself, this homemade Uncrustables recipe is about to become your new best friend.
Why This Recipe Works
This homemade Uncrustables recipe has completely changed how I think about freezer snacks. After testing several methods and fillings, here’s why I keep coming back to this one:
- Simple Ingredients, Big Flavor — No need for fancy stuff. Just bread, your favorite spread, and jam or other fillings. I keep it classic with peanut butter and jelly, but the options are endless.
- Perfectly Sealed Every Time — The trick is in the pressing and freezing steps. The edges seal so well that jam never leaks in the freezer or lunchbox, which I learned the hard way on my first try.
- Freezer Friendly for Easy Meal Prep — I make a double batch on Sundays and freeze them individually. My kids grab them straight from the freezer for school lunches or after-school snacks. No thawing required.
- Kid-Approved and Mess-Free — My picky eaters love these because they’re fun to eat and mess-free. No crust means no complaints about soggy or hard edges.
- Customizable — Whether you want to swap peanut butter for almond butter or use Nutella instead of jelly, this recipe adapts easily. I’ve even made savory versions with cream cheese and cucumber.
This is my go-to snack hack whenever I need something quick, reliable, and freezer friendly. It’s like a little homemade convenience food that tastes way better than store-bought.
Ingredients Breakdown
Here’s the thing about this recipe: it looks simple because it is. But I’m picky about a few ingredients to get the best texture and seal.
For the Bread and Filling:
- White sandwich bread (8-12 slices) — Choose soft, fresh white bread without crusts. I prefer bread without added seeds or grains because it seals better and is easier to press. Wonder Bread or any soft sandwich loaf works great.
- Peanut butter
- Strawberry jam or jelly (½ cup / 150g) — Choose a thicker jam or jelly to prevent leaking. I’ve tested this with classic grape jelly and homemade preserves, and thicker jams hold up best when frozen.
- Butter or margarine (optional, for sealing) — Lightly spreading the edges with softened butter before pressing helps the sandwich seal tighter. I don’t always do this, but it adds an extra layer of “stickiness” that prevents leaks.
Optional Ingredients and Variations:
- Almond butter or sunflower seed butter — Good alternatives if you have allergies or want a different flavor.
- Nutella or chocolate spread — For a sweeter treat, swap the peanut butter or jelly.
- Cream cheese — Great for savory versions with veggies or herbs.
- Honey or maple syrup — To drizzle inside for extra sweetness.
Quick note: I always keep my bread slightly chilled so it’s easier to handle and cut. Warm bread is too soft and tears easily. Also, crust removal is key—don’t skip this step or you won’t get that classic Uncrustables shape.
Equipment You’ll Need
You don’t need any special gadgets for homemade Uncrustables. Here’s what I use:
- Round sandwich cutter or biscuit cutter (about 3-4 inches diameter) — This is the easiest way to get that classic circle shape and seal the edges. I’ve tried square cutters, but circles just work better.
- Rolling pin
- Baking sheet or tray
- Parchment paper
- Plastic wrap or freezer bags
No fancy kitchen tools needed. If you don’t have a sandwich cutter, a sharp knife and steady hands work too, but it takes a bit more practice to get the seal right.
Step-by-Step Instructions
Alright, here’s how I make these freezer-friendly homemade Uncrustables, step by step:
- Prep your workspace (5 minutes): Lay out your bread slices on a clean surface. Remove crusts carefully using a serrated knife or crust cutter. Keep your bread slightly chilled—it’s less likely to tear.
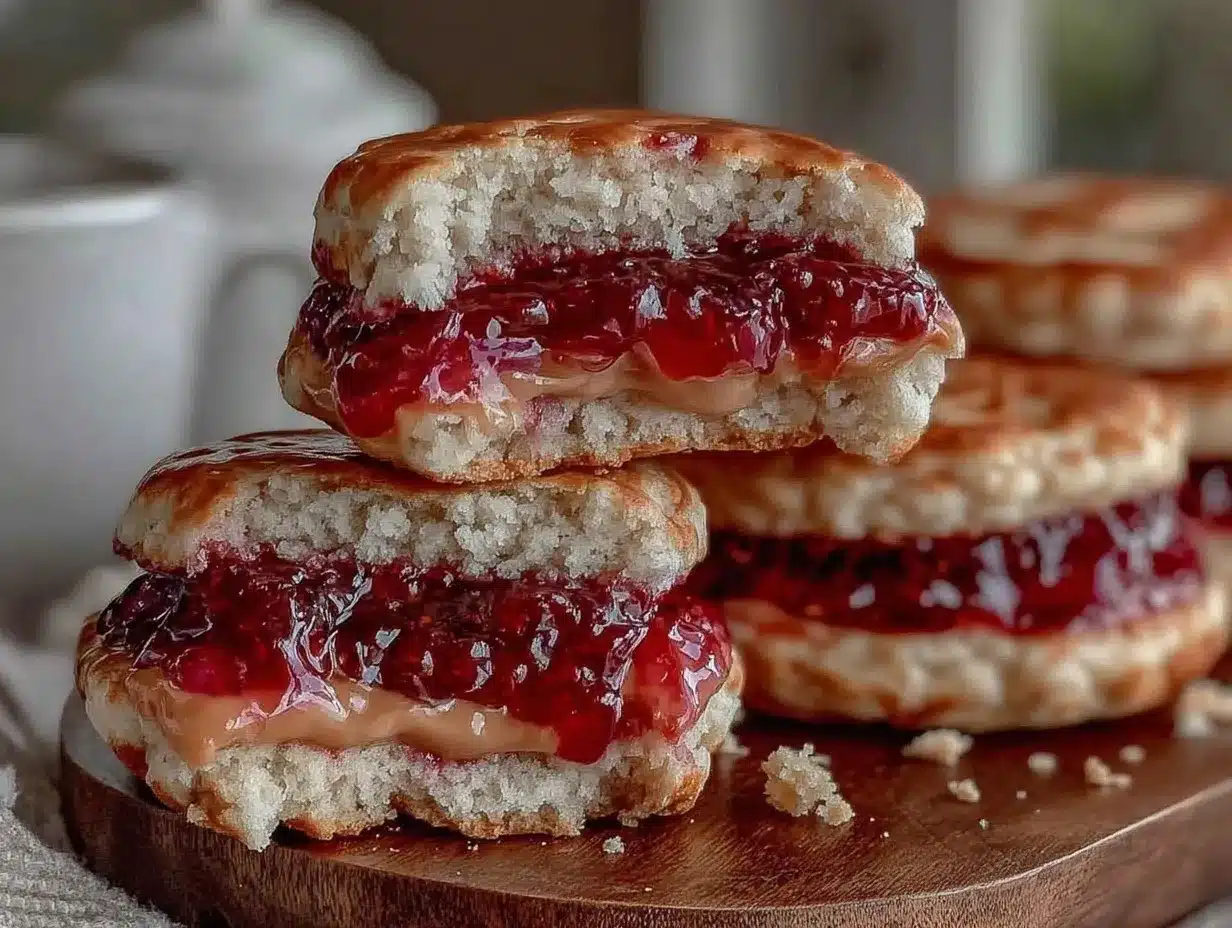
- Spread the fillings (5 minutes): On one slice of bread, spread about 1 tablespoon of peanut butter evenly, leaving about ½ inch around the edge. On a second slice, spread about 1 tablespoon of strawberry jam, also leaving the edges clear. Don’t overload or the filling will ooze out when sealed.
- Assemble the sandwich (3 minutes): Place the jam-covered slice on top of the peanut butter slice, matching edges. If you want, lightly brush the edges with softened butter to help seal.
- Cut and seal (5 minutes): Press the round sandwich cutter firmly down through the bread to cut and seal the edges in one motion. If you don’t have a cutter, use a sharp knife to cut a circle and press edges tightly together with your fingers or a rolling pin. The seal should be firm to keep the filling inside.
- Freeze individually (10 minutes): Place each sandwich on a parchment-lined baking sheet, spaced apart so they don’t touch. Freeze for 1-2 hours until firm.
- Store for later (2 minutes): Once frozen solid, transfer sandwiches to a labeled freezer bag or container. They keep for up to 3 months.
- To serve: Eat cold straight from the freezer or let thaw for 10 minutes at room temperature. They’re great for lunchboxes or quick snacks.
Total active time is about 30 minutes, plus freezing. The hardest part? Waiting for them to freeze so you can try one!
Expert Tips & Troubleshooting
Here’s everything I’ve learned from making homemade Uncrustables way more times than I should admit:
- Don’t skip crust removal. The crust is what makes sealing tricky. Without a clean edge, your sandwich won’t seal properly and filling will leak.
- Keep bread chilled. Cold bread is easier to cut and seal without tearing. I store my loaf in the fridge for 20 minutes before starting.
- Use thick spreads. Thin or runny jams will leak during freezing or thawing. Thick preserves or jellies work best.
- Seal edges firmly. Press hard with your cutter or rolling pin. If you see any gaps, reseal by pressing with your fingers.
- Freeze individually first. Don’t pack sandwiches together before freezing or they’ll stick. Freeze on a parchment-lined tray, then bag.
- Watch portion size. Too much filling and the sandwiches will burst open. I stick to about 1 tablespoon of each spread per sandwich.
- Experiment with fillings. My kids love cream cheese and honey or Nutella versions for variety.
If your sandwiches leak or fall apart, it’s usually because the edges weren’t sealed tightly or the bread was too warm. I’ve learned the hard way with many messy lunches!
Variations & Substitutions
Once you’ve nailed the basic homemade Uncrustables, you can have fun switching things up:
- Sunflower seed butter + raspberry jam — Allergy-friendly and delicious.
- Nutella + sliced bananas — Add a thin banana slice inside for extra sweetness.
- Cream cheese + smoked salmon — For a savory twist, great for adult snacks.
- Peanut butter + honey + cinnamon — A warm flavor combo that kids adore.
- Gluten-free bread — Use your favorite soft gluten-free loaf. I recommend slicing it thicker to prevent tearing.
- Vegan options — Swap butter for vegan margarine and use nut butters with fruit preserves that don’t contain gelatin.
These sandwiches are surprisingly versatile, so feel free to get creative. Just remember to keep the spreads thick enough to avoid leaks.
Serving & Storage
I love how these homemade Uncrustables make snack time effortless. Here’s how I serve and store them:
- Serving ideas: They’re perfect cold from the freezer for a quick snack or lunchbox surprise. You can also let them thaw for 10-15 minutes if you prefer a softer bite. For a special treat, toast them lightly in a panini press for a warm, melty twist.
- Storage: Store sandwiches individually wrapped or in a single layer inside freezer bags. They keep well for up to 3 months.
- Thawing: No need to thaw before packing in lunchboxes—kids can eat straight from the freezer. If you want to thaw ahead, 10-15 minutes at room temp works great.
For busy mornings, I make a batch of these alongside other freezer-friendly breakfasts like fluffy mini quiches. It’s all about having options ready to go!
Nutrition Information
Here’s a rough idea of what you’re getting per sandwich (based on 12 sandwiches):
| Nutrient | Per Sandwich |
|---|---|
| Calories | 210 |
| Protein | 6g |
| Total Carbohydrates | 28g |
| Dietary Fiber | 2g |
| Sugars | 12g (mostly from jam and bread) |
| Total Fat | 8g |
| Saturated Fat | 1.5g |
| Sodium | 180mg |
This is a treat-style snack, so it’s got a fair bit of sugar and carbs from the bread and jam, but also some protein and healthy fats from the peanut butter. Compared to store-bought, you’re avoiding preservatives and controlling exactly what goes in.
Final Thoughts
So there you have it—my tried-and-true homemade Uncrustables recipe that’s easy, freezer friendly, and packed with simple ingredients. I’ve made these over and over because they save me time and keep my kids happy during hectic mornings or snack attacks. Plus, there’s just something satisfying about the perfectly sealed, crustless little sandwiches that taste way better than the store-bought kind.
Give it a go, tweak the fillings to your heart’s content, and stash a batch in your freezer. Before you know it, you’ll be the snack hero of your household. And hey, if you’re interested in more easy freezer-friendly snacks, my crispy prosciutto-wrapped asparagus bites are a quick savory hit that pairs great with any party spread.
If you try this recipe, I’d love to hear how it went—and what fillings you picked. Drop a comment below or share your tweaks. I’m always here to help if something doesn’t work out or if you want ideas for your next batch.
Happy sandwich making!
FAQs
Can I use whole wheat or multigrain bread for homemade Uncrustables?
Yes, you can! Just be aware that denser breads like whole wheat or multigrain don’t seal quite as well because the edges are less soft and pliable. I recommend slightly warming the bread to make it more flexible or pressing the edges a bit longer to get a good seal. Also, thicker bread slices help prevent tearing.
How long do homemade Uncrustables last in the freezer?
They keep well for up to 3 months when stored properly in airtight bags or containers. Beyond that, they might start to lose texture or flavor. I usually make batches that last us about 2-3 weeks to keep them fresh.
Can I make these ahead and freeze them without cutting into circles?
You can, but the classic sealed edge works best with the round shape. If you skip cutting, the filling may not stay contained when thawing. If you want to save time, consider cutting squares and tightly wrapping each sandwich before freezing, but expect a different texture and appearance.
Do I have to use peanut butter and jelly?
Not at all! This recipe is a blank canvas. I’ve made versions with almond butter and honey, cream cheese and cucumber, or even Nutella and banana. Just make sure your fillings aren’t too runny to avoid leaks.
How do I keep the sandwiches from sticking together in the freezer?
Freeze them individually on a parchment-lined tray until firm (usually 1-2 hours), then transfer to a freezer bag or container. This prevents them from freezing into one big block and makes grabbing just one easy.
Can I toast or warm homemade Uncrustables?
Absolutely! I love popping them in a panini press or toaster oven for a few minutes. The peanut butter melts slightly, and the bread crisps up nicely. Just keep an eye on them so they don’t over-toast or the filling doesn’t leak out.
Is there a way to make these allergy-friendly?
Yes, swap peanut butter for sunflower seed butter or soy nut butter if you have nut allergies, and choose seed-free bread. For dairy allergies, avoid butter for sealing or use a dairy-free alternative. Just be mindful of cross-contamination if you’re packing for kids with allergies.
Pin This Recipe!
Homemade Uncrustables Recipe Easy Freezer Friendly Snack with Simple Ingredients

This homemade Uncrustables recipe offers a quick, kid-friendly, and freezer-friendly snack made with simple ingredients. Perfectly sealed and customizable, these crustless sandwiches are great for busy mornings, road trips, or snack time.
- Prep Time: 13 minutes
- Cook Time: 0 minutes
- Total Time: 30 minutes plus freezing time
- Yield: 12 sandwiches 1x
- Category: Snack
- Cuisine: American
Ingredients
- 8–12 slices white sandwich bread (soft, fresh, crusts removed)
- ½ cup (125g) creamy peanut butter
- ½ cup (150g) strawberry jam or jelly (thick consistency)
- Butter or margarine (optional, for sealing edges)
- Optional variations: almond butter, sunflower seed butter, Nutella or chocolate spread, cream cheese, honey or maple syrup
Instructions
- Prep your workspace (5 minutes): Lay out bread slices on a clean surface. Remove crusts carefully using a serrated knife or crust cutter. Keep bread slightly chilled to prevent tearing.
- Spread the fillings (5 minutes): Spread about 1 tablespoon of peanut butter evenly on one slice, leaving ½ inch around the edge. Spread about 1 tablespoon of strawberry jam on a second slice, also leaving edges clear.
- Assemble the sandwich (3 minutes): Place the jam-covered slice on top of the peanut butter slice, matching edges. Optionally, lightly brush edges with softened butter to help seal.
- Cut and seal (5 minutes): Press a round sandwich cutter (3-4 inches diameter) firmly down through the bread to cut and seal edges in one motion. If no cutter, use a sharp knife to cut a circle and press edges tightly with fingers or rolling pin.
- Freeze individually (10 minutes): Place each sandwich on a parchment-lined baking sheet spaced apart. Freeze for 1-2 hours until firm.
- Store for later (2 minutes): Transfer frozen sandwiches to labeled freezer bags or containers. Keep for up to 3 months.
- To serve: Eat cold straight from the freezer or let thaw for 10-15 minutes at room temperature. Optionally, toast lightly in a panini press for a warm, melty snack.
Notes
[‘Keep bread slightly chilled before cutting to prevent tearing.’, ‘Remove crusts completely for a proper seal.’, ‘Use thick jams or jellies to prevent leaking.’, ‘Press edges firmly to seal; reseal any gaps by pressing with fingers.’, ‘Freeze sandwiches individually on parchment-lined tray before storing together to prevent sticking.’, ‘Use about 1 tablespoon of each spread per sandwich to avoid bursting.’, ‘Experiment with different fillings like cream cheese and honey, Nutella and banana, or savory options.’, ‘Sandwiches can be eaten cold or lightly toasted in a panini press.’]
Nutrition
- Serving Size: 1 sandwich
- Calories: 210
- Sugar: 12
- Sodium: 180
- Fat: 8
- Saturated Fat: 1.5
- Carbohydrates: 28
- Fiber: 2
- Protein: 6
Keywords: homemade uncrustables, freezer friendly snack, peanut butter and jelly, crustless sandwich, kid-friendly snack, easy snack recipe, make ahead snack


