One afternoon last week, I finally hit my limit. The usual scramble of “What’s for snack?” followed by a chorus of “I don’t want that!” from my kids had me dreaming of a better way. I wanted something quick, no-fuss, and—most importantly—that everyone in the family would actually want to eat. Enter the after school snack board, my new lifesaver. I pulled together a handful of simple ingredients from the pantry and fridge, arranged them on a big wooden board, and watched everyone gravitate toward it like it was a mini feast. No fights. No complaints. Just happy little snackers nibbling on their favorites, chatting about their day. After making it three times in one week, it felt like a secret weapon for easy, crowd-pleasing snacks that don’t require hours in the kitchen.
What makes this after school snack board so special? It’s the perfect mix of simple, wholesome ingredients that your whole family will crave. No complicated recipes, just fresh, tasty bites that come together in minutes. Whether your kids love fresh fruit, crunchy veggies, or a little cheese with crackers, this snack board has something for everyone. And if you love entertaining, this style of snacking makes a relaxed, pretty spread for grown-up gatherings too (I’ve used it as a quick appetizer when friends drop by, no stress). Trust me, once you try this, you’ll wonder how you ever managed snack time without it.
Why This Recipe Works
This after school snack board has totally changed the way I approach snack time—and honestly, it’s made my life easier in a million little ways. Here’s why I keep coming back to it:
- Super Fast Assembly — No cooking involved. I’m talking 5-10 minutes tops, which means I’m not stuck in the kitchen when the kids walk through the door famished.
- Customizable for Every Palate — Whether your kids are cheese lovers, fruit fanatics, or veggie skeptics, you can swap out ingredients to suit everyone. I’ve tested variations with olives, nuts, and dips, and they all work great.
- Encourages Mindful Eating — Because everything is laid out buffet-style, kids naturally pick and choose what they want. It feels less like a forced snack and more like a fun little food adventure.
- Perfect for All Ages — From toddlers to adults, everyone finds something they love. My husband often joins in after work, and honestly, it’s a nice way to reconnect before dinner.
- Simple Ingredients You Probably Have — I rarely have to make special grocery runs. Most of the items are pantry staples or fridge basics, which means you can throw this together anytime.
Snack time used to be a stressful scramble, but this board has turned it into a calm, happy ritual. It’s easy to prepare, feels special without being fussy, and gives everyone a chance to snack their way. Seriously, it’s my go-to when I want something quick that feels like a real treat.
Ingredients Breakdown
Here’s the thing about this snack board: it’s all about simple, wholesome ingredients that complement each other. You don’t need fancy or expensive stuff—just basics done well.
Fresh Fruits and Veggies
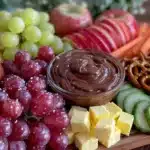
- Apple slices (1-2 medium apples) — Crisp, slightly sweet, and perfect for pairing with cheese or nut butter. I like to leave the skin on for texture and nutrients.
- Grapes or berries (1 cup) — Juicy bursts of sweetness that kids love. Berries add color and antioxidants; grapes are easy to grab and pop.
- Carrot sticks and cucumber slices (1 cup total) — Crunchy and refreshing. I usually cut these into sticks or rounds. If you want to sneak in some veggies, these are the easiest to “hide” behind dips.
- Cherry tomatoes (½ cup) — Sweet, juicy, and bite-sized. I wash and leave them whole for no-fuss snacking.
Cheeses
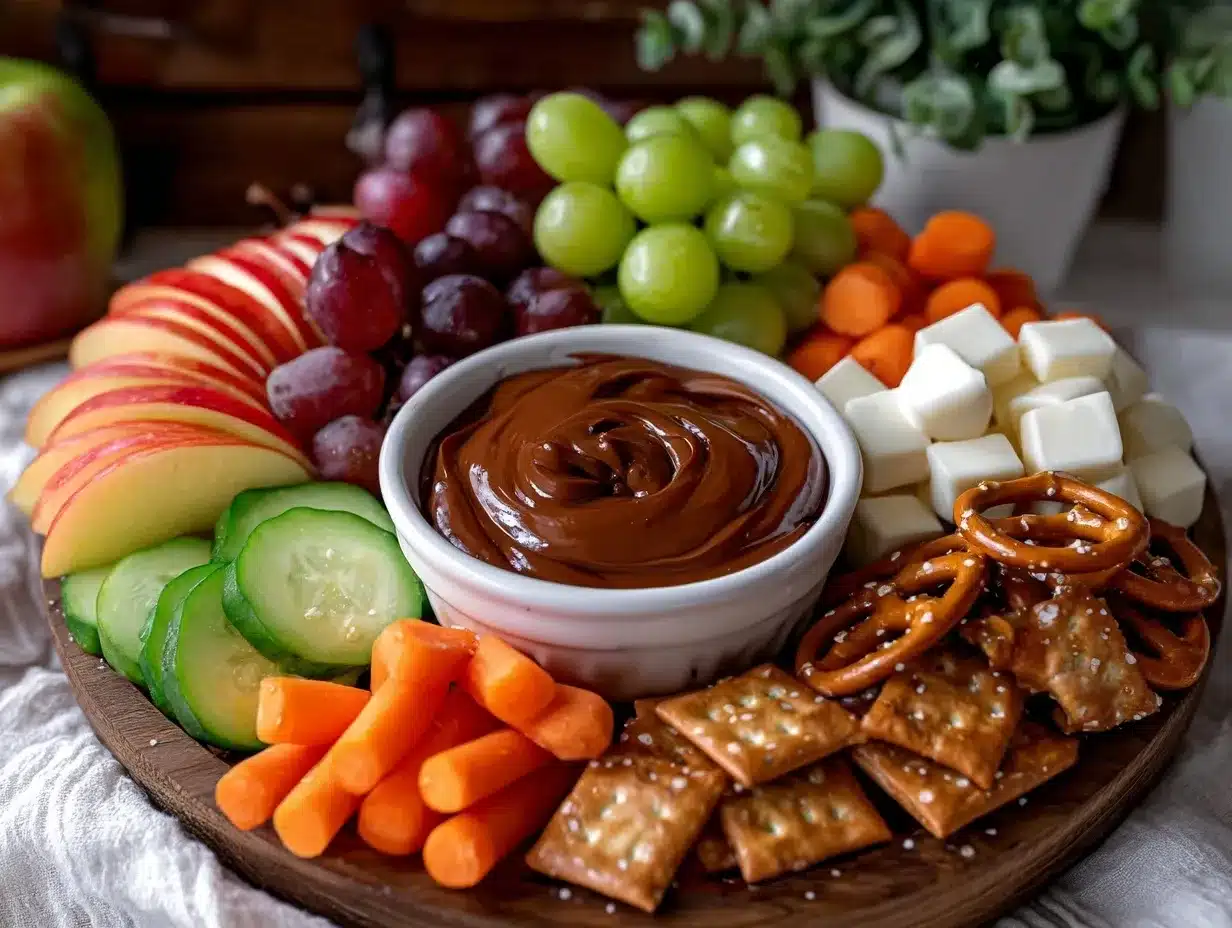
- Cheddar or gouda slices (4-6 ounces) — I slice these into thin wedges or cubes. Sharp cheddar works great for flavor contrast; gouda adds a creamy touch.
- String cheese or mozzarella balls (4 ounces) — Fun for kids to peel apart or pop in their mouths. I opt for the small mozzarella balls when I want something fancy-looking but easy.
Crunchy Elements
- Whole grain crackers or pita chips (1 cup) — Look for ones without too many additives or salt. These provide the crunch factor and are perfect for pairing with cheese or spreads.
- Roasted nuts (½ cup) — Almonds, cashews, or walnuts. I toast them lightly in a dry pan to bring out the flavor. They add protein and a satisfying crunch.
Dips and Spreads
- Hummus or guacamole (½ cup) — I usually buy these premade but sometimes whip up a quick batch of hummus at home. They’re great for dipping veggies and crackers.
- Peanut butter or almond butter (¼ cup) — A kid favorite. I serve it in a small bowl for dipping apple slices and crackers.
Extras
- Olives (¼ cup) — Optional but adds a salty, briny kick that adults appreciate.
- Dark chocolate pieces (a handful) — Because a little sweet treat is always welcome. I break up a bar into small chunks for nibbling.
Most of these ingredients are things I keep stocked regularly (shoutout to my constant hummus obsession). If you’re wondering what to swap, I’ve found that any fresh fruit or raw veggie will work—think celery sticks, sliced bell peppers, or even radishes. If you want to add protein, a few slices of deli meat or boiled eggs are easy additions. If you’re curious about dips, I love pairing this snack board with my fluffy mini quiches as a more filling after-school spread.
Equipment You’ll Need
You don’t need much to create this snack board, which is part of the magic:
- Large wooden board or platter — I use a cutting board or a shallow tray. Bigger is better so everything has room to breathe and looks inviting.
- Small bowls or ramekins — For dips and nut butters. I use these for portion control and to keep things tidy.
- Sharp knife and cutting board — For slicing fruits, veggies, and cheese.
- Serving utensils — Small spoons for dips, cheese knives or toothpicks for convenience.
Optional but handy:
- Tongs or mini forks — Great for grabbing olives or nuts without using fingers.
- Reusable snack cups or containers — If you want to pack portions for on-the-go snacking.
If you don’t have a wooden board, a large plate or even a baking sheet lined with parchment paper works just fine. The key is to arrange everything nicely so it’s appealing and easy to grab.
Step-by-Step Instructions
- Prep your ingredients (10-15 minutes)
Wash and dry all fresh fruits and veggies. Slice apples, cucumbers, and carrots into bite-size pieces or sticks. Cut cheese into cubes or slices. Toast nuts in a dry skillet over medium heat for 3-4 minutes, stirring frequently until fragrant and lightly browned. Let cool. - Prepare your dips and spreads
Spoon hummus, guacamole, and nut butters into small bowls or ramekins. Place these on your serving board first to anchor the layout. - Arrange the fresh ingredients
Start with the larger items like apple slices and carrot sticks, fanning them out in groups around the board. Add clusters of grapes or berries in between for pops of color. Place cherry tomatoes in small piles or scatter them for a casual look. - Add the cheese and crunchy elements
Place cheese slices or cubes near crackers and pita chips. Arrange crackers in small stacks or overlapping rows. Scatter roasted nuts in small piles or in a bowl. - Include extras and finishing touches
Add olives in a small bowl or directly on the board. Break up dark chocolate into chunks and scatter a few pieces around for a hint of sweetness. - Final check and serve
Step back and see if the board looks balanced with a variety of colors, textures, and flavors. Adjust spacing if needed for easy grabbing. Place serving utensils nearby and set out napkins.
That’s it! The whole process takes about 15-20 minutes once you get the hang of it, and it feels like a mini celebration every time.
Expert Tips & Troubleshooting
Here’s what I’ve learned after making this snack board a dozen times (and surviving the chaos of snack time):
- Keep it fresh — Prep just before serving if you can. Apples brown quickly, so toss them with a splash of lemon juice if you’re prepping early.
- Balance textures — Make sure there’s a mix of crunchy, creamy, juicy, and salty elements. This keeps everyone interested and satisfied.
- Watch portion sizes — Kids can get overwhelmed by too many choices. I like to start with a few items and refill as needed.
- Change it up weekly — Swap fruits and veggies based on what’s in season or on sale. Keeps things exciting and reduces waste.
- Include fun dips — Even picky eaters love dipping. I’ve had great success adding a little ranch or yogurt-based dip alongside hummus.
- Don’t overfill the board — It looks better with space between items. Crowding makes it hard to pick things up.
If you notice your kids aren’t eating certain items, try cutting them smaller or serving with a dip. Sometimes that’s all it takes. And if the board feels too light, add a few slices of deli meat or some boiled eggs for extra protein. When I want to impress grown-up guests, I pair it with crispy prosciutto-wrapped asparagus bites for a simple but elegant spread.
Variations & Substitutions
Once you have the basic snack board down, you can mix and match components to keep it fresh. Here are some ideas I’ve tested and loved:
- Mediterranean Style — Add marinated artichokes, roasted red peppers, feta cheese, and pita bread. Swap hummus for tzatziki.
- Sweet Tooth Board — Load up on fresh berries, apple slices with peanut butter, yogurt-covered pretzels, and a few dark chocolate chunks.
- Vegan-Friendly — Skip cheese and opt for extra hummus, guacamole, nuts, and lots of fresh veggies. Add roasted chickpeas for crunch.
- Protein Boost — Include boiled eggs, slices of turkey or ham, and extra nuts. Great for after school snacks when kids need more fuel.
- Crunchy Swap — Instead of crackers, use rice cakes, pretzel sticks, or even roasted chickpeas for a different texture.
If you’re short on time, pre-sliced veggies or pre-washed salad mixes can save prep. And if you want to get fancy, a little drizzle of honey over cheese or fruit adds a lovely touch. For a completely different vibe, pair your snack board with a refreshing drink like the champagne punch recipe—perfect for weekend gatherings.
Serving & Storage
This snack board is best enjoyed fresh and assembled right before serving, but here are some tips for storage and leftovers:
- Serve fresh — Fruits and veggies are crispest and tastiest the day you prep. Apples can brown if sliced too early, so toss them with lemon juice or prep just before snack time.
- Store leftovers separately — Keep cut fruit in airtight containers in the fridge. Cheese wrapped tightly in parchment or plastic wrap stays fresh for 3-5 days.
- Save crackers and nuts at room temp — Keep crunchy items in sealed containers to prevent sogginess.
- Use leftovers creatively — Extra veggies and cheese make great additions to salads or omelets. And fruit works perfectly in smoothies or as a topping for oatmeal.
- Pack for on-the-go — Portion the snack board ingredients into small containers for school or car rides.
If you find yourself with a lot of leftovers, repurposing them into simple dishes like a quick grilled cheese sandwich with apple slices or a veggie-packed hummus wrap works wonders. This snack board style is so versatile it fits into busy days without adding extra work.
Nutrition Information
I’m not a nutritionist, but here’s a rough idea of what a serving of this after school snack board looks like (based on a moderate portion):
| Nutrient | Approximate Amount |
|---|---|
| Calories | 250-300 |
| Protein | 8-12g (depends on cheese and nuts) |
| Total Carbohydrates | 25-35g (from fruit and crackers) |
| Dietary Fiber | 5-7g |
| Fat | 12-18g (mostly from nuts and cheese) |
| Sugars | 12-18g (mostly natural fruit sugars) |
The key here is balance—there’s fiber from fresh produce, protein from cheese and nuts, and carbs from fruit and crackers. Compared to typical processed snacks or packaged bars, this board feels more like real food. And it keeps everyone feeling satisfied until dinner.
Final Thoughts
So that’s my simple, crowd-pleasing after school snack board. It’s the one thing that’s made snack time something I actually look forward to instead of dread. With just a handful of easy ingredients, you can create a colorful, tasty spread that your whole family will reach for—and that’s a win in my book.
Try customizing it with your favorite fruits, cheeses, and dips. Experiment with different combos and see what your family loves best. I promise, once you start, you’ll find yourself making this board again and again—not just for snacks, but for casual get-togethers and easy entertaining too.
If you want to keep building your snack and appetizer repertoire, I highly recommend checking out the crispy bacon-wrapped dates recipe for a sweet and savory bite or the elegant caviar deviled eggs for something fancy but simple.
Give this snack board a try and let me know how it goes. I’m always here to help with tips or variations if you want to switch things up. Happy snacking!
FAQs
- Can I make the after school snack board ahead of time?
You can prep most ingredients in advance—wash and cut fruits and veggies, slice cheese, and toast nuts a day before. Keep everything in airtight containers in the fridge, then assemble the board right before serving to keep it fresh and vibrant. - What if my kids don’t like some of the ingredients?
No worries! The beauty of this board is that you can tailor it. Swap out anything your kids aren’t into. For picky eaters, try smaller pieces and add fun dips like ranch or peanut butter—they make veggies and fruits more appealing. - How do I keep apple slices from browning?
Toss them in a little lemon juice or a mix of water and vinegar right after slicing. This slows browning and keeps them looking fresh longer. - Can I include allergy-friendly options?
Absolutely. Use seed butters instead of nut butters, gluten-free crackers, and dairy-free cheese substitutes. Fresh fruits and veggies are naturally safe for most allergies. - What’s your favorite dip for this snack board?
I’m a sucker for classic hummus—it goes with almost everything on the board. But I also love a simple Greek yogurt dip with herbs or guacamole for a creamy twist. - Can this snack board work for grown-up parties?
Definitely! Just add a few gourmet touches like marinated olives, fancy cheeses, and artisanal crackers. Pair it with a sparkling beverage like the sparkling New Year’s sangria for an easy, elegant spread. - How do I store leftovers?
Store leftovers separately to keep freshness—fruit and veggies in the fridge, crackers and nuts in airtight containers at room temperature, cheese wrapped tightly. Leftover dips stay good for 3-4 days refrigerated.
Pin This Recipe!
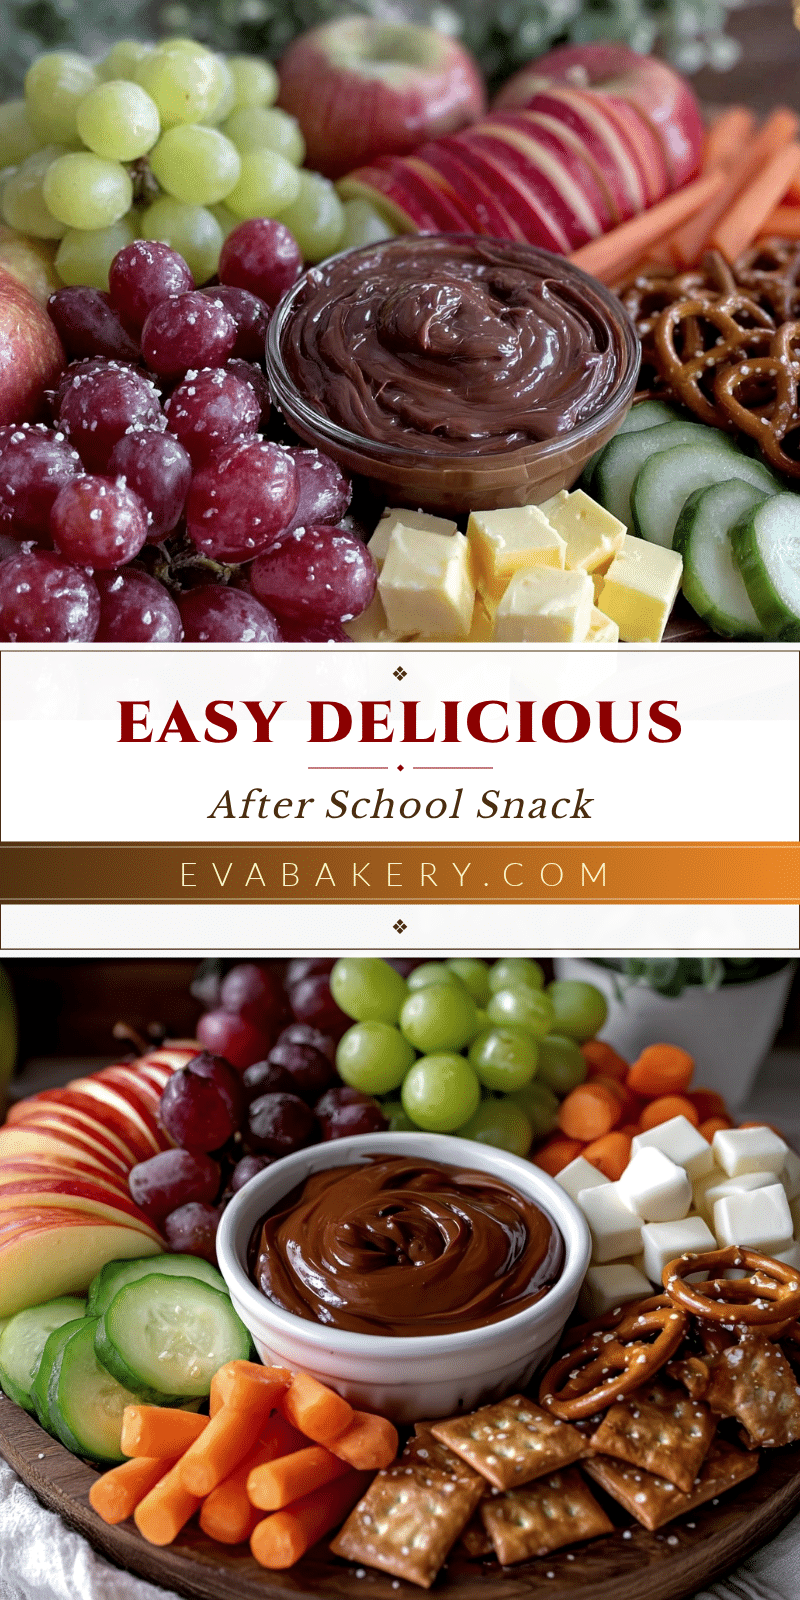
After School Snack Board Easy Recipe with Simple Ingredients for Family
A quick, no-fuss after school snack board featuring simple, wholesome ingredients that everyone in the family will enjoy. Perfect for kids and adults alike, this customizable snack board comes together in minutes with fresh fruits, veggies, cheeses, nuts, and dips.
- Prep Time: 10-15 minutes
- Cook Time: 3-4 minutes (toasting nuts)
- Total Time: 15-20 minutes
- Yield: 4 servings 1x
- Category: Snack
- Cuisine: American
Ingredients
- 1–2 medium apples, sliced
- 1 cup grapes or berries
- 1 cup carrot sticks and cucumber slices
- ½ cup cherry tomatoes
- 4–6 ounces cheddar or gouda cheese, sliced or cubed
- 4 ounces string cheese or mozzarella balls
- 1 cup whole grain crackers or pita chips
- ½ cup roasted nuts (almonds, cashews, or walnuts)
- ½ cup hummus or guacamole
- ¼ cup peanut butter or almond butter
- ¼ cup olives (optional)
- A handful of dark chocolate pieces
Instructions
- Wash and dry all fresh fruits and veggies. Slice apples, cucumbers, and carrots into bite-size pieces or sticks. Cut cheese into cubes or slices.
- Toast nuts in a dry skillet over medium heat for 3-4 minutes, stirring frequently until fragrant and lightly browned. Let cool.
- Spoon hummus, guacamole, and nut butters into small bowls or ramekins. Place these on your serving board first to anchor the layout.
- Arrange larger items like apple slices and carrot sticks, fanning them out in groups around the board. Add clusters of grapes or berries in between for pops of color. Place cherry tomatoes in small piles or scatter them for a casual look.
- Place cheese slices or cubes near crackers and pita chips. Arrange crackers in small stacks or overlapping rows. Scatter roasted nuts in small piles or in a bowl.
- Add olives in a small bowl or directly on the board. Break up dark chocolate into chunks and scatter a few pieces around for a hint of sweetness.
- Step back and see if the board looks balanced with a variety of colors, textures, and flavors. Adjust spacing if needed for easy grabbing. Place serving utensils nearby and set out napkins.
Notes
[‘Prep just before serving to keep fruits and veggies fresh.’, ‘Toss apple slices with lemon juice to prevent browning if prepping early.’, ‘Balance textures by including crunchy, creamy, juicy, and salty elements.’, ‘Adjust portion sizes to avoid overwhelming kids.’, ‘Swap ingredients based on preferences or seasonal availability.’, ‘Add deli meats or boiled eggs for extra protein if desired.’, ‘Store leftovers separately to maintain freshness.’, ‘Use leftovers creatively in salads, wraps, or sandwiches.’]
Nutrition
- Serving Size: Moderate portion per
- Calories: 275
- Sugar: 15
- Sodium: 250
- Fat: 15
- Saturated Fat: 5
- Carbohydrates: 30
- Fiber: 6
- Protein: 10
Keywords: after school snack, snack board, easy snack, family snack, healthy snack, kids snack, cheese board, fruit and veggie snack


