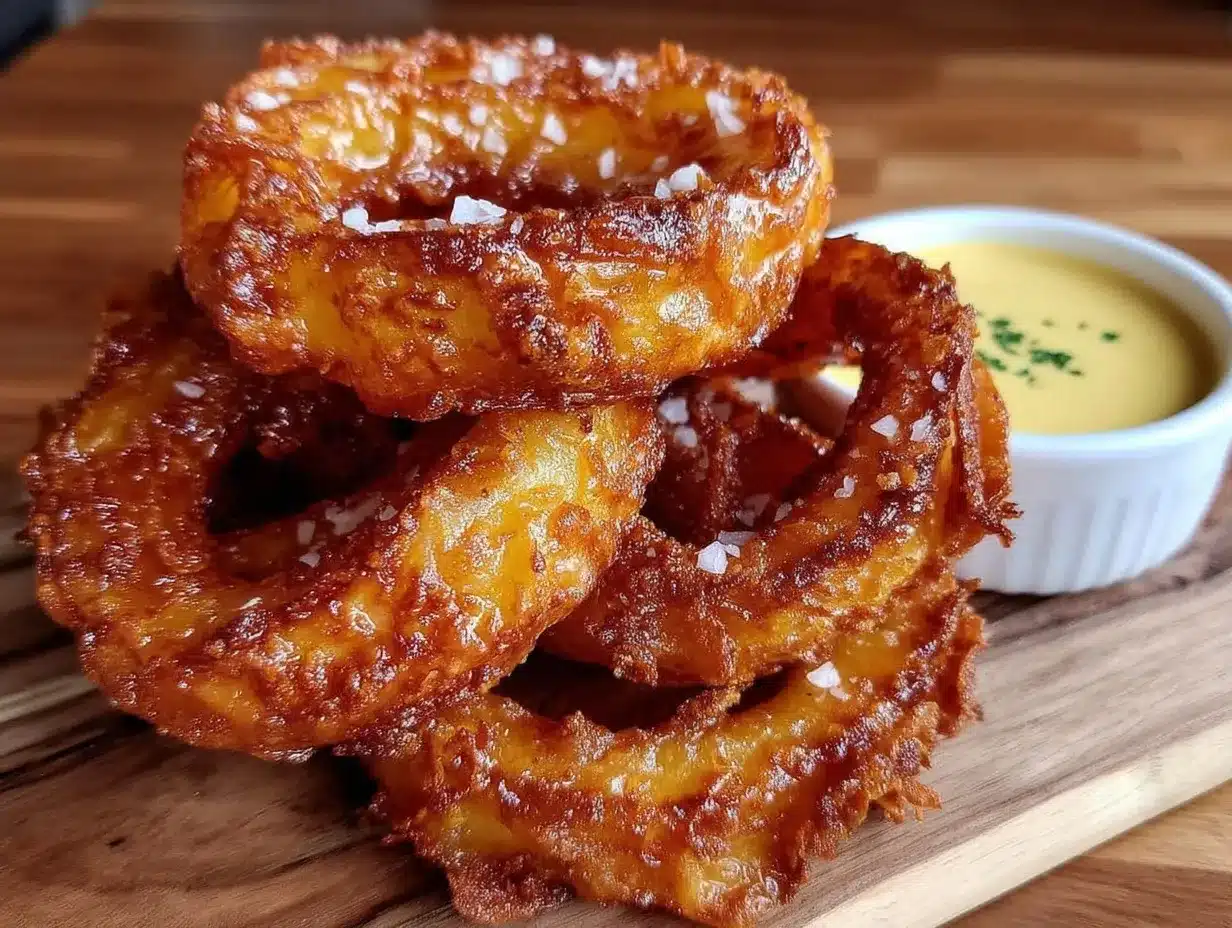
Let me tell you, the scent of sizzling onions coated in a golden, crispy crust wafting from my skillet is enough to make anyone’s mouth water. The first time I made these crispy onion rings with hand-breaded crunch, I was instantly hooked. It was one of those rare kitchen moments where everything just fell into place—the crunch, the flavor, the perfect balance of sweet onion and savory coating—the kind of moment where you pause, take a deep breath, and just smile because you know you’re onto something truly special.
Years ago, when I was knee-high to a grasshopper, my grandma used to make something similar, but honestly, her recipe always ended up a little soggy. Finding this hand-breaded technique felt like uncovering a secret treasure. My family couldn’t stop sneaking these onion rings off the cooling rack (and I can’t really blame them). Honestly, these crispy onion rings are dangerously easy to make and provide pure, nostalgic comfort in every bite.
You know what makes this recipe stand out? It’s perfect for potlucks, a sweet treat for your kids, or just to brighten up your Pinterest cookie board with something savory and satisfying. After testing it multiple times in the name of research, of course, it’s become a staple for family gatherings and casual weekend snacks. It feels like a warm hug, and you’re going to want to bookmark this one for those times when you need a crunchy, flavorful snack that hits all the right notes.
Why You’ll Love This Recipe
Honestly, these crispy onion rings with hand-breaded crunch aren’t just good—they’re the kind of recipe that makes you close your eyes after the first bite. As a home cook who’s tried many versions, here’s why this one stands out:
- Quick & Easy: Comes together in under 30 minutes—perfect for busy weeknights or last-minute cravings.
- Simple Ingredients: No fancy grocery trips needed; you likely already have everything in your kitchen.
- Perfect for Any Occasion: Whether it’s a casual snack, game day, or a side for burgers, these onion rings shine.
- Crowd-Pleaser: Always gets rave reviews from kids and adults alike—no fighting over the last ring here.
- Unbelievably Delicious: The texture and flavor combo is next-level comfort food with that perfect hand-breaded crunch.
What makes this recipe different? It’s all about the hand-breading technique that locks in the crunch without being greasy or heavy. Plus, the seasoning—just the right balance of salt, pepper, and a hint of paprika—gives these onion rings a subtle kick that keeps you coming back. This isn’t just another fried onion ring; it’s your best version, crafted with love and a bit of kitchen wisdom.
Let’s face it, this recipe is comfort food reimagined—fast, delicious, and with soul-soothing satisfaction. Whether you’re impressing guests without stress or turning a simple meal into something memorable, these crispy onion rings deliver every time.
What Ingredients You Will Need
This recipe uses simple, wholesome ingredients to deliver bold flavor and satisfying texture without the fuss. Most of these are pantry staples, and substitutions are easy if needed.
- Large yellow onions (2 medium, sliced into ½-inch thick rings; sweet onions work well too)
- All-purpose flour (1 cup / 120g, for that essential base coating)
- Cornstarch (¼ cup / 30g, helps with extra crispiness)
- Salt (1 tsp, plus extra for seasoning)
- Ground black pepper (½ tsp)
- Smoked paprika (½ tsp, adds a subtle smoky depth)
- Buttermilk (1 cup / 240ml, room temperature; if you don’t have it, mix 1 cup milk with 1 tbsp lemon juice and let sit 5 minutes)
- Large eggs (2, beaten, room temperature)
- Panko breadcrumbs (2 cups / 100g, for that light, airy crunch—recommended brand: Japanese style panko)
- Vegetable oil (for frying; about 4 cups / 1 liter, canola or sunflower oil works great)
Substitution tips: Use almond flour or gluten-free flour blend instead of all-purpose flour for gluten-free options. Swap buttermilk for dairy-free milk with a splash of apple cider vinegar for a vegan tweak (just use flax eggs instead of real eggs).
Equipment Needed
- Large mixing bowls: For coating and batter steps.
- Deep frying pan or Dutch oven: At least 3-quart capacity works well for frying the onion rings evenly.
- Wire rack: Essential for draining excess oil and keeping the onion rings crispy.
- Slotted spoon or spider strainer: To safely remove onion rings from hot oil.
- Thermometer (optional but recommended): To keep the oil at the perfect 350°F (175°C) for frying. I’ve fried a few batches without it, but trust me, it helps avoid greasy or overcooked rings.
- Kitchen paper towels: For quick blotting after frying.
If you don’t have a thermometer, no worries—just heat the oil over medium heat and test by dropping a small breadcrumb in; it should sizzle immediately but not burn. A budget-friendly frying thermometer can be found easily online or in kitchen stores and is worth the investment if you fry often.
Preparation Method
- Slice the onions: Peel and slice two medium yellow onions into ½-inch thick rings. Separate them carefully, trying to keep the rings intact. This should take about 5 minutes.
- Prepare the dry mix: In a large bowl, whisk together 1 cup all-purpose flour, ¼ cup cornstarch, 1 teaspoon salt, ½ teaspoon black pepper, and ½ teaspoon smoked paprika. Set aside.
- Mix the wet ingredients: In another bowl, combine 1 cup buttermilk and 2 beaten large eggs. Mix until smooth. This bath tenderizes the onions and helps the coating stick.
- Set up the breadcrumb bowl: Place 2 cups panko breadcrumbs in a third bowl. These will give you that signature hand-breaded crunch.
- Coat the onion rings: Working in batches, dredge onion rings first in the dry flour mixture, shaking off excess. Next, dip them into the buttermilk-egg mixture. Finally, press them firmly into the panko breadcrumbs, making sure each ring is thoroughly coated. This triple step is the secret for maximum crunch. Set coated rings on a plate.
- Heat the oil: Pour about 4 cups vegetable oil into a deep frying pan or Dutch oven. Heat over medium heat until the oil reaches 350°F (175°C). Use a thermometer if you have it; if not, test with a breadcrumb (it should sizzle instantly).
- Fry the onion rings: Carefully add a few rings at a time to the hot oil—don’t overcrowd the pan! Fry for 2 to 3 minutes per side, or until golden brown and crispy. Use a slotted spoon to turn them halfway through.
- Drain and season: Remove the rings with a slotted spoon and place on a wire rack over a baking sheet lined with paper towels. Immediately sprinkle with a pinch of salt while still hot.
- Serve warm: Repeat frying with remaining rings. Serve hot with your favorite dipping sauce—ranch, spicy mayo, or classic ketchup all work wonders.
Pro tip: If your coating starts to fall off, try patting the onion rings dry with paper towels before starting. Also, maintaining oil temperature is key—too hot, and the coating burns; too cool, and the rings get greasy.
Cooking Tips & Techniques
Honestly, getting crispy onion rings with that perfect hand-breaded crunch can be a little finicky, but these tips have saved me more than once:
- Keep the onion rings dry: After slicing, pat them with paper towels to remove excess moisture. This helps the batter stick better.
- Triple coating matters: Flour, wet batter, then panko. Skipping any step compromises the crunch.
- Don’t overcrowd the pan: Fry in small batches so the oil temperature stays steady. Overcrowding cools the oil, making the rings soggy.
- Use the right oil temperature: 350°F (175°C) is sweet spot. If you don’t have a thermometer, test with a tiny breadcrumb before frying.
- Drain on wire racks: Paper towels alone trap steam and make the rings soggy. Wire racks let air circulate and keep them crisp.
- Season immediately: A quick sprinkle of salt right after frying sticks better and enhances flavor.
- Don’t skip the cornstarch: It’s the secret ingredient that makes the crust extra crunchy and light.
From personal experience, I once tried frying all the rings at once—disaster! The oil temperature dropped, and I ended up with greasy, limp rings. Lesson learned: patience wins every time.
Variations & Adaptations
There’s plenty of room to customize crispy onion rings with hand-breaded crunch to your tastes or dietary needs:
- Gluten-Free Version: Use a gluten-free flour blend and gluten-free panko breadcrumbs. Almond flour works too for the dry coating.
- Spicy Kick: Add cayenne pepper or chili powder to the flour mixture for a little heat. I love this for game day snacks.
- Baked Option: For a lighter take, place the breaded rings on a parchment-lined baking sheet, spray with cooking oil, and bake at 425°F (220°C) for 15-20 minutes, flipping halfway.
- Vegan Adaptation: Swap eggs for flax eggs (1 tbsp flaxseed meal + 3 tbsp water, set for 5 minutes) and use plant-based milk with vinegar instead of buttermilk.
- Different Onions: Try sweet Vidalia or red onions for unique flavor twists. Just adjust sweetness and savoriness accordingly.
One time, I tried adding grated Parmesan to the panko for a cheesy crust—major hit with the family! Feel free to experiment until you find your own perfect crunch combo.
Serving & Storage Suggestions
Serve these crispy onion rings fresh and hot for best crunch. They’re fantastic as a side for burgers, sandwiches, or even just with a cold beer. For dipping, ranch dressing, spicy aioli, or classic ketchup are all winners.
If you have leftovers (though rare!), store them in an airtight container in the fridge for up to 2 days. To reheat, pop them in a preheated 375°F (190°C) oven for about 10 minutes on a wire rack to refresh the crunch. Avoid microwaving unless you want soggy disappointment.
Flavors actually deepen a bit after a few hours as the seasoning settles, but the texture is always best fresh. These onion rings make great party snacks and keep well when reheated carefully.
Nutritional Information & Benefits
Each serving (about 6 rings) provides approximately 300 calories, with 18 grams of fat, 30 grams of carbohydrates, and 3 grams of protein. While fried, the recipe uses moderate oil and a light hand with breading, making it a reasonable indulgence.
Onions themselves offer antioxidant benefits and contain compounds that support heart health. Using buttermilk adds a touch of probiotics, and the simple seasoning avoids unnecessary additives. This recipe is naturally gluten-free if you swap the flour and breadcrumbs, and can be made dairy-free with simple substitutions.
From a wellness perspective, these onion rings are a treat best enjoyed mindfully—and honestly, that crunchy satisfaction is worth every bite!
Conclusion
When it comes to crispy onion rings with hand-breaded crunch, this recipe truly hits the mark. The combination of simple ingredients, a foolproof hand-breading method, and that irresistible crunch makes it a snack you’ll keep coming back to. Customize it your way, whether you like it spicy, cheesy, or gluten-free, and enjoy every bite.
I love this recipe because it brings people together—kids and adults alike fight over the last ring, and that’s a pretty good sign. So go ahead, give it a try, and don’t forget to share your tweaks and thoughts in the comments. You’re going to feel like a kitchen hero with this one!
Frequently Asked Questions
How can I keep my onion rings crispy after frying?
Drain them on a wire rack instead of paper towels to prevent steam buildup, and serve immediately. If reheating, use the oven to revive crispiness.
Can I prepare the onion rings ahead of time?
You can bread the rings and refrigerate them for up to 2 hours before frying, but frying right after breading is best for crunch.
What’s the best onion type for onion rings?
Yellow onions are classic, but sweet onions like Vidalia or Walla Walla give a milder, sweeter flavor. Red onions add color and a slightly sharper taste.
Is it possible to bake these instead of frying?
Yes! Bake at 425°F (220°C) for 15-20 minutes on a parchment-lined sheet, flipping halfway. They won’t be quite as crispy but still delicious.
How do I know when the oil is the right temperature for frying?
Use a thermometer aiming for 350°F (175°C). Without one, test by dropping a breadcrumb into the oil—it should sizzle immediately but not burn in seconds.
Pin This Recipe!
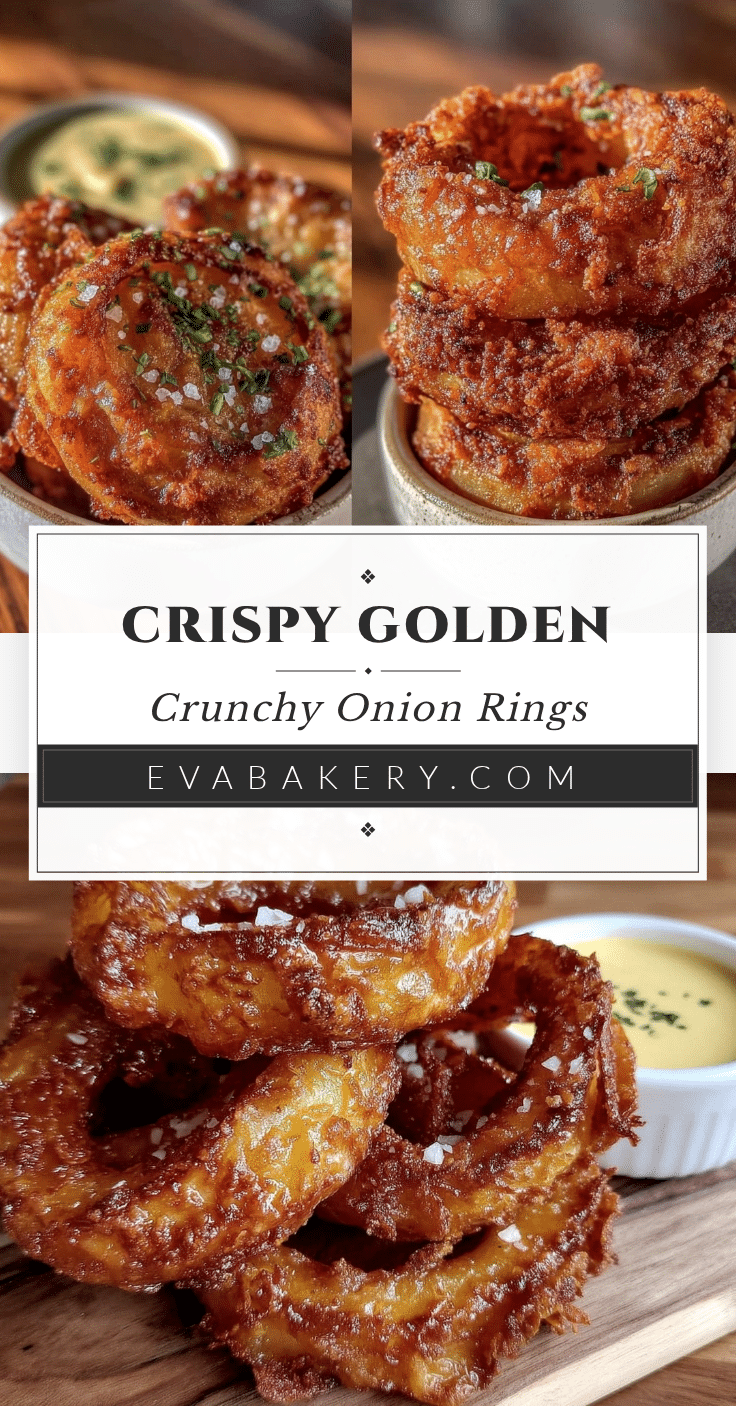
Crispy Onion Rings Recipe Easy Hand-Breaded Crunch for Perfect Snack

These crispy onion rings feature a hand-breaded technique that delivers a perfect crunchy, golden crust with a subtle smoky kick. Quick and easy to make, they are ideal for snacks, parties, or as a side dish.
- Prep Time: 10 minutes
- Cook Time: 15 minutes
- Total Time: 25 minutes
- Yield: 4 servings 1x
- Category: Snack
- Cuisine: American
Ingredients
- 2 medium large yellow onions, sliced into ½-inch thick rings (sweet onions work well too)
- 1 cup all-purpose flour (120g)
- ¼ cup cornstarch (30g)
- 1 teaspoon salt, plus extra for seasoning
- ½ teaspoon ground black pepper
- ½ teaspoon smoked paprika
- 1 cup buttermilk (240ml), room temperature (or 1 cup milk + 1 tbsp lemon juice, let sit 5 minutes)
- 2 large eggs, beaten, room temperature
- 2 cups panko breadcrumbs (100g), preferably Japanese style
- About 4 cups vegetable oil (canola or sunflower) for frying
Instructions
- Peel and slice two medium yellow onions into ½-inch thick rings. Separate rings carefully to keep intact (about 5 minutes).
- In a large bowl, whisk together 1 cup all-purpose flour, ¼ cup cornstarch, 1 teaspoon salt, ½ teaspoon black pepper, and ½ teaspoon smoked paprika. Set aside.
- In another bowl, combine 1 cup buttermilk and 2 beaten large eggs. Mix until smooth.
- Place 2 cups panko breadcrumbs in a third bowl.
- Dredge onion rings first in the dry flour mixture, shaking off excess. Then dip into the buttermilk-egg mixture. Finally, press firmly into the panko breadcrumbs to coat thoroughly. Set coated rings on a plate.
- Pour about 4 cups vegetable oil into a deep frying pan or Dutch oven. Heat over medium heat until oil reaches 350°F (175°C). Use a thermometer or test with a breadcrumb (should sizzle immediately).
- Fry a few rings at a time without overcrowding for 2 to 3 minutes per side until golden brown and crispy. Turn halfway using a slotted spoon.
- Remove rings with a slotted spoon and place on a wire rack over a baking sheet lined with paper towels. Immediately sprinkle with a pinch of salt while hot.
- Repeat frying with remaining rings. Serve warm with your favorite dipping sauce.
Notes
Pat onion rings dry with paper towels before breading to help coating stick better. Maintain oil temperature at 350°F (175°C) to avoid greasy or burnt rings. Drain fried rings on a wire rack instead of paper towels to keep them crispy. Season immediately after frying with salt. For gluten-free, substitute flour and panko with gluten-free alternatives. Vegan adaptations include using flax eggs and plant-based milk with vinegar.
Nutrition
- Serving Size: About 6 onion rings
- Calories: 300
- Fat: 18
- Carbohydrates: 30
- Protein: 3
Keywords: crispy onion rings, hand-breaded onion rings, fried onion rings, snack recipe, easy onion rings, crunchy onion rings