Let me tell you, the scent of golden, crispy chicken smothered in rich tomato sauce and melted cheese wafting from my oven is enough to make anyone’s mouth water. The first time I baked this Easy Crispy Dump-and-Bake Chicken Parmesan, I was instantly hooked—the kind of moment where you pause, take a deep breath, and just smile because you know you’re onto something truly special. Years ago, when I was knee-high to a grasshopper, my grandma would make chicken parmesan the old-fashioned way: dipping, dredging, frying, and then baking. Honestly, it was delicious but a bit intimidating and messy.
One rainy weekend, I decided to simplify the whole process—no more standing over a hot skillet, no more flour-dusted countertops—and created this dump-and-bake version that keeps all the flavor and adds that perfect crispiness. My family couldn’t stop sneaking bites off the baking dish while it cooled (and I can’t really blame them). This recipe feels like pure, nostalgic comfort but in a dangerously easy, weeknight-friendly package.
You know what’s great? It’s perfect for those evenings when you want a classic, comforting dinner without the fuss. Whether you’re cooking for your kids, hosting a casual dinner, or just craving a bright and cheesy meal that will brighten up your Pinterest recipe board, this Easy Crispy Dump-and-Bake Chicken Parmesan is your new best friend. I’ve tested it multiple times in the name of research, of course, and it’s become a staple for family gatherings and gifting alike. Trust me—you’re going to want to bookmark this one.
Why You’ll Love This Recipe
After countless trials and plenty of feedback from family and friends, I can confidently say this Easy Crispy Dump-and-Bake Chicken Parmesan stands out because it’s:
- Quick & Easy: Comes together in under 40 minutes, perfect for busy weeknights or last-minute cravings.
- Simple Ingredients: No fancy grocery trips needed—you probably already have everything in your pantry and fridge.
- Perfect for Any Occasion: Great for cozy dinners, casual get-togethers, or even impressing guests without breaking a sweat.
- Crowd-Pleaser: Kids and adults alike rave about the crunchy, cheesy goodness every single time.
- Unbelievably Delicious: The combination of crispy chicken, tangy tomato sauce, and melty mozzarella is next-level comfort food.
What makes this recipe different from the rest? Well, the magic is in the dump-and-bake method paired with a crispy panko and parmesan crust that bakes right on the chicken—no frying required. It keeps the chicken juicy inside and crunchy outside, with a perfectly balanced seasoning that’s just right. Honestly, it’s comfort food reimagined—faster, less messy, but with all the soul-soothing satisfaction you crave. Whether you want to impress guests without stress or turn a simple weeknight meal into something memorable, this recipe has your back.
What Ingredients You Will Need
This Easy Crispy Dump-and-Bake Chicken Parmesan uses simple, wholesome ingredients to deliver bold flavor and satisfying texture without the fuss. Most are pantry staples, making it ideal for a quick whip-up. Here’s what you’ll want to have on hand:
- Chicken breasts, boneless and skinless (about 4 medium-sized pieces; you can also use thighs if preferred)
- Panko breadcrumbs (for that all-important crunch; I like using Japanese brand for extra crispiness)
- Grated Parmesan cheese (adds richness and depth—freshly grated if possible)
- Dried Italian seasoning (a blend of oregano, basil, thyme, and rosemary; you can use homemade or store-bought)
- Garlic powder (for a subtle savory kick)
- Salt and black pepper (to taste; freshly ground pepper makes a difference)
- Olive oil (about 2 tablespoons; for drizzling to help crisp the topping)
- Marinara sauce (about 1 ½ cups; homemade or store-bought works—choose a good quality one with bold tomato flavor)
- Mozzarella cheese, shredded (1 ½ cups; fresh mozzarella can be used for a creamier melt, but shredded melts more evenly)
- Fresh basil leaves, for garnish (optional but adds a nice fresh touch)
If you want to swap things up, use gluten-free panko breadcrumbs or almond flour for a low-carb version. You can also replace the marinara with a roasted red pepper sauce to change the flavor profile. Don’t hesitate to pick a marinara with chunky tomatoes if you like texture or a smoother one if you prefer silky sauce.
Equipment Needed
To get this Easy Crispy Dump-and-Bake Chicken Parmesan on the table, you’ll want a few essential kitchen tools:
- Baking dish (a 9×13 inch glass or ceramic dish works perfectly; I personally prefer glass because it heats evenly and lets you check the browning)
- Mixing bowls (for combining breadcrumbs, cheese, and seasonings)
- Measuring cups and spoons (accuracy is key for seasoning balance)
- Spoon or spatula (for spreading sauce and cheese)
- Kitchen tongs (handy for handling chicken without making a mess)
- Oven mitts (don’t skimp here—safety first!)
Don’t have a glass baking dish? A metal or enamel roasting pan works fine, but keep an eye on cooking times as metal can cook faster. For a budget-friendly option, thrift stores often have great sturdy baking dishes. Just make sure your dish is oven-safe to at least 400°F (200°C).
Preparation Method
- Preheat your oven to 400°F (200°C). This temperature helps get the panko topping crisp and the chicken cooked through without drying it out. While the oven heats, lightly grease your baking dish with olive oil or non-stick spray.
- Prepare the crumb mixture: In a medium bowl, combine 1 cup panko breadcrumbs, ½ cup grated Parmesan cheese, 1 teaspoon dried Italian seasoning, ½ teaspoon garlic powder, ½ teaspoon salt, and ¼ teaspoon black pepper. Mix well so everything is evenly distributed.
- Pat the chicken breasts dry with paper towels—this helps the crumb coating stick better. If the breasts are unevenly thick, gently pound them to an even thickness of about ½ inch (1.3 cm) for even cooking.
- Coat the chicken: Drizzle about 2 tablespoons olive oil over the chicken breasts, then press each piece firmly into the panko mixture, making sure both sides are well coated. The oil helps the crumbs brown beautifully in the oven.
- Arrange the coated chicken in a single layer in your prepared baking dish. There’s no need to overlap; give each piece some space so the heat circulates evenly.
- Spread marinara sauce evenly over each chicken breast—about 2 to 3 tablespoons per piece. Be generous but don’t drown the chicken; you want a balanced ratio of sauce to crispy topping.
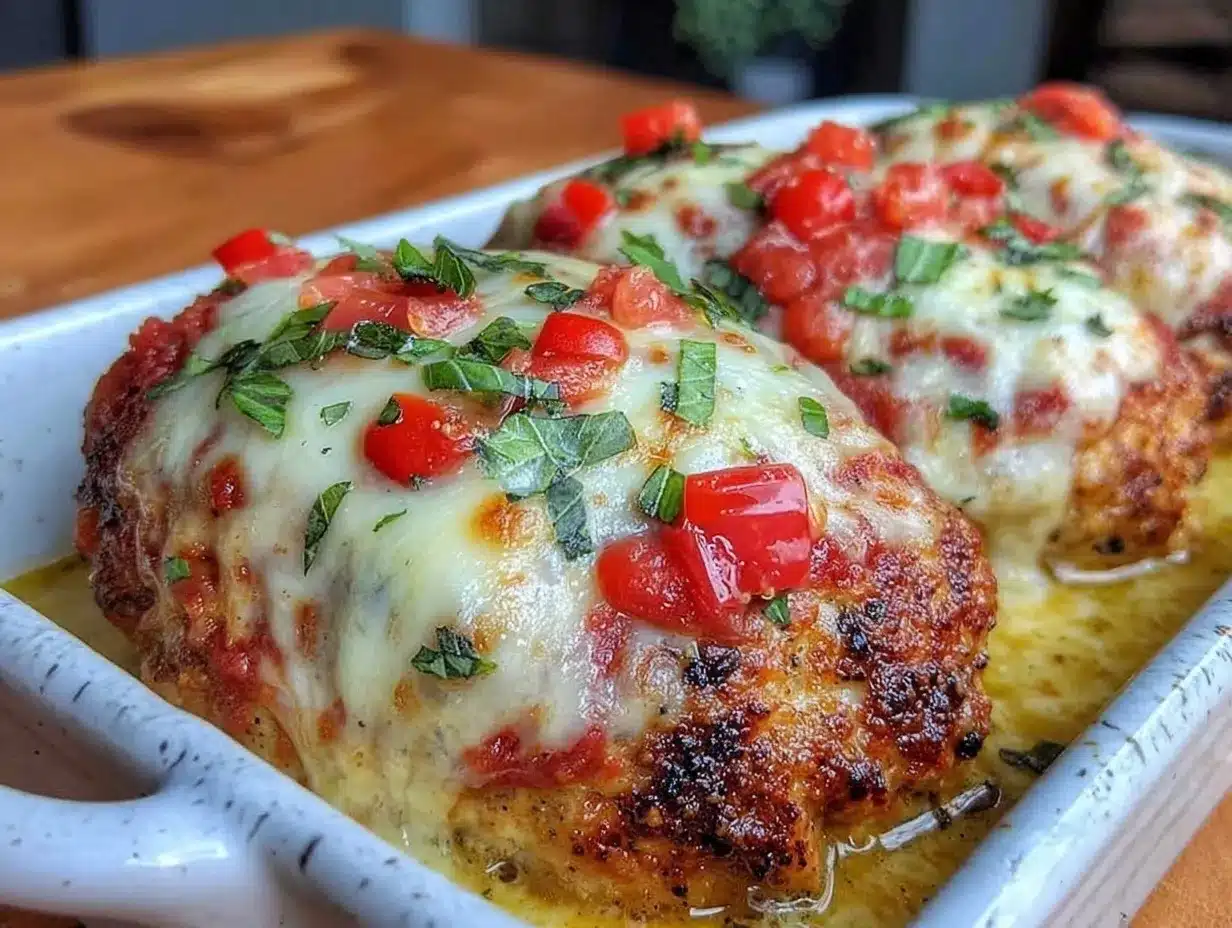
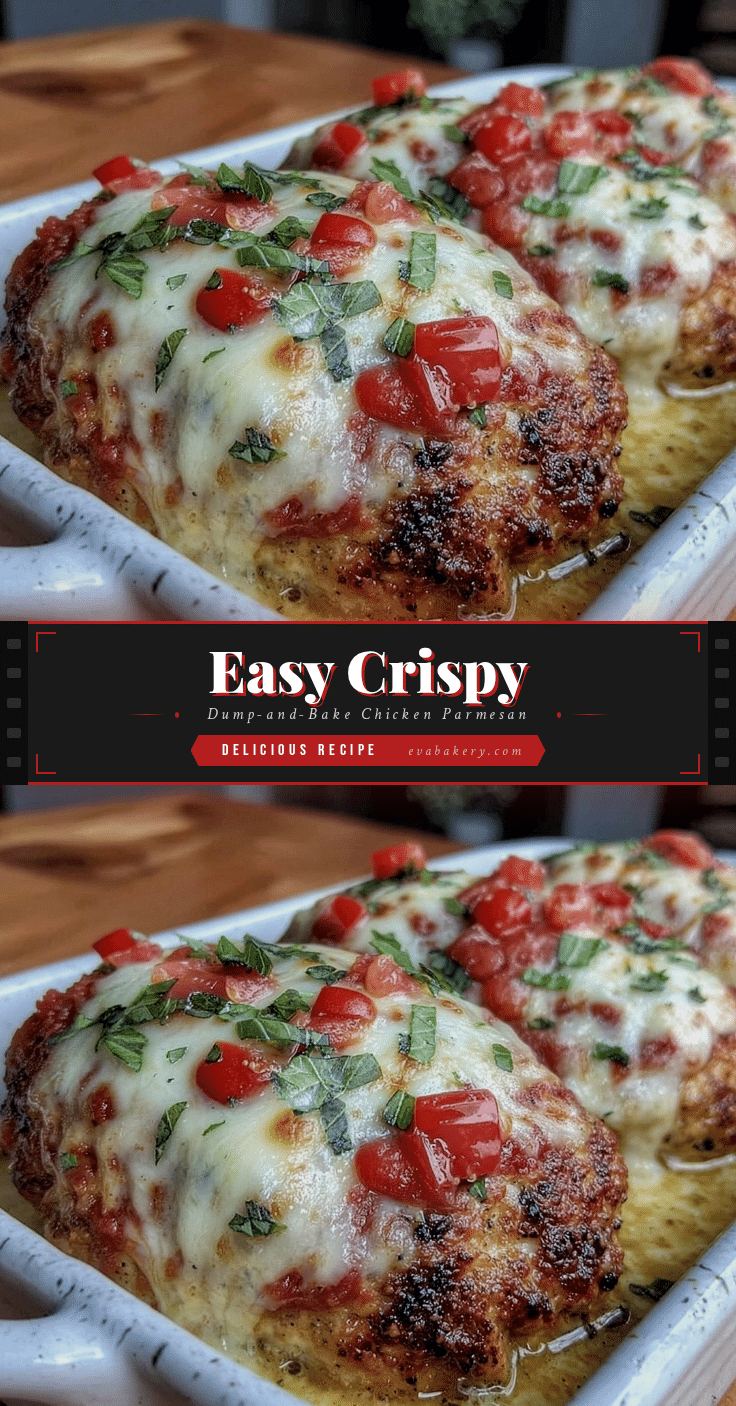
- Sprinkle shredded mozzarella cheese over the sauced chicken, covering each piece completely. This will melt into a bubbly, golden layer that’s irresistible.
- Bake uncovered for 25 to 30 minutes, until the chicken reaches an internal temperature of 165°F (74°C) and the topping is golden brown and crispy. If the cheese browns too quickly, loosely tent the dish with foil halfway through baking.
- Let the chicken rest for 5 minutes after baking—this helps the juices redistribute and the cheese set slightly, so it doesn’t slide off when you serve.
- Garnish with fresh basil leaves if desired and serve warm. This final touch adds a pop of color and fresh flavor that brightens the dish beautifully.
Cooking Tips & Techniques
Getting that perfect crispy, golden crust on chicken parmesan without frying can feel tricky, but here are some tips I learned the hard way:
- Dry chicken is your friend. Always pat chicken dry before coating—moisture is the enemy of crispiness.
- Even thickness matters. Pounding chicken breasts to an even thickness ensures they cook uniformly. Otherwise, you risk dry edges or undercooked centers.
- Don’t skip the oil. Drizzling olive oil before coating helps the panko toast beautifully in the oven. Spray oil also works if you prefer less mess.
- Watch your oven temperature. 400°F (200°C) is the sweet spot for crispy topping without drying the chicken. Lower temps can leave the crust soggy; higher temps risk burning.
- Use a thermometer. This is a game-changer for perfectly cooked chicken—no guesswork, no dry bites.
- Resting is key. Letting the chicken rest after baking keeps it juicy and lets the cheese set slightly so it doesn’t slide off.
Multitasking? While the chicken bakes, you can whip up a simple green salad or prep a side of garlic bread. Timing your sides helps everything come together hot and fresh.
Variations & Adaptations
This Easy Crispy Dump-and-Bake Chicken Parmesan is pretty versatile. Here are some tasty twists you can try:
- Low-carb option: Swap panko breadcrumbs for crushed pork rinds or almond flour. This keeps the crunch while cutting carbs.
- Seasonal flavors: In summer, add fresh chopped tomatoes or roasted red peppers on top before baking for a bright, fresh flair.
- Spicy kick: Mix red pepper flakes into the panko mixture or use a spicy marinara for some heat.
- Dairy-free version: Use vegan cheese alternatives and skip the Parmesan or replace it with nutritional yeast for cheesy flavor.
- Personal favorite: I sometimes add a thin layer of pesto under the marinara sauce for an herby, nutty surprise that my family loves.
You can also try baking in individual ramekins for a fun presentation or double the recipe easily for larger crowds. Just keep the baking times consistent and use a thermometer to check doneness.
Serving & Storage Suggestions
This chicken parmesan is best served hot right out of the oven, with the cheese still melty and the topping crispy. Serve it over spaghetti, zucchini noodles, or alongside a fresh green salad and crusty garlic bread for a full meal. A glass of red wine or sparkling water with lemon pairs nicely to balance the rich flavors.
To store leftovers, let the chicken cool completely, then place in an airtight container and refrigerate for up to 3 days. Reheat gently in a 350°F (175°C) oven for about 10-15 minutes to restore crispiness. Avoid microwaving if you want to keep that crunch.
You can also freeze cooked chicken parmesan wrapped tightly in foil and placed in a freezer-safe bag for up to 2 months. Thaw overnight in the fridge before reheating.
Flavors tend to deepen a bit after resting, so leftover chicken parmesan can taste even better the next day—if it lasts that long!
Nutritional Information & Benefits
Here’s an estimated nutritional breakdown per serving (based on 4 servings):
| Calories | 450-500 kcal |
|---|---|
| Protein | 45g |
| Carbohydrates | 20g |
| Fat | 20g |
| Fiber | 2-3g |
This recipe offers a great source of lean protein thanks to the chicken breast and is fairly balanced with carbs and fats. The tomato sauce brings in vitamin C and antioxidants, while the Parmesan contributes calcium and a savory depth. If you swap traditional panko for gluten-free or almond flour, this can also fit gluten-free or lower-carb diets.
Be mindful of dairy if you have allergies or sensitivities, but otherwise, it’s a wholesome, satisfying dish that fits well into many eating styles. From my personal wellness perspective, having a homemade comfort meal like this that’s quick, clean, and nourishing is a total win.
Conclusion
So, why should you give this Easy Crispy Dump-and-Bake Chicken Parmesan a try? Because it’s the perfect blend of ease, flavor, and comfort. It saves you from frying mess and complicated prep without sacrificing that crispy, cheesy goodness that makes chicken parmesan a household favorite. Customize it to your tastes, swap ingredients to suit your needs, and make it yours.
I love this recipe because it turns a classic dish into a no-fuss wonder that feels like a warm hug on a plate. It’s become a go-to in my kitchen, and I can’t wait for you to enjoy it as much as my family does. If you try it, please let me know how it goes! Leave a comment, share your variations, or ask questions—I love hearing from you.
Here’s to many delicious, stress-free dinners ahead. Happy cooking!
FAQs About Easy Crispy Dump-and-Bake Chicken Parmesan
Can I use chicken thighs instead of breasts?
Absolutely! Boneless, skinless chicken thighs work wonderfully and stay juicy. Just adjust cooking time slightly if they’re thicker.
How do I keep the topping crispy when reheating?
Reheat in the oven at 350°F (175°C) for 10-15 minutes instead of microwaving to maintain that crispy crust.
Is this recipe freezer-friendly?
Yes! Bake the chicken, then cool and freeze in airtight containers for up to 2 months. Thaw overnight in the fridge before reheating.
Can I make this dairy-free?
Yes, swap mozzarella and Parmesan for your favorite vegan cheese alternatives. Nutritional yeast can add cheesy flavor if you skip Parmesan.
What sides go best with chicken parmesan?
Classic choices include spaghetti, garlic bread, or a fresh green salad. For a lighter option, try zucchini noodles or roasted veggies.
Pin This Recipe!
Easy Crispy Dump-and-Bake Chicken Parmesan

A quick and easy chicken parmesan recipe that delivers crispy, juicy chicken topped with tangy marinara and melted mozzarella cheese, perfect for weeknight dinners without the mess of frying.
- Prep Time: 10 minutes
- Cook Time: 30 minutes
- Total Time: 40 minutes
- Yield: 4 servings 1x
- Category: Main Course
- Cuisine: Italian-American
Ingredients
- 4 boneless, skinless chicken breasts (about medium-sized; thighs can be used as an alternative)
- 1 cup panko breadcrumbs
- 1/2 cup grated Parmesan cheese
- 1 teaspoon dried Italian seasoning
- 1/2 teaspoon garlic powder
- 1/2 teaspoon salt
- 1/4 teaspoon black pepper
- 2 tablespoons olive oil
- 1 1/2 cups marinara sauce
- 1 1/2 cups shredded mozzarella cheese
- Fresh basil leaves (optional, for garnish)
Instructions
- Preheat your oven to 400°F (200°C). Lightly grease a 9×13 inch baking dish with olive oil or non-stick spray.
- In a medium bowl, combine panko breadcrumbs, grated Parmesan cheese, dried Italian seasoning, garlic powder, salt, and black pepper. Mix well.
- Pat the chicken breasts dry with paper towels. If uneven in thickness, gently pound to about 1/2 inch thickness for even cooking.
- Drizzle olive oil over the chicken breasts, then press each piece firmly into the panko mixture, coating both sides well.
- Arrange the coated chicken breasts in a single layer in the prepared baking dish.
- Spread about 2 to 3 tablespoons of marinara sauce evenly over each chicken breast.
- Sprinkle shredded mozzarella cheese over the sauced chicken, covering each piece completely.
- Bake uncovered for 25 to 30 minutes, until the chicken reaches an internal temperature of 165°F (74°C) and the topping is golden brown and crispy. Tent with foil if cheese browns too quickly.
- Let the chicken rest for 5 minutes after baking to allow juices to redistribute and cheese to set.
- Garnish with fresh basil leaves if desired and serve warm.
Notes
Pat chicken dry before coating for crispiness. Use a meat thermometer to ensure chicken is cooked to 165°F. Drizzle olive oil before coating helps panko brown. Rest chicken after baking for juicy results. Reheat in oven at 350°F to maintain crispiness. Swap panko for gluten-free or almond flour for dietary needs. Vegan cheese alternatives can be used for dairy-free version.
Nutrition
- Serving Size: 1 chicken breast wit
- Calories: 475
- Sugar: 4
- Sodium: 600
- Fat: 20
- Saturated Fat: 8
- Carbohydrates: 20
- Fiber: 2.5
- Protein: 45
Keywords: chicken parmesan, dump and bake, easy chicken recipe, crispy chicken, weeknight dinner, comfort food, baked chicken parmesan