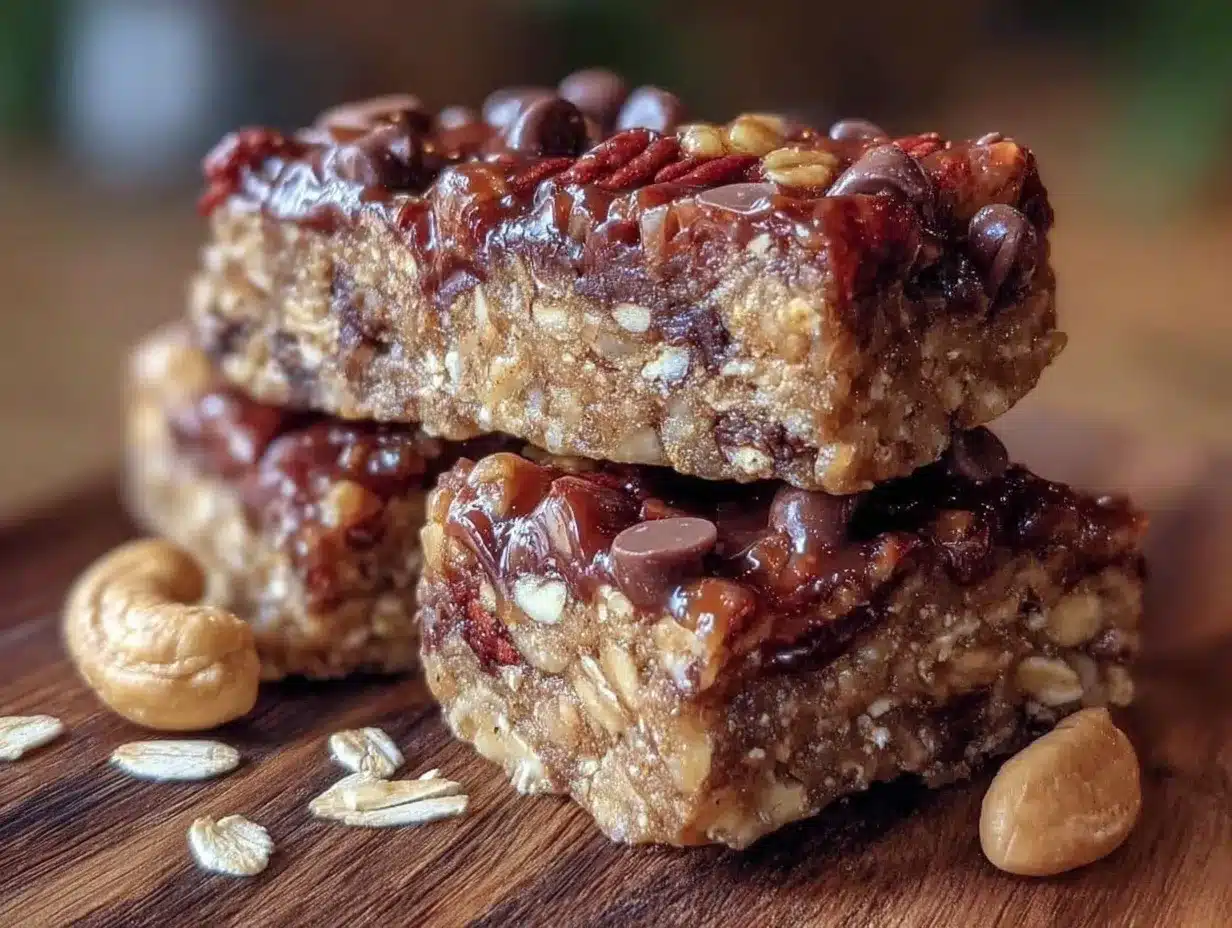
“Can you grab something quick for the road?” That was the text I got while scrambling to pack up my bag for an early morning meeting. Honestly, I was staring at an empty countertop and a fridge that looked more like a barren wasteland than a snack haven. I’d promised myself no last-minute junk food this week, but the craving for something sweet and energizing was real. So, I grabbed some oats, peanut butter, and—luckily—a bag of chocolate chips sitting in the back of the pantry. No-bake granola bars? Why not? I whipped up a batch in under 10 minutes, popped them in the fridge, and by the time I was heading out, I had a snack that hit the spot without any guilt or fuss.
This easy no-bake chocolate chip granola bars recipe became my go-to after that chaotic morning. The best part? You don’t need an oven or fancy equipment, just a handful of simple ingredients that you probably already have. I’ve made these bars countless times since, perfect for those moments when you want a quick bite that’s both satisfying and a little indulgent. Plus, they travel amazingly well, which is a lifesaver for busy days or when I’m packing snacks for little ones.
It’s funny how the simplest recipes often stick with us the longest. I never imagined that a few pantry staples could turn into a snack so dependable and delicious. Honestly, once you get the hang of the quick mix and chill method, you’ll find yourself reaching for these bars more than you expect. And here’s the quiet realization: this recipe isn’t just for rushed mornings—it’s a little ritual of comfort that’s always ready in the fridge when life speeds up.
Why You’ll Love This Recipe
Having tested this easy no-bake chocolate chip granola bars recipe through multiple snack emergencies (and maybe a few weekend treats), I can say it stands out for several reasons:
- Quick & Easy: Ready in under 15 minutes, no baking involved—perfect for busy mornings or sudden snack cravings.
- Simple Ingredients: No need for fancy grocery trips; pantry staples like oats, nut butter, and chocolate chips do the trick.
- Perfect for On-the-Go: Great for packing in lunches, road trips, or post-workout fuel.
- Crowd-Pleaser: Kids, coworkers, and friends all appreciate these bars; they’re sweet but not overpowering.
- Unbelievably Delicious: The combination of chewy oats and melty chocolate chips makes for a comforting, chewy texture that’s hard to beat.
What makes this recipe different? Instead of just dumping everything together, I like to toast the oats lightly first (it’s a small step but adds a nutty depth) and blend the peanut butter with honey just right so it holds together without being too sticky or crumbly. I usually use natural peanut butter (the kind with just peanuts and salt) because it gives a cleaner, more wholesome taste. Also, the chocolate chips aren’t melted in but sprinkled in after the oat mixture cools a bit—this keeps them from turning into a melted mess and keeps that satisfying chocolate bite intact.
Honestly, these bars are more than just a grab-and-go snack; they’re a little joy that fits neatly in your day. They remind me of how small, simple things can bring comfort—especially when you least expect it.
What Ingredients You Will Need
This recipe uses simple, wholesome ingredients to deliver bold flavor and satisfying texture without the fuss. Most of these are pantry staples, and a couple of easy swaps can cater to dietary needs or preferences.
- Old-Fashioned Rolled Oats (2 cups / 180 g) – The hearty base; I prefer Bob’s Red Mill for consistent texture.
- Peanut Butter (1 cup / 240 ml) – Natural, unsweetened works best for a rich, nutty flavor and less sugar.
- Honey (½ cup / 120 ml) – Acts as the natural sweetener and binder. Maple syrup can be swapped for a vegan option.
- Mini Chocolate Chips (½ cup / 90 g) – I like the smaller size so every bite has a touch of chocolate without overwhelming sweetness.
- Vanilla Extract (1 teaspoon / 5 ml) – Adds depth and warmth to the flavor.
- Salt (¼ teaspoon / 1.5 g) – Balances the sweetness perfectly.
- Optional Add-ins: Chopped nuts (¼ cup / 30 g), shredded coconut (¼ cup / 20 g), or dried fruit (¼ cup / 40 g) – great for extra texture or seasonal flair.
If you want a gluten-free version, just make sure to use certified gluten-free oats. For a nut-free twist, sunflower seed butter works nicely, though the flavor will shift a bit. And hey, if you’re feeling adventurous, swapping in almond butter or even tahini can create new taste profiles—but the classic peanut butter and honey combo is pretty unbeatable.
Equipment Needed
- Mixing Bowl: A large bowl to combine your oats and wet ingredients comfortably.
- Wooden Spoon or Silicone Spatula: For mixing without damaging your bowl or scrapping up too much mixture.
- Measuring Cups and Spoons: Accuracy helps the bars hold together just right.
- Small Saucepan: To gently warm the peanut butter and honey mixture, making it easier to combine.
- Baking Dish or Pan: An 8×8-inch (20×20 cm) square dish lined with parchment paper works best for pressing the mixture evenly.
- Refrigerator: To chill the bars until firm.
I’ve tried using a food processor to pulse the oats for a finer texture, but honestly, the chewiness of rolled oats is what makes these bars so satisfying. If you don’t have an 8×8-inch pan, a loaf pan or even a small casserole dish will do fine. Just adjust the thickness accordingly. As for parchment paper, it’s a small investment that makes cleanup and bar removal a breeze—trust me on this one.
Preparation Method
- Toast the oats: Heat a large, dry skillet over medium heat. Add 2 cups (180 g) of rolled oats and stir frequently for 3-4 minutes until they turn a golden color and smell nutty. This step is optional but highly recommended for flavor. Transfer the toasted oats to a large mixing bowl and let cool slightly.
- Warm the peanut butter and honey: In a small saucepan over low heat, combine 1 cup (240 ml) natural peanut butter and ½ cup (120 ml) honey. Stir continuously until smooth and well combined, about 2-3 minutes. Remove from heat and stir in 1 teaspoon (5 ml) vanilla extract and ¼ teaspoon (1.5 g) salt.
- Combine wet and dry ingredients: Pour the warm peanut butter and honey mixture over the toasted oats in the mixing bowl. Stir gently until all oats are evenly coated. If you’re adding nuts, coconut, or dried fruit, fold them in now.
- Cool slightly, then add chocolate chips: Let the mixture cool for 5 minutes to prevent the chocolate chips from melting. Then fold in ½ cup (90 g) mini chocolate chips evenly.
- Press into pan: Line an 8×8-inch (20×20 cm) pan with parchment paper, leaving some overhang for easy removal. Transfer the mixture to the pan and press firmly with a spatula or your hands to create an even, compact layer about 1 inch (2.5 cm) thick.
- Chill: Refrigerate the pan for at least 2 hours or until bars are firm enough to cut.
- Slice and store: Lift the bars out using the parchment paper edges and cut into 12 bars or squares. Store in an airtight container in the fridge for up to a week, or freeze for longer storage.
Pro tip: If your mixture feels too sticky or loose, adding a tablespoon or two of oats helps absorb excess moisture. Conversely, if it’s too dry, a splash more honey or peanut butter can bring it together. The bars should hold their shape but still be chewy and soft.
Cooking Tips & Techniques
Here’s what I learned after making these bars a few too many times:
- Don’t skip the toasting: Toasting the oats adds a toasty flavor that makes the bars taste homemade, not just a quick fix.
- Temperature matters: Warm the peanut butter and honey gently. If it gets too hot, it can separate or scorch, ruining the flavor.
- Mix gently: Overmixing can crush the oats and make the bars dense. A light hand keeps them chewy and light.
- Chocolate chips last: Adding the chocolate chips after the mixture cools prevents them from melting into the bars, giving you those little bursts of chocolate.
- Press firmly: Don’t be shy about pressing the mixture down tightly in the pan—it helps the bars hold together well without crumbling.
- Chill time: Patience is key. The bars need enough time to firm up in the fridge, or they’ll be too sticky to cut cleanly.
Multitasking tip: While your bars chill, it’s a great moment to prep other easy appetizers or snacks—like the crispy prosciutto wrapped asparagus bites that come together just as fast and impressively.
Variations & Adaptations
These bars are super flexible, so here are a few ways to make them your own:
- Nut-Free Version: Swap peanut butter for sunflower seed butter and use allergy-friendly chocolate chips to keep it safe for nut-sensitive eaters.
- Seasonal Twist: During fall, add cinnamon and chopped dried apples or swap chocolate chips for pumpkin seeds for a cozy flavor.
- Protein Boost: Stir in a scoop of your favorite protein powder or sprinkle in chia seeds for extra nutrition.
- Flavor Swap: Use almond or cashew butter instead of peanut butter for a different nutty note.
- Different Sweeteners: If you’re watching sugar, try using brown rice syrup or agave instead of honey, but keep in mind it may affect texture slightly.
Personally, I’ve tried the addition of shredded coconut and a sprinkle of sea salt on top—it’s a game-changer that adds a little crunch and balances the sweetness perfectly. Feel free to experiment and find what works best for your taste buds.
Serving & Storage Suggestions
These granola bars are best served chilled or at room temperature. They make a satisfying snack alongside a cup of tea or coffee, or a quick breakfast paired with a piece of fruit.
If you want a fun snack box, pair these bars with some fresh berries or a small container of yogurt for a balanced bite. They also hold up well in your bag, making them ideal for hiking, school, or work.
Storage is simple: keep them in an airtight container in the refrigerator where they last about a week. For longer storage, freeze them in a zip-top bag for up to 3 months. To thaw, just leave them on the counter for 15-20 minutes or warm slightly in the microwave for a chewy, fresh-out-of-the-oven feel.
Over time, the flavors meld beautifully, so sometimes I even prefer eating these bars a day or two after making them—they taste more developed and the chocolate gets a little creamier.
Nutritional Information & Benefits
Each bar (assuming 12 bars per batch) contains approximately:
| Calories | 180-200 kcal |
|---|---|
| Protein | 5-6 grams |
| Fat | 8-10 grams (mostly healthy fats from peanut butter) |
| Carbohydrates | 22-24 grams (with fiber from oats) |
This recipe provides a good balance of healthy fats, protein, and fiber, making it a more wholesome snack choice compared to many store-bought bars. The oats offer slow-digesting carbs to keep you energized, while the peanut butter supplies satiating fats and protein. Honey adds natural sweetness without refined sugars.
Since these bars are naturally gluten-free (with certified oats) and can be tweaked to be nut-free or vegan, they work well for many dietary preferences or restrictions. Just watch out for the chocolate chips if you have soy or dairy allergies.
Conclusion
Honestly, this easy no-bake chocolate chip granola bars recipe has become my secret weapon for quick, wholesome snacks that don’t sacrifice flavor or texture. It’s a simple, fuss-free way to keep something nourishing and delicious on hand, whether you’re rushing out the door or need a mid-afternoon pick-me-up.
Feel free to make it yours—add extra nuts, swap your favorite nut butter, or toss in dried fruit for variety. The best part is how adaptable and forgiving this recipe is, making it perfect for even the busiest or most distracted home cooks.
I’m always happy when these bars are stocked in my fridge; they quietly make any day a little better, and I hope they’ll do the same for you. If you make these bars, I’d love to hear how you customize them or any tips you discover along the way.
FAQs
Can I use quick oats instead of rolled oats?
Quick oats can be used but the bars will be softer and less chewy. Rolled oats give the best texture and hold better.
How long do these granola bars last?
Stored in an airtight container in the fridge, they last about a week. You can freeze them for up to 3 months.
Can I substitute peanut butter with another nut or seed butter?
Yes! Almond butter, cashew butter, or sunflower seed butter all work well. Be mindful some butters are thinner and may affect texture.
Is it possible to make these bars vegan?
Absolutely. Use maple syrup instead of honey and choose vegan-friendly chocolate chips.
How do I prevent the chocolate chips from melting?
Let the peanut butter and honey mixture cool slightly before folding in the chocolate chips. This keeps them intact during chilling.
For more easy, quick recipes that fit busy lifestyles, you might enjoy the fluffy mini quiches recipe or the crispy bacon wrapped dates that come together just as effortlessly for snack or appetizer needs.
Pin This Recipe!
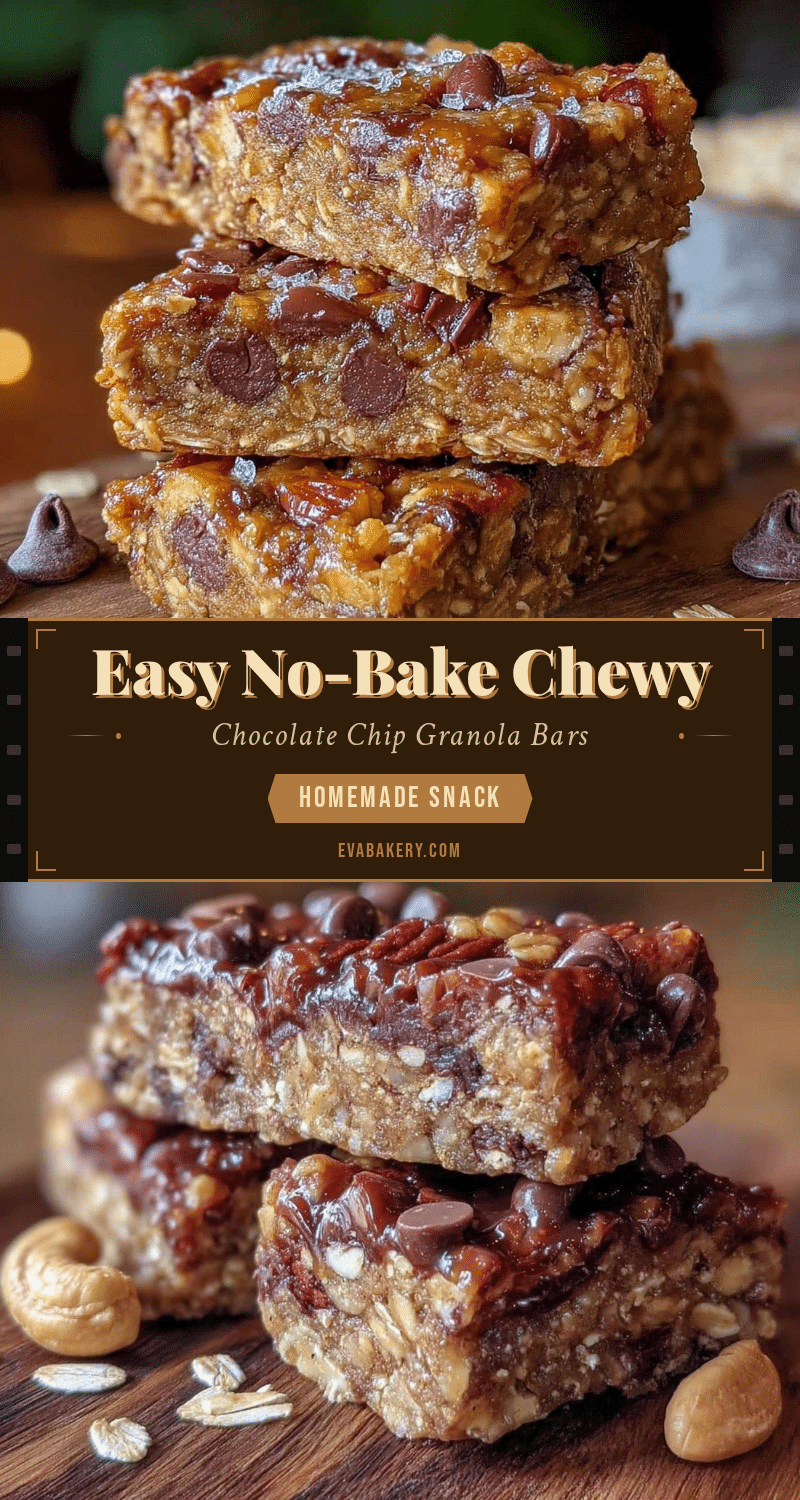
Easy No-Bake Chocolate Chip Granola Bars
A quick and easy no-bake granola bars recipe using simple pantry staples like oats, peanut butter, and chocolate chips. Perfect for a healthy, on-the-go snack that requires no oven.
- Prep Time: 10 minutes
- Cook Time: 0 minutes
- Total Time: 2 hours 10 minutes
- Yield: 12 bars 1x
- Category: Snack
- Cuisine: American
Ingredients
- 2 cups (180 g) old-fashioned rolled oats
- 1 cup (240 ml) natural peanut butter (unsweetened)
- 1/2 cup (120 ml) honey (maple syrup as vegan substitute)
- 1/2 cup (90 g) mini chocolate chips
- 1 teaspoon (5 ml) vanilla extract
- 1/4 teaspoon (1.5 g) salt
- Optional add-ins: 1/4 cup (30 g) chopped nuts, 1/4 cup (20 g) shredded coconut, 1/4 cup (40 g) dried fruit
Instructions
- Toast the oats: Heat a large, dry skillet over medium heat. Add 2 cups (180 g) of rolled oats and stir frequently for 3-4 minutes until golden and nutty. Transfer to a large mixing bowl and let cool slightly.
- Warm the peanut butter and honey: In a small saucepan over low heat, combine 1 cup (240 ml) natural peanut butter and 1/2 cup (120 ml) honey. Stir continuously until smooth and well combined, about 2-3 minutes. Remove from heat and stir in 1 teaspoon (5 ml) vanilla extract and 1/4 teaspoon (1.5 g) salt.
- Combine wet and dry ingredients: Pour the warm peanut butter and honey mixture over the toasted oats. Stir gently until all oats are coated. Fold in optional nuts, coconut, or dried fruit if using.
- Cool slightly, then add chocolate chips: Let the mixture cool for 5 minutes to prevent melting, then fold in 1/2 cup (90 g) mini chocolate chips evenly.
- Press into pan: Line an 8×8-inch (20×20 cm) pan with parchment paper. Transfer mixture and press firmly into an even, compact layer about 1 inch (2.5 cm) thick.
- Chill: Refrigerate for at least 2 hours or until firm.
- Slice and store: Lift bars out using parchment paper edges and cut into 12 bars. Store in an airtight container in the fridge for up to one week or freeze for longer storage.
Notes
Toasting oats adds a nutty flavor and better texture. Warm peanut butter and honey gently to avoid scorching. Add chocolate chips after mixture cools to prevent melting. Press mixture firmly in pan for bars that hold together well. Chill bars at least 2 hours before slicing. Adjust moisture by adding oats if too sticky or honey/peanut butter if too dry.
Nutrition
- Serving Size: 1 bar (1/12th of bat
- Calories: 190
- Sugar: 12
- Sodium: 90
- Fat: 9
- Saturated Fat: 1.5
- Carbohydrates: 23
- Fiber: 3
- Protein: 6
Keywords: no-bake granola bars, chocolate chip granola bars, healthy snacks, quick snacks, peanut butter bars, easy granola bars