Flipped the last chicken thigh into the baking dish and realized I’d forgotten to turn the oven on. Classic Tuesday night move. I was halfway through convincing myself to just order pizza when I noticed the parmesan sitting on the counter—already grated, already smelling like it was begging to be used. So I cranked the heat, tossed those thighs back in the fridge for five minutes, and decided to wing it with what I had: panko crumbs from the back of the pantry, a sad half-lemon, and more garlic powder than any sane recipe would call for.
That dinner turned into one of those meals where everyone goes quiet. My kid, who usually eats around anything crispy, actually asked for seconds. My husband looked at me like I’d just pulled off a magic trick. And honestly? It felt like one. The skin got shatter-crisp without frying, the parmesan turned into this golden, savory crust that clung to every bite, and the meat stayed so tender it practically fell apart. I didn’t plan it. I just needed dinner fast, and this crispy baked parmesan chicken thighs recipe was born from a moment of pure kitchen desperation.
Now it’s the dish I make when I want something that tastes like I spent hours on it but actually took thirty minutes from start to finish. It’s become my go-to for busy weeknights, lazy Sundays, and even the occasional dinner guest who thinks I’m way more put-together than I actually am. Let me show you how it works—no deep fryer required, just a hot oven and a little faith in the power of cheese and breadcrumbs.
Why You’ll Love This Recipe
This isn’t just another chicken recipe. It’s the one that makes you wonder why you ever bothered with takeout. Here’s what makes it special:
- Quick & Easy: From prep to plate in under 30 minutes. Perfect for those nights when you’re staring at the fridge wondering what’s for dinner.
- Simple Ingredients: You probably have most of these in your kitchen right now. No weird specialty items, no trips to three different stores.
- Perfect for Weeknights: It’s fast enough for a Tuesday but fancy enough for a Saturday. Serve it with a simple salad or some roasted veggies, and you’ve got a meal that feels like an event.
- Crowd-Pleaser: Kids love the crispy coating. Adults love the flavor. Even picky eaters tend to go back for more.
- Unbelievably Delicious: The texture is what gets me every time. That crunchy, cheesy exterior gives way to juicy, tender meat. It’s comfort food that doesn’t weigh you down.
What really sets this apart from other baked chicken recipes is the technique. Instead of just coating the thighs and hoping for the best, we’re using a two-step breading method that locks in moisture while building that shatteringly crisp crust. The parmesan isn’t just a flavor addition—it actually helps create a barrier that keeps the chicken from drying out. Plus, we’re baking at a higher temperature than most recipes call for, which means you get that golden-brown finish without having to flip or fuss.
This is the kind of recipe that makes you close your eyes after the first bite. It’s simple, yes. But it’s also deeply satisfying in a way that feels almost unfair for how little effort it requires.
What Ingredients You Will Need
This recipe uses simple, wholesome ingredients to deliver bold flavor and satisfying texture without the fuss. Most of these are pantry staples, but I’ve included a few notes to help you pick the best options.
- Chicken thighs (6 bone-in, skin-on thighs, about 2.5 lbs total) — Bone-in, skin-on is non-negotiable here. The skin helps keep the meat moist, and the bone adds flavor. If you only have boneless, skinless thighs, reduce cooking time to about 20 minutes.
- Panko breadcrumbs (1 cup) — These give you the crispiest texture. Regular breadcrumbs work in a pinch, but panko creates that light, airy crunch that makes this dish special. I like Ian’s brand for gluten-free options.
- Grated parmesan cheese (¾ cup, divided) — Use the real stuff from a wedge, not the green can. The pre-grated stuff has anti-caking agents that prevent it from melting properly. I recommend Parmigiano-Reggiano for the best flavor.
- Garlic powder (1 teaspoon) — Don’t skip this. It adds that savory depth that makes the crust irresistible.
- Onion powder (½ teaspoon) — Works with the garlic to build flavor without being overpowering.
- Dried oregano (1 teaspoon) — Adds a subtle herbal note that complements the parmesan beautifully.
- Salt (1 teaspoon) — I use fine sea salt. Adjust based on your preference.
- Black pepper (½ teaspoon, freshly ground) — Freshly ground makes a difference here.
- Paprika (½ teaspoon) — Adds color and a mild sweetness. Smoked paprika works great too.
- Olive oil (2 tablespoons) — Helps the coating get golden and crispy. Avocado oil works as a substitute.
- Dijon mustard (1 tablespoon) — This is my secret ingredient. It adds a tangy depth that you won’t taste directly but will notice if it’s missing.
- Lemon (1, for serving) — A squeeze of fresh lemon right before eating brightens everything up. Don’t skip this.
- Fresh parsley (2 tablespoons, chopped, optional) — For garnish, but honestly, it makes the dish look restaurant-ready.
Ingredient Selection Tips: Look for chicken thighs that are roughly the same size so they cook evenly. If your parmesan wedge feels too hard, it’s probably aged enough to grate beautifully. And if you’re out of Dijon, whole grain mustard works—it just adds little seeds to the crust, which is actually pretty nice.
Substitutions: Use almond flour mixed with a little more parmesan for a low-carb version. For a dairy-free option, skip the parmesan and add an extra ¼ cup of nutritional yeast to the breadcrumbs—it won’t be the same, but it’ll still be good.
Equipment Needed
You don’t need much for this recipe, which is part of why I love it. Here’s what you’ll need:
- Baking sheet (rimmed, 13×18 inches) — A rimmed sheet keeps any rendered fat from spilling into your oven. I use a half-sheet pan for even heat distribution.
- Wire rack (fits inside the baking sheet) — This is the real secret to crispy chicken. Elevating the thighs allows hot air to circulate underneath, so the bottom gets crispy too. No soggy chicken here.
- Three shallow bowls — For the breading station. Pie plates work great if you don’t have shallow bowls.
- Tongs — For moving the chicken through the breading station without making a mess.
- Microplane or box grater — For grating the parmesan. A microplane gives you that fine, fluffy texture that coats the chicken perfectly.
- Instant-read thermometer — Not strictly necessary, but it takes the guesswork out of doneness. Chicken thighs are done at 165°F, but I pull them at 160°F and let carryover cooking finish the job.
Budget-Friendly Options: If you don’t have a wire rack, you can bake the chicken directly on the pan. Just flip it halfway through to crisp both sides. It won’t be quite as crunchy, but it’ll still be delicious. A fork works fine for the breading station if you don’t have tongs.
Maintenance Tip: Wash your wire rack by hand, not in the dishwasher. The coating can get stuck in the grid, and hand-washing keeps it from rusting.
Preparation Method

This is where the magic happens. Follow these steps, and you’ll have the crispiest, juiciest chicken thighs of your life.
- Preheat your oven to 425°F (220°C). Place the wire rack on the rimmed baking sheet and set it aside. Let the oven heat fully—this high temperature is key to getting that crust golden and crunchy.
- Pat the chicken thighs dry with paper towels. This is probably the most important step. Moisture is the enemy of crispiness. Get them as dry as you can, especially the skin side. If you have time, let them sit uncovered in the fridge for 15 minutes to dry out even more.
- Set up your breading station. In the first shallow bowl, combine the panko breadcrumbs, ½ cup of the grated parmesan, garlic powder, onion powder, oregano, salt, pepper, and paprika. Stir to combine. In the second bowl, whisk together the olive oil and Dijon mustard. The third bowl stays empty—this is where you’ll place the coated thighs.
- Season the chicken lightly with a pinch of salt and pepper on both sides. Don’t go overboard; there’s plenty of seasoning in the breading.
- Coat the thighs. Using tongs, dip each thigh into the oil-mustard mixture, turning to coat all sides. Let the excess drip off for a second, then press it into the breadcrumb mixture, making sure it’s fully coated on all sides. Don’t be shy—really press the coating into the chicken so it sticks.
- Place the coated thighs on the wire rack, skin side up, leaving a little space between each one. This allows hot air to circulate and ensures even browning.
- Bake for 25-30 minutes, until the internal temperature reaches 160°F (71°C) when tested with an instant-read thermometer inserted into the thickest part of the thigh (avoiding the bone). The crust should be deep golden brown and crispy to the touch.
- Let them rest for 5 minutes on the wire rack. This is important—it allows the juices to redistribute so the meat stays tender. Don’t skip this step, even though it’s tempting to dig in right away.
- Squeeze fresh lemon juice over the top and sprinkle with the remaining ¼ cup of parmesan and fresh parsley if you’re using it. Serve immediately.
Sensory Cues: At the 20-minute mark, the kitchen should smell like garlic and toasted cheese. The crust will look golden brown, and you might see a few bubbles of rendered fat around the edges of the thighs. When you tap the crust with a fork, it should sound hollow and crisp—not soft or squishy.
Troubleshooting: If the crust isn’t browning after 20 minutes, your oven might run cool. Try bumping the temperature to 450°F for the last 5-10 minutes. If the coating looks like it’s burning but the chicken isn’t done, tent loosely with foil and continue baking.
Cooking Tips & Techniques
I’ve made this recipe about forty times now, and I’ve learned a few things the hard way. Here’s what I wish someone had told me:
Don’t overcrowd the pan. I know it’s tempting to fit all six thighs on one rack, but if they’re touching, they’ll steam instead of crisp. Leave at least an inch between each one. If you have to, use two racks and rotate them halfway through.
Use your hands for the breading. Tongs are fine for dipping, but pressing the coating on with your fingers gives you way more control. Just make sure one hand stays dry for the breadcrumb mixture and the other handles the wet chicken. Otherwise, you’ll end up with breadcrumb-glue fingers.
Let the coating set. If you have an extra 10 minutes, let the breaded thighs sit on the wire rack at room temperature before baking. This helps the coating adhere better and prevents it from sliding off during cooking.
Watch the fat render. Chicken thighs are fatty, and that fat will drip onto the pan during baking. Don’t be alarmed if you see a little smoke—it’s normal. Just make sure your baking sheet has a rim to catch it, and keep an eye on it.
My biggest failure: The first time I made this, I used pre-shredded parmesan from a bag. The coating came out clumpy and didn’t stick. It was edible, but it wasn’t crispy. Freshly grated cheese makes all the difference. Trust me on this.
Multitasking tip: While the chicken bakes, you can easily whip up a side dish. I often make a quick arugula salad with lemon vinaigrette or roast some broccoli on a separate pan. Everything comes together at the same time, and you look like a dinner hero.
Variations & Adaptations
This recipe is incredibly flexible. Here are some ways to change it up:
Spicy Version: Add ½ teaspoon of cayenne pepper and 1 teaspoon of red pepper flakes to the breadcrumb mixture. You’ll get a nice kick that cuts through the richness of the chicken. I’ve also drizzled hot honey over the finished thighs, and it was incredible.
Herb-Crusted Version: Swap the dried oregano for a tablespoon of fresh chopped rosemary and thyme. The fresh herbs add a bright, aromatic quality that feels more elegant. Perfect for when you’re serving guests.
Gluten-Free Adaptation: Use gluten-free panko breadcrumbs (I like Ian’s brand) and make sure your Dijon mustard is gluten-free. The texture is almost identical to the original, and no one will know the difference.
Air Fryer Method: Preheat your air fryer to 375°F (190°C). Place the breaded thighs in a single layer in the basket (you might need to work in batches). Cook for 18-20 minutes, flipping halfway through. The crust gets even crispier in the air fryer, and it cuts the cooking time down by about 10 minutes.
Lemon-Pepper Twist: Add the zest of one lemon and an extra teaspoon of black pepper to the breadcrumb mixture. The lemon zest adds brightness that pairs beautifully with the parmesan. I tried this on a whim one night, and now it’s my husband’s favorite version.
Dairy-Free Option: Replace the parmesan with ¼ cup of nutritional yeast and an extra ¼ cup of panko. The nutritional yeast gives you that savory, cheesy flavor without any dairy. It’s not an exact match, but it’s surprisingly good.
Serving & Storage Suggestions
These thighs are best served hot, straight from the oven, with that crust still singing. But they’re also pretty great the next day.
Serving Temperature: Serve immediately after the 5-minute rest. The crust will be at its crispiest. If you let them sit too long, the steam from the meat will soften the coating.
Presentation: Arrange the thighs on a platter with lemon wedges and fresh parsley scattered around. A side of roasted vegetables or a simple green salad makes the plate look complete. For a heartier meal, serve with mashed potatoes or crusty bread to soak up any juices.
Complementary Dishes: These thighs pair beautifully with a refreshing champagne punch if you’re feeling fancy, or a crisp white wine like Sauvignon Blanc. For a non-alcoholic option, sparkling water with lemon works perfectly.
Storage: Let any leftover chicken cool completely, then store in an airtight container in the refrigerator for up to 4 days. The crust will soften, but the flavor will still be great.
Reheating: The best way to revive the crispiness is in the oven or air fryer. Preheat to 375°F (190°C) and reheat for 5-7 minutes, or until the crust is crispy again. The microwave will work in a pinch, but you’ll lose that crunch.
Freezing: You can freeze the baked thighs for up to 3 months. Let them cool completely, then wrap individually in plastic wrap and place in a freezer bag. To reheat, thaw in the refrigerator overnight, then reheat in the oven at 375°F for 10-12 minutes.
Flavor Development: Honestly, these thighs are even better the next day. The flavors meld together overnight, and the meat becomes even more tender. I’ve been known to make a double batch just for leftovers.
Nutritional Information & Benefits
Here’s the nutritional breakdown per serving (one thigh, based on six servings):
- Calories: 380
- Protein: 32g
- Fat: 24g (including 8g saturated fat)
- Carbohydrates: 8g
- Fiber: 1g
- Sugar: 1g
- Sodium: 620mg
Health Benefits: Chicken thighs are a great source of high-quality protein, which supports muscle health and keeps you full longer. They also contain selenium, which is important for thyroid function, and B vitamins that help with energy metabolism. The parmesan adds calcium and a little extra protein, while the olive oil provides heart-healthy monounsaturated fats.
Dietary Considerations: This recipe is naturally low-carb (about 8g per serving) and can be made gluten-free with a simple swap. It’s not suitable for dairy-free diets unless you make the substitution mentioned above. The sodium content is moderate, so if you’re watching your salt intake, reduce the added salt to ½ teaspoon.
Personal Perspective: I love that this recipe feels indulgent but isn’t fried. It satisfies that craving for something crispy and savory without the heavy feeling that comes from deep-frying. It’s a win-win in my book.
Conclusion
This crispy baked parmesan chicken thighs recipe has become a staple in my kitchen for good reason. It’s fast enough for a weeknight, fancy enough for company, and so simple that you’ll memorize it after making it once. The crust is shatteringly crisp, the meat is tender and juicy, and the flavor is everything you want from a comfort meal—savory, cheesy, and deeply satisfying.
Don’t be afraid to play around with the seasonings or try one of the variations I mentioned. Cooking should be fun, and this recipe is forgiving enough to handle a little experimentation. If you make it spicier, add more herbs, or try the air fryer version, I’d love to hear how it turns out.
Drop a comment below and let me know how your chicken turned out. Did you try a variation? Serve it with something unexpected? I read every comment, and your ideas often inspire my next kitchen experiment. Happy cooking!
Frequently Asked Questions
Can I use chicken breasts instead of thighs?
Yes, but you’ll need to adjust the cooking time. Boneless, skinless chicken breasts will cook faster—about 18-22 minutes at 425°F. Bone-in breasts need about 25-30 minutes. Just make sure the internal temperature reaches 165°F. The breasts won’t be quite as juicy as thighs, but they’ll still be delicious.
Why is my coating not sticking to the chicken?
This usually happens when the chicken is too wet. Make sure you pat the thighs completely dry with paper towels before coating. Also, don’t skip the oil-mustard mixture—it acts as the glue that holds the breading in place. If you’re still having trouble, let the breaded chicken rest for 10 minutes before baking to help the coating set.
Can I make this recipe ahead of time?
Absolutely. You can bread the chicken up to 8 hours in advance and keep it in the refrigerator on the wire rack. Just cover it loosely with plastic wrap. When you’re ready to bake, add about 5 minutes to the cooking time since the chicken will be cold. The texture won’t be quite as crispy as fresh-baked, but it’s still really good.
How do I get the crust extra crispy?
Three things: dry the chicken thoroughly, use a wire rack, and don’t skip the high oven temperature. If you want even more crunch, you can spray the breaded thighs lightly with cooking spray before baking. This helps the panko brown and crisp up even more. I’ve also started adding a tablespoon of cornstarch to the breadcrumb mixture for extra crunch.
What sides go best with this chicken?
I love serving this with roasted vegetables like broccoli, asparagus, or Brussels sprouts. A simple green salad with lemon vinaigrette cuts through the richness beautifully. For a heartier meal, try mashed potatoes, roasted sweet potatoes, or crusty bread. If you’re looking for something to serve alongside, these thighs also pair wonderfully with crispy prosciutto-wrapped asparagus bites for a complete meal.
Pin This Recipe!
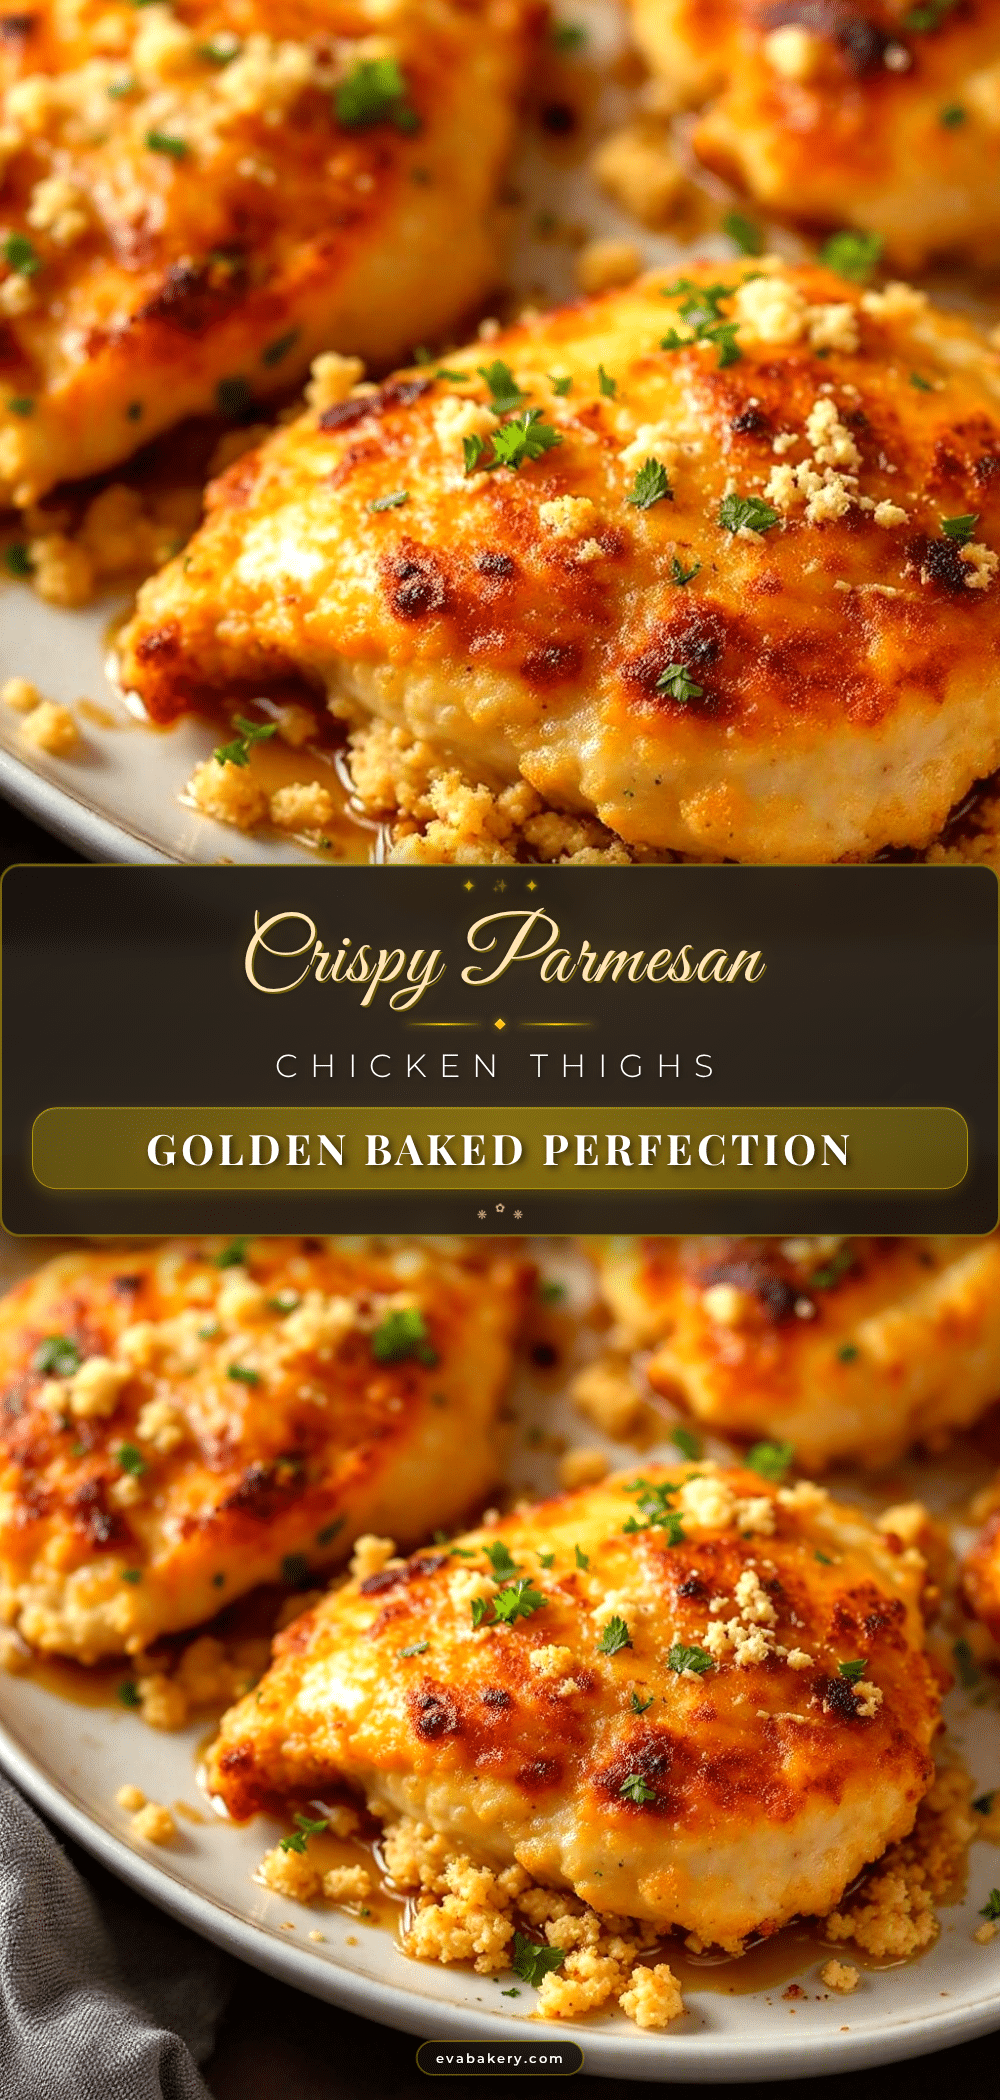
Crispy Baked Parmesan Chicken Thighs: Easy 30-Minute Dinner

Crispy, juicy baked chicken thighs with a golden parmesan-panko crust, ready in under 30 minutes. A simple, crowd-pleasing weeknight dinner that tastes like you spent hours on it.
- Prep Time: 10 minutes
- Cook Time: 25-30 minutes
- Total Time: 35-40 minutes
- Yield: 6 servings 1x
- Category: Main Course
- Cuisine: American
Ingredients
- 6 bone-in, skin-on chicken thighs (about 2.5 lbs total)
- 1 cup panko breadcrumbs
- 3/4 cup grated parmesan cheese, divided
- 1 teaspoon garlic powder
- 1/2 teaspoon onion powder
- 1 teaspoon dried oregano
- 1 teaspoon fine sea salt
- 1/2 teaspoon freshly ground black pepper
- 1/2 teaspoon paprika
- 2 tablespoons olive oil
- 1 tablespoon Dijon mustard
- 1 lemon, for serving
- 2 tablespoons fresh parsley, chopped (optional)
Instructions
- Preheat oven to 425°F (220°C). Place a wire rack on a rimmed baking sheet.
- Pat chicken thighs dry with paper towels, especially the skin side.
- In a shallow bowl, combine panko, 1/2 cup parmesan, garlic powder, onion powder, oregano, salt, pepper, and paprika.
- In a second shallow bowl, whisk together olive oil and Dijon mustard.
- Season chicken lightly with salt and pepper.
- Using tongs, dip each thigh into the oil-mustard mixture, then press into the breadcrumb mixture, coating all sides.
- Place coated thighs skin side up on the wire rack, leaving space between each.
- Bake for 25-30 minutes, until internal temperature reaches 160°F (71°C) and crust is golden brown.
- Let rest on wire rack for 5 minutes.
- Squeeze fresh lemon juice over top, sprinkle with remaining 1/4 cup parmesan and parsley. Serve immediately.
Notes
Pat chicken very dry for crispiest crust. Use freshly grated parmesan, not pre-shredded. Let breaded chicken rest 10 minutes before baking for better coating adhesion. For extra crunch, spray breaded thighs lightly with cooking spray before baking. If crust isn’t browning, increase oven to 450°F for last 5-10 minutes.
Nutrition
- Serving Size: 1 chicken thigh
- Calories: 380
- Sugar: 1
- Sodium: 620
- Fat: 24
- Saturated Fat: 8
- Carbohydrates: 8
- Fiber: 1
- Protein: 32
Keywords: crispy baked chicken thighs, parmesan chicken, easy chicken dinner, 30-minute meal, weeknight dinner, baked chicken, panko chicken


