“You really don’t need an oven for this one,” my friend said over the phone as I wrestled with my usual baking anxieties. Honestly, the last thing I wanted was to heat up the kitchen or babysit a dessert for hours. That’s how these Creamy No-Bake Oreo Cheesecake Cups came into my life—through a casual chat and a stubborn refusal to tackle a complicated recipe after a long day. I figured, why not try a quick dessert with Oreos and cream cheese? I was skeptical at first; no-bake desserts always seemed too easy to be satisfying. But, well, after the first bite, I was hooked.
The texture surprised me—silky, smooth, and just the right amount of Oreo crunch. Plus, it only took about five minutes to put together (not counting the chilling time, but hey, that’s hands-off). This recipe has become my go-to for unexpected guests or those evenings when I want something sweet but zero stress. I’ve made it so many times that I can whip it up in my sleep, and honestly, it’s the kind of treat that makes you pause and smile quietly to yourself.
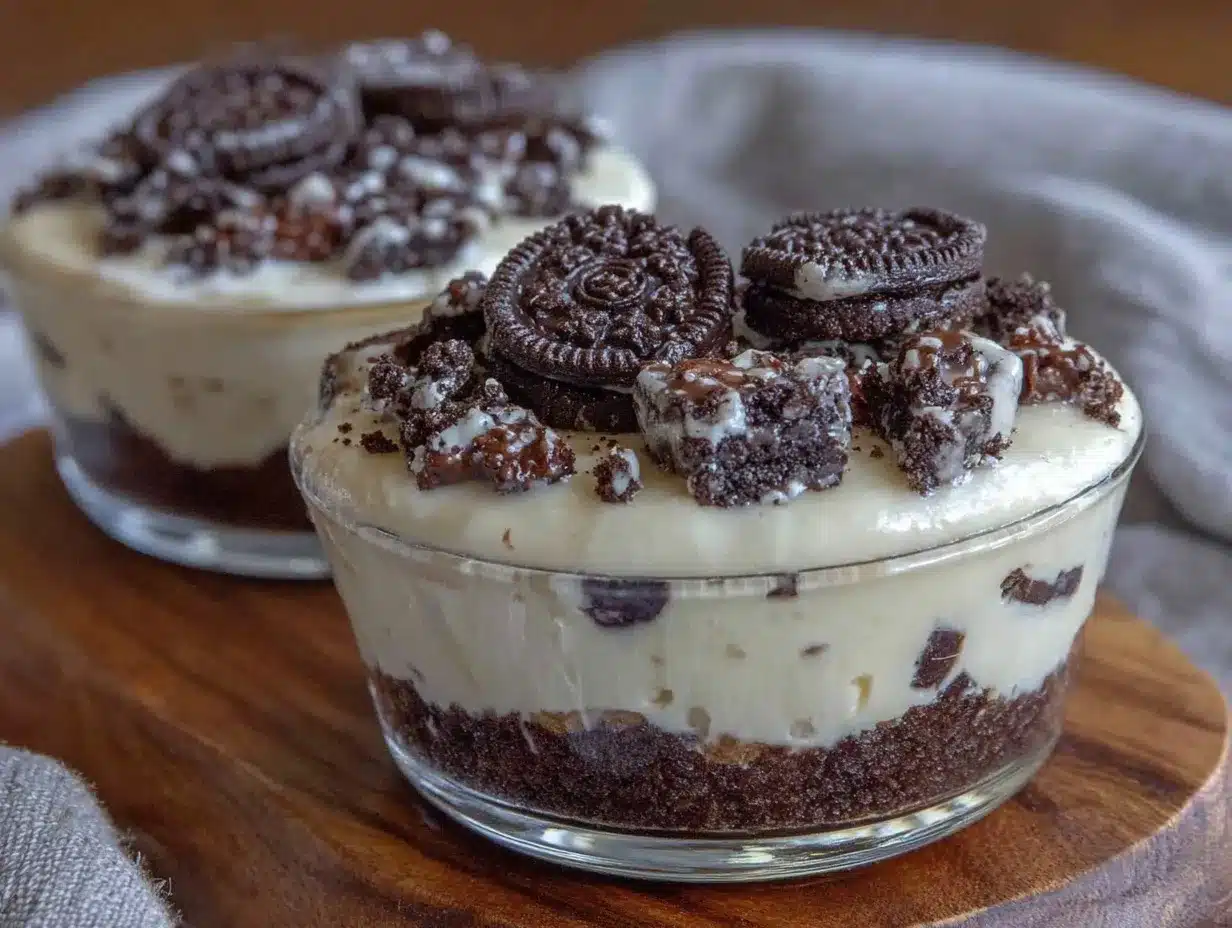
What’s cool is how the simple combination of crushed Oreos and a creamy filling creates this mini indulgence that feels fancy but isn’t. You can layer it in little cups for a pretty presentation, and it’s always a hit. It’s the kind of dessert that fits right in whether you’re serving it alongside a sparkling drink like the Refreshing Champagne Punch or as a sweet finale after something savory like prosciutto-wrapped asparagus bites. I guess what I’m saying is, this recipe stuck because it’s just simple—and sometimes, simple wins.
Why You’ll Love This Recipe
Honestly, this Creamy No-Bake Oreo Cheesecake Cups Recipe is one of those finds that’s a win every time. Here’s why it quickly became a staple in my dessert rotation:
- Quick & Easy: Mix everything in under 5 minutes, perfect for those moments when you want dessert without delay.
- Simple Ingredients: No crazy shopping list here—just basics like cream cheese, Oreos, and a touch of whipped cream.
- Perfect for Any Occasion: Whether it’s a laid-back family night or a last-minute gathering, these cups fit right in.
- Crowd-Pleaser: Kids and adults alike adore them; the Oreo crunch paired with the creamy filling hits all the right notes.
- Unbelievably Delicious: The balance of sweet, tangy, and crunchy textures makes it feel indulgent without being overwhelming.
What sets this apart from other Oreo cheesecake recipes is the texture. Instead of a dense, heavy cheesecake, these cups are airy and light thanks to folding in some whipped cream, which gives that melt-in-your-mouth feel. Plus, layering the crushed Oreos throughout adds a fun surprise in every bite. I’ve tried baking cheesecakes before, but this no-bake version is more forgiving—and honestly, it’s the one I reach for when I want a guaranteed hit without the fuss.
This dessert isn’t just about the flavor; it’s about the ease and joy it brings when you’re stretched thin or just craving something sweet without the hassle. It’s like a little creamy hug in a cup, something that quietly promises comfort without making you work for it.
What Ingredients You Will Need
This recipe keeps things straightforward with ingredients you likely already have or can grab quickly at the store. Each part plays a role in building that creamy, crunchy, and perfectly balanced Oreo cheesecake cup.
- For the Base and Layers:
- Oreos (about 20 cookies, crushed) – I prefer using the classic version for that iconic flavor and crunch. If you want to switch it up, chocolate wafer cookies work well too.
- For the Creamy Filling:
- Cream cheese (8 ounces / 225 grams, softened) – Make sure it’s softened to room temperature for smooth blending. Philadelphia brand is my go-to for consistency.
- Powdered sugar (1/2 cup / 60 grams) – Adds sweetness without grit.
- Vanilla extract (1 teaspoon) – Brings out the flavors beautifully.
- Heavy whipping cream (1 cup / 240 ml, cold) – Whipped to soft peaks to fold into the cream cheese mixture, giving it that light texture. You can substitute with coconut cream for a dairy-free option, but it changes the flavor slightly.
- Optional Toppings:
- Mini Oreo pieces or cookie crumbs for garnish
- Chocolate shavings or drizzle
You can easily adjust the amount of crushed Oreos depending on how crunchy you like your cups. And if you want to add a little twist, I’ve sometimes swapped in a few tablespoons of peanut butter into the cream cheese mix—it adds a fun nutty note without overpowering the Oreo.
Equipment Needed
- Mixing bowls – One medium bowl for the cream cheese mixture and a separate one for whipping the cream.
- Electric mixer or stand mixer – While you can whip the cream by hand, the mixer makes it faster and fluffier. I’ve tried both; the mixer saves my wrists, especially when making multiple batches.
- Spatula – For folding the whipped cream gently into the cream cheese mixture.
- Measuring cups and spoons – Accuracy helps with balance here.
- Serving cups or small jars – I like using clear glass cups to show off the Oreo layers, but small mason jars or even silicone muffin cups work if you want to make them portable or freezer-friendly.
- Food processor or a plastic bag and rolling pin – To crush the Oreos finely. A food processor gives a nice even crumb, but a zip-top bag and rolling pin is a budget-friendly alternative.
If you’re tight on tools, a simple hand mixer and a sturdy bowl will do the trick. Keeping your cream cheese at room temperature and your whipping cream cold is key, so prepping the kitchen tools ahead helps the process go smoothly.
Preparation Method
- Crush the Oreos: Place 20 Oreos in a food processor and pulse until they form fine crumbs. If you don’t have a processor, put them in a zip-top bag and crush with a rolling pin. Set aside about 1/4 cup (30 grams) of crumbs for topping later. This step should take about 5 minutes.
- Make the Cream Cheese Mixture: In a medium bowl, beat 8 ounces (225 grams) of softened cream cheese with 1/2 cup (60 grams) powdered sugar and 1 teaspoon vanilla extract until smooth and creamy. This usually takes around 3 minutes with an electric mixer.
- Whip the Cream: In a separate chilled bowl, whip 1 cup (240 ml) heavy cream until soft peaks form. You want it firm enough to hold shape but not stiff. This step takes about 4-5 minutes.
- Fold the Cream into the Cheese: Gently fold the whipped cream into the cream cheese mixture using a spatula. Be careful not to deflate it; the goal is a light, airy filling. This should take 2 minutes.
- Assemble the Cups: Start with a spoonful of crushed Oreos at the bottom of each serving cup. Add a layer of the creamy filling, then another Oreo layer, and finish with a final layer of filling. Repeat until the cups are filled, leaving space for garnish. This assembly takes roughly 7-10 minutes depending on how many cups you’re making.
- Top and Chill: Sprinkle the reserved Oreo crumbs or mini Oreo pieces on top. Cover with plastic wrap and refrigerate for at least 2 hours to set properly. Overnight chilling improves flavor and texture.
Pro tip: When folding in the whipped cream, use slow, sweeping motions. I’ve learned the hard way that overmixing leads to a denser filling, which loses that dreamy cheesecake feel. Also, if you want to speed things up, you can prepare these a day ahead—just remember to add the toppings fresh before serving.
Cooking Tips & Techniques
Making no-bake desserts like these Oreo cheesecake cups is all about balance and technique. Here are some tips I picked up along the way:
- Softening the Cream Cheese: Don’t rush this. If it’s too cold, you’ll get lumps in your filling. I usually leave it on the counter for 30 minutes before mixing.
- Whipping the Cream: Use cold heavy cream and a chilled bowl for best results. It whips faster and holds peaks better. If you’ve ever ended up with butter instead of whipped cream, you’ll know why this matters.
- Folding, Not Stirring: When combining the whipped cream and cream cheese mixture, fold gently to keep the air in. This is what makes the dessert light and fluffy instead of dense.
- Crushing Oreos: A finer crumb works better as the base and topping, while chunkier pieces make for great texture in the layers. I usually do a mix of both.
- Chilling Time: Don’t skip the chill. The flavors meld, and the cream firms up, making it easier to eat and more flavorful.
One time, I tried to skip the chilling step out of impatience—it was a disaster. The filling was too soft, and the cups collapsed. Lesson learned! Also, multitasking while these chill is easy; I often prep drinks like the sparkling New Year’s sangria to go with them.
Variations & Adaptations
This recipe is a solid base that’s easy to customize depending on what you like or what you have on hand.
- Dietary Adaptations: Use dairy-free cream cheese and coconut whipped cream for a vegan-friendly version. Gluten-free Oreo alternatives also work if you’re avoiding gluten.
- Flavor Twists: Add a tablespoon of instant coffee powder to the cream cheese mix for a mocha flair. Or swirl in some peanut butter for a rich, nutty note.
- Seasonal Variations: In summer, toss in fresh raspberries or strawberries between the layers with the Oreos for a fruity surprise.
- Different Cookie Bases: Swap Oreos for Biscoff cookies or graham crackers for a new flavor profile.
- Frozen Treat: Freeze the assembled cups for a couple of hours and serve as a semi-frozen dessert, perfect for hot days.
Personally, I once tried adding a layer of salted caramel sauce between the Oreo and cream layers—talk about indulgence! It was a hit at a friend’s party. Feel free to experiment and find your own favorite spin.
Serving & Storage Suggestions
These cheesecake cups are best served chilled straight from the fridge. I like to garnish them just before serving to keep the Oreo crumbs crisp.
They pair wonderfully with light, bubbly drinks—something like the champagne punch or a sparkling water with a twist of lemon. The contrast between the creamy dessert and crisp beverage is just right.
For storage, cover the cups tightly with plastic wrap or lids and keep them refrigerated for up to 3 days. They don’t freeze well after assembly because the texture changes. If you want to prep ahead, keep the filling and crushed Oreos separate and assemble just before serving.
Reheating isn’t necessary here; these are best cold, but if you want to soften them slightly, just let them sit at room temperature for 10 minutes before digging in. Over time, the flavors meld beautifully, making the next-day version even better in my opinion.
Nutritional Information & Benefits
Each serving of these Creamy No-Bake Oreo Cheesecake Cups offers a sweet treat with moderate calories, typically around 250-300 calories per cup depending on portion size.
The cream cheese provides protein and calcium, while the whipped cream adds richness. Of course, Oreos add sugar and fat, so moderation is key. For those watching carbs, swapping Oreos with low-carb cookie alternatives can help.
Gluten-free and vegan versions are possible with simple ingredient swaps, making this recipe quite versatile. It’s not a health food by any stretch, but it’s a delightful occasional indulgence that satisfies sweet cravings without hours in the kitchen.
Conclusion
These Creamy No-Bake Oreo Cheesecake Cups have become a quiet favorite of mine—not flashy, but steady and reliable when I want a no-fuss dessert that feels special. The ease of whipping them up combined with that perfect balance of creamy and crunchy is why I keep coming back to this recipe.
Feel free to tweak it to your taste and occasion; it’s forgiving and flexible. Whether you’re serving it after a casual dinner or alongside something elegant like the caviar deviled eggs, it fits right in.
Give it a try, and let me know how you like to customize your cups. There’s something quietly satisfying about a dessert that’s both easy and indulgent—these cheesecake cups are exactly that.
FAQs
Can I make these cheesecake cups ahead of time?
Yes! You can prepare and assemble them a day in advance. Just keep them covered in the fridge and add any crunchy toppings right before serving.
What can I use if I don’t have heavy cream?
You can substitute chilled coconut cream or use store-bought whipped topping, but the texture may be slightly different.
Are these cheesecake cups gluten-free?
Not with regular Oreos, as they contain gluten. Use gluten-free cookie alternatives to make a gluten-free version.
Can I use low-fat cream cheese?
Yes, but the texture might be less creamy and more dense. Full-fat cream cheese gives the best results.
How long should I chill the cups before serving?
At least 2 hours is recommended for the filling to set properly. Overnight chilling enhances the flavor and firmness even more.
Pin This Recipe!
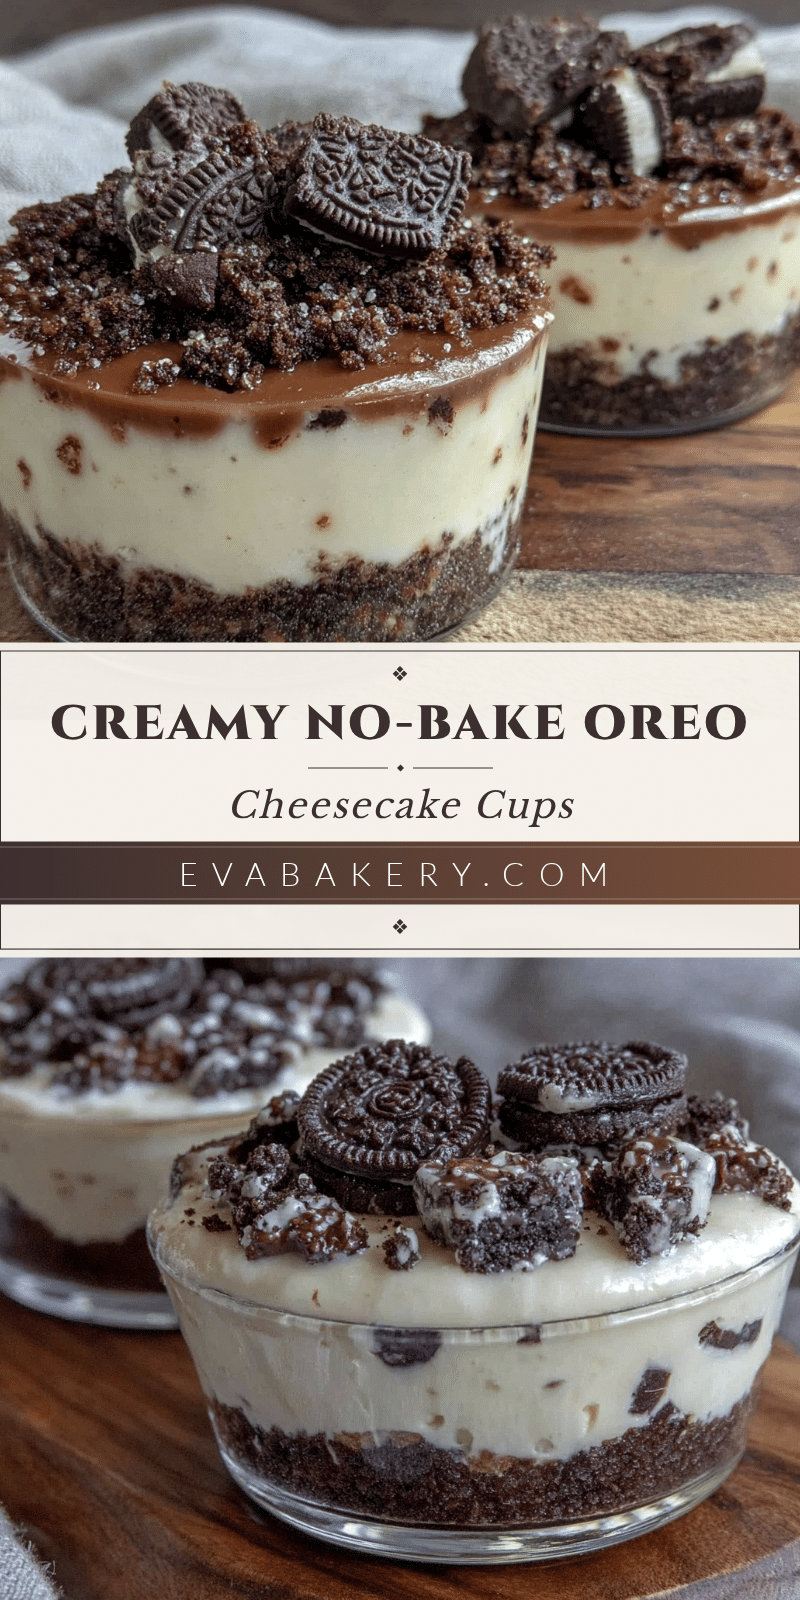
Creamy No-Bake Oreo Cheesecake Cups
A quick and easy no-bake dessert featuring creamy cheesecake filling layered with crushed Oreos, perfect for any occasion and ready in just 5 minutes plus chilling time.
- Prep Time: 10 minutes
- Cook Time: 0 minutes
- Total Time: 2 hours 10 minutes
- Yield: 6 servings 1x
- Category: Dessert
- Cuisine: American
Ingredients
- 20 Oreos, crushed
- 8 ounces (225 grams) cream cheese, softened
- 1/2 cup (60 grams) powdered sugar
- 1 teaspoon vanilla extract
- 1 cup (240 ml) heavy whipping cream, cold
- Optional toppings: mini Oreo pieces or cookie crumbs, chocolate shavings or drizzle
Instructions
- Crush the Oreos using a food processor or place in a zip-top bag and crush with a rolling pin. Set aside about 1/4 cup (30 grams) of crumbs for topping.
- In a medium bowl, beat the softened cream cheese with powdered sugar and vanilla extract until smooth and creamy.
- In a separate chilled bowl, whip the heavy cream until soft peaks form.
- Gently fold the whipped cream into the cream cheese mixture using a spatula, being careful not to deflate the mixture.
- Assemble the cups by layering crushed Oreos and creamy filling alternately, finishing with a layer of filling.
- Top with reserved Oreo crumbs or mini Oreo pieces.
- Cover and refrigerate for at least 2 hours to set. Overnight chilling is recommended for best flavor and texture.
Notes
Keep cream cheese softened to room temperature for smooth blending. Use cold heavy cream and a chilled bowl for best whipping results. Fold whipped cream gently to keep the filling light and airy. Chill at least 2 hours or overnight for best texture. Prepare a day ahead and add toppings fresh before serving.
Nutrition
- Serving Size: 1 cup serving
- Calories: 275
- Sugar: 20
- Sodium: 150
- Fat: 18
- Saturated Fat: 10
- Carbohydrates: 25
- Fiber: 1
- Protein: 4
Keywords: no-bake, Oreo, cheesecake, dessert, easy, quick, creamy, Oreo cheesecake cups


