“You sure you want to try making scones from scratch?” my cousin asked with a raised eyebrow as I pulled out a bowl and some flour one slow Sunday morning. Honestly, I wasn’t all that confident myself. I’d always admired those fluffy strawberry scones from the bakery but figured they were one of those treats best left to the pros. Yet, there I was, flour dusting the counter and a small pile of fresh strawberries waiting to be turned into something magical.
The kitchen smelled like early summer—sweet, slightly tart strawberries mingling with a hint of vanilla and butter melting. It was that quiet moment before a baking adventure, the kind that feels comforting yet just a bit daring. One batch led to another that week (I couldn’t help myself), and soon these airy, tender scones with that dreamy creamy vanilla glaze became my go-to for mornings when I needed a little calm and sweetness.
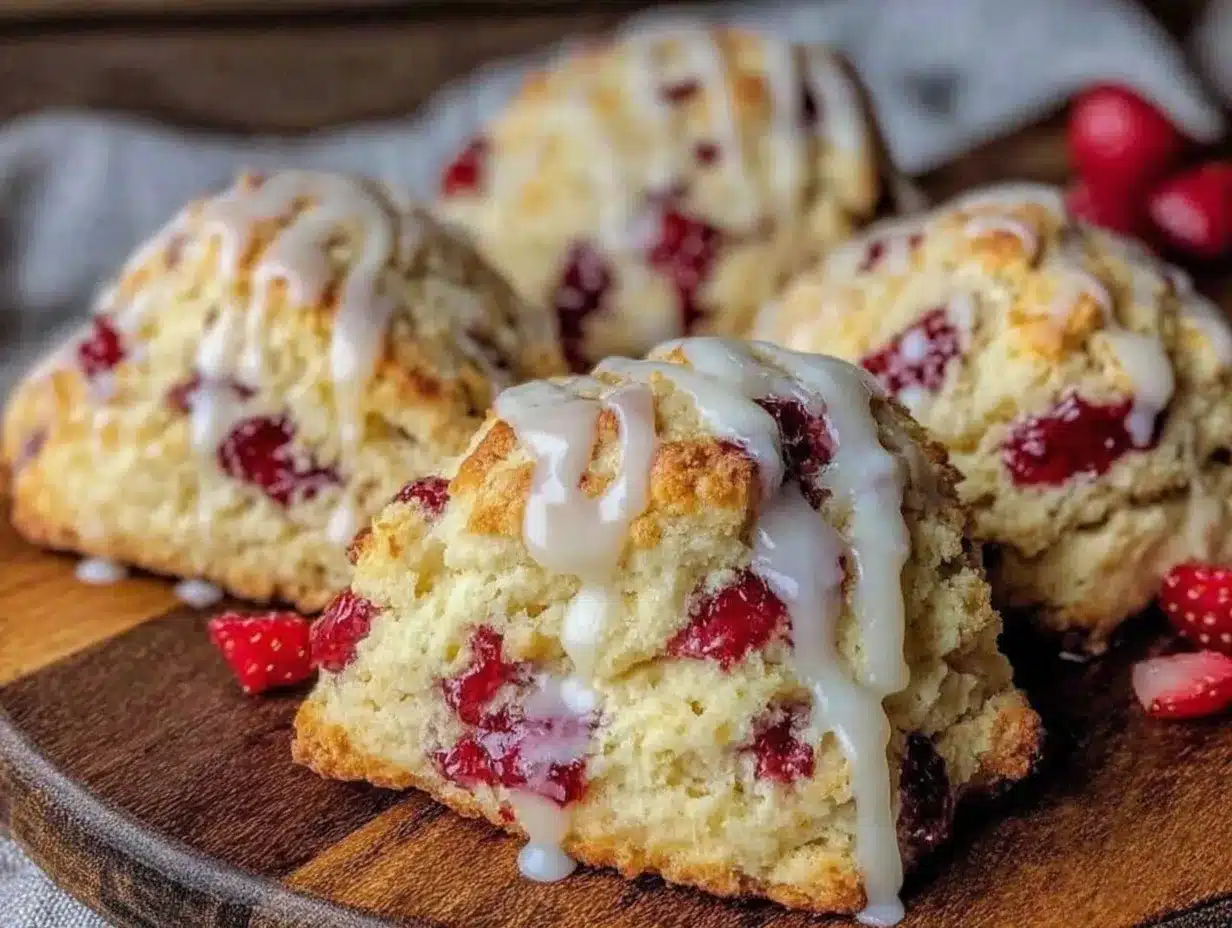
There’s something about the flaky layers breaking apart, the juicy bursts of strawberry, and the smooth vanilla glaze that makes this recipe stick with me. Not fancy, not complicated—just honest, homemade comfort that surprises you with how easy it really is. It’s the kind of treat that feels like a hug in pastry form, and honestly, that’s why I keep coming back to these fluffy strawberry scones with creamy vanilla glaze.
Why You’ll Love This Recipe
After testing and tweaking this recipe over several weekends (and yes, sharing with plenty of skeptical friends), I can say this is one recipe that delivers every time. Here’s why it’s worth your kitchen space:
- Quick & Easy: You can have these ready in about 35 minutes, perfect for last-minute brunch plans or a cozy breakfast.
- Simple Ingredients: No need to hunt down fancy components—everything’s likely already in your pantry or fridge, including fresh or frozen strawberries.
- Perfect for Special Occasions: Whether it’s a casual weekend brunch or a small celebration, these scones bring a touch of homemade charm without the fuss.
- Crowd-Pleaser: Kids, adults, picky eaters—everyone seems to reach for seconds, especially once that vanilla glaze is on the scene.
- Unbelievably Delicious: The tender crumb, the juicy strawberry bits, and the sweet glaze combine into a texture and flavor that just feels ‘right’—comfort food with a light, fresh twist.
What sets this recipe apart is the balance: I use a touch of cold butter cut into the flour for that flaky texture, and the strawberries stay plump without turning mushy. The vanilla glaze is simple but made with real vanilla bean paste or extract, giving it a warm, authentic flavor. Honestly, it’s not your run-of-the-mill scone; it’s the kind that makes you close your eyes on the first bite and think, “I nailed this.”
What Ingredients You Will Need
This recipe uses simple, wholesome ingredients to deliver bold flavor and satisfying texture without any complicated steps. Most of these are pantry staples, with fresh strawberries adding that seasonal pop. Here’s what you’ll need:
- All-purpose flour (2 ½ cups / 312 g) – the base for a tender crumb
- Baking powder (1 tablespoon) – for that perfect rise
- Sugar (¼ cup / 50 g) – just enough sweetness in the dough
- Salt (½ teaspoon) – to balance the flavors
- Unsalted butter, cold and cubed (½ cup / 113 g) – I recommend Kerrygold for great flavor and texture
- Fresh strawberries, hulled and diced (1 cup / 150 g) – if out of season, frozen works fine; just thaw and drain excess liquid
- Heavy cream (¾ cup / 180 ml) – adds richness and moisture
- Vanilla extract (1 teaspoon) – or vanilla bean paste for a more intense flavor
- Egg, large (1) – for binding and color
For the creamy vanilla glaze:
- Powdered sugar (1 cup / 120 g) – for sweetness and smoothness
- Milk or cream (2-3 tablespoons / 30-45 ml) – adjust for desired consistency
- Vanilla extract (½ teaspoon) – makes all the difference
If you want a gluten-free option, swapping in a trusted almond flour blend works well, though the texture will be slightly different. For dairy-free, use coconut cream and a plant-based butter substitute. I’ve found that the key is to keep the butter cold and not overmix the dough—more on that in the method!
Equipment Needed
- Mixing bowls: At least one large for the dough, and a small one for the glaze.
- Baking sheet: Preferably rimmed; I line mine with parchment paper for easy cleanup.
- Pastry cutter or fork: For cutting cold butter into the flour. If you don’t have one, two knives or your fingers work fine, just be quick to keep the butter cold.
- Measuring cups and spoons: Accurate measurements are key here.
- Whisk: For blending the glaze smoothly.
- Cooling rack: Helps scones cool evenly without getting soggy underneath.
Optional but helpful: a kitchen scale for precise flour measurement, and a silicone spatula for gentle folding. I’ve used both cheap and fancy baking sheets, and honestly, a good non-stick surface makes a difference in browning. If you’re on a budget, parchment paper does wonders for preventing sticking.
Preparation Method
- Preheat your oven to 400°F (200°C). Line a baking sheet with parchment paper and set aside. This higher temperature helps the scones get that quick rise and golden crust.
- Mix dry ingredients: In a large bowl, whisk together 2 ½ cups (312 g) all-purpose flour, 1 tablespoon baking powder, ¼ cup (50 g) sugar, and ½ teaspoon salt. Make sure the baking powder is fresh for the best lift.
- Cut in the butter: Add ½ cup (113 g) cold, cubed unsalted butter to the flour mixture. Using a pastry cutter or two knives, cut the butter into the flour until the mixture resembles coarse crumbs with some pea-sized bits of butter. This step is crucial for flaky scones—don’t overwork it or the butter will melt too soon.
- Add strawberries: Gently fold in 1 cup (150 g) diced fresh strawberries, being careful not to crush them. You want those juicy bursts intact.
- Whisk wet ingredients: In a separate bowl, whisk together ¾ cup (180 ml) heavy cream, 1 large egg, and 1 teaspoon vanilla extract until combined.
- Combine wet and dry: Pour the wet mixture into the dry ingredients. Using a spatula, fold gently just until the dough starts to come together. It will be slightly sticky but should hold shape. If too dry, add a tablespoon more cream; if too wet, add a bit more flour.
- Shape the dough: Turn the dough onto a lightly floured surface. Pat it into a 7-inch (18 cm) circle about 1 inch (2.5 cm) thick. Avoid kneading to keep it tender.
- Cut into wedges: Using a sharp knife or bench scraper, cut the circle into 8 equal wedges. Transfer these wedges carefully to the prepared baking sheet, spacing them about 2 inches apart.
- Bake: Place the baking sheet in the preheated oven and bake for 18-22 minutes, or until the scones are golden brown on top and a toothpick inserted into the center comes out clean. The smell at this point is just heavenly—like fresh strawberries and warm butter wrapped in vanilla.
- Cool: Remove from oven and let scones cool on the baking sheet for 5 minutes, then transfer to a cooling rack to cool completely before glazing.
- Prepare glaze: In a small bowl, whisk 1 cup (120 g) powdered sugar with 2-3 tablespoons (30-45 ml) milk or cream and ½ teaspoon vanilla extract until smooth and pourable. Adjust milk quantity to reach your preferred consistency.
- Glaze and serve: Drizzle the vanilla glaze over the cooled scones with a spoon or fork. Let it set for a few minutes before enjoying.
Pro tip: If your strawberries release too much juice while mixing, gently pat them dry with paper towels before adding to the dough. This prevents soggy scones. Also, keep your butter cold and work quickly to get those flaky layers just right.
Cooking Tips & Techniques
Fluffy scones can be tricky, but a few tricks make all the difference. First, always use cold butter straight from the fridge. I’ve learned the hard way that warm butter melts in the dough and ruins the texture.
When mixing, less is more. Overmixing develops gluten and makes scones tough. It’s tempting to keep stirring, but folding gently until just combined keeps them tender.
Don’t skip the resting time after baking; letting scones cool slightly helps them finish setting and keeps the crumb soft. Also, watch your oven temperature carefully—too low and they’ll be dense; too high and they’ll brown too fast without cooking through.
One of my favorite hacks is using vanilla bean paste instead of extract for the glaze. It adds little flecks of vanilla that look gorgeous and taste richer. And if you’re into multitasking, get your glaze ready while the scones bake so you can drizzle right when they’re cool.
Variations & Adaptations
This recipe adapts well to your mood and pantry. Here are some ideas I’ve tried or thought about:
- Berry Medley: Swap strawberries for a mix of blueberries, raspberries, and blackberries for a more complex flavor.
- Gluten-Free: Use a 1:1 gluten-free baking flour blend. The texture changes slightly but still delicious.
- Lemon Zest Twist: Add a teaspoon of freshly grated lemon zest to the dough and a bit to the glaze for a bright, citrusy pop.
- Dairy-Free: Substitute heavy cream with coconut cream and use a vegan butter alternative. The scones will still be tender and flavorful.
- Chocolate Chip: For a sweeter treat, toss ½ cup (90 g) mini chocolate chips with the flour before adding wet ingredients.
One personal favorite is the lemon zest variation paired with a hot cup of tea on a rainy afternoon. It’s simple but feels special. If you want to experiment with savory, you might enjoy the buttery crust techniques used in my fluffy mini quiches recipe—great inspiration for texture!
Serving & Storage Suggestions
These scones are best served warm, fresh from the oven or after a quick 10-second zap in the microwave. The creamy vanilla glaze hardens just enough to add a sweet, silky finish without being sticky.
They pair beautifully with a simple cup of black coffee or a refreshing glass of iced tea. For a brunch spread, I like to serve them alongside fresh fruit and a light salad. They’d also complement the sparkling vibes of a champagne punch for a celebratory feel.
Store leftover scones in an airtight container at room temperature for up to 2 days. For longer storage, freeze them individually wrapped in plastic wrap and foil for up to 3 months. Thaw at room temperature and reheat briefly in the oven to bring back that just-baked texture.
Glazed scones don’t freeze as well with the topping on, so I recommend glazing after reheating if freezing. Over time, the flavors deepen, and the strawberries mellow, making them a bit sweeter the next day.
Nutritional Information & Benefits
Each fluffy strawberry scone contains approximately 250-300 calories, depending on size and glaze amount. The strawberries add a boost of vitamin C and antioxidants, while the cream and butter provide satisfying richness.
This recipe can be easily adapted for dietary needs—gluten-free flours keep it accessible, and swapping dairy ingredients can accommodate lactose intolerance. While these scones are a treat, the fresh fruit and real vanilla add nutrients and flavor without artificial extras.
I appreciate recipes like this that balance indulgence and wholesomeness—good enough to feel like a splurge, but made with ingredients you can trust. It’s one of those recipes that fits nicely into a balanced lifestyle, especially when shared with friends.
Conclusion
Fluffy strawberry scones with creamy vanilla glaze have become one of those recipes I reach for when I want something both simple and special. They’re easy enough for a no-fuss morning but fancy enough to impress without stress. The balance of tender crumb, bright strawberries, and sweet vanilla glaze just works every time.
Feel free to tweak the ingredients or glaze to your liking—that’s part of the fun in baking. I love how this recipe brings a little bit of joy to an ordinary day, and I hope it does the same for you.
If you try it, I’d love to hear how your batch turns out or what variations you discover. Baking is better when shared, right? Here’s to many cozy mornings filled with the smell of fresh strawberries and the warmth of homemade treats.
FAQs
Can I use frozen strawberries instead of fresh?
Yes! Just thaw and drain them well to avoid soggy dough. Pat dry with paper towels before folding into the flour mixture.
How do I store leftover scones?
Keep them in an airtight container at room temperature for 1-2 days or freeze individually wrapped for up to 3 months. Reheat in the oven for best texture.
Can I make these scones vegan?
Absolutely. Substitute butter with a vegan butter alternative and heavy cream with coconut cream or another plant-based cream. Use a flax egg or other egg replacer if desired.
What’s the best way to measure flour for this recipe?
For accuracy, use a kitchen scale to weigh 312 grams of flour. If measuring by cup, spoon the flour lightly into the cup and level off; don’t pack it down.
Why are my scones dense instead of fluffy?
Common causes include overmixing the dough, using expired baking powder, or butter melting before baking. Keep ingredients cold and mix gently just until combined.
Pin This Recipe!
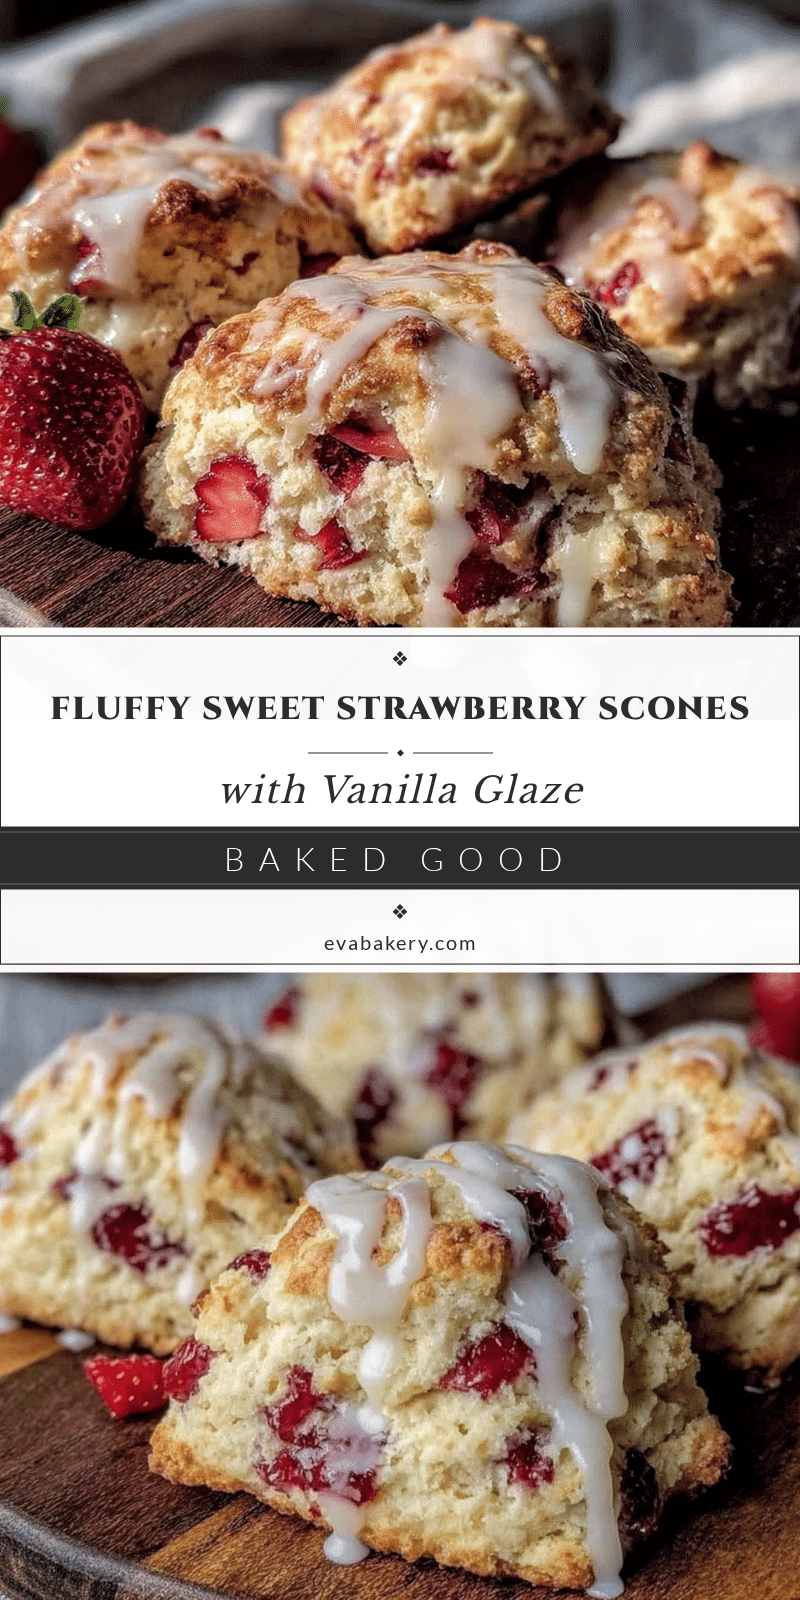
Fluffy Strawberry Scones Recipe Easy Homemade with Creamy Vanilla Glaze

These fluffy strawberry scones feature a tender crumb with juicy strawberry bursts and a smooth creamy vanilla glaze, perfect for a cozy breakfast or brunch.
- Prep Time: 15 minutes
- Cook Time: 20 minutes
- Total Time: 35 minutes
- Yield: 8 servings 1x
- Category: Breakfast, Brunch, Snack
- Cuisine: American
Ingredients
- 2 ½ cups (312 g) all-purpose flour
- 1 tablespoon baking powder
- ¼ cup (50 g) sugar
- ½ teaspoon salt
- ½ cup (113 g) cold unsalted butter, cubed
- 1 cup (150 g) fresh strawberries, hulled and diced
- ¾ cup (180 ml) heavy cream
- 1 teaspoon vanilla extract or vanilla bean paste
- 1 large egg
- For the glaze:
- 1 cup (120 g) powdered sugar
- 2–3 tablespoons (30–45 ml) milk or cream
- ½ teaspoon vanilla extract
Instructions
- Preheat your oven to 400°F (200°C). Line a baking sheet with parchment paper and set aside.
- In a large bowl, whisk together the flour, baking powder, sugar, and salt.
- Add the cold, cubed butter to the flour mixture. Cut the butter into the flour using a pastry cutter or two knives until the mixture resembles coarse crumbs with some pea-sized bits of butter.
- Gently fold in the diced strawberries, being careful not to crush them.
- In a separate bowl, whisk together the heavy cream, egg, and vanilla extract until combined.
- Pour the wet mixture into the dry ingredients. Fold gently with a spatula just until the dough starts to come together. If too dry, add a tablespoon more cream; if too wet, add a bit more flour.
- Turn the dough onto a lightly floured surface and pat into a 7-inch (18 cm) circle about 1 inch (2.5 cm) thick. Avoid kneading.
- Cut the circle into 8 equal wedges and transfer them to the prepared baking sheet, spacing about 2 inches apart.
- Bake for 18-22 minutes until golden brown and a toothpick inserted comes out clean.
- Let scones cool on the baking sheet for 5 minutes, then transfer to a cooling rack to cool completely.
- Prepare the glaze by whisking powdered sugar, milk or cream, and vanilla extract until smooth and pourable.
- Drizzle the glaze over the cooled scones and let set before serving.
Notes
Keep butter cold and work quickly to maintain flaky texture. Pat strawberries dry if they release too much juice to avoid soggy scones. Do not overmix dough to keep scones tender. Use fresh baking powder for best rise. Glaze after scones have cooled. For gluten-free, substitute with almond flour blend; for dairy-free, use coconut cream and vegan butter.
Nutrition
- Serving Size: 1 scone
- Calories: 275
- Sugar: 14
- Sodium: 220
- Fat: 14
- Saturated Fat: 8
- Carbohydrates: 33
- Fiber: 2
- Protein: 4
Keywords: strawberry scones, fluffy scones, vanilla glaze, homemade scones, easy scones, breakfast recipe, brunch recipe


