That first crackle of butter hitting a hot pan — the sound that promises something good — still takes me straight to my tiny New York apartment kitchen at 11 p.m. on a Tuesday. I wasn’t trying to create anything special. I just had three black-spotted bananas on the counter, a bag of walnuts I’d forgotten about, and a craving that wouldn’t quit. But that night, I decided to brown the butter instead of just melting it. And honestly? It changed everything.
I remember standing there, watching the butter foam and swirl, those little brown specks appearing like magic. The nutty aroma filled the whole apartment — the kind of smell that makes neighbors text you asking what you’re baking. I poured it over the sugar, mashed the bananas with a fork (no mixer, because who had space for one?), and folded in those walnuts I’d toasted while the butter was browning. The batter looked so ordinary. But the smell? That was a promise.
When I pulled that loaf out of the oven, it was golden and cracked on top, with those little caramelized edges that make banana bread feel like a real treat. I let it cool for maybe ten minutes before cutting into it — impatient, as always — and the steam rose up with that brown butter scent all over again. The first bite was soft and tender, with those little crunchy bits of walnut and that deep, almost butterscotch flavor from the browned butter. It wasn’t just banana bread anymore. It was the kind of thing you remember.
This recipe stuck because it didn’t try to be fancy. It just took something familiar and made it a little more thoughtful. A little more worth the wait.
Why You’ll Love This Recipe
Let me tell you why this brown butter banana bread with toasted walnuts is the one you’ll keep coming back to. I’ve tested this recipe about seven times — yes, seven — to get the balance just right. Not too sweet, not too dense, with that perfect crackly top that bakery banana bread always has.
- Deep, Nutty Flavor: Browning the butter adds a richness that regular butter just can’t touch. It’s like the difference between a regular chocolate chip cookie and one with browned butter — you’ll never go back.
- Perfect Texture Every Time: The combination of melted browned butter and ripe bananas gives you a tender, moist crumb that stays soft for days. No dry banana bread here, I promise.
- Simple Ingredients: You probably have everything already — bananas, butter, sugar, eggs, flour, and walnuts. No fancy extracts or specialty flours needed.
- Make-Ahead Friendly: This bread actually gets better after a day or two. The flavors meld together, and the brown butter taste deepens. Perfect for prepping ahead of a brunch or holiday gathering.
- Crowd-Pleaser: I’ve brought this to potlucks, family dinners, and even a book club meeting. It disappears fast. Kids love it, adults love it — it’s that universal comfort food that makes everyone happy.
What makes this version different from all the other banana breads out there? It’s the technique. Browning the butter adds a nutty, caramel-like depth that complements the bananas perfectly. And toasting the walnuts? That extra step brings out their oils and makes them crunchy instead of soft and sad. This isn’t just another banana bread recipe — it’s the one you’ll bookmark and text to your mom.
There’s something about that first bite — warm, with a little pat of butter melting on top — that just makes you close your eyes for a second. It’s comfort food that feels special without being complicated. And honestly, isn’t that the best kind?
What Ingredients You Will Need
This recipe uses simple, wholesome ingredients that come together to create something truly special. Most of these are pantry staples, so you might not even need a trip to the store.
For the Banana Bread
- Unsalted butter, ½ cup (1 stick / 113g) — You’ll brown this first, so don’t skip that step. I like using Kerrygold or Plugrà for the best flavor.
- Ripe bananas, 3 medium (about 1½ cups mashed / 340g) — The riper, the better. Look for bananas with lots of brown spots or even completely black skins. They’re sweeter and easier to mash.
- Granulated sugar, ¾ cup (150g) — Regular white sugar works perfectly. You can reduce to ½ cup if your bananas are very ripe and sweet.
- Large egg, 1, at room temperature — Room temperature eggs mix more evenly into the batter. If you forgot to take it out, place it in warm water for 5 minutes.
- Vanilla extract, 1 teaspoon — Pure vanilla extract adds warmth, but imitation works fine too. I prefer Nielsen-Massey for baking.
- All-purpose flour, 1½ cups (190g) — Spoon and level your flour for the most accurate measurement. Scooping directly can pack in too much flour and make the bread dry.
- Baking soda, 1 teaspoon — This helps the bread rise and gives it that nice domed top.
- Salt, ½ teaspoon — Don’t skip this! Salt enhances all the other flavors, especially the browned butter.
- Toasted walnuts, ½ cup (60g), chopped — Toast them in a dry pan over medium heat for 3-4 minutes until fragrant. This brings out their nutty flavor and keeps them crunchy in the bread.
For the Topping (Optional but Recommended)
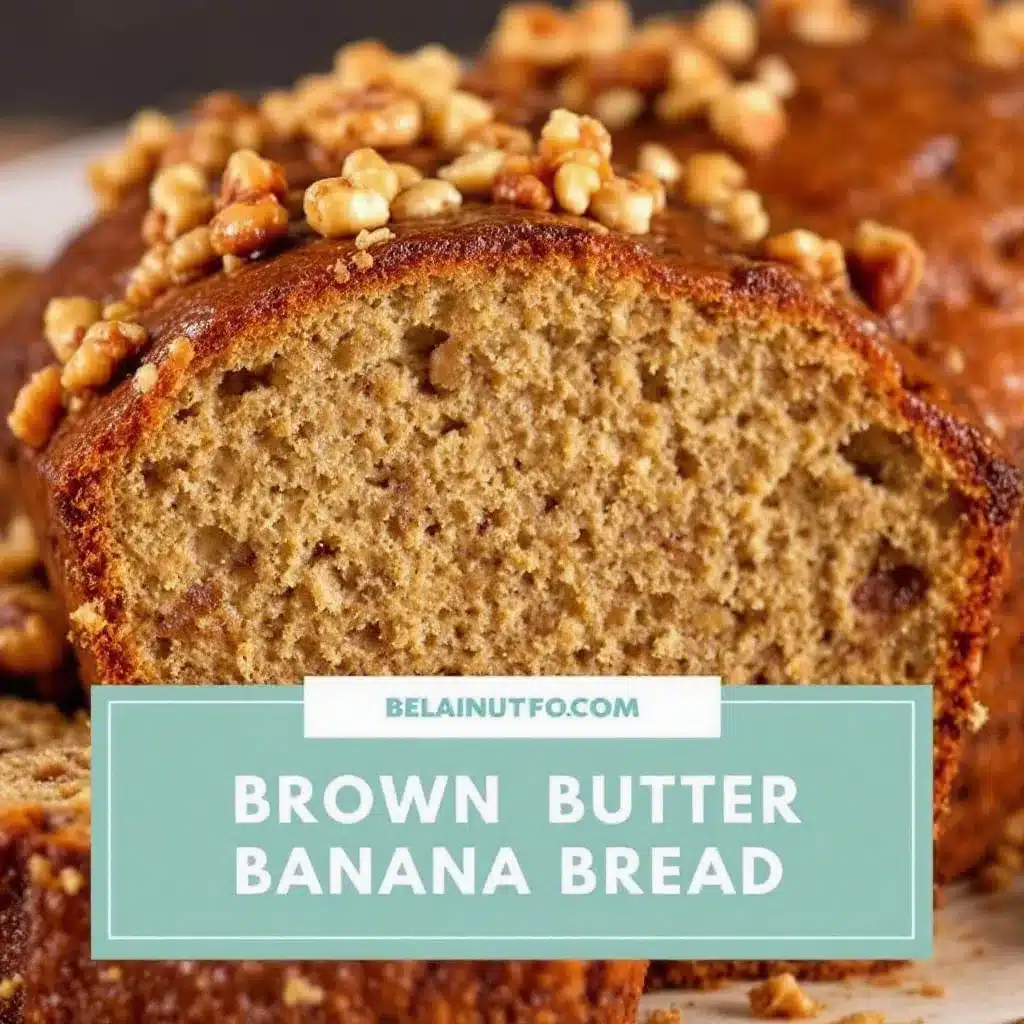
- Toasted walnuts, ¼ cup (30g), roughly chopped — Save these to sprinkle on top before baking for a beautiful, crunchy crust.
- Turbinado or demerara sugar, 1 tablespoon — This gives the top a sparkly, crunchy finish. Regular sugar works too, but the coarse sugar is prettier.
Substitution Notes: You can use salted butter, just reduce the added salt to ¼ teaspoon. For a dairy-free option, use vegan butter — just note that browning may not work the same way, so you could skip that step and use melted vegan butter instead. Walnuts can be swapped with pecans or even chocolate chips if you’re not a nut person. For a gluten-free version, use a 1:1 gluten-free flour blend — I’ve had good luck with King Arthur’s Measure for Measure.
Equipment Needed
You don’t need a fancy kitchen to make this bread. Here’s what you’ll need:
- 9×5-inch loaf pan — A standard loaf pan works perfectly. If you use a smaller pan, your bread will take longer to bake and might overflow.
- Light-colored saucepan or skillet — A light-colored pan makes it easier to see when the butter is browning. Dark pans can hide the color change.
- Mixing bowls (large and medium) — One for dry ingredients, one for wet ingredients.
- Whisk and rubber spatula — A whisk for mixing dry ingredients, a spatula for folding everything together.
- Parchment paper — Lining the pan makes removal so much easier. Leave some overhang on the sides for handles.
- Cooling rack — Letting the bread cool in the pan for 10 minutes, then on a rack, prevents a soggy bottom.
- Digital kitchen scale (optional but helpful) — For the most consistent results, especially with flour measurement.
If you don’t have a loaf pan, you can bake this in an 8×8-inch square pan — just reduce the baking time by about 10-15 minutes and check for doneness earlier. I’ve also made mini loaves in a 6-cavity mini loaf pan, baking for about 25-30 minutes.
Preparation Method
Let’s get baking! This recipe comes together in about 15 minutes of active prep, then the oven does the rest.
Step 1: Preheat and Prep Your Pan
Preheat your oven to 350°F (175°C). Line your 9×5-inch loaf pan with parchment paper, leaving about 2 inches of overhang on the long sides. This makes lifting the bread out so much easier later. Lightly grease the parchment with butter or nonstick spray.
Step 2: Brown the Butter
Place your ½ cup (1 stick) of unsalted butter in a light-colored saucepan or skillet over medium heat. Let it melt completely, then continue cooking, swirling the pan occasionally. The butter will start to foam and bubble — that’s normal. After about 4-5 minutes, you’ll notice the foam subsiding and little brown specks appearing at the bottom of the pan. The butter will smell nutty and toasty. As soon as it turns a golden-amber color and smells amazing, remove it from the heat immediately. Pour it into a heatproof bowl to stop the cooking process. Let it cool for 5-10 minutes while you prepare the other ingredients.
Tip: Don’t walk away while browning butter! It can go from perfect to burnt in seconds. If you see black specks instead of golden brown, you’ve gone too far — start over.
Step 3: Toast the Walnuts
While the butter cools, place your walnuts in a dry skillet over medium heat. Toast them for 3-4 minutes, stirring frequently, until they smell fragrant and are lightly golden. Watch closely — they burn quickly. Remove from the pan immediately and let them cool. Chop half of them (½ cup) for the batter, and roughly chop the remaining ¼ cup for the topping.
Step 4: Mash the Bananas
In a large mixing bowl, mash your three ripe bananas with a fork until smooth but with a few small lumps remaining. You want about 1½ cups of mashed banana. The lumps add nice texture to the finished bread.
Step 5: Mix the Wet Ingredients
To the mashed bananas, add the cooled browned butter (it should be warm but not hot), ¾ cup granulated sugar, 1 large egg, and 1 teaspoon vanilla extract. Whisk everything together until smooth and well combined. The mixture will look a little thin — that’s okay.
Step 6: Mix the Dry Ingredients
In a separate medium bowl, whisk together 1½ cups all-purpose flour, 1 teaspoon baking soda, and ½ teaspoon salt. Make sure there are no lumps of baking soda.
Step 7: Combine Wet and Dry Ingredients
Pour the dry ingredients into the wet ingredients. Use a rubber spatula to fold everything together gently. Mix just until you don’t see any more streaks of flour — overmixing will make the bread tough. A few small lumps are fine. Fold in the ½ cup of chopped toasted walnuts.
Step 8: Fill the Pan and Add Topping
Pour the batter into your prepared loaf pan and spread it evenly. Sprinkle the remaining ¼ cup of roughly chopped walnuts on top, followed by the 1 tablespoon of turbinado sugar (if using). This gives the top a beautiful, crunchy crust.
Step 9: Bake
Bake at 350°F (175°C) for 50-60 minutes. The bread is done when a toothpick inserted into the center comes out clean or with just a few moist crumbs. The top should be deep golden brown and cracked. If the top is browning too quickly (after about 40 minutes), tent the pan loosely with foil.
Check for doneness: The internal temperature should read about 200-205°F (93-96°C) on an instant-read thermometer. This ensures the center is fully cooked without being dry.
Step 10: Cool and Serve
Let the bread cool in the pan on a wire rack for 10 minutes. Then use the parchment paper overhang to lift it out and transfer it to the rack to cool completely — at least 1 hour. I know it’s hard to wait, but slicing too early will make it crumble. Trust me, I’ve learned this the hard way.
Cooking Tips & Techniques
After testing this recipe multiple times, I’ve picked up a few tricks that make a real difference:
- Room temperature ingredients matter: Cold eggs can seize the browned butter and make the batter lumpy. Let your egg sit out for 30 minutes before starting, or place it in warm water for 5 minutes.
- Don’t overmix the batter: This is the number one mistake people make with quick breads. Mix until the flour just disappears. Overmixing develops gluten, which makes the bread dense and tough instead of tender and soft.
- Use a toothpick to check doneness: The toothpick should come out with a few moist crumbs, not wet batter. If it’s clean, it’s done. If there’s batter, give it 5 more minutes and check again.
- Let it cool completely: I know, I know — the smell is torture. But slicing warm banana bread is like trying to cut through a cloud. It’ll fall apart. Give it at least an hour on the cooling rack.
- Browned butter can be made ahead: You can brown the butter up to a week in advance and store it in the fridge. Just gently reheat it until liquid before using. This makes the recipe even faster on baking day.
- Toast your walnuts: This step is non-negotiable. Raw walnuts can taste bitter and soft. Toasting brings out their natural oils and gives them that lovely crunch that contrasts with the soft bread.
One mistake I made early on? I used a dark nonstick pan for browning the butter and couldn’t see the color change at all. The butter went from melted to burnt in seconds. Light-colored pans are your friend here. Also, I once forgot to line my pan with parchment and spent 20 minutes trying to get the bread out in one piece. Learn from my failures!
Variations & Adaptations
This recipe is wonderfully adaptable. Here are some ways to make it your own:
- Chocolate Chip Banana Bread: Swap the walnuts for ½ cup of dark chocolate chips or chunks. The bitterness of dark chocolate pairs beautifully with the sweet, nutty browned butter.
- Gluten-Free Version: Use a 1:1 gluten-free flour blend. I’ve tested this with King Arthur’s Measure for Measure and it worked perfectly. The texture is slightly more tender, but still delicious.
- Vegan Option: Use vegan butter (though browning may not work the same — just melt it) and a flax egg (1 tablespoon ground flaxseed mixed with 3 tablespoons water, let sit for 5 minutes). The texture will be a bit denser but still tasty.
- Spiced Up: Add 1 teaspoon of cinnamon, ½ teaspoon of nutmeg, and ¼ teaspoon of ground ginger to the dry ingredients. This gives the bread a warm, cozy fall flavor.
- Lower Sugar: Reduce the sugar to ½ cup if your bananas are very ripe and sweet. You can also use coconut sugar for a less refined option — it’ll be darker and slightly less sweet.
- Add a Streusel Topping: Mix 2 tablespoons of cold butter, ¼ cup of flour, ¼ cup of brown sugar, and ¼ cup of chopped walnuts until crumbly. Sprinkle on top before baking for a crunchy, buttery crust.
I once made a version with chopped dried apricots and white chocolate chips — it was incredible. Don’t be afraid to experiment based on what you have in your pantry!
Serving & Storage Suggestions
This banana bread is wonderful in so many ways. Here’s how to serve and store it:
- Serving temperature: Slightly warm or at room temperature. For an extra treat, toast a slice and spread it with a little salted butter. The butter melts into the warm bread and takes it to another level.
- Perfect pairings: Serve with a cup of hot coffee, a glass of cold milk, or a dollop of Greek yogurt for breakfast. It’s also lovely with a scoop of vanilla ice cream for dessert.
- Presentation: Slice it thick and arrange on a wooden board or a simple white plate. A dusting of powdered sugar or a drizzle of honey makes it look extra special for guests.
- Storage: Wrap the cooled bread tightly in plastic wrap or store in an airtight container at room temperature for up to 4 days. The flavors actually improve after day one as the brown butter flavor deepens.
- Freezing: This bread freezes beautifully. Wrap the whole loaf or individual slices in plastic wrap, then in foil, and freeze for up to 3 months. Thaw at room temperature or pop a frozen slice in the toaster for a quick treat.
- Reheating: To revive day-old bread, microwave a slice for 15-20 seconds, or pop it in a 300°F oven for 5-7 minutes. The toaster works great too — just watch it so the walnuts don’t burn.
One thing I love about this recipe is that it’s even better the next day. The brown butter flavor seems to deepen and the bananas become even more pronounced. It’s the perfect make-ahead breakfast or snack for a busy week.
Nutritional Information & Benefits
Here’s an approximate nutritional breakdown per slice (based on 10 slices):
- Calories: ~280
- Fat: 14g
- Carbohydrates: 37g
- Fiber: 2g
- Sugar: 19g
- Protein: 5g
This banana bread offers some nutritional perks too. Bananas are rich in potassium, vitamin B6, and fiber, which support heart health and digestion. Walnuts provide omega-3 fatty acids, which are great for brain health. And while this is definitely a treat, using whole ingredients means you’re getting more than empty calories.
If you’re watching your sugar intake, you can reduce the sugar to ½ cup or use a sugar substitute like monk fruit sweetener. For a lower-fat version, you can substitute half the browned butter with unsweetened applesauce — though the texture will be slightly different.
This recipe is naturally vegetarian and can be made dairy-free or gluten-free with the substitutions mentioned above. It contains gluten, dairy, and tree nuts (walnuts), so keep that in mind if serving to guests with allergies.
Conclusion
This brown butter banana bread with toasted walnuts is more than just a recipe — it’s the kind of thing that makes a regular Tuesday feel special. The nutty depth of browned butter, the sweet softness of ripe bananas, and the satisfying crunch of toasted walnuts come together in a way that’s familiar but somehow better than you remember.
I love this recipe because it’s forgiving. You can swap nuts, adjust sugar, or even use whole wheat pastry flour for half the all-purpose. It’s a recipe that works with you, not against you. And the smell? That alone is worth the effort.
So go ahead — grab those spotty bananas on your counter, brown that butter, and treat yourself to something wonderful. I’d love to know how it turns out for you! Drop a comment below with your favorite variation, or tag me in your photos if you share them online. Happy baking!
Frequently Asked Questions
Can I use frozen bananas for this recipe?
Absolutely! Frozen bananas work great. Just thaw them completely, then drain off any excess liquid before mashing. They’ll be very soft and almost liquid — that’s fine. The flavor is actually more concentrated because freezing breaks down the cell walls.
Why did my banana bread sink in the middle?
This usually happens for a few reasons: the bread was underbaked (check with a toothpick next time), the oven temperature was too low (use an oven thermometer to verify), or you opened the oven door too often during baking. Also, make sure your baking soda is fresh — it loses potency after about 6 months.
Can I make this recipe without walnuts?
Of course! You can leave the walnuts out entirely for a plain brown butter banana bread, or swap them for pecans, chocolate chips, dried fruit, or even shredded coconut. The brown butter flavor is still amazing on its own.
How do I know when the butter is properly browned?
You’re looking for a golden-amber color with small brown specks at the bottom of the pan. The butter will smell nutty and toasty, like caramel or toasted hazelnuts. It should also stop foaming and become clear before the specks appear. If you see black specks or smell anything burnt, you’ve gone too far.
Can I double this recipe?
Yes, you can easily double it to make two loaves. Just make sure you use a large enough pan to brown the butter (a 3-quart saucepan works well), and bake the loaves on separate racks in the oven. You may need to rotate them halfway through for even baking.
Pin This Recipe!
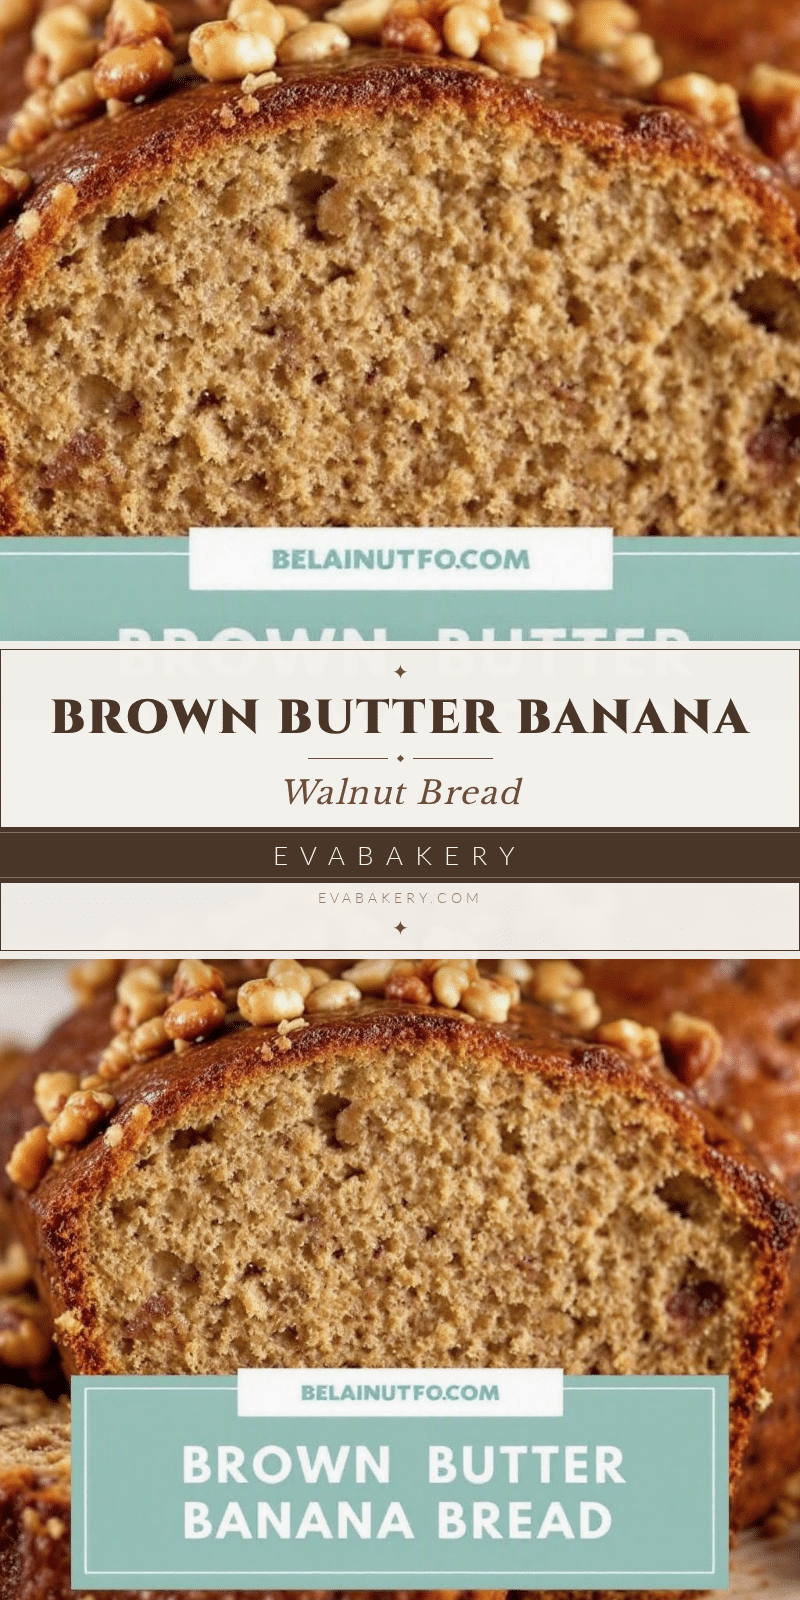
Best Brown Butter Banana Bread with Walnuts
This brown butter banana bread with toasted walnuts is a simple yet elevated twist on a classic. The nutty depth of browned butter and crunchy walnuts create a tender, moist loaf that’s perfect for breakfast, snack, or dessert.
- Prep Time: 15 minutes
- Cook Time: 55 minutes
- Total Time: 1 hour 10 minutes
- Yield: 10 servings 1x
- Category: Dessert
- Cuisine: American
Ingredients
- ½ cup (1 stick / 113g) unsalted butter
- 3 medium ripe bananas (about 1½ cups mashed / 340g)
- ¾ cup (150g) granulated sugar
- 1 large egg, at room temperature
- 1 teaspoon vanilla extract
- 1½ cups (190g) all-purpose flour
- 1 teaspoon baking soda
- ½ teaspoon salt
- ½ cup (60g) toasted walnuts, chopped (for batter)
- ¼ cup (30g) toasted walnuts, roughly chopped (for topping)
- 1 tablespoon turbinado or demerara sugar (optional, for topping)
Instructions
- Preheat oven to 350°F (175°C). Line a 9×5-inch loaf pan with parchment paper, leaving overhang on the long sides. Lightly grease the parchment.
- Brown the butter: In a light-colored saucepan over medium heat, melt ½ cup unsalted butter. Continue cooking, swirling occasionally, until it foams, then subsides, and small brown specks appear at the bottom (about 4-5 minutes). Remove from heat immediately and pour into a heatproof bowl to cool for 5-10 minutes.
- Toast the walnuts: In a dry skillet over medium heat, toast walnuts for 3-4 minutes until fragrant and lightly golden. Remove from pan and let cool. Chop ½ cup for the batter and roughly chop ¼ cup for the topping.
- In a large bowl, mash the bananas with a fork until smooth with a few small lumps.
- Add the cooled browned butter, sugar, egg, and vanilla extract to the bananas. Whisk until smooth.
- In a separate medium bowl, whisk together flour, baking soda, and salt.
- Pour dry ingredients into wet ingredients. Fold gently with a rubber spatula until just combined (do not overmix). Fold in ½ cup chopped toasted walnuts.
- Pour batter into prepared pan and spread evenly. Sprinkle remaining ¼ cup walnuts and turbinado sugar on top.
- Bake for 50-60 minutes, until a toothpick inserted in the center comes out clean or with a few moist crumbs. If top browns too quickly, tent with foil after 40 minutes.
- Cool in pan on a wire rack for 10 minutes, then lift out using parchment and cool completely on rack (at least 1 hour) before slicing.
Notes
For best results, use very ripe bananas with brown spots. Room temperature ingredients ensure even mixing. Do not overmix the batter to keep the bread tender. Let the bread cool completely before slicing to prevent crumbling. Browned butter can be made ahead and stored in the fridge for up to a week.
Nutrition
- Serving Size: 1 slice
- Calories: 280
- Sugar: 19
- Sodium: 220
- Fat: 14
- Saturated Fat: 7
- Carbohydrates: 37
- Fiber: 2
- Protein: 5
Keywords: brown butter banana bread, banana bread with walnuts, easy banana bread, moist banana bread, brown butter recipe


