The sourdough starter had been sitting in the back of my fridge for two weeks, neglected and honestly looking a little sad. I’d fed it, ignored it, fed it again, and then felt guilty every time I opened the yogurt container next to it. Friday night rolls around, and I’m staring at this bubbly, tangy starter, a bundle of fresh rosemary from the farmer’s market, and a head of garlic that was starting to sprout. My plans for a quiet night in with takeout suddenly felt like a waste of good ingredients. So, I did what any reasonable person would do—I poured a glass of wine, cranked up some old Motown, and decided to make focaccia. Not just any focaccia, but the best rosemary garlic sourdough focaccia I could possibly pull off with what I had.
There’s something about focaccia that feels forgiving, you know? It doesn’t demand the precision of a laminated dough or the patience of a classic boule. It just wants time and a little bit of love. I mixed the dough by hand (no stand mixer that night, just my own two hands and a stubborn streak), let it rest, and watched it transform. The kitchen started smelling like an Italian bakery—all warm garlic and piney rosemary. Honestly, I wasn’t sure it would work. My starter was sluggish, and I’d forgotten to take the eggs out for breakfast. But when I pulled that golden, cratered bread out of the oven, I knew I had stumbled onto something special.
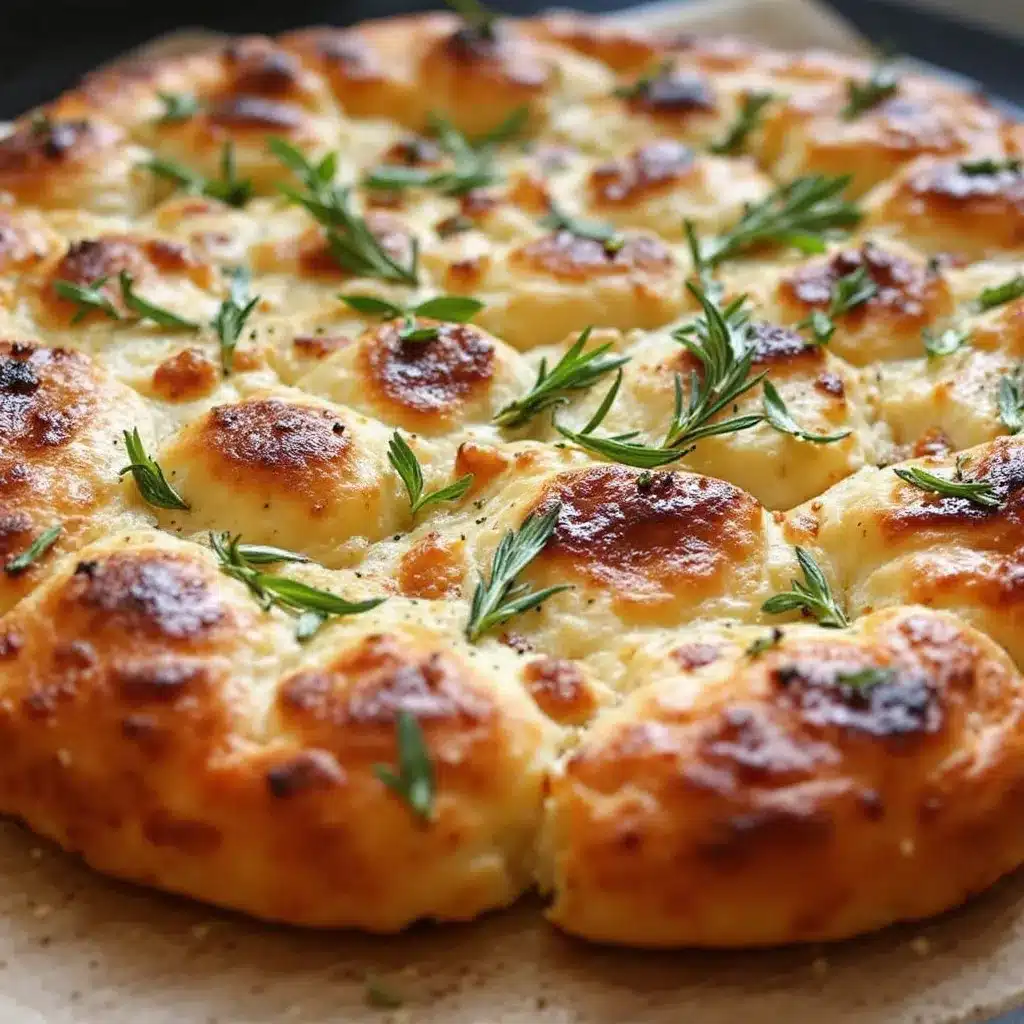
That first bite was a quiet, personal victory. The crust was shatteringly crisp, the inside was pillowy and airy, and the olive oil had pooled into those signature dimples, carrying little flecks of garlic and rosemary. It wasn’t just bread; it was proof that you don’t need a perfect plan to make something beautiful. This rosemary garlic sourdough focaccia has become my go-to for impromptu gatherings, lazy Sunday afternoons, and even as a side for soups and salads. It’s the recipe that reminded me why I love cooking in the first place—because sometimes the best things come from a fridge full of odds and ends and a little bit of faith.
Why You’ll Love This Recipe
This isn’t just another focaccia recipe. After dozens of tests (and a few flat, sad discs), I’ve dialed in the perfect balance of tangy sourdough flavor, crispy edges, and that soft, airy crumb that makes focaccia so addictive. Here’s why this one is a keeper:
- Quick & Easy: While it requires some resting time, the active hands-on work is only about 15 minutes. It’s perfect for a lazy weekend bake or for prepping ahead during the week.
- Simple Ingredients: No fancy grocery trips needed. You likely already have flour, olive oil, garlic, and rosemary. The sourdough starter does all the heavy lifting.
- Perfect for Any Occasion: It works as an appetizer with dips, a side for soups and salads, the base for sandwiches, or just a snack straight from the pan (no judgment here).
- Crowd-Pleaser: I’ve brought this to potlucks and dinner parties, and it always disappears first. Kids love the dimples, adults love the flavor.
- Unbelievably Delicious: The combination of tangy sourdough, fruity olive oil, fragrant rosemary, and mellow roasted garlic is next-level comfort food. It’s the kind of bread that makes you close your eyes after the first bite.
What sets this recipe apart is the technique. Instead of just mixing everything together, we’re using a gentle folding method that develops the gluten without overworking the dough. Plus, the long, cold fermentation in the fridge deepens the sourdough flavor and creates a more complex texture. It’s not just another version—it’s the best version, tested and tweaked until I got that perfect crumb and crackling crust.
What Ingredients You Will Need
This recipe uses simple, wholesome ingredients to deliver bold flavor and satisfying texture without the fuss. Most of these are pantry staples, which makes it easy to whip up on a whim.
- For the Dough:
- Active sourdough starter (100g): Make sure it’s bubbly and has been fed within the last 4-6 hours. A hungry starter won’t give you the rise you need. I prefer using my own organic rye starter for a deeper flavor, but any active starter works.
- Bread flour (400g): Higher protein content gives focaccia its signature chewy structure. All-purpose flour works in a pinch, but the crumb will be softer and less structured.
- Warm water (300g): About 85-90°F (30-32°C). Too hot will kill the yeast; too cold will slow fermentation.
- Extra-virgin olive oil (3 tablespoons): Plus more for the pan and drizzling. Use a good quality oil here—it’s a major flavor component.
- Fine sea salt (8g): Don’t skip the salt; it controls fermentation and strengthens the gluten.
- For the Topping:
- Fresh rosemary (2 tablespoons, chopped): Dried rosemary works, but fresh is infinitely better. It releases its oils into the olive oil as it bakes.
- Garlic (4-5 cloves, thinly sliced): Roasting the garlic slices on top mellows their sharpness and turns them sweet and buttery.
- Flaky sea salt (1 teaspoon): Maldon or any flaky salt is perfect for that final crunchy, salty bite.
- Extra-virgin olive oil (2 tablespoons for drizzling): Don’t be shy—focaccia needs generous olive oil for that crispy, golden crust.
Ingredient Selection Tips: Look for a sourdough starter that’s doubled in size and full of bubbles. If your starter is sluggish, give it an extra feeding and wait 8-12 hours. For the rosemary, choose bright green, fragrant sprigs. Avoid woody stems. For the garlic, fresher cloves will be milder and sweeter when roasted.
Substitution Guidance: Gluten-free? Use a high-quality gluten-free bread flour blend and add 1 teaspoon of xanthan gum. Vegan? This recipe is naturally vegan as written! No bread flour? All-purpose flour works, but the texture will be slightly less chewy and more cake-like. If you don’t have fresh rosemary, use 1 teaspoon of dried rosemary, crushed between your fingers to release the oils.
Equipment Needed
You don’t need a fully stocked professional kitchen to make this bread. Here’s what I use and what you can substitute:
- Digital kitchen scale: Honestly, this is the most important tool. Measuring by weight is far more accurate than cups, especially with sourdough. A $15 scale from Amazon works perfectly.
- Large mixing bowl: Glass or ceramic is ideal because they retain heat better than metal. I use a 4-quart Pyrex bowl.
- 9×13-inch baking pan: This gives you the perfect thickness—not too thin, not too thick. A half-sheet pan works too, but the focaccia will be thinner and crispier.
- Bench scraper: Great for folding the dough and cleaning up sticky messes. A plastic dough scraper is gentler on non-stick surfaces.
- Plastic wrap or a damp kitchen towel: To cover the dough during bulk fermentation. I prefer plastic wrap because it creates a better seal.
- Cooling rack: Essential for keeping the bottom crust crispy. Don’t skip this, or the bottom will get soggy.
- Sharp knife or kitchen shears: For slicing the garlic and rosemary thinly.
Budget-Friendly Options: No baking pan? A cast-iron skillet works beautifully and gives you an even crispier bottom. No bench scraper? A sturdy spatula or even a butter knife works for folding. No cooling rack? Invert a second baking pan and let the focaccia cool on that.
Maintenance Tip: If you use a cast-iron skillet, make sure it’s well-seasoned. The olive oil will help maintain the seasoning, but avoid using metal utensils that could scratch the surface.
Preparation Method
- Feed your starter (4-6 hours before mixing): Take 20g of your refrigerated starter and feed it with 100g of bread flour and 100g of warm water. Let it sit at room temperature until it’s bubbly, doubled in size, and passes the float test (a small spoonful floats in water). This is your active starter.
- Mix the dough (10 minutes): In your large bowl, combine 100g of active starter, 300g of warm water, and 3 tablespoons of olive oil. Whisk until the starter is mostly dissolved. Add 400g of bread flour and 8g of fine sea salt. Mix with your hands or a dough whisk until no dry flour remains. The dough will be sticky and shaggy—that’s perfect. Cover the bowl with plastic wrap and let it rest for 30 minutes. This is called the autolyse, and it starts gluten development without any effort from you.
- Perform stretch and folds (2 hours): After the rest, wet your hands slightly to prevent sticking. Grab one side of the dough, stretch it up, and fold it over the center. Rotate the bowl 90 degrees and repeat. Do this 4-6 times total (one full rotation). Cover and rest for 30 minutes. Repeat this stretch and fold process 3 more times, every 30 minutes. After the fourth fold, the dough should feel smoother, stronger, and less sticky. You’ll see visible air bubbles forming.
- Cold fermentation (8-24 hours): Cover the bowl tightly with plastic wrap and place it in the refrigerator. Let it cold-ferment for at least 8 hours, but up to 24 hours for deeper flavor. The longer it sits, the more tangy and complex the sourdough flavor becomes. I usually do this overnight and bake the next afternoon.
- Prepare the pan (10 minutes before baking): About 3 hours before you want to bake, remove the dough from the fridge. Pour 2 tablespoons of olive oil into your 9×13-inch baking pan and spread it evenly. Transfer the cold dough to the pan. Don’t try to stretch it yet—just plop it in. Cover with plastic wrap and let it come to room temperature for 1 hour.
- Stretch and dimple (5 minutes): After 1 hour, the dough will be more relaxed. Gently stretch it to the edges of the pan. If it resists, let it rest for 10 more minutes and try again. Don’t force it, or you’ll tear the gluten. Once it fills the pan, cover and let it rise for another 1-2 hours, until it’s puffy and jiggly. The dough should have doubled in thickness.
- Preheat and prepare topping (15 minutes): About 30 minutes before baking, preheat your oven to 425°F (220°C). While it heats, mix the chopped rosemary and sliced garlic with 2 tablespoons of olive oil in a small bowl. Let it sit so the flavors meld.
- Dimple and top (5 minutes): When the dough is puffy, use your fingertips to press deep dimples all over the surface—all the way to the bottom of the pan. Don’t be shy; these dimples are what catch the olive oil and create those crispy, flavorful pockets. Drizzle the rosemary-garlic oil mixture evenly over the top, making sure some garlic and rosemary fall into the dimples. Sprinkle generously with flaky sea salt.
- Bake (20-25 minutes): Place the pan on the middle rack of the oven. Bake for 20-25 minutes, until the top is deep golden brown and the bottom sounds hollow when tapped. If the top is browning too fast but the bottom isn’t done, tent loosely with foil for the last 5 minutes.
- Cool and serve (at least 15 minutes): Remove from the oven and let the focaccia cool in the pan for 5 minutes. Then transfer it to a cooling rack. This is crucial—if you leave it in the pan, the bottom will steam and get soggy. Let it cool for at least 15 minutes before slicing. The crust will continue to crisp as it cools.
Sensory Cues: At the stretch and fold stage, the dough should feel like a soft, slightly tacky earlobe. After cold fermentation, it should be firm but still pliable. When it’s ready to bake, the dough should jiggle like a water bed when you gently shake the pan. The baked focaccia should sound hollow when you tap the bottom, and the edges should be a deep amber color.
Cooking Tips & Techniques
After making this recipe more times than I can count (and ruining a few batches along the way), here are the tips that make the biggest difference:
- Don’t skip the cold fermentation. I know it’s tempting to rush, but that overnight rest in the fridge is where the magic happens. It develops the sourdough tang, improves the texture, and makes the dough much easier to handle. I once tried to bake it after just 4 hours, and the flavor was flat and one-dimensional.
- Use wet hands for sticky dough. This was a game-changer for me. Instead of adding more flour (which makes the bread dense), just wet your hands with cold water before handling the dough. It prevents sticking without altering the hydration.
- Be generous with the olive oil. Focaccia is essentially fried bread in the oven. The oil in the pan and on top creates that crispy, golden crust. If you skimp, you’ll end up with a pale, dry bread. I use about 5 tablespoons total for one batch.
- Dimple with confidence. The first few times I made focaccia, I was too gentle with the dimples. Press all the way to the bottom of the pan. Those deep pockets are where the oil pools and creates the best, crispiest bits. It’s also where the garlic and rosemary settle, so don’t be shy.
- Let it cool completely. I know it’s hard to wait, but cutting into hot focaccia will crush the airy crumb and make it gummy. Let it cool for at least 15-20 minutes on a wire rack. The crust will continue to crisp, and the interior will set properly.
Common Mistake to Avoid: Over-proofing the dough. If you let it rise too long (more than 4 hours at room temperature after the cold fermentation), the gluten will weaken, and the focaccia will collapse in the oven. The dough should be puffy and jiggly, but not deflated when you poke it. If it doesn’t spring back at all, you’ve gone too far.
Variations & Adaptations
This recipe is a fantastic base for endless variations. Here are some of my favorites that I’ve tested and loved:
- Roasted Tomato & Basil: Before baking, press halved cherry tomatoes (roasted for 10 minutes at 400°F to concentrate their flavor) into the dimples along with fresh basil leaves. The tomatoes burst in the oven, creating little pockets of sweet, jammy goodness. This pairs beautifully with a simple balsamic glaze drizzle after baking.
- Olive & Thyme: Add 1/2 cup of halved Kalamata or Castelvetrano olives to the top before baking. Swap the rosemary for fresh thyme leaves. The briny olives contrast perfectly with the rich olive oil and tangy sourdough. This is my go-to for serving alongside a hearty minestrone or a light lemon butter scallops.
- Caramelized Onion & Gruyère: Slowly caramelize 2 large onions in butter and olive oil for about 45 minutes until deeply golden. Spread them over the dough before the final rise, then top with shredded Gruyère cheese before baking. The cheese gets all bubbly and crispy, and the sweet onions are incredible. This version is rich enough to be a meal on its own with a simple green salad.
- Spicy Everything Bagel: Mix 1 teaspoon of red pepper flakes into the dough during the stretch and folds. Before baking, sprinkle the top with everything bagel seasoning (sesame seeds, poppy seeds, dried garlic, dried onion, and salt). The heat from the pepper flakes and the savory crunch from the seasoning is an addictive combination.
- Gluten-Free Adaptation: Use a high-quality gluten-free bread flour blend (like Cup4Cup or King Arthur Measure for Measure). Add 1 teaspoon of xanthan gum if your blend doesn’t already contain it. The dough will be more like a thick batter than a traditional dough, but it still bakes up beautifully. You may need to add an extra 10-15 minutes of baking time.
Personal Variation I Love: During the summer, I press thin slices of heirloom peaches and a few sprigs of fresh thyme into the dimples. The sweetness of the peaches with the savory olive oil and flaky salt is absolutely stunning. It’s unexpected, but everyone raves about it.
Serving & Storage Suggestions
This focaccia is incredibly versatile and can be served in so many ways. Here’s how I like to enjoy it:
- Serving Temperature: It’s best served warm or at room temperature. If you’ve made it ahead, reheat it in a 350°F (175°C) oven for 5-7 minutes to revive the crispy crust. Avoid the microwave—it will turn the bread rubbery.
- Presentation Ideas: Cut it into squares or long strips and arrange on a wooden board. Serve with a bowl of good olive oil mixed with balsamic vinegar for dipping. It also makes incredible sandwich bread—slice it horizontally and fill with roasted vegetables, fresh mozzarella, and pesto. For a party, cut it into small cubes and serve as croutons on a macaron platter for a sweet and salty contrast.
- Complementary Dishes: This focaccia is the perfect side for soups (especially tomato basil or minestrone), salads (like a classic Caesar or arugula with lemon vinaigrette), or grilled meats. It also pairs beautifully with a glass of light red wine or a crisp Italian beer.
- Storage Instructions: Store leftover focaccia in an airtight container or wrapped tightly in plastic wrap at room temperature for up to 2 days. Do not refrigerate—it will dry out and become stale. For longer storage, freeze it. Wrap the cooled focaccia tightly in plastic wrap, then a layer of aluminum foil, and freeze for up to 3 months.
- Reheating from Frozen: Thaw at room temperature for 30 minutes, then reheat in a 350°F (175°C) oven for 5-7 minutes. The crust will be just as crispy as the day you baked it.
- Flavor Development: I actually think this focaccia tastes even better the next day. The flavors meld and deepen overnight. Just make sure to reheat it properly to restore the texture.
Nutritional Information & Benefits
While focaccia is definitely a treat, it does offer some surprising benefits when made with sourdough. Here’s a rough breakdown per serving (1/8 of the recipe):
- Calories: Approximately 280-320
- Carbohydrates: 42g
- Protein: 7g
- Fat: 10g (mostly from heart-healthy olive oil)
- Fiber: 2g
- Sodium: 450mg
Health Benefits of Key Ingredients:
- Extra-virgin olive oil: Rich in monounsaturated fats and antioxidants, which support heart health and reduce inflammation.
- Rosemary: Contains rosmarinic acid and other compounds with anti-inflammatory and antioxidant properties. Plus, it adds incredible flavor without any extra calories.
- Garlic: Known for its immune-boosting properties and potential cardiovascular benefits. Roasting it mellows the flavor while retaining many of the health benefits.
- Sourdough fermentation: The long fermentation process breaks down phytic acid, making the minerals in the flour more bioavailable. It also produces beneficial lactic acid bacteria, which can support gut health.
Dietary Considerations: This recipe is naturally vegan and dairy-free. For a gluten-free version, see the variations section. It’s also relatively low in sugar (less than 1g per serving). If you’re watching your sodium, you can reduce the flaky salt topping or omit it altogether.
Personal Wellness Perspective: I love that this bread feels indulgent but is made with simple, whole ingredients. The sourdough fermentation makes it easier to digest for many people, including myself. It’s the kind of bread you can feel good about serving to your family—it’s not just empty calories; it’s nourishing food made with love and patience.
Conclusion
This rosemary garlic sourdough focaccia is more than just a recipe—it’s a reminder that the best things in life often come from a little bit of chaos and a whole lot of love. It’s forgiving, rewarding, and absolutely delicious. Whether you’re a seasoned sourdough baker or a complete beginner, this recipe will make you feel like a pro. The tangy crumb, the crispy edges, the fragrant garlic and rosemary—it’s pure comfort in every bite.
I hope you give this a try and make it your own. Maybe you’ll add olives, or maybe you’ll go full-on with caramelized onions and cheese. That’s the beauty of focaccia—it’s a canvas for your creativity. Don’t be afraid to experiment and find your perfect version. And if you do make it, I’d love to hear how it turned out! Drop a comment below and let me know your favorite topping combination, or share a photo on social media and tag me. Happy baking, friends—you’ve got this!
Frequently Asked Questions
Can I use all-purpose flour instead of bread flour?
Yes, you can! The focaccia will be slightly softer and less chewy, but it will still be delicious. Bread flour gives a more structured, airy crumb due to its higher protein content. If you use all-purpose, you might want to add an extra 10-15g of flour to compensate for the lower protein absorption.
My starter isn’t very active. Can I still make this recipe?
You can, but the rise will be slower and less reliable. I recommend giving your starter a few days of consistent feedings (once every 12 hours) to get it bubbly and strong. If you’re in a pinch, you can add 1/4 teaspoon of active dry yeast along with the starter to give it a boost. The flavor will still be predominantly sourdough.
How do I know when the dough is properly proofed?
After the final rise in the pan, the dough should look puffy and jiggly. When you gently poke it with a floured finger, the indentation should slowly spring back, but not completely. If it springs back immediately, it needs more time. If it doesn’t spring back at all, it’s over-proofed, and you should bake it immediately.
Can I make this recipe without a stand mixer?
Absolutely! This recipe is designed to be made by hand. The stretch and fold method is actually gentler on the dough than a mixer, leading to a better crumb structure. No special equipment is needed—just a bowl, your hands, and a little patience.
Why is my focaccia dense and not airy?
Dense focaccia usually means one of three things: your starter wasn’t active enough, you over-floured the dough during handling, or you didn’t give it enough time to rise. Make sure your starter is bubbly and doubled before using, use wet hands instead of flour to handle the dough, and be patient with the proofing times. Cold fermentation also helps develop a lighter texture.
Pin This Recipe!
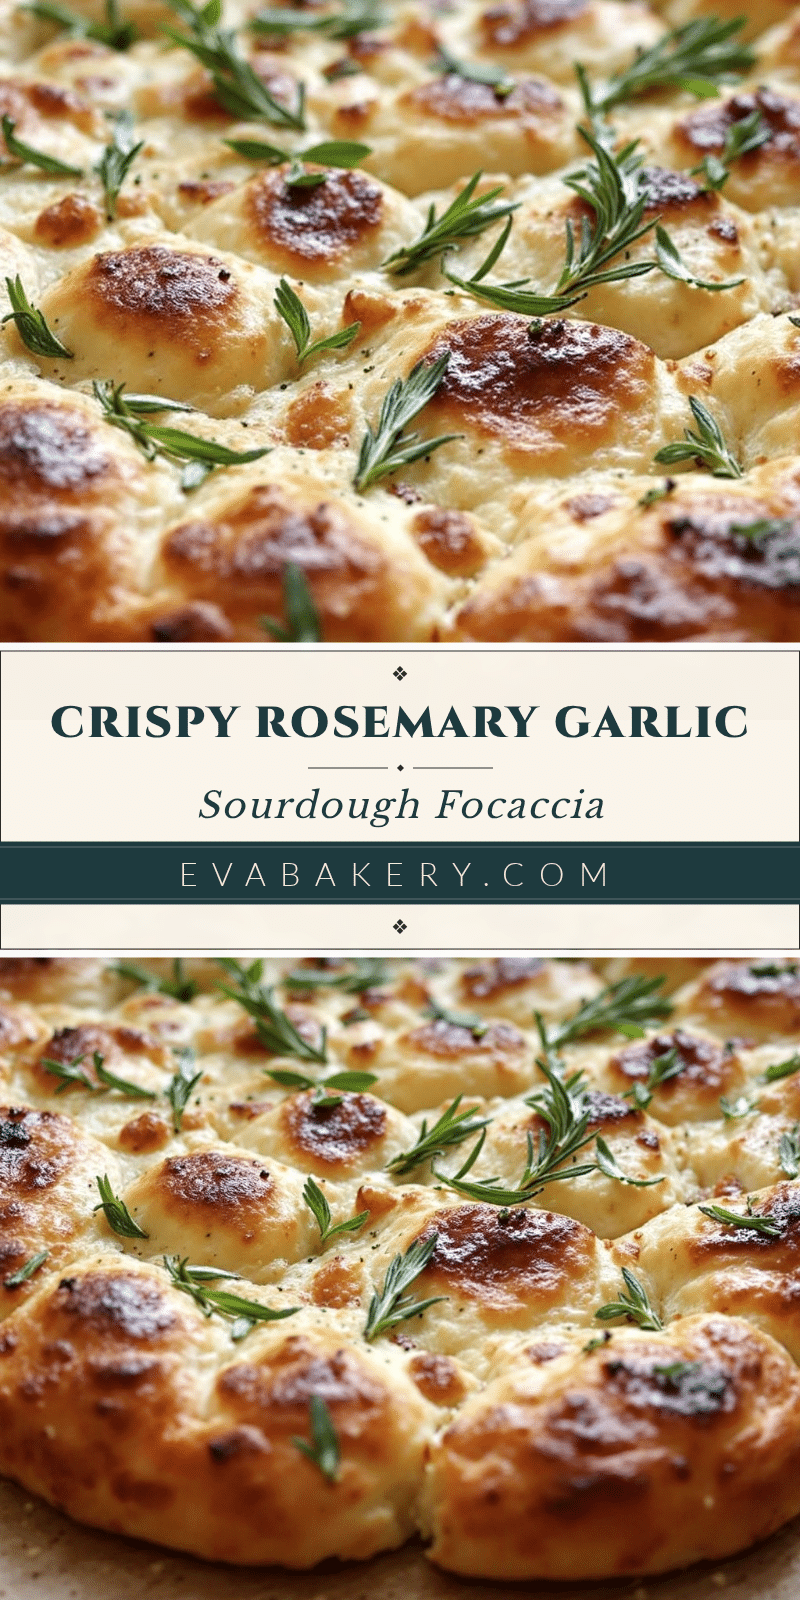
Best Rosemary Garlic Sourdough Focaccia – Easy Homemade Recipe
This rosemary garlic sourdough focaccia is forgiving, rewarding, and absolutely delicious. With a tangy crumb, crispy edges, and fragrant garlic and rosemary, it’s pure comfort in every bite.
- Prep Time: 15 minutes
- Cook Time: 25 minutes
- Total Time: 45 minutes (plus 8-24 hours cold fermentation and 2-3 hours final rise)
- Yield: 8 servings 1x
- Category: Bread
- Cuisine: Italian
Ingredients
- 100g active sourdough starter
- 400g bread flour
- 300g warm water (85-90°F / 30-32°C)
- 3 tablespoons extra-virgin olive oil (plus more for pan and drizzling)
- 8g fine sea salt
- 2 tablespoons fresh rosemary, chopped
- 4–5 cloves garlic, thinly sliced
- 1 teaspoon flaky sea salt (e.g., Maldon)
- 2 tablespoons extra-virgin olive oil (for drizzling)
Instructions
- Feed your starter 4-6 hours before mixing: Take 20g of refrigerated starter and feed it with 100g bread flour and 100g warm water. Let sit at room temperature until bubbly, doubled, and passes the float test.
- Mix the dough: In a large bowl, combine 100g active starter, 300g warm water, and 3 tablespoons olive oil. Whisk until starter is mostly dissolved. Add 400g bread flour and 8g fine sea salt. Mix with hands or a dough whisk until no dry flour remains. Cover and let rest for 30 minutes (autolyse).
- Perform stretch and folds: Wet your hands slightly. Grab one side of the dough, stretch it up, and fold it over the center. Rotate the bowl 90 degrees and repeat. Do 4-6 stretches total (one full rotation). Cover and rest 30 minutes. Repeat this stretch and fold process 3 more times, every 30 minutes.
- Cold fermentation: Cover the bowl tightly with plastic wrap and refrigerate for 8-24 hours.
- Prepare the pan: About 3 hours before baking, remove dough from fridge. Pour 2 tablespoons olive oil into a 9×13-inch baking pan and spread evenly. Transfer cold dough to pan. Cover with plastic wrap and let come to room temperature for 1 hour.
- Stretch and dimple: After 1 hour, gently stretch dough to edges of pan. If it resists, let rest 10 more minutes. Cover and let rise another 1-2 hours until puffy and jiggly.
- Preheat and prepare topping: About 30 minutes before baking, preheat oven to 425°F (220°C). Mix chopped rosemary and sliced garlic with 2 tablespoons olive oil in a small bowl.
- Dimple and top: When dough is puffy, use fingertips to press deep dimples all over the surface. Drizzle rosemary-garlic oil mixture evenly over top. Sprinkle generously with flaky sea salt.
- Bake: Place pan on middle rack. Bake for 20-25 minutes until deep golden brown and bottom sounds hollow when tapped. If top browns too fast, tent loosely with foil for last 5 minutes.
- Cool and serve: Let cool in pan for 5 minutes, then transfer to a cooling rack. Cool at least 15 minutes before slicing.
Notes
For best flavor, don’t skip the cold fermentation. Use wet hands to handle sticky dough instead of adding extra flour. Be generous with olive oil for a crispy crust. Dimple all the way to the bottom of the pan. Let cool completely before slicing to maintain texture.
Nutrition
- Serving Size: 1/8 of recipe
- Calories: 300
- Sodium: 450
- Fat: 10
- Saturated Fat: 1.5
- Carbohydrates: 42
- Fiber: 2
- Protein: 7
Keywords: sourdough focaccia, rosemary garlic focaccia, homemade focaccia, easy focaccia recipe, sourdough bread


