“You really don’t need to bake this?” my friend asked, raising an eyebrow as I stirred the custard-like mixture in the bowl. Honestly, I was half-expecting it to be a flop when I first tried this creamy no-bake banana pudding delight. It all started on one of those lazy afternoons when I just wanted something sweet but didn’t want to turn on the oven or spend hours in the kitchen. I had a bunch of ripe bananas sitting on the counter, a box of vanilla wafers, and a vague memory of my grandma’s old banana pudding recipe that always seemed a bit too fussy for a quick fix.
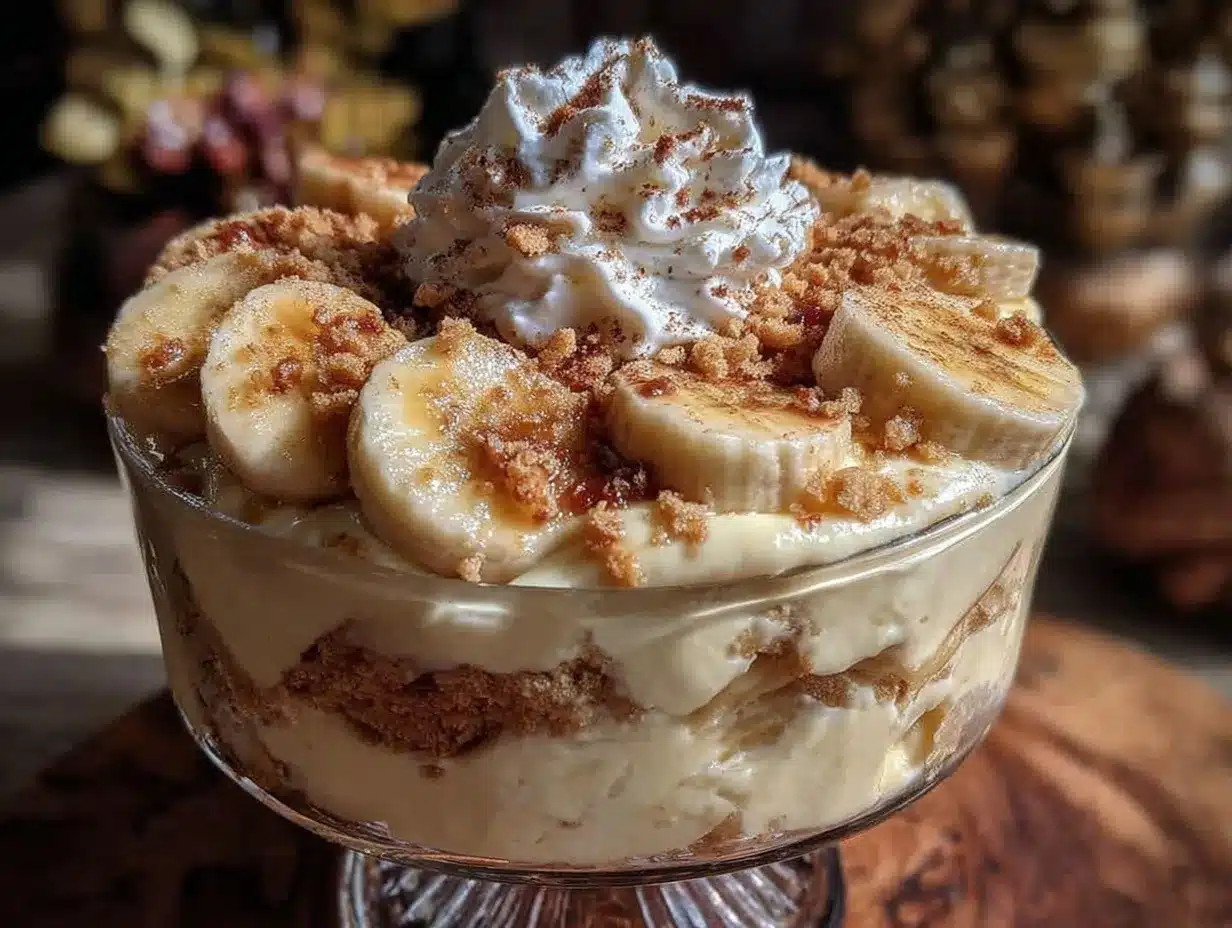
So, I decided to tinker with it, skipping the baking part altogether. I whipped up a smooth, luscious pudding with cream cheese and whipped cream, layered it with fresh banana slices and those crunchy vanilla wafers, and chilled it. The result? A dessert that looked elegant, tasted like a dream, and came together in under 20 minutes. My skeptical friend took a bite, paused, and then asked for the recipe. That moment sealed it for me.
This creamy no-bake banana pudding delight isn’t just a recipe; it’s a little win for anyone who’s ever wanted a homemade dessert without the usual fuss. The texture is silky, the bananas add freshness, and the wafers bring that nostalgic crunch. Plus, it’s perfect for those moments when you want to impress guests or just treat yourself without breaking a sweat. Somehow, this pudding became my go-to comfort food, a sweet reset after chaotic days, and a quiet reminder that sometimes simple is exactly what you need.
Why You’ll Love This Recipe
This creamy no-bake banana pudding delight has quickly become a favorite in my kitchen, and here’s why I think it deserves a spot in yours:
- Quick & Easy: From start to finish, it takes under 20 minutes to prepare, making it ideal for busy weeknights or last-minute dessert cravings.
- Simple Ingredients: No fancy or hard-to-find items here—just pantry staples and fresh bananas that you probably already have.
- Perfect for Entertaining: Whether it’s a casual get-together or a special occasion, this pudding looks fancy but feels effortless.
- Crowd-Pleaser: Kids, adults, and even the pickiest eaters tend to ask for seconds. The balance of creamy and crunchy textures is addictive.
- Unbelievably Delicious: The secret blend of cream cheese and whipped cream gives it a velvety texture that feels indulgent without being heavy.
What sets this version apart is the little twist of folding in softened cream cheese, which adds richness and tanginess, making the pudding taste more layered and less sweet than the typical versions. Also, instead of the usual instant pudding mix, I use real vanilla extract and homemade custard base for a more authentic flavor. It’s dessert with soul, but without the stress.
Honestly, every bite feels like a comforting hug—just the kind of dessert that makes you close your eyes and smile. If you like desserts that combine ease, flavor, and a touch of nostalgia, this one’s going to stick around in your recipe box for a while.
What Ingredients You Will Need
This recipe uses simple, wholesome ingredients to deliver bold flavor and satisfying texture without the fuss. Most of these are pantry staples or fresh produce, so no last-minute grocery runs required.
- For the Pudding Base:
- 2 cups (480 ml) whole milk (for creamier pudding, use whole milk; skim works too)
- 1/2 cup (100 g) granulated sugar
- 1/4 cup (30 g) cornstarch (thickens the pudding perfectly)
- 3 large egg yolks, room temperature (adds richness and smooth texture)
- 2 tablespoons (30 g) unsalted butter, softened
- 1 teaspoon pure vanilla extract (I like Nielsen-Massey for its deep vanilla flavor)
- For the Creamy Layer:
- 8 oz (225 g) cream cheese, softened (gives the pudding that signature tang and creaminess)
- 1 cup (240 ml) heavy whipping cream, chilled (whipped to soft peaks)
- 1/4 cup (30 g) powdered sugar (balances the tang of cream cheese)
- Fruits and Crunch:
- 4 ripe bananas, sliced (choose bananas that are yellow with some brown spots for best flavor)
- 1 package (about 11 oz / 310 g) vanilla wafers (Nilla Wafers or your favorite brand)
Substitution tips: You can swap heavy cream for coconut cream for a dairy-free option. Use almond or oat milk instead of cow’s milk but expect a slightly different texture. For gluten-free, look for gluten-free vanilla wafers or substitute with crushed gluten-free cookies. Also, if you don’t want to use raw eggs, you can try a cornstarch-only pudding base with extra vanilla, but the texture won’t be quite as rich.
Equipment Needed
- Medium saucepan (non-stick preferred to prevent burning the pudding)
- Mixing bowls (one for pudding, one for whipping cream)
- Whisk (essential for smoothing out the pudding base)
- Electric mixer or hand mixer (for whipping cream and cream cheese together smoothly)
- Measuring cups and spoons
- Spatula (silicone works best for folding in whipped cream gently)
- Serving dish or individual dessert cups (clear glass bowls make the layers look beautiful)
You don’t need any fancy gadgets here. My old saucepan and trusty mixer have served me well for years. If you don’t have an electric mixer, you can whip the cream by hand with a whisk but be ready for a bit of a workout! For a budget-friendly option, any basic whisk and bowl combo will work, just take your time whipping the cream to soft peaks.
Preparation Method
- Make the Custard Base (15 minutes): In a medium saucepan, whisk together the sugar, cornstarch, and a pinch of salt. Slowly add the milk, whisking well to avoid lumps. In a separate small bowl, lightly beat the egg yolks. Temper the yolks by slowly adding about a cup of the warm milk mixture while whisking constantly, then pour the yolk mixture back into the saucepan.
- Place the saucepan over medium heat, whisking constantly until the mixture thickens and starts to bubble gently—about 5-7 minutes. It should coat the back of a spoon thickly. Remove from heat and stir in the butter and vanilla extract until smooth.
- Transfer the custard to a clean bowl, cover with plastic wrap pressed directly onto the surface (to prevent a skin), and let it cool completely at room temperature.
- Prepare the Creamy Layer: While the custard cools, use an electric mixer to beat the softened cream cheese and powdered sugar until smooth and fluffy. In a separate chilled bowl, whip the heavy cream until soft peaks form.
- Gently fold the whipped cream into the cream cheese mixture using a spatula, keeping it light and airy.
- Combine Layers: Once the custard is cool, fold it into the cream cheese and whipped cream mixture until fully incorporated and silky smooth. This creates the luscious creamy no-bake banana pudding base.
- Assemble the Pudding: In your serving dish or individual cups, spread a thin layer of the pudding mixture. Add a layer of vanilla wafers, followed by a layer of banana slices. Repeat layering until you run out of pudding, finishing with pudding on top. You can crumble a few wafers on top for garnish if you like.
- Chill: Refrigerate for at least 4 hours, preferably overnight. This chilling time lets the wafers soften just right and all the flavors meld together beautifully.
Pro tip: If you want to speed up chilling, pop the pudding in the freezer for 30 minutes, but don’t forget to check it so it doesn’t freeze solid. Also, avoid slicing bananas too far in advance to prevent browning—slice them right before layering.
Cooking Tips & Techniques
Making this creamy no-bake banana pudding delight is pretty straightforward, but a few tips can make it even better:
- Whisk Constantly: When making the custard base, keep whisking to prevent lumps and avoid scorching the milk. Patience pays off here.
- Softened Cream Cheese: Don’t rush this step—room temperature cream cheese blends effortlessly, preventing lumps in your creamy layer.
- Whip Cream Just Right: Whip until soft peaks form but don’t overdo it; otherwise, the cream might become grainy or turn to butter.
- Layering Matters: Be gentle when folding layers and assembling. Pressing wafers too hard can make the pudding dense instead of light and airy.
- Avoid Brown Bananas: Use ripe but firm bananas. If your bananas are too ripe, they’ll turn mushy and brown quickly.
- Multitasking: While the custard cools, prepare the creamy layer and slice bananas to save time.
Early on, I learned the hard way that skipping the chilling step resulted in a runny mess—patience is key! Also, if your pudding seems too stiff after chilling, a quick gentle stir can bring back the creaminess. You’ll get a feel for it after a couple of tries.
Variations & Adaptations
This recipe is surprisingly versatile. Here are a few of my favorite twists and tweaks:
- Chocolate Banana Pudding: Stir 1/4 cup (25 g) cocoa powder into the custard base for a rich chocolate layer that pairs deliciously with bananas.
- Dairy-Free Version: Use coconut cream whipped with a touch of vanilla instead of heavy cream and swap cream cheese for a dairy-free spread.
- Tropical Twist: Add chopped pineapple or mango slices along with bananas for a fruitier, summery vibe.
- Crunch Upgrade: Swap vanilla wafers with crushed graham crackers or even gluten-free cookies for a different texture.
- Alcohol-Inspired: A splash of rum or banana liqueur folded into the pudding adds a grown-up flavor perfect for parties.
Personally, I once tried this with a layer of crispy prosciutto-wrapped asparagus bites alongside it for a savory-sweet contrast at a brunch gathering. It was a hit! Feel free to get creative and find your own signature spin.
Serving & Storage Suggestions
This pudding is best served chilled, straight from the fridge. The creamy layers will be set but still soft, and the wafers will have softened to just the right tenderness—not soggy, not crunchy.
For presentation, clear glass dishes or individual parfait cups really show off the beautiful layers. Garnish with a few fresh banana slices or a sprinkle of crushed wafers on top for a little extra charm.
Leftovers keep well covered in the refrigerator for up to 3 days. The flavors actually deepen with time, but the texture of the bananas and wafers will change (wafers get softer). Avoid freezing, as it can alter the pudding’s smooth consistency.
When reheating, this dessert is best enjoyed cold, but if you want to warm it slightly, take it out of the fridge 10-15 minutes before serving for a creamier mouthfeel.
This pudding pairs beautifully with light, sparkling drinks like the refreshing champagne punch to balance its sweetness during gatherings or parties.
Nutritional Information & Benefits
Per serving (about 1 cup / 240 g):
| Calories | 320 |
|---|---|
| Fat | 18 g |
| Carbohydrates | 35 g |
| Protein | 5 g |
| Sugar | 25 g |
Key ingredients like bananas provide potassium and dietary fiber, supporting heart health and digestion. Cream cheese and heavy cream contribute calcium and vitamin A, though they add saturated fat, so moderation is wise.
This recipe is naturally gluten-free if you choose gluten-free wafers, making it suitable for many dietary needs. It’s a treat that balances indulgence with some wholesome fruit benefits.
From a personal wellness perspective, it’s a dessert that feels like a treat without the heaviness of baked custards or heavy frostings. You can enjoy it as a sweet finish without feeling weighed down.
Conclusion
This creamy no-bake banana pudding delight has been a small, sweet revolution in my kitchen—a dessert that’s quick, easy, and genuinely tasty without any fuss. It’s the kind of recipe that lets you relax while making something impressive, whether you’re feeding family or surprising friends.
Feel free to make it your own by swapping fruits, tweaking textures, or adding your favorite flavors. That’s the fun part—making it your signature dessert. I love how it brings a little joy and calm to busy days or festive moments alike.
If you try it, I’d love to hear how it turns out or any twists you come up with. Sharing recipes is like sharing a piece of happiness, right? So, here’s to many creamy, dreamy banana pudding moments ahead!
Frequently Asked Questions (FAQs)
Can I make this banana pudding ahead of time?
Absolutely! It tastes even better after chilling overnight as the flavors meld and wafers soften perfectly.
Can I use instant pudding mix instead of making the custard?
While you can, homemade custard adds a richer, fresher flavor and creamier texture that instant mixes can’t quite match.
What can I substitute for cream cheese if I’m allergic?
Try using mascarpone cheese or a dairy-free cream cheese alternative. Adjust sweetness and tang to taste.
How do I prevent my banana slices from browning?
Slice bananas just before assembling and consider lightly brushing them with lemon juice to slow browning.
Can I make this pudding without eggs?
Yes, you can omit the egg yolks and increase cornstarch slightly, but the pudding will be less rich and silky.
Pin This Recipe!
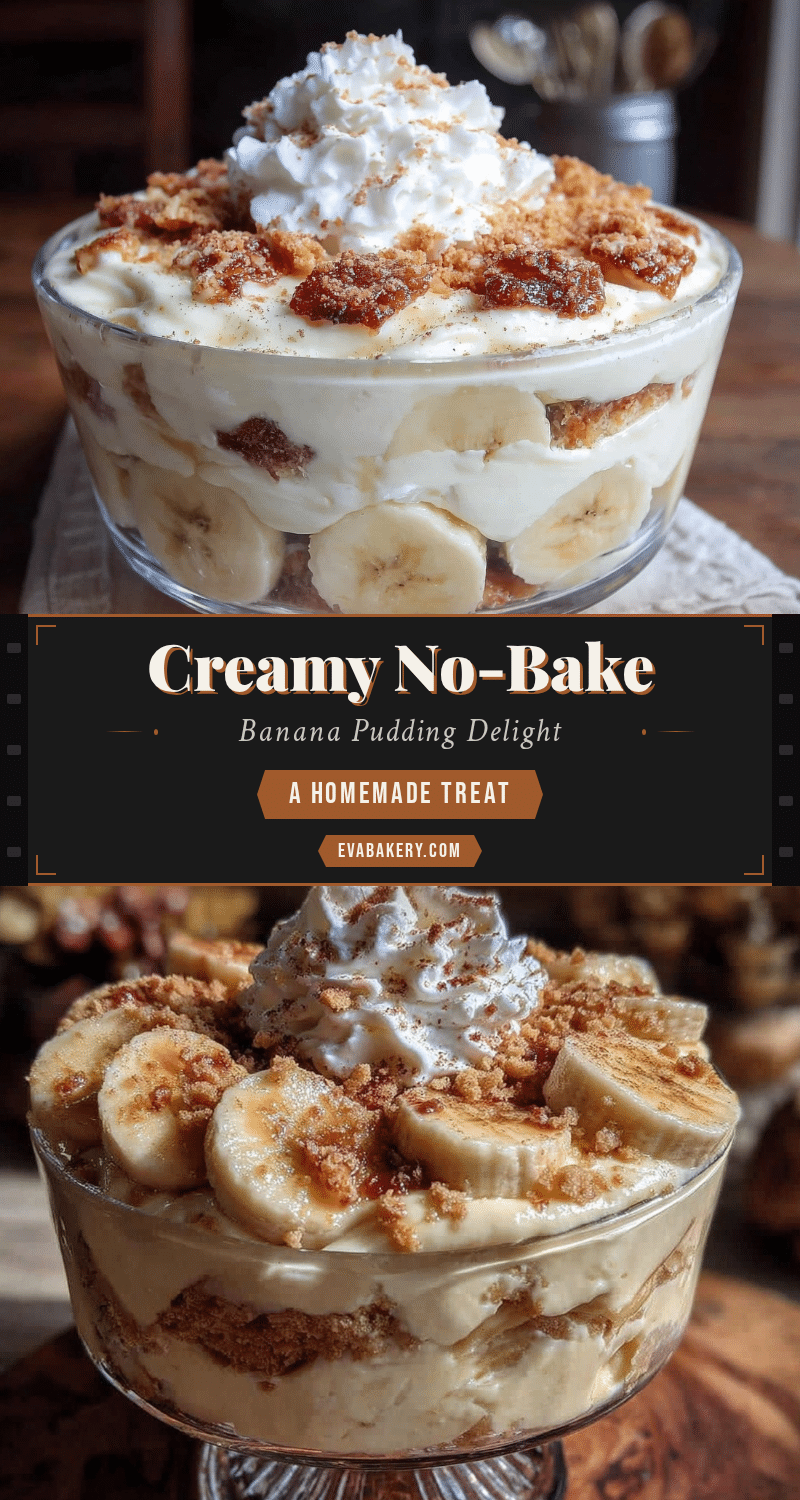
Creamy No-Bake Banana Pudding Delight
A quick and easy no-bake banana pudding layered with a creamy custard base, cream cheese, whipped cream, fresh bananas, and crunchy vanilla wafers. Perfect for a fuss-free, elegant dessert that comes together in under 20 minutes.
- Prep Time: 15 minutes
- Cook Time: 7 minutes
- Total Time: 4 hours 22 minutes
- Yield: 8 servings 1x
- Category: Dessert
- Cuisine: American
Ingredients
- 2 cups (480 ml) whole milk
- 1/2 cup (100 g) granulated sugar
- 1/4 cup (30 g) cornstarch
- 3 large egg yolks, room temperature
- 2 tablespoons (30 g) unsalted butter, softened
- 1 teaspoon pure vanilla extract
- 8 oz (225 g) cream cheese, softened
- 1 cup (240 ml) heavy whipping cream, chilled
- 1/4 cup (30 g) powdered sugar
- 4 ripe bananas, sliced
- 1 package (about 11 oz / 310 g) vanilla wafers
Instructions
- In a medium saucepan, whisk together sugar, cornstarch, and a pinch of salt. Slowly add milk, whisking well to avoid lumps.
- In a separate small bowl, lightly beat the egg yolks. Temper the yolks by slowly adding about a cup of the warm milk mixture while whisking constantly, then pour the yolk mixture back into the saucepan.
- Place the saucepan over medium heat, whisking constantly until the mixture thickens and starts to bubble gently, about 5-7 minutes. It should coat the back of a spoon thickly.
- Remove from heat and stir in the butter and vanilla extract until smooth.
- Transfer the custard to a clean bowl, cover with plastic wrap pressed directly onto the surface to prevent a skin, and let it cool completely at room temperature.
- While the custard cools, use an electric mixer to beat the softened cream cheese and powdered sugar until smooth and fluffy.
- In a separate chilled bowl, whip the heavy cream until soft peaks form.
- Gently fold the whipped cream into the cream cheese mixture using a spatula, keeping it light and airy.
- Once the custard is cool, fold it into the cream cheese and whipped cream mixture until fully incorporated and silky smooth.
- In your serving dish or individual cups, spread a thin layer of the pudding mixture. Add a layer of vanilla wafers, followed by a layer of banana slices.
- Repeat layering until you run out of pudding, finishing with pudding on top. Optionally, crumble a few wafers on top for garnish.
- Refrigerate for at least 4 hours, preferably overnight, to let the wafers soften and flavors meld.
Notes
Use ripe bananas with some brown spots for best flavor. Slice bananas just before layering to prevent browning. For dairy-free, substitute coconut cream for heavy cream and dairy-free cream cheese. Use gluten-free vanilla wafers for gluten-free version. Chill pudding at least 4 hours or overnight for best texture. To speed chilling, freeze for 30 minutes but do not let freeze solid.
Nutrition
- Serving Size: About 1 cup (240 g)
- Calories: 320
- Sugar: 25
- Fat: 18
- Carbohydrates: 35
- Protein: 5
Keywords: banana pudding, no-bake dessert, creamy pudding, vanilla wafers, easy dessert, quick dessert, layered pudding


