I figured a no-bake pumpkin pie would be a compromise — something you make when you want the flavor but can’t be bothered with the real thing. It took about one bite for that assumption to fall apart completely.
It was mid-October, and I had promised to bring dessert to a friend’s potluck. The oven was already occupied with a batch of beef tenderloin for the next day, and I needed something that wouldn’t require a single degree of heat. I remembered a creamy no-bake pumpkin pie my aunt used to throw together for Thanksgiving when she was hosting and overwhelmed. She’d always shrug and say, “It’s not fancy, but it works.” I never thought much of it until that moment.
I pulled out a graham cracker crust, a can of pumpkin, and some cream cheese — skeptical, honestly. The filling came together in a few minutes, and I poured it into the crust with zero ceremony. It sat in the fridge overnight, and by the next afternoon, I had completely forgotten about it. When I sliced into it at the party, the filling was firm but silky, the spices warm and familiar. Someone asked for the recipe before I’d even finished my first bite.
That’s the thing about this creamy no-bake pumpkin pie. It doesn’t try to be impressive. It just shows up, tastes like autumn, and makes everyone happy. No oven required, no stress involved — just a five-minute filling and a fridge that does the hard work for you.
Why You’ll Love This Recipe
This isn’t your typical pumpkin pie — it’s better in ways that actually matter for real life. Here’s why this creamy no-bake pumpkin pie has earned a permanent spot in my dessert rotation:
- Quick & Easy : The filling comes together in about five minutes. No rolling dough, no blind baking, no waiting for butter to soften. Just mix, pour, and chill.
- Simple Ingredients : You probably have most of these in your pantry right now. No fancy extracts, no obscure spices, no trips to a specialty store.
- Perfect for Holidays : When your oven is packed with side dishes and your stovetop is covered, this pie saves the day. It’s ideal for Thanksgiving, Christmas, or any fall gathering.
- Crowd-Pleaser : I’ve served this alongside traditional baked pumpkin pie, and guess which one disappears first? Every single time, it’s the no-bake version.
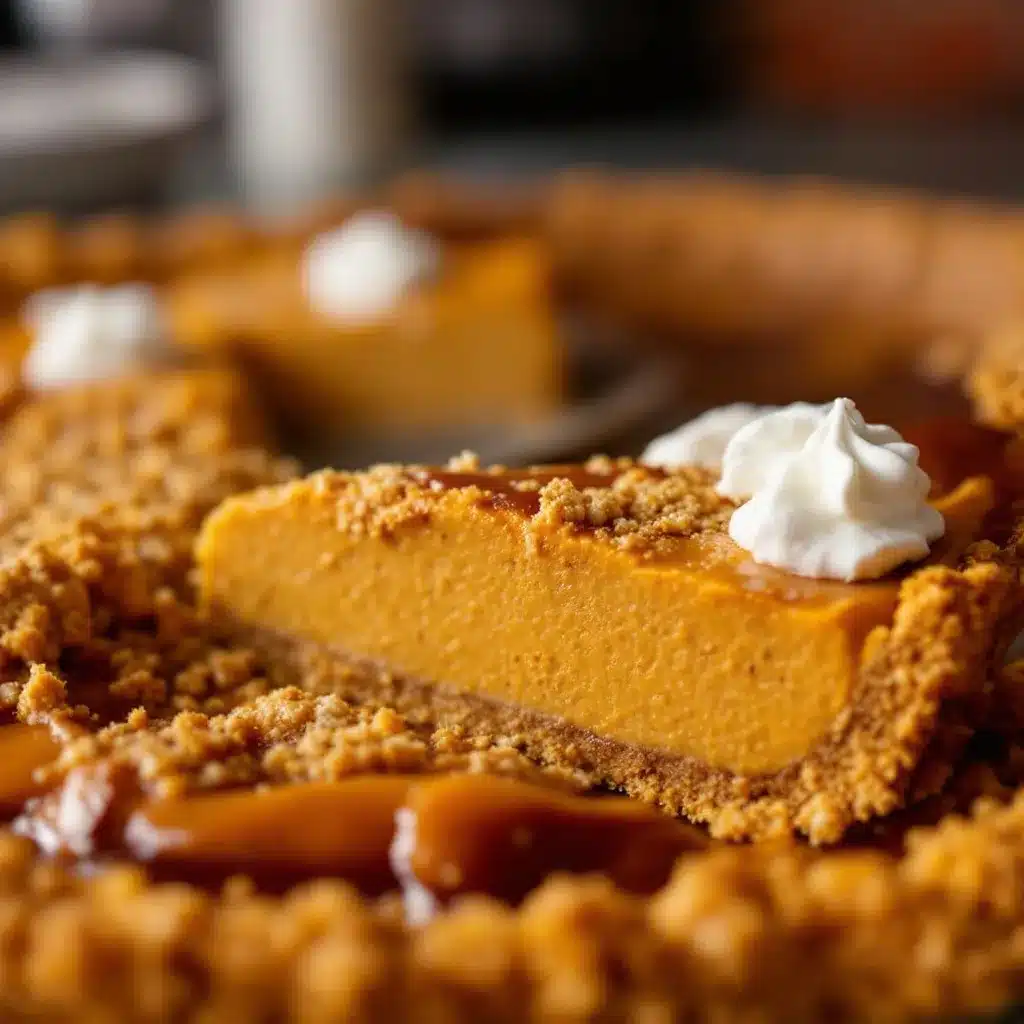
- Unbelievably Delicious : The texture is what gets people — it’s creamy without being heavy, rich without being cloying. The graham cracker crust adds that buttery crunch that contrasts perfectly with the smooth filling.
What makes this recipe different from the dozens of other pumpkin pie recipes out there? It’s the cream cheese base. Most no-bake pumpkin pies rely on pudding mix or gelatin, which can leave a weird texture. Using cream cheese gives you that silky, cheesecake-like consistency that tastes homemade — because it is.
This isn’t just good for a no-bake dessert. It’s good, period. The kind of dessert that makes you close your eyes after the first bite, even if you’re standing at the kitchen counter eating it straight from the pie dish. (Not that I’ve done that. More than once.)
What Ingredients You Will Need
This creamy no-bake pumpkin pie uses simple, wholesome ingredients to deliver that rich, spiced flavor and silky texture without any fuss. Most of these are pantry staples, especially if you keep basic baking supplies on hand.
For the Graham Cracker Crust
- 1 ½ cups graham cracker crumbs (about 12-15 full sheets, crushed finely)
- ¼ cup granulated sugar
- 6 tablespoons unsalted butter, melted (adds richness and helps the crust hold together)
- Pinch of salt (balances the sweetness)
For the Creamy Pumpkin Filling
- 8 ounces cream cheese, softened to room temperature (use full-fat for best texture; low-fat will work but won’t be as creamy)
- ¾ cup packed brown sugar (light or dark both work; dark adds deeper molasses notes)
- 1 cup pumpkin puree (not pumpkin pie filling — make sure it’s 100% pure pumpkin. I prefer Libby’s for consistent results)
- 1 teaspoon vanilla extract
- 1 ½ teaspoons pumpkin pie spice (or make your own with ¾ tsp cinnamon, ½ tsp ginger, ¼ tsp nutmeg, ¼ tsp cloves)
- ¼ teaspoon salt
- 1 cup heavy cream, cold (whipped to stiff peaks for that light, airy texture)
For the Topping (Optional but Recommended)
- 1 cup heavy cream, cold
- 2 tablespoons powdered sugar
- ½ teaspoon vanilla extract
- Ground cinnamon or nutmeg for dusting
Ingredient tips: Make sure your cream cheese is truly at room temperature — cold cream cheese will leave lumps in your filling that won’t smooth out. If you’re in a hurry, cut the cream cheese into cubes and let it sit on the counter for 20 minutes. For the heavy cream, keep it cold right up until you whip it; warm cream won’t whip properly. If you want a dairy-free version, use vegan cream cheese and coconut cream (chilled, solid part only) in place of heavy cream.
Equipment Needed
You don’t need much for this creamy no-bake pumpkin pie, which is part of its charm. Here’s what you’ll want to have on hand:
- 9-inch pie dish (glass or ceramic works best for even chilling)
- Mixing bowls (one large, one medium)
- Electric hand mixer or stand mixer (you can whisk by hand, but your arm will thank you for the mixer)
- Measuring cups and spoons
- Spatula for scraping down the bowl
- Ziploc bag or rolling pin (for crushing graham crackers if you’re not using pre-made crumbs)
- Plastic wrap for covering the pie while it chills
If you don’t have a pie dish, a 9-inch springform pan works beautifully — it makes for easier slicing and a prettier presentation. A food processor can crush graham crackers in seconds, but a Ziploc bag and a heavy-bottomed glass work just as well. I’ve made this pie in a rented cabin with nothing but a fork and a mixing bowl, and it still turned out great. Don’t overthink the equipment.
Preparation Method
This creamy no-bake pumpkin pie comes together in three simple stages. Take your time with each one, and you’ll be rewarded with a dessert that looks and tastes like you spent hours on it.
Step 1: Make the Graham Cracker Crust
- In a medium bowl, combine the graham cracker crumbs, sugar, and salt. Stir to evenly distribute.
- Pour the melted butter over the crumb mixture and stir with a fork until every crumb is moistened. It should look like wet sand.
- Transfer the mixture to your pie dish. Press it firmly into the bottom and up the sides. Use the bottom of a measuring cup or a flat-bottomed glass to get an even, compact layer.
- Place the crust in the refrigerator to firm up while you make the filling — about 15-20 minutes. This step is crucial; a warm crust will make your filling slide around.
Step 2: Make the Creamy Pumpkin Filling
- In a large bowl, beat the softened cream cheese with an electric mixer on medium speed until smooth and creamy, about 2 minutes. Scrape down the sides and bottom of the bowl.
- Add the brown sugar and beat until fully incorporated, another 1-2 minutes. The mixture should be light and fluffy.
- Add the pumpkin puree, vanilla extract, pumpkin pie spice, and salt. Mix on medium-low until everything is combined and smooth. Scrape the bowl again — you don’t want any streaks of unincorporated cream cheese.
- In a separate medium bowl, whip the cold heavy cream on medium-high speed until stiff peaks form. This takes about 3-4 minutes with a hand mixer. You’ll know it’s ready when you lift the beaters and the cream holds its shape without drooping.
- Gently fold the whipped cream into the pumpkin mixture using a spatula. Work in three additions, folding gently but thoroughly. Don’t stir vigorously — you want to keep as much air in the mixture as possible for that light, mousse-like texture.
Step 3: Assemble and Chill
- Remove the crust from the refrigerator. Spoon the filling into the crust and spread it evenly with a spatula.
- Cover the pie loosely with plastic wrap and refrigerate for at least 6 hours, but preferably overnight. The filling needs time to set properly — rushing this step will give you a slice that slumps instead of standing tall.
- When you’re ready to serve, make the whipped cream topping (if using). Whip the cold heavy cream, powdered sugar, and vanilla together until stiff peaks form. Spread or pipe over the pie.
- Dust with a light sprinkle of cinnamon or nutmeg just before serving. Slice with a sharp knife dipped in hot water and wiped clean between cuts for the cleanest slices.
Sensory cues: The filling should be thick and spoonable before you pour it into the crust — think thick pancake batter. When you fold in the whipped cream, the mixture will lighten in color from deep orange to a pale, creamy pumpkin shade. After chilling, the filling should feel firm to the touch but still give slightly when you press it gently.
Cooking Tips & Techniques
I’ve made this creamy no-bake pumpkin pie more times than I can count, and I’ve learned a few things the hard way. Here are the tips that make the difference between a good pie and a great one:
- Don’t skip the cream cheese softening. I once tried to speed things up with cold cream cheese, and the filling had tiny lumps that no amount of mixing could fix. Room temperature cream cheese blends into a silky, seamless base.
- Whip the cream to stiff peaks. Soft peaks will deflate when you fold them into the pumpkin mixture, leaving you with a dense, flat filling. Stiff peaks hold their shape and give the pie its airy, mousse-like texture.
- Fold, don’t stir. Stirring the whipped cream into the pumpkin mixture will knock out all the air you just worked to create. Use a gentle folding motion — cut through the center, scrape along the bottom, and bring the mixture up and over. Repeat until just combined.
- Chill for the full time. I know it’s tempting to cut into it after four hours, but trust me — six hours is the minimum, and overnight is best. The filling needs time to set so it slices cleanly. A rushed pie will still taste good, but it won’t hold its shape.
- Use a store-bought crust if you’re short on time. This is a judgment-free zone. A pre-made graham cracker crust from the store works perfectly and saves you about ten minutes. Just make sure it’s the 9-inch size.
Variations & Adaptations
This creamy no-bake pumpkin pie is endlessly adaptable. Here are some of my favorite variations:
- Gluten-Free Version: Use gluten-free graham crackers or crushed gluten-free cookies for the crust. The filling is naturally gluten-free, so this is an easy swap that everyone can enjoy.
- Dairy-Free Version: Substitute the cream cheese with a high-quality vegan cream cheese (I like Kite Hill or Miyoko’s). Use chilled coconut cream (the solid part from a can of full-fat coconut milk) in place of heavy cream. The texture will be slightly different but still delicious.
- Maple Pumpkin Pie: Replace the brown sugar with maple syrup for a deeper, more complex sweetness. Reduce the heavy cream by 2 tablespoons to compensate for the extra liquid from the syrup.
- Chocolate Graham Crust: Swap half the graham cracker crumbs with crushed chocolate wafer cookies or chocolate graham crackers. The chocolate-pumpkin combination is surprisingly good — like a pumpkin truffle in pie form.
- Mini Pie Version: Press the crust into a muffin tin (lined with parchment strips for easy removal) and divide the filling among the cups. Chill as directed, and you’ll have individual servings that are perfect for parties or portion control.
I once made a version with a gingersnap crust instead of graham crackers, and it was absolutely fantastic. The spicy ginger and molasses notes paired beautifully with the pumpkin filling. If you have gingersnaps lying around after the holidays, give it a try.
Serving & Storage Suggestions
This creamy no-bake pumpkin pie is best served cold, straight from the refrigerator. The filling should be firm but still creamy, with a texture that melts on your tongue. Here’s how to serve and store it:
- Serving temperature: Cold, with a dollop of whipped cream and a dusting of cinnamon. If you’ve made the whipped cream topping, add it just before serving — it will deflate if left on the pie for too long.
- Pairings: This pie is lovely on its own, but it also pairs beautifully with a cup of hot coffee, spiced apple cider, or a glass of champagne punch for a festive touch. For a full dessert spread, serve it alongside creamy New Year’s cheesecake for a stunning contrast of textures.
- Refrigerator storage: Cover the pie tightly with plastic wrap or aluminum foil and store in the refrigerator for up to 5 days. The crust will stay crisp for the first 2-3 days, then soften slightly — which some people actually prefer.
- Freezer storage: This pie freezes beautifully. Wrap the fully chilled pie (without whipped cream topping) in plastic wrap, then a layer of aluminum foil. Freeze for up to 3 months. Thaw in the refrigerator overnight before serving. Add fresh whipped cream after thawing.
- Flavor development: The spices in this pie actually deepen and meld together after a day or two in the fridge. It might taste even better on day two than it did on day one — if you can wait that long.
Nutritional Information & Benefits
Here’s the estimated nutritional breakdown for one slice of this creamy no-bake pumpkin pie (based on 10 servings, without optional whipped cream topping):
- Calories: 345
- Fat: 23g
- Carbohydrates: 32g
- Protein: 4g
- Fiber: 2g
- Sugar: 22g
Pumpkin is a nutritional powerhouse — it’s packed with vitamin A (over 200% of your daily needs per serving), fiber, and antioxidants like beta-carotene. The cream cheese and heavy cream add richness and calcium, while the graham cracker crust provides a satisfying crunch. This isn’t a health food, but it’s a dessert made with real ingredients that you can feel good about serving to your family. If you’re watching your sugar intake, you can reduce the brown sugar to ½ cup without significantly affecting the texture.
Conclusion
This creamy no-bake pumpkin pie is the kind of recipe that makes you look like a hero without breaking a sweat. It’s rich, silky, and packed with all the warm, spiced flavors of fall — but it comes together in five minutes and lets the fridge do all the work. Whether you’re juggling a Thanksgiving feast, hosting a casual dinner party, or just craving something pumpkin without turning on the oven, this pie delivers every single time.
I love this recipe because it reminds me that good food doesn’t have to be complicated. Sometimes the simplest approach — a graham cracker crust, a creamy filling, and a few hours of patience — creates something truly memorable. And honestly, any dessert that lets me spend more time with my guests and less time in the kitchen is a winner in my book.
Have you tried this creamy no-bake pumpkin pie? I’d love to hear how it turned out for you. Drop a comment below and let me know if you made any fun variations — I’m always looking for new ideas to try. And if you loved it, share this recipe with a friend who needs a no-fuss dessert in their life!
Frequently Asked Questions
Can I use pumpkin pie filling instead of pumpkin puree?
No, I wouldn’t recommend it. Pumpkin pie filling is already sweetened and spiced, which will throw off the balance of this recipe. Stick with 100% pure pumpkin puree so you can control the sweetness and spice levels yourself.
How far in advance can I make this pie?
You can make this creamy no-bake pumpkin pie up to 2 days in advance. In fact, it tastes even better after a day in the fridge because the flavors have time to meld. Just wait to add the whipped cream topping until right before serving.
Can I use a store-bought crust?
Absolutely. A pre-made graham cracker crust from the store works perfectly and saves you about 10 minutes. Just make sure it’s the 9-inch size so your filling fits properly.
Why is my filling lumpy?
Lumpy filling usually means your cream cheese wasn’t soft enough when you started. Make sure it’s at room temperature before you beat it. If you still get lumps, try beating the mixture for an extra minute on medium-high speed — sometimes they’ll smooth out with a little more effort.
Can I freeze the leftovers?
Yes! Wrap the pie tightly in plastic wrap and then aluminum foil, and freeze for up to 3 months. Thaw in the refrigerator overnight before serving. Add fresh whipped cream after thawing for the best texture.
Pin This Recipe!
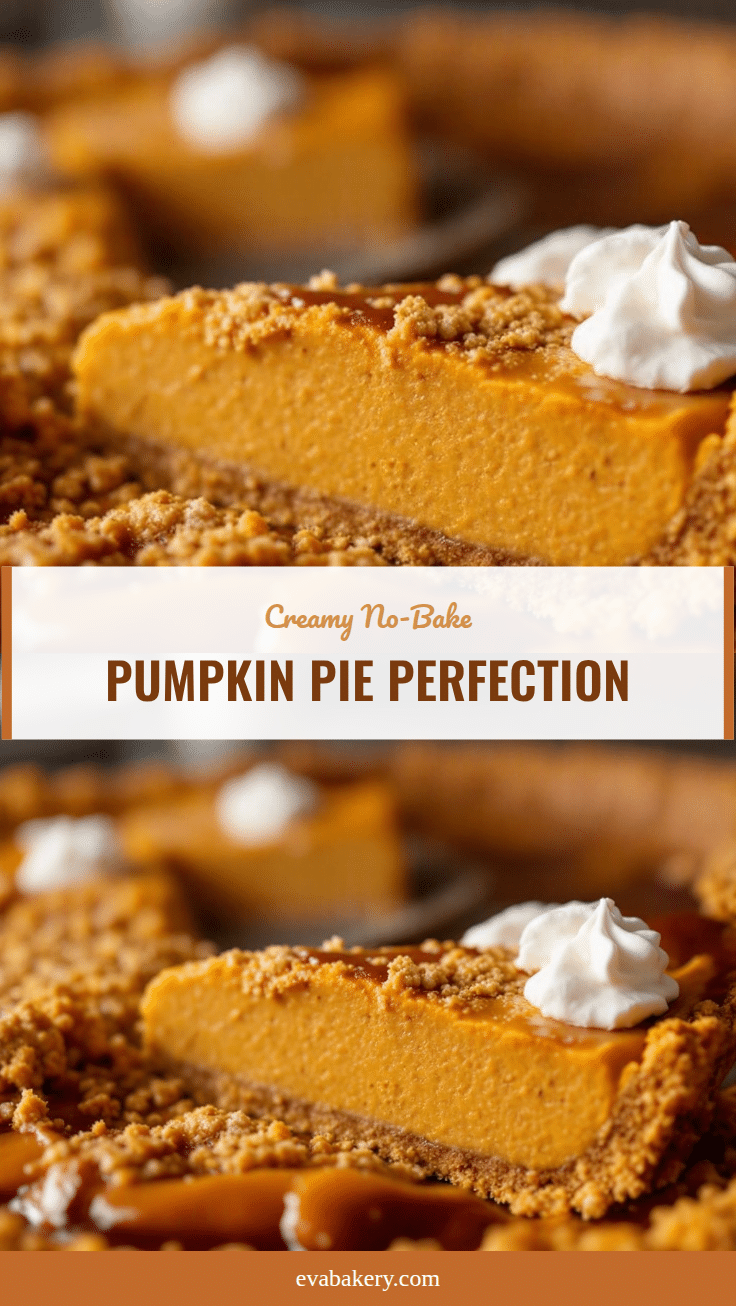
Creamy No-Bake Pumpkin Pie: The Easiest 5-Minute Dessert
This creamy no-bake pumpkin pie comes together in just five minutes with simple ingredients. No oven required, just a fridge that does the hard work for you, resulting in a silky, spiced dessert that tastes like autumn.
- Prep Time: 15 minutes
- Cook Time: 0 minutes
- Total Time: 6 hours 15 minutes (includes chilling time)
- Yield: 10 servings 1x
- Category: Dessert
- Cuisine: American
Ingredients
- 1 ½ cups graham cracker crumbs (about 12–15 full sheets, crushed finely)
- ¼ cup granulated sugar
- 6 tablespoons unsalted butter, melted
- Pinch of salt
- 8 ounces cream cheese, softened to room temperature
- ¾ cup packed brown sugar (light or dark)
- 1 cup pumpkin puree (100% pure pumpkin, not pumpkin pie filling)
- 1 teaspoon vanilla extract
- 1 ½ teaspoons pumpkin pie spice (or ¾ tsp cinnamon, ½ tsp ginger, ¼ tsp nutmeg, ¼ tsp cloves)
- ¼ teaspoon salt
- 1 cup heavy cream, cold
- 1 cup heavy cream, cold (for topping)
- 2 tablespoons powdered sugar (for topping)
- ½ teaspoon vanilla extract (for topping)
- Ground cinnamon or nutmeg for dusting (for topping)
Instructions
- Make the graham cracker crust: In a medium bowl, combine graham cracker crumbs, sugar, and salt. Stir to evenly distribute. Pour melted butter over the crumb mixture and stir with a fork until every crumb is moistened (like wet sand). Transfer to a 9-inch pie dish and press firmly into the bottom and up the sides using the bottom of a measuring cup or flat-bottomed glass. Refrigerate for 15-20 minutes to firm up.
- Make the creamy pumpkin filling: In a large bowl, beat softened cream cheese with an electric mixer on medium speed until smooth and creamy, about 2 minutes. Scrape down the sides and bottom. Add brown sugar and beat until fully incorporated, another 1-2 minutes until light and fluffy. Add pumpkin puree, vanilla extract, pumpkin pie spice, and salt. Mix on medium-low until combined and smooth. Scrape the bowl again.
- In a separate medium bowl, whip cold heavy cream on medium-high speed until stiff peaks form, about 3-4 minutes. Gently fold the whipped cream into the pumpkin mixture in three additions using a spatula, folding gently but thoroughly to keep as much air as possible.
- Assemble and chill: Remove the crust from the refrigerator. Spoon the filling into the crust and spread evenly with a spatula. Cover loosely with plastic wrap and refrigerate for at least 6 hours, preferably overnight.
- When ready to serve, make the whipped cream topping (if using): Whip cold heavy cream, powdered sugar, and vanilla together until stiff peaks form. Spread or pipe over the pie. Dust with cinnamon or nutmeg just before serving. Slice with a sharp knife dipped in hot water and wiped clean between cuts.
Notes
Make sure cream cheese is at room temperature to avoid lumps. Whip cream to stiff peaks for best texture. Chill for at least 6 hours (overnight is best) for clean slices. For a dairy-free version, use vegan cream cheese and chilled coconut cream. The pie can be made up to 2 days in advance and freezes well for up to 3 months.
Nutrition
- Serving Size: 1 slice (1/10 of pie
- Calories: 345
- Sugar: 22
- Sodium: 280
- Fat: 23
- Saturated Fat: 14
- Carbohydrates: 32
- Fiber: 2
- Protein: 4
Keywords: no-bake pumpkin pie, easy pumpkin dessert, creamy pumpkin pie, Thanksgiving dessert, fall dessert, 5-minute dessert, graham cracker crust pumpkin pie


