For a while, I just accepted that apple nachos weren’t going to taste like actual nachos. You know the kind—soggy apple slices sitting in a puddle of lukewarm caramel, looking more like a failed school project than a party centerpiece. I had been looking for a snack that actually stayed crisp long enough to be eaten before it turned into a sticky mess on the counter. The problem was always the moisture. Apples release water. Caramel melts. Gravity exists. It’s a perfect storm for disappointment.
I tried baking them. That just made the apples soft and the chips soggy. I tried dipping them in chocolate. That was fine, but it felt too heavy for an afternoon snack or a light appetizer. I wanted something with crunch. I wanted that satisfying snap you get from a good tortilla chip, but with the warmth of fall flavors. Honestly, it felt like an impossible balance to strike until I stopped trying to mimic the original dish too closely.
The breakthrough wasn’t complicated. It was about temperature control and texture contrast. I needed a base that could hold up to the heat, and a topping that would set hard instead of running. That’s when I started experimenting with thinner chips and a quicker caramel method. It wasn’t a dramatic revelation, just a quiet adjustment in the kitchen. Now, whenever I see a bag of tortilla chips and a bag of caramel squares, I know exactly what to do. It’s become a reliable go-to because it solves the one thing that always ruined the concept before.
Why You’ll Love This Recipe
This recipe works because it respects the physics of food. Most people give up on apple nachos because they expect the texture of a baked dessert, but this version delivers the crunch of a savory snack with the sweetness of a candy bar. Here is why this specific combination of crispy caramel apple nachos with toffee bits stands out from the crowd:
- Quick & Easy: You can have these ready in under 15 minutes. There is no baking involved, which means no preheating the oven and no waiting for cooling racks. It’s perfect for busy weeknights or last-minute cravings when you need something sweet but fast.
- Simple Ingredients: No fancy grocery trips needed. You likely already have tortilla chips, caramel squares, and apples in your kitchen. If you don’t have toffee bits, a quick chop of a toffee bar works just as well. It’s accessible comfort food.
- Perfect for Fall Gatherings: Great for potlucks, cozy dinners, or Halloween parties. The warm, gooey texture contrasts nicely with cooler autumn air, making it feel seasonal without being heavy.
- Crowd-Pleaser: Always gets rave reviews from kids and adults alike. Kids love the candy-like appearance, and adults appreciate the balance of tart apple and sweet caramel. It’s a safe bet for any group.
- Unbelievably Delicious: The texture and flavor combo is next-level comfort food. The crunch of the chip, the snap of the cooled caramel, and the fresh bite of the apple create a sensory experience that keeps you reaching for more.
What makes this recipe different is the technique. Most recipes tell you to drizzle warm caramel over cold apples, which leads to sogginess. By toasting the chips slightly and letting the caramel set properly, you maintain integrity. It’s not just another version—it’s your best version. It’s the kind of snack that makes you close your eyes after the first bite because the crunch is so satisfying. It’s comfort food reimagined—faster, but with the same soul-soothing satisfaction. Perfect for impressing guests without stress, or turning a simple pantry staple into something memorable.
What Ingredients You Will Need
This recipe uses simple, wholesome ingredients to deliver bold flavor and satisfying texture without the fuss. The key is selecting items that contribute to structural integrity and flavor balance. You want apples that hold their shape, chips that don’t break under weight, and caramel that sets firm.
- Granny Smith Apples (2 medium, sliced thin): Granny Smiths are the best choice because they are tart and firm. Other varieties like Fuji or Gala are too soft and will turn mushy quickly. Look for firm, small-curd apples for best texture. The tartness cuts through the sweetness of the caramel.
- Thinly Sliced Tortilla Chips (1 large bag): Use standard yellow corn tortilla chips. Avoid thick kettle chips as they can be too heavy. The thin chips provide a delicate crunch that doesn’t overpower the apple. I recommend brands like Mission or Old El Paso for consistent thickness.
- Caramel Squares (12-15 squares): Standard wrapped caramel squares work best because they melt evenly. Avoid loose caramel sauce, which is too runny. unwrapping them before you start helps them melt faster and smoother.
- Toasted Toffee Bits (1/2 cup): Buying pre-made toffee bits saves time, but chopping a toffee bar yourself ensures you get nice chunks in every bite. The toffee adds a buttery, crunchy element that complements the apple perfectly.
- Sea Salt Flakes (optional): A light sprinkle of flaky sea salt after adding the toffee enhances the sweetness. It creates a sweet-and-salty profile that feels more gourmet than basic candy.
- Vegetable Oil Spray (for chips): A light mist of oil helps the chips brown slightly if you choose to toast them, adding a deeper flavor profile.
You can swap Granny Smiths for Honeycrisp if you prefer a sweeter apple, but keep in mind they may soften faster. For a dairy-free option, check if your caramel squares are dairy-free, though most standard brands contain butter.
Equipment Needed
You don’t need much to pull this off, but having the right tools makes the process smoother.
- Large Sheet Pan: A standard half-sheet pan is ideal. Make sure it has a rim so the melted caramel doesn’t drip onto your oven racks if you decide to warm the chips.
- Microwave-Safe Bowl: A glass or ceramic bowl works best for melting the caramel. Avoid plastic bowls as they can warp or absorb odors from the caramel.
- Sharp Chef’s Knife: You need a sharp knife to slice the apples thinly and evenly. Dull knives slip on round apples and can be dangerous. A sharp knife ensures uniform slices that cook and set evenly.
- Paper Towels: Keep these handy to blot any excess moisture from the apple slices if they seem wet. Dry apples help the caramel adhere better.
- Pastry Brush or Oil Spray Bottle: If you choose to toast the chips, these help distribute oil evenly without using too much.
If you don’t have a sheet pan, you can use a large platter, but make sure it’s clean and dry. A microwave-safe measuring cup can also work for melting caramel if your bowl is too small, but be careful as it heats up fast.
Preparation Method
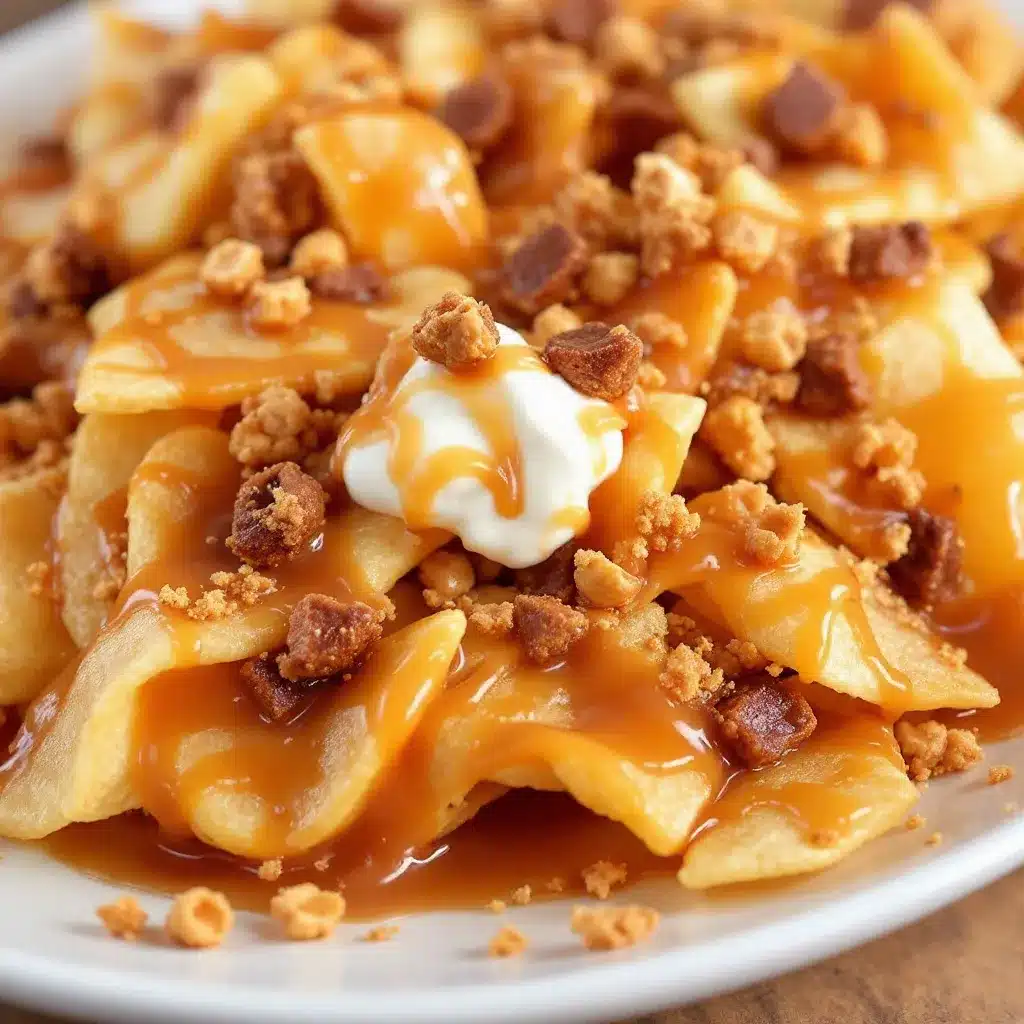
Getting the base right is the most important part. If your chips are soggy or your caramel is too hot, the whole dish suffers. Here is how to build it properly.
- Prepare the Apples (5 minutes): Wash the Granny Smith apples thoroughly. Remove the core and slice them into thin, uniform rounds or wedges. Try to keep the slices about 1/8 inch thick. Thinner slices crisp up faster and have a better ratio to the toppings. Place them on a plate and pat them dry with a paper towel. This step removes surface moisture that could prevent the caramel from sticking.
- Arrange the Chips (2 minutes): Line your large sheet pan with parchment paper. This makes cleanup instant and prevents any sticky caramel from bonding to the metal. Arrange the tortilla chips in a single layer, slightly overlapping if necessary. You want full coverage so you can scoop up chips with toppings easily. Do not stack them.
- Toast the Chips (Optional, 3 minutes): For extra crunch, you can toast the chips. Spray them lightly with vegetable oil spray. Place the pan in a preheated 350°F (175°C) oven for 2-3 minutes. Watch them closely—they burn quickly. Remove and let them cool slightly. This step is optional but highly recommended for texture.
- Melt the Caramel (2 minutes): Place the unwrapped caramel squares in a microwave-safe bowl. Microwave on high for 30 seconds. Stir. Microwave for another 15-20 seconds. Stir again until smooth. If it’s still lumpy, continue in 10-second bursts. Do not overheat, or the caramel will seize and become grainy. It should be pourable but thick.
- Drizzle the Caramel (2 minutes): While the caramel is still warm, drizzle it over the chips. Use a fork or a spoon to create a zigzag pattern. You don’t need to cover every chip completely; a generous drizzle is enough. The residual heat from the chips (if toasted) will help the caramel spread slightly.
- Add Apples and Toffee (1 minute): Immediately place the apple slices on top of the warm caramel. Press them down gently so they adhere. Sprinkle the toasted toffee bits evenly over the entire pan. If you are using sea salt flakes, add them now.
- Set and Serve (5 minutes): Let the nachos sit at room temperature for 5 minutes. This allows the caramel to cool and set slightly, making it less sticky to handle. Serve immediately while the chips are still crisp.
If the caramel gets too thick while you are drizzling, add a tiny splash of milk or water and stir it in to thin it out.
Cooking Tips & Techniques
There are a few common pitfalls with this recipe, but they are easy to avoid with a little practice.
- Control the Heat: Caramel burns easily. When melting it in the microwave, short bursts are your friend. Long heating times cause the sugar to crystallize, resulting in a grainy texture. If your caramel looks separated, whisk in a teaspoon of heavy cream to bring it back together.
- Work Quickly: Caramel sets fast. Once you drizzle it, the window for adding toppings is short. Have your apples and toffee ready before you start melting the caramel. This is a make-ahead style snack, but it’s best made moments before eating.
- Apple Selection Matters: Stick to tart, firm apples. I once tried this with Red Delicious apples, and they turned into mush within minutes. The moisture content in softer apples breaks down the chip structure. Granny Smith or Honeycrisp are your best bets.
- Chip Integrity: If your chips are already stale or soft from the bag, they will not hold up. Always use fresh, crisp chips. If you have leftover chips that are slightly soft, toast them first to restore crunch.
- Temperature Contrast: If you want a more dynamic texture, you can serve these with a side of cold vanilla ice cream or whipped cream. The temperature contrast between the warm caramel and cold cream is addictive.
I learned the hard way that using a wooden spoon to stir caramel can cause it to stick and burn on the edges. A silicone spatula is much better because it scrapes the sides and ensures even melting.
Variations & Adaptations
You can tweak this recipe to suit different dietary needs or flavor preferences.
- Dairy-Free Option: Use dairy-free caramel squares and ensure your toffee bits are dairy-free (some contain butter). Most tortilla chips are naturally dairy-free, but check the label for any whey powder.
- Gluten-Free Twist: Swap standard tortilla chips for certified gluten-free corn chips. Many brands offer thin, crisp varieties that work perfectly. Just be careful with cross-contamination if you have severe allergies.
- Nutty Variation: Add chopped pecans or walnuts along with the toffee. The nuttiness pairs beautifully with both apple and caramel. Toast the nuts in a dry pan for 2 minutes before adding them for extra flavor.
- Chocolate Swap: Instead of caramel, use melted chocolate chips. Drizzle white chocolate or milk chocolate over the chips, then add apples and toffee. This creates a “bark” style snack that is rich and indulgent.
- Seasonal Spice: Add a pinch of cinnamon or nutmeg to the caramel while it melts. This enhances the fall flavor profile and makes the snack taste more like apple pie.
I once tried adding bacon bits to this recipe, and while it was delicious, it made the chips soggy too quickly. If you want to try it, add the bacon right before serving.
Serving & Storage Suggestions
These nachos are best served immediately. They are not designed to be stored for long periods because the moisture from the apples and the humidity in the air will soften the chips.
- Serving Temperature: Serve at room temperature. If the caramel is too warm, it will be messy. If it’s too cold, it will be hard to bite through. The 5-minute rest period is crucial.
- Complementary Dishes: Pair these with a crisp apple cider or a glass of white wine. For a meal, they work well as an appetizer before a main course like crispy bacon wrapped dates or a light salad.
- Storage: Do not store assembled nachos. If you must prepare ahead, store the chips, apples, and toppings separately. Keep apples in an airtight container with a paper towel to absorb moisture. Melt the caramel just before serving.
- Reheating: If you have leftover assembled nachos (unlikely, but possible), you can warm them in the microwave for 10 seconds to soften the caramel, but the chips will lose their crunch. It’s better to make a fresh batch.
- Flavor Development: The flavors meld best when fresh. The sharpness of the apple balances the sweetness of the caramel most effectively in the first hour after assembly.
For parties, set up a station where guests can assemble their own. This ensures everyone gets a crisp chip.
Nutritional Information & Benefits
While this is a treat, it does offer some nutritional benefits depending on how you make it.
- Estimated Calories: Each serving (approx. 4-5 chips) contains around 150-200 calories, depending on the size of the apple slices and amount of caramel.
- Fiber Content: Granny Smith apples provide dietary fiber, which aids in digestion. One medium apple contains about 4 grams of fiber.
- Sugar Awareness: The primary source of sugar is the caramel and toffee. If you are watching sugar intake, use less caramel and opt for dark chocolate variations.
- Allergens: This recipe contains dairy (caramel, toffee) and gluten (tortilla chips). Use alternative ingredients to accommodate allergies.
- Personal Wellness Perspective: I view this as a mindful treat. It’s sweet, so enjoy it slowly. Pairing it with a protein-rich snack or a meal helps balance blood sugar spikes.
Moderation is key. This is a dessert-like snack, so enjoy it as such.
Conclusion
Crispy caramel apple nachos with toffee bits are a simple yet satisfying twist on a classic fall flavor. They solve the problem of soggy snacks by prioritizing crunch and texture. I love this recipe because it brings joy without requiring hours of prep. It’s flexible, fun, and always a hit.
Customize it with your favorite toppings or spices to make it your own. I hope you give it a try and find your own quiet satisfaction in the crunch.
Please leave a comment below with your favorite variation. Share your photos on social media and tag me—I love seeing how you adapt this recipe. Enjoy the process and the delicious results.
FAQs
Can I use pre-sliced apples from the store?
Pre-sliced apples often have added citric acid to prevent browning, which can affect the taste. It’s better to slice them fresh. If you must use pre-sliced, pat them very dry before using.
Why did my caramel seize?
Caramel seizes if water gets into it or if it is overheated. Ensure your bowl is completely dry before adding caramel squares. Heat in short bursts and stir frequently.
Can I make this recipe ahead of time?
It is best made fresh. If you prepare the components separately, you can assemble them just before serving to maintain the crunch of the chips.
What type of chips work best?
Thin, standard yellow corn tortilla chips are ideal. Avoid thick, heavy chips or flavored chips, as they can clash with the sweet caramel and apple flavors.
How do I store leftovers?
There are no recommended storage methods for assembled nachos as they will become soggy. Store ingredients separately and assemble fresh.
Pin This Recipe!
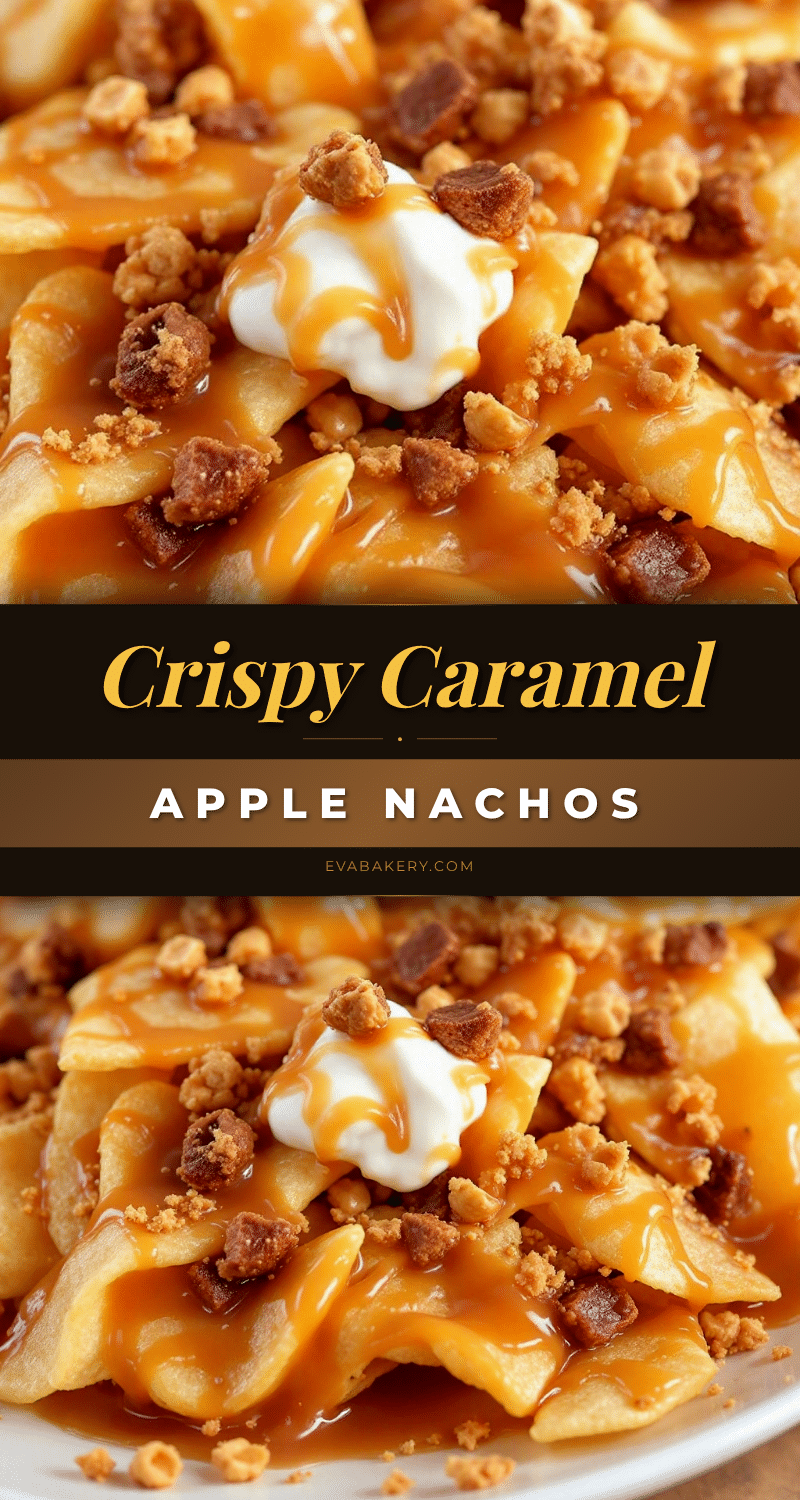
Crispy Caramel Apple Nachos with Toffee Bits

A quick and easy fall snack featuring thin tortilla chips topped with warm caramel, tart Granny Smith apples, and crunchy toffee bits. This recipe solves the soggy apple problem by prioritizing texture contrast and temperature control.
- Prep Time: 7 minutes
- Cook Time: 3 minutes
- Total Time: 10 minutes
- Yield: 4 servings 1x
- Category: Snack
- Cuisine: American
Ingredients
- 2 medium Granny Smith apples, sliced thin
- 1 large bag thinly sliced tortilla chips (standard yellow corn)
- 12–15 caramel squares, unwrapped
- 1/2 cup toasted toffee bits
- Sea salt flakes (optional)
- Vegetable oil spray (for toasting chips)
Instructions
- Wash and core the apples, slicing them into thin, uniform rounds or wedges (about 1/8 inch thick). Pat slices dry with a paper towel to remove surface moisture.
- Line a large sheet pan with parchment paper and arrange tortilla chips in a single layer.
- Optional: Spray chips lightly with vegetable oil spray and toast in a preheated 350°F (175°C) oven for 2-3 minutes until crisp. Let cool slightly.
- Place unwrapped caramel squares in a microwave-safe bowl. Microwave on high for 30 seconds, stir, then microwave for another 15-20 seconds. Stir until smooth and pourable.
- Drizzle the warm caramel over the chips in a zigzag pattern.
- Immediately place apple slices on top of the warm caramel and press gently to adhere. Sprinkle toffee bits and sea salt flakes evenly over the top.
- Let the nachos sit at room temperature for 5 minutes to allow the caramel to set. Serve immediately while chips are crisp.
Notes
Use tart, firm apples like Granny Smith to prevent mushiness. Work quickly as caramel sets fast. Do not store assembled nachos as they will become soggy; store ingredients separately if preparing ahead.
Nutrition
- Serving Size: Approx. 4-5 chips pe
- Calories: 150200
- Sugar: 18
- Sodium: 120
- Fat: 8
- Saturated Fat: 4
- Carbohydrates: 25
- Fiber: 2
- Protein: 2
Keywords: fall snack, caramel apple, nachos, toffee, easy dessert, party food, gluten-free option, dairy-free option


