My husband took a bite, chewed slowly, and then just stared at the plate. Not in a dramatic way, you know, more like he was trying to figure out if I’d secretly ordered takeout. “These are actually better than regular fries,” he said, reaching for another one before I could even respond. And honestly? That moment caught me off guard. I’d been testing this butternut squash fries recipe for weeks, tweaking the temperature, the cut, the coating—trying to get that perfect balance of crispy outside and tender, sweet inside. But it wasn’t until I saw him grabbing them straight off the baking sheet, burning his fingers a little, that I knew I’d finally cracked it.
It’s funny how a simple side dish can become the star of the meal. These crispy parmesan butternut squash fries have that effect on people. They’re not trying to be fancy—they’re just really, really good. The parmesan gets all golden and crunchy in the oven, creating this savory crust that contrasts perfectly with the natural sweetness of the squash. And they bake up in about 25 minutes, which means you can have them on the table faster than you’d think.
I’ll be honest—my first few attempts were soggy disasters. But after some trial and error (and a few burned fingertips), I figured out the tricks that actually work. So this isn’t some theoretical perfect recipe. It’s the one I’ve made for game nights, weeknight dinners, and even Thanksgiving when I wanted something lighter than the usual heavy sides. And every single time, someone asks for the recipe.
Why You’ll Love This Recipe
Let me tell you why these crispy parmesan butternut squash fries have become my go-to side dish for pretty much everything. I’ve tested this recipe more times than I care to admit, and here’s what makes it stand out from the rest.
- Quick & Easy: From cutting board to table in about 30 minutes. No soaking, no double-baking, no complicated steps. Just slice, season, and bake.
- Simple Ingredients: You probably have most of these in your kitchen right now. No fancy equipment or specialty items required—just a butternut squash, some parmesan, and basic pantry staples.
- Perfect for Any Occasion: Game day snack? Check. Healthy side for weeknight dinner? Absolutely. Holiday table showstopper? You bet. These fries fit in everywhere.
- Crowd-Pleaser: I’ve served these to kids who swear they hate vegetables, to picky eaters, and to foodie friends. They disappear every single time.
- Unbelievably Delicious: The combo of crispy parmesan crust with tender, sweet squash is honestly addictive. You’ll find yourself making excuses to eat them.
What makes this recipe different from all the other butternut squash fries out there? It’s the technique. Most recipes tell you to just toss the squash in oil and bake, which gives you soggy, sad results. I figured out that a light coating of cornstarch plus finely grated parmesan creates that authentic crispy exterior—the kind that actually stays crunchy even after they cool down a bit. Plus, baking at a higher temperature (425°F) gets them golden without drying out the inside.
This isn’t just another version of roasted squash. It’s the one that makes you close your eyes after the first bite. The one that turns vegetable skeptics into converts. And honestly? It’s comfort food that happens to be good for you—which is my favorite kind of recipe.
What Ingredients You Will Need
This recipe uses simple, wholesome ingredients that work together to create that irresistible crispy exterior and tender interior. Most of these are pantry staples, which makes this dish perfect for last-minute cravings or planned meals alike.
For the Fries:
- 1 medium butternut squash (about 2-2.5 pounds) – Look for one with a long, straight neck section. That part is easier to cut into even fry shapes. The bulbous bottom works too, but you’ll get more uniform fries from the neck.
- 2 tablespoons olive oil – Use a good quality extra virgin here. It adds flavor and helps everything crisp up. Avocado oil works great too if you prefer a neutral taste.
- 1/3 cup finely grated parmesan cheese – The pre-shredded stuff from a bag won’t give you the same result. I really recommend grating it fresh from a block. The texture is finer, it melts better, and the flavor is so much more pronounced. I like using Parmigiano-Reggiano when I can find it.
- 1 tablespoon cornstarch – This is the secret to crispiness. It absorbs excess moisture and creates that light, crunchy coating. Don’t skip it!
- 1 teaspoon garlic powder – Not garlic salt. We’ll control the salt separately. Garlic powder adds savory depth without burning in the oven.
- 1/2 teaspoon smoked paprika – This gives a subtle smoky flavor and beautiful color. Regular paprika works too, but smoked really elevates the taste.
- 1/2 teaspoon salt – I use fine sea salt. Adjust based on your preference and how salty your parmesan is.
- 1/4 teaspoon black pepper – Freshly ground is best, but pre-ground works in a pinch.
- Optional: Pinch of cayenne pepper – For a tiny kick of heat. Totally optional, but I love the contrast with the sweet squash.
For Serving (Optional but Recommended):
- Fresh parsley, chopped – For color and freshness.
- Extra grated parmesan – Because more cheese is always a good idea.
- Dipping sauce of choice – I’ll share my favorites in the serving section.
Ingredient Tips: When selecting your butternut squash, give it a little squeeze. It should feel heavy for its size and have no soft spots. The skin should be a consistent tan color without green patches (those mean it was picked too early). If you’re in a hurry, many stores sell pre-cut butternut squash cubes—just look for even-sized pieces that you can cut into fry shapes. I personally prefer cutting my own because I can control the thickness, but the pre-cut option is a time-saver when you need it.
For the parmesan, I’ve tested this with both the green can stuff and fresh-grated. Fresh is noticeably better. The pre-grated stuff has anti-caking agents that prevent it from melting and crisping properly. Trust me on this one—spend the extra two minutes grating your own.
Equipment Needed
You don’t need much for this recipe, which is part of why I love it. Here’s what you’ll want to have on hand:
- Sharp chef’s knife – A good, sharp knife makes cutting butternut squash so much safer and easier. Dull knives are actually more dangerous because they slip. I use my 8-inch chef’s knife for this.
- Vegetable peeler – A standard Y-peeler or swivel peeler works fine. Make sure it’s sharp enough to glide through the squash skin without too much effort.
- Large baking sheet – A half-sheet pan (18×13 inches) is ideal. You want enough space so the fries aren’t crowded. If they’re too close together, they’ll steam instead of crisp. I’ve learned this the hard way.
- Parchment paper or silicone baking mat – Parchment paper makes cleanup a breeze and helps prevent sticking. Silicone mats work too, but I find parchment gives slightly crispier results.
- Large mixing bowl – For tossing everything together. Any big bowl works.
- Measuring spoons – For accurate seasoning.
- Kitchen towel or paper towels – For drying the squash after washing. Removing excess moisture is crucial for crispiness.
Budget-Friendly Tip: If you don’t have a good chef’s knife, a sharp serrated knife actually works surprisingly well for cutting squash. And parchment paper is pretty inexpensive at any grocery store. Don’t feel like you need fancy equipment—I’ve made these in a tiny apartment kitchen with minimal tools and they turned out great.
Preparation Method
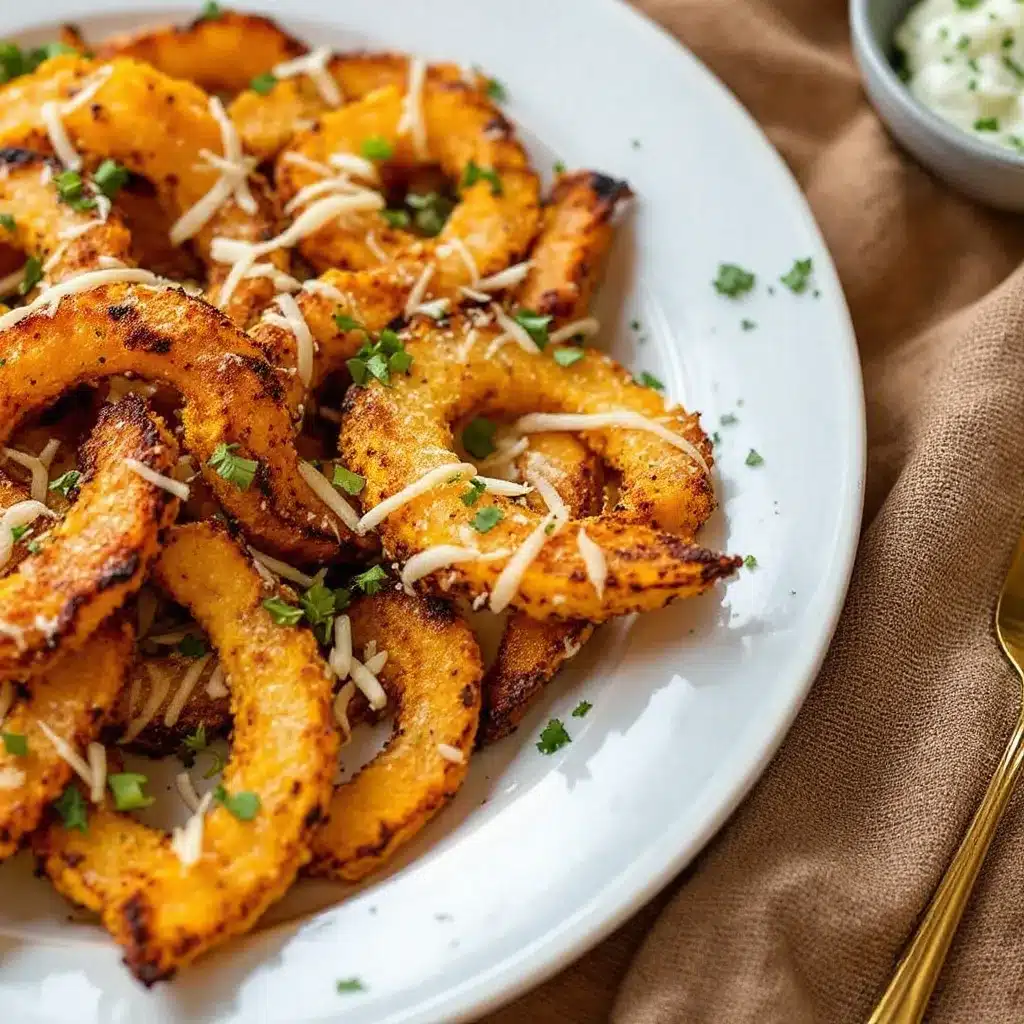
Alright, let’s get to the good part. Here’s exactly how to make these crispy parmesan butternut squash fries, step by step. I’ve included all the little details I wish someone had told me when I first started making these.
- Preheat your oven to 425°F (220°C). Place one rack in the middle position. Give the oven plenty of time to come to temperature—at least 15 minutes. A properly preheated oven is key for crispy results.
- Prepare the butternut squash. First, cut off both ends of the squash with your sharp knife—about 1/2 inch from each end. This creates flat surfaces for stability. Then cut the squash in half where the narrow neck meets the bulbous bottom. Stand the neck piece upright on your cutting board and carefully slice off the skin from top to bottom, following the curve of the squash. Repeat with the bottom piece, then cut it in half and scoop out the seeds with a spoon. (Save those seeds for roasting later—they’re delicious!)
- Cut into fry shapes. Slice the peeled squash into 1/2-inch thick planks, then cut those planks into 1/2-inch wide strips. Try to keep them as uniform as possible—this ensures even cooking. Some will naturally be shorter, especially from the bottom section, and that’s totally fine. Aim for fries that are roughly the same thickness so they crisp up at the same rate.
- Dry the squash thoroughly. This step is non-negotiable. Spread the cut fries on a clean kitchen towel or paper towels and pat them dry. Let them sit for about 5 minutes while you prepare the coating mixture. Excess moisture is the enemy of crispiness—it creates steam in the oven, which makes soggy fries.
- Mix the coating. In a large bowl, combine the grated parmesan, cornstarch, garlic powder, smoked paprika, salt, black pepper, and cayenne if using. Whisk everything together with a fork until well combined. The cornstarch should be evenly distributed—no clumps.
- Add the oil and toss. Drizzle the olive oil over the dried squash fries and toss gently with your hands to coat evenly. Every fry should have a light sheen of oil. Don’t overdo it—too much oil will make them greasy instead of crispy.
- Add the coating mixture. Sprinkle the parmesan mixture over the oiled fries. Toss gently but thoroughly, using your hands to make sure each fry gets coated. The mixture will stick to the oil. Some of it will fall to the bottom of the bowl—that’s okay, just keep tossing until it’s all distributed.
- Arrange on the baking sheet. Line your baking sheet with parchment paper. Spread the coated fries in a single layer, making sure none are overlapping. Leave a little space between each fry if possible. If they’re crowded, they’ll steam instead of crisp. Use two baking sheets if you need to—it’s better than overcrowding.
- Bake for 20-25 minutes. Place the baking sheet in the preheated oven. After 12 minutes, carefully flip each fry using tongs or a spatula. They should be starting to brown on the bottom. Return to the oven and bake for another 8-13 minutes, until golden brown and crispy on the outside. The exact time depends on your oven and how thick you cut your fries.
- Check for doneness. The fries should be golden brown with darker crispy edges. A fork should slide through the center easily—they should be tender inside, not crunchy or raw. If they need more time, check every 2 minutes after the initial 20-minute mark. Ovens vary, and I’ve had batches that needed a full 28 minutes.
- Cool slightly before serving. Let the fries rest on the baking sheet for 2-3 minutes. This allows them to firm up a bit. Transfer to a serving platter, sprinkle with fresh parsley and extra parmesan if desired, and serve immediately while they’re still hot and crispy.
Sensory Cues: When you flip the fries at the 12-minute mark, the bottoms should be golden brown and the tops should look slightly dry. The kitchen should smell nutty and savory from the parmesan. When they’re done, they’ll have a satisfying crunch when you bite into them, but the inside will be soft and sweet—like a perfect french fry, but better.
Cooking Tips & Techniques
After making these crispy parmesan butternut squash fries more times than I can count, I’ve collected some real-world tips that make a difference. Let me share the ones that actually matter.
The Cornstarch Trick: This is the biggest game-changer. Cornstarch creates a thin, crispy coating that oil and parmesan cling to. Without it, the cheese tends to slide off and burn on the pan. With it? You get that perfect crunchy exterior that stays put. Don’t substitute flour—it doesn’t work the same way.
Don’t Skip the Drying Step: I know it seems like an extra hassle, but drying the squash thoroughly is probably the most important step. Squash naturally holds a lot of moisture, and if you don’t pat it dry, that moisture turns to steam in the oven. Steam makes soggy fries. End of story. I’ve made this mistake more than once, and every time I regret it.
Watch Your Oven Temperature: Every oven runs a little differently. If yours runs hot, check the fries a few minutes early. If it runs cool, you might need an extra 5 minutes. The first time I made these, I trusted my oven’s display temperature and ended up with pale, sad fries. Now I use an oven thermometer—it’s cheap and takes the guesswork out.
Common Mistake: Overcrowding the Pan. I get it—you want to make a big batch. But crowding the pan is the fastest way to ruin these fries. When they’re too close together, they trap steam and never get crispy. Use two pans if you need to, and rotate them halfway through baking. Your patience will be rewarded with actually crispy fries.
Timing Strategy: These fries are best fresh from the oven, so I like to prep everything ahead of time. Cut and dry the squash, mix the coating, and have your baking sheet ready. Then, about 30 minutes before you want to eat, toss everything together and pop them in the oven. They’ll be done right when the rest of your meal is ready.
My Biggest Failure: The first time I made these, I used pre-shredded parmesan and skipped the cornstarch. The cheese melted into a greasy mess on the pan, the fries were soggy, and I ended up scraping burnt cheese off the baking sheet for 20 minutes. Learn from my mistakes—fresh parmesan and cornstarch are non-negotiable.
Variations & Adaptations
One of the best things about this recipe is how versatile it is. Here are some variations I’ve tried and loved:
Spicy Version: Add 1/2 teaspoon of cayenne pepper and 1/4 teaspoon of chili flakes to the coating mixture. The heat pairs beautifully with the sweet squash. I made this version for a game day party and they disappeared faster than the regular ones.
Herb & Garlic: Add 1 teaspoon of dried rosemary or thyme to the coating mixture. Fresh herbs work too—just chop them finely and add them after baking, because they’ll burn in the oven. I love this version with roasted chicken or steak.
Gluten-Free Adaptation: This recipe is naturally gluten-free if you use certified gluten-free cornstarch. The parmesan is naturally gluten-free too. Just double-check your specific brands if you have celiac or severe sensitivity. I’ve served these to gluten-free friends and they couldn’t tell the difference.
Vegan Option: Swap the parmesan for nutritional yeast (use about 3 tablespoons) and a tablespoon of almond flour or ground flaxseed for texture. The flavor won’t be exactly the same, but it’s still delicious and crispy. I tested this version for a vegan friend and honestly, I’d make it again even when I’m not cooking for anyone with dietary restrictions.
Air Fryer Method: If you have an air fryer, these turn out amazing. Preheat to 400°F (200°C), arrange the coated fries in a single layer in the basket (work in batches if needed), and cook for 10-12 minutes, shaking the basket halfway through. They get even crispier than the oven version. I actually prefer this method when I’m making a small batch.
Different Squash: This same technique works beautifully with other winter squashes. Acorn squash, delicata squash (no need to peel!), and even sweet potatoes all work great. Just adjust cooking time slightly based on thickness. I’ve made a mixed batch before and it looked gorgeous on the plate.
Serving & Storage Suggestions
These crispy parmesan butternut squash fries are best served hot and fresh, but here’s how to make the most of them.
Serving Temperature: Serve immediately after baking, while they’re still hot and crispy. They cool down quickly, so I like to bring the baking sheet straight to the table and let people grab them as I’m transferring them to a platter. If you’re serving them as part of a bigger meal, time them to come out of the oven right when everything else is ready.
Dipping Sauce Ideas: These fries are amazing on their own, but dipping sauces take them to another level. My personal favorites are garlic aioli, spicy sriracha mayo, or a simple balsamic glaze. For a lighter option, try Greek yogurt mixed with lemon juice and herbs. And honestly? Ketchup works too—no judgment here.
What to Serve With Them: These fries pair beautifully with so many main dishes. They’re perfect alongside a perfect scallops with lemon butter sauce for an elegant dinner, or with a juicy burger for a casual meal. I also love serving them with crispy bacon-wrapped dates for a game day spread that feels fancy but is actually super easy.
Storage: If you somehow have leftovers (unlikely, but possible), store them in an airtight container in the refrigerator for up to 3 days. They will lose their crispiness, unfortunately. To reheat, spread them on a baking sheet and pop them in a 400°F oven for 5-7 minutes. The microwave will turn them into sad, soggy squash—don’t do it.
Freezer Instructions: These fries don’t freeze well after baking, but you can freeze them before baking. Arrange the coated, uncooked fries on a parchment-lined baking sheet and freeze until solid (about 2 hours). Transfer to a freezer bag and store for up to 3 months. Bake from frozen at 425°F for 25-30 minutes, adding a few extra minutes. No need to thaw.
Flavor Development: Honestly, these are best the day they’re made. The crispiness is the star of the show, and it fades with time. But the flavors do meld together nicely if you’re reheating them—the parmesan gets even more pronounced. Just don’t expect them to be as crispy as fresh.
Nutritional Information & Benefits
Let’s talk about what’s actually in these fries—because they’re not just delicious, they’re pretty good for you too.
Estimated Nutritional Values (per serving, about 1/4 of recipe):
- Calories: 185
- Total Fat: 9g
- Saturated Fat: 2.5g
- Cholesterol: 8mg
- Sodium: 420mg
- Total Carbohydrates: 24g
- Dietary Fiber: 4g
- Sugars: 5g
- Protein: 6g
Health Benefits: Butternut squash is packed with vitamin A (one serving gives you over 100% of your daily needs), vitamin C, potassium, and fiber. The parmesan adds calcium and protein. And since these are baked instead of fried, you’re saving a significant amount of oil compared to traditional french fries. Plus, the cornstarch is a small amount—just enough to create that crispy texture without adding many calories.
Dietary Considerations: This recipe is naturally vegetarian and gluten-free (with certified gluten-free cornstarch). It’s also lower in carbs than potato fries, making it a good option for those watching their carbohydrate intake. The fat content comes primarily from olive oil and parmesan—both nutrient-dense sources.
Potential Allergens: This recipe contains dairy (parmesan cheese). For a dairy-free version, use the nutritional yeast substitution mentioned in the variations section. Always check your specific ingredients if cooking for someone with severe allergies.
My Wellness Perspective: I love that this recipe lets me enjoy something that feels indulgent while still getting a serving of vegetables. It’s not about being perfect—it’s about finding ways to make healthy food actually enjoyable. And honestly, if eating these fries means I’m getting more squash in my diet, that’s a win in my book.
Conclusion
These crispy parmesan butternut squash fries have honestly become a staple in my kitchen. They’re the kind of recipe that proves you don’t need complicated techniques or fancy ingredients to make something truly special. Just good squash, quality parmesan, and a few simple tricks that make all the difference.
I love that this recipe works for so many occasions. Need a quick side for a weeknight dinner? Done. Hosting a party and want something that’ll impress without stress? These are your answer. Craving something crispy and satisfying but want to keep it on the healthier side? You’ve got it. They’re versatile, forgiving, and—most importantly—absolutely delicious.
I’d love to hear how these turn out for you. Did you try any of the variations? Find a new favorite dipping sauce? Burn your fingers grabbing them straight off the pan? (That’s a rite of passage, honestly.) Drop a comment below and let me know. And if you’re looking for more easy, crowd-pleasing recipes, check out some of my other favorites—like these crispy prosciutto-wrapped asparagus bites or this fluffy mini quiches recipe for your next gathering.
Until next time, happy cooking—and don’t forget to save some fries for yourself before everyone else grabs them all!
Frequently Asked Questions
Can I make these ahead of time for a party?
You can prep the squash and coating mixture separately up to a day in advance. Store the cut squash in cold water in the fridge (pat dry before using) and the coating in an airtight container. But I really recommend baking them fresh—they’re at their crispiest straight from the oven. If you need to reheat, use the oven, not the microwave.
Why are my butternut squash fries soggy?
This usually happens for one of three reasons: the squash wasn’t dried thoroughly before coating, the fries were crowded on the baking sheet, or the oven wasn’t hot enough. Make sure you pat the squash completely dry, leave space between each fry on the pan, and preheat your oven to 425°F. The cornstarch also helps—don’t skip it!
Can I use pre-cut butternut squash from the store?
Absolutely! Pre-cut squash saves time and works well. Just look for even-sized pieces that you can cut into fry shapes. Keep in mind that pre-cut squash is often cut into cubes, so you might end up with shorter fries. Pat them extra dry since pre-cut squash can be a bit more moist from storage.
What’s the best way to cut butternut squash safely?
Use a sharp knife—dull knives are more dangerous because they slip. Cut off both ends first to create flat surfaces. Then cut the squash where the neck meets the bulb. Stand the neck upright and slice down to remove the skin. For the bottom half, cut it in half first, scoop out the seeds, then slice off the skin. Take your time and keep your fingers curled under.
Can I make these in an air fryer instead of the oven?
Yes! Air fryers work great for these fries. Preheat to 400°F, arrange in a single layer (work in batches if needed), and cook for 10-12 minutes, shaking the basket halfway through. They actually get even crispier in the air fryer. Just keep an eye on them toward the end since air fryers can vary in temperature.
Pin This Recipe!
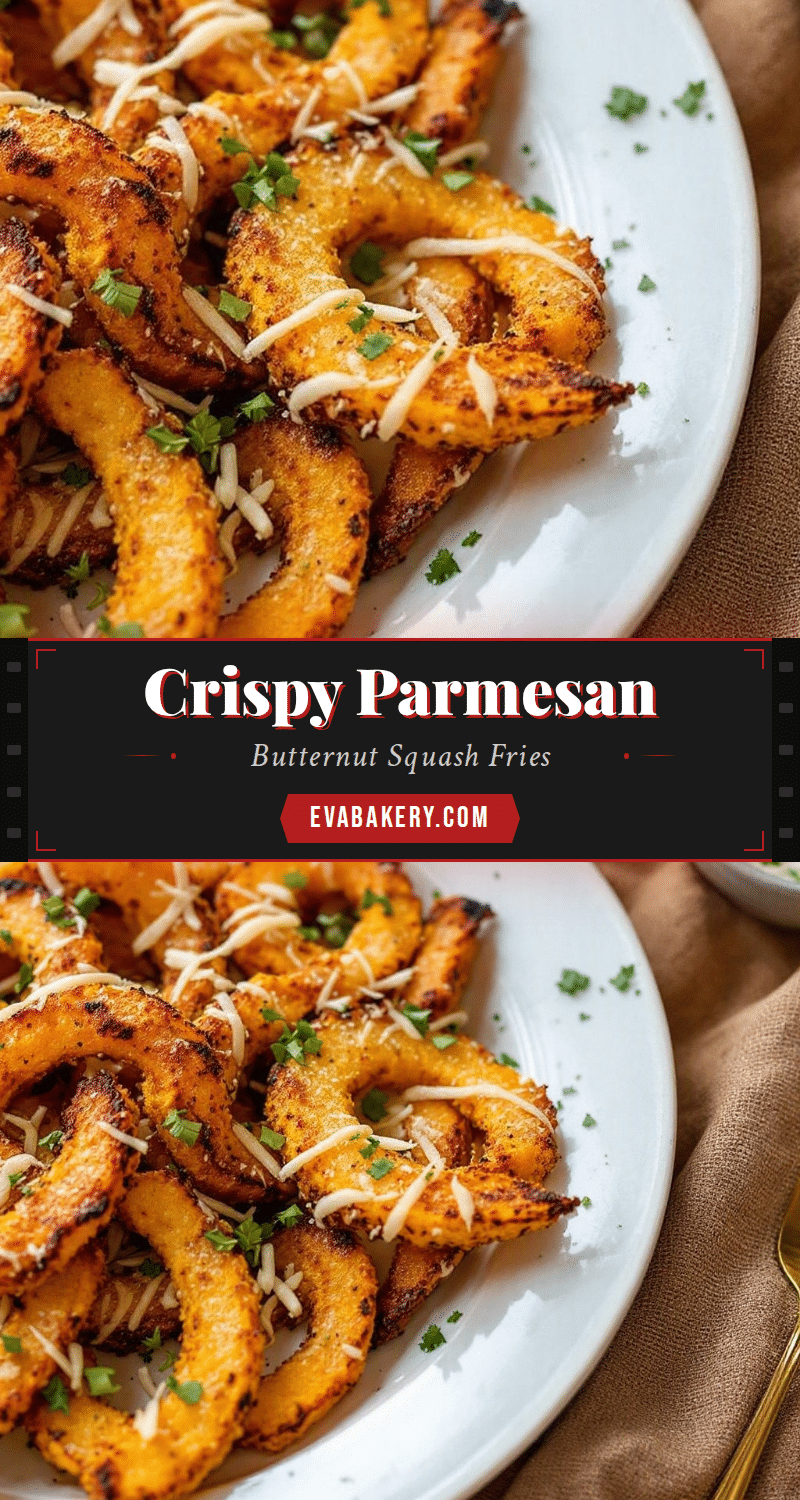
Crispy Parmesan Butternut Squash Fries Recipe (Easy & Baked)

These crispy parmesan butternut squash fries are baked to perfection with a savory parmesan crust and tender, sweet interior. A quick and easy side dish that’s perfect for any occasion.
- Prep Time: 15 minutes
- Cook Time: 25 minutes
- Total Time: 40 minutes
- Yield: 4 servings 1x
- Category: Side Dish
- Cuisine: American
Ingredients
- 1 medium butternut squash (about 2–2.5 pounds)
- 2 tablespoons olive oil
- 1/3 cup finely grated parmesan cheese
- 1 tablespoon cornstarch
- 1 teaspoon garlic powder
- 1/2 teaspoon smoked paprika
- 1/2 teaspoon salt
- 1/4 teaspoon black pepper
- Pinch of cayenne pepper (optional)
- Fresh parsley, chopped (for serving)
- Extra grated parmesan (for serving)
Instructions
- Preheat your oven to 425°F (220°C). Place one rack in the middle position.
- Prepare the butternut squash: cut off both ends, then cut the squash in half where the narrow neck meets the bulbous bottom. Stand the neck piece upright and slice off the skin. Cut the bottom piece in half and scoop out the seeds.
- Cut into fry shapes: slice the peeled squash into 1/2-inch thick planks, then cut into 1/2-inch wide strips.
- Dry the squash thoroughly with a clean kitchen towel or paper towels. Let sit for 5 minutes.
- In a large bowl, combine the grated parmesan, cornstarch, garlic powder, smoked paprika, salt, black pepper, and cayenne if using. Whisk together.
- Drizzle the olive oil over the dried squash fries and toss gently with your hands to coat evenly.
- Sprinkle the parmesan mixture over the oiled fries and toss gently until each fry is coated.
- Line a baking sheet with parchment paper. Arrange the coated fries in a single layer, ensuring none are overlapping.
- Bake for 20-25 minutes. After 12 minutes, flip each fry using tongs or a spatula. Return to the oven and bake for another 8-13 minutes until golden brown and crispy.
- Check for doneness: fries should be golden brown with darker crispy edges, and a fork should slide through the center easily.
- Let the fries rest on the baking sheet for 2-3 minutes. Transfer to a serving platter, sprinkle with fresh parsley and extra parmesan if desired, and serve immediately.
Notes
For best results, use freshly grated parmesan and don’t skip the cornstarch or drying step. Avoid overcrowding the pan to ensure crispiness. For an air fryer version, cook at 400°F for 10-12 minutes.
Nutrition
- Serving Size: 1/4 of recipe
- Calories: 185
- Sugar: 5
- Sodium: 420
- Fat: 9
- Saturated Fat: 2.5
- Carbohydrates: 24
- Fiber: 4
- Protein: 6
Keywords: butternut squash fries, crispy parmesan fries, baked squash fries, healthy fries, easy side dish, vegetarian, gluten-free


