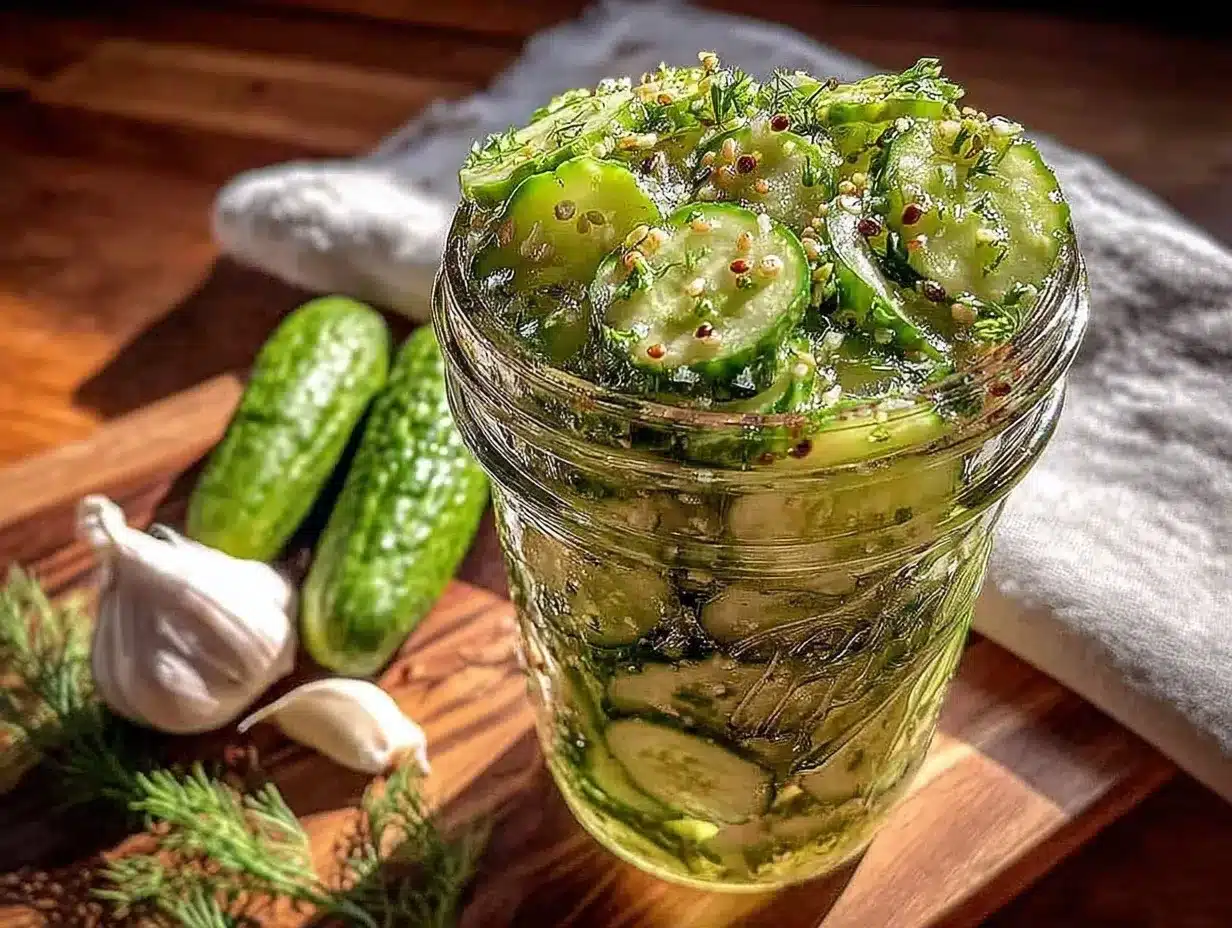
The jar was empty by breakfast — my neighbor’s text came through before the sun was fully up. “Can you send me that crunchy dill refrigerator pickles recipe again? They disappeared faster than I expected.” Honestly, I was a bit surprised myself. I’ve made plenty of pickles before, but these easy no-canning pickles? They have this way of sneaking off the shelf. The crisp snap when you bite in, that fresh dill aroma mingling with a bright, tangy bite — it’s the kind of snack that gets noticed, quietly but firmly.
It all started when I wanted quick homemade pickles without the fuss of traditional canning. No boiling water baths, no sterilizing jars, just fresh cucumbers and a simple brine that transforms overnight. I wasn’t expecting a crowd-pleaser, just a crunchy snack for myself. But it turns out, once you get a taste of these refrigerator pickles, you’re hooked. The recipe stuck with me—not because it’s complicated, but because it’s genuinely satisfying and surprisingly easy.
What’s funny is how these pickles became my unofficial party starter. I’ve seen guests reach for the jar before the main course arrived, crunching away like it was the best thing on the table. It’s a quiet kind of success, the kind you notice in the little moments — empty jars, quick texts, and smiles over a simple homemade snack.
There’s a reason this recipe feels like it belongs in your fridge. It’s straightforward, approachable, and honestly, it just works. So if you’re looking for a crunchy dill refrigerator pickles recipe that’s easy to make and impossible to stop munching, you’re in the right place. Let’s get to why this little jar of goodness has become such a staple in my kitchen.
Why You’ll Love This Recipe
Having tested this crunchy dill refrigerator pickles recipe several times, I can say with quiet confidence it’s become a staple for good reason. The balance of tang, herbaceous dill, and that unbeatable crunch sets it apart. Plus, it’s just plain easy.
- Quick & Easy: Ready in about 24 hours with minimal prep—perfect for those last-minute snack cravings or to prep ahead for gatherings.
- Simple Ingredients: No need for exotic spices or hard-to-find items. The ingredients are pantry staples and fresh veggies you likely already have.
- Perfect for Any Occasion: Whether it’s a casual get-together, a picnic, or a cozy dinner, these pickles bring a burst of flavor and crunch that pairs well with everything.
- Crowd-Pleaser: Kids, adults, picky eaters, and snack lovers all seem to reach for these pickles first.
- Unbelievably Delicious: The crispness of fresh cucumbers combined with the bright tang of vinegar and fresh dill makes the texture and flavor combo a winner every time.
- What Makes It Different: I’ve tried blending fresh dill sprigs with garlic cloves and mustard seeds in the brine, creating a nuanced flavor profile that’s far from your average pickle. Plus, the no-canning method means you can make smaller batches frequently and enjoy fresh pickles without the long wait.
It’s a recipe that feels like comfort food reinvented—simple, fresh, and with a satisfying crunch that makes you pause and really taste. I keep coming back to it because it’s easy to trust and consistently delivers, whether it’s a weeknight snack or a party nibble.
What Ingredients You Will Need
This recipe uses simple, wholesome ingredients to deliver bold flavor and that perfect crunchy texture without the fuss. Most are pantry or fridge staples, so no special trips required.
- Fresh Cucumbers: About 4 medium Kirby cucumbers or pickling cucumbers, sliced into spears or rounds (Kirbys hold their crunch best).
- Fresh Dill: 4-5 sprigs of fresh dill (the star herb here; if unavailable, dill seeds can substitute but won’t be quite the same).
- Garlic Cloves: 3 cloves, peeled and smashed (adds a punch of aroma and flavor).
- White Vinegar: 1 cup (240 ml) of distilled white vinegar for that classic tang.
- Water: 1 cup (240 ml) of cold water to balance the acidity.
- Pickling Salt or Kosher Salt: 1 tablespoon (fine salt dissolves best; avoid iodized table salt).
- Granulated Sugar: 1 teaspoon (balances the vinegar’s sharpness without sweetness overload).
- Mustard Seeds: 1 teaspoon (adds a subtle bite and depth).
- Black Peppercorns: 1 teaspoon (whole peppercorns bring gentle heat and complexity).
- Optional: A pinch of red pepper flakes if you want a little heat.
For best results, I like to choose firm, unblemished cucumbers and fresh dill that’s bright green and fragrant. If you can’t find Kirby cucumbers, regular small cucumbers work but keep in mind they might be less crunchy. For a gluten-free or low-carb twist, this recipe is naturally compliant without any modification needed.
Equipment Needed
You don’t need much to get this crunchy dill refrigerator pickles recipe going. Here’s what I use and recommend:
- Glass Jar or Container: A quart-sized (1 liter) jar with a tight-fitting lid works best for storing and marinating. Mason jars are ideal, but any clean glass container with a lid will do.
- Measuring Cups and Spoons: Accurate measurements keep the brine balanced.
- Small Saucepan: To heat the brine just enough to dissolve salt and sugar (about 3-5 minutes).
- Knife and Cutting Board: For slicing cucumbers and prepping garlic.
- Mixing Bowl: Optional, but handy for combining ingredients before packing the jar.
If you’re on a budget, reused jars from store-bought pickles or pasta sauce can work perfectly fine. Just make sure to clean and sterilize them well to keep things fresh longer. I’ve found that glass containers keep the pickles tasting fresh and crisp better than plastic ones over time.
Preparation Method
- Prepare the Cucumbers: Wash your cucumbers thoroughly to remove any dirt or waxy coating. Slice them into spears about 3-4 inches (7-10 cm) long or into ¼-inch (6 mm) thick rounds, depending on your preference. I usually go for spears because they’re easier to grab as a snack. Set aside.
- Make the Brine: In a small saucepan, combine 1 cup (240 ml) white vinegar, 1 cup (240 ml) water, 1 tablespoon pickling salt, and 1 teaspoon sugar. Heat gently over medium heat, stirring occasionally until the salt and sugar dissolve completely. This should take about 3-5 minutes — don’t let it boil hard, just warm enough to dissolve ingredients.
- Pack the Jar: Place the fresh dill sprigs, smashed garlic cloves, mustard seeds, black peppercorns, and optional red pepper flakes into the bottom of your clean glass jar.
- Add the Cucumbers: Tightly pack your cucumber slices or spears into the jar, leaving about ½ inch (1.2 cm) of headspace at the top. Don’t smash them — keep them snug but not crushed.
- Pour the Brine: Carefully pour the warm brine over the cucumbers, making sure they’re fully submerged. Use a clean utensil to press down gently if needed. Seal the jar tightly with a lid.
- Refrigerate: Let the jar chill in the refrigerator for at least 24 hours before tasting. For best flavor, wait 48 hours. The pickles will stay crunchy and vibrant for up to 3 weeks.
- Enjoy and Store: When you’re ready to snack, grab a pickle spear and enjoy that satisfying crunch. Return the jar to the fridge between uses.
Quick tip: If you notice any floating cucumbers, press them down to keep fully submerged — exposure to air can affect texture and flavor. Also, the brine can be reheated gently to dissolve salt again if you tweak the batch size.
Cooking Tips & Techniques
Here’s what I’ve learned over a few batches of making these crunchy dill refrigerator pickles:
- Choose the Right Cucumbers: Pickling cucumbers or Kirby cucumbers are your best bet for that satisfying crunch. Regular slicing cucumbers often have more water and can turn soft.
- Don’t Skip the Salt Quality: Pickling or kosher salt dissolves cleanly and won’t cloud your brine. Table salt can sometimes add off-flavors or make brine cloudy.
- Brine Temperature Matters: Warm (not boiling) brine dissolves salt and sugar more efficiently but won’t cook your cucumbers. Hot brine can soften them, which we want to avoid.
- Pack Snugly, Not Squashed: Give cucumbers room to breathe but avoid too much air space. This helps keep them crunchy and evenly flavored.
- Patience is Key: I know it’s tempting, but waiting 24-48 hours really makes the difference between bland and brilliantly tangy.
- Flavor Boosters: Adding garlic and mustard seeds brings extra depth. If you’re feeling adventurous, a few coriander seeds or a bay leaf can add a subtle twist.
In my early attempts, I sometimes ended up with soggy pickles by overheating the brine or using the wrong cucumbers. Learning to control brine temperature and picking the right cucumbers made all the difference—and trust me, once you nail it, you won’t want store-bought again.
Variations & Adaptations
If you want to switch things up or accommodate dietary needs, here are some variations to try:
- Spicy Pickles: Add 1-2 sliced fresh jalapeños or ½ teaspoon red pepper flakes for a fiery kick.
- Garlic Lovers’ Pickles: Double the garlic cloves and include sliced garlic for an extra punch.
- Herb Mix: Swap fresh dill for fresh tarragon or add fresh thyme for a different herbal note.
- Low Sodium: Reduce salt by 25% and extend marinating time to 48 hours for flavor.
- Vegan & Allergy-Friendly: This recipe is naturally vegan and gluten-free. For a milder brine, swap sugar with a teaspoon of maple syrup.
Personally, I once tried a batch with fresh lemon zest added to the brine — it gave a bright, citrusy note that paired beautifully with the dill. Definitely worth experimenting to find your favorite twist.
Serving & Storage Suggestions
Serve these crunchy dill refrigerator pickles chilled straight from the jar for maximum snap and flavor. They make a fantastic side or snack:
- Perfect alongside sandwiches, burgers, or hot dogs — the tang cuts through rich flavors beautifully.
- Great as a crunchy garnish on salads or charcuterie boards.
- Pair them with drinks for a refreshing bite, like a savory Bloody Mary or a crisp white wine.
Store pickles in the refrigerator, covered tightly. They’ll keep their crunch and flavor for up to 3 weeks, but honestly, they rarely last that long at my place. If you’re reheating a recipe like a warm sandwich with pickles, add the pickles fresh after cooking to keep their crunch.
Over time, flavors deepen and blend, so they can get even better after a few days in the fridge. Just be sure to check that cucumbers remain submerged in brine to avoid soft spots.
Nutritional Information & Benefits
Crunchy dill refrigerator pickles are low in calories (about 10-15 calories per spear) and fat-free, making them a guilt-free snack. The vinegar-based brine contains probiotics if naturally fermented, but since this recipe uses quick pickling, probiotic benefits are minimal. However, the cucumber provides hydration and fiber, and fresh dill adds antioxidants.
This recipe is gluten-free, vegan, and low-carb, fitting nicely into many diets. Pickles can help add variety and crunch without extra calories or sugar. Just watch the sodium intake if you’re on a low-salt diet, as pickling salt can be high in sodium.
From a personal perspective, I appreciate having a fresh, crunchy snack that feels homemade and wholesome—especially when paired with dishes like my crispy prosciutto wrapped asparagus bites, where the tangy crunch adds contrast and balance.
Conclusion
If you want a crunchy dill refrigerator pickles recipe that’s easy, quick, and reliably delicious, this one fits the bill. It’s a simple snack that brings a little brightness and crunch to your day without fuss or fancy equipment. I love how it’s flexible enough to fit different tastes and occasions but consistent enough to become a go-to.
Whether you’re a seasoned pickle fan or just curious about making your own, this recipe invites you to experiment and make it your own. I keep coming back because it’s dependable and always gets the kind of quiet compliments that make you feel like you nailed it.
Give it a try, tweak it, and share how it turns out—you might find yourself texting a friend for the recipe too.
Frequently Asked Questions
How long do crunchy dill refrigerator pickles last in the fridge?
They typically keep well for up to 3 weeks if stored in a sealed jar and kept refrigerated. Always check that cucumbers stay submerged in brine.
Can I use regular cucumbers instead of pickling cucumbers?
You can, but regular cucumbers tend to be less crunchy and more watery. For best results, use Kirby or pickling cucumbers.
Do I have to use fresh dill, or can I use dried?
Fresh dill gives the best flavor and aroma. Dried dill will work in a pinch but won’t provide the same vibrant taste.
Can I make these pickles without garlic?
Yes, garlic adds flavor but can be omitted if you prefer a milder pickle.
Is this recipe suitable for canning and shelf storage?
No, this is a refrigerator pickle recipe meant to be stored chilled and consumed within a few weeks. It’s a no-canning, quick-pickle method.
Pin This Recipe!

Crunchy Dill Refrigerator Pickles Easy No-Canning Recipe for Perfect Homemade Snack
A quick and easy no-canning recipe for crunchy dill refrigerator pickles with a bright, tangy bite and fresh dill aroma. Perfect for snacking or serving at gatherings.
- Prep Time: 15 minutes
- Cook Time: 5 minutes
- Total Time: 24 hours (including refrigeration time)
- Yield: About 1 quart (4 servings) 1x
- Category: Snack
- Cuisine: American
Ingredients
- 4 medium Kirby cucumbers or pickling cucumbers, sliced into spears or rounds
- 4–5 sprigs fresh dill
- 3 garlic cloves, peeled and smashed
- 1 cup (240 ml) distilled white vinegar
- 1 cup (240 ml) cold water
- 1 tablespoon pickling salt or kosher salt
- 1 teaspoon granulated sugar
- 1 teaspoon mustard seeds
- 1 teaspoon black peppercorns
- Optional: pinch of red pepper flakes
Instructions
- Wash cucumbers thoroughly and slice into 3-4 inch spears or 1/4-inch thick rounds.
- In a small saucepan, combine white vinegar, water, pickling salt, and sugar. Heat gently over medium heat, stirring until salt and sugar dissolve (3-5 minutes). Do not boil.
- Place fresh dill sprigs, smashed garlic cloves, mustard seeds, black peppercorns, and optional red pepper flakes into the bottom of a clean quart-sized glass jar.
- Tightly pack cucumber slices or spears into the jar, leaving about 1/2 inch of headspace at the top.
- Pour the warm brine over the cucumbers, ensuring they are fully submerged. Press down gently if needed. Seal the jar tightly.
- Refrigerate the jar for at least 24 hours before tasting; for best flavor, wait 48 hours.
- Enjoy the pickles chilled. Keep the jar refrigerated and ensure cucumbers remain submerged in brine. Pickles stay fresh and crunchy for up to 3 weeks.
Notes
Use Kirby or pickling cucumbers for best crunch. Avoid boiling the brine to keep cucumbers crisp. Keep cucumbers fully submerged in brine to maintain texture and flavor. Wait 24-48 hours for best flavor. Optional additions include jalapeños for spice or extra garlic for flavor. Store pickles refrigerated and consume within 3 weeks.
Nutrition
- Serving Size: 1 pickle spear or eq
- Calories: 1015
- Sugar: 1
- Sodium: 400
- Carbohydrates: 2
- Fiber: 0.5
Keywords: crunchy dill pickles, refrigerator pickles, no-canning pickles, easy pickle recipe, homemade pickles, quick pickles, dill pickles


