That sticky-sweet, buttery scent of melted marshmallows – the kind that clings to your hair and your sweater for the rest of the day – still takes me straight to my friend Jenna’s tiny apartment kitchen in early October. She was desperately trying to use up a bag of candy corn she’d impulse-bought, and I was just there for the wine. She dumped the whole bag into a pot of melted butter and marshmallows, stirred it until it turned this almost neon shade of orange and yellow, and pressed it into a pan. I thought she was crazy. Then I took a bite.
The crunchy, chewy texture of a classic Rice Krispie treat was there, but it was punctuated by these little pops of waxy, super-sweet candy corn. It was weirdly perfect. It was the kind of accidental discovery that makes you feel like a kitchen genius, even though you really just got lucky. (Honestly, most of my best recipes start this way.)
This isn’t a fancy recipe. It’s not trying to be. It’s the treat you make when you want something fun, fast, and undeniably festive without turning on the oven. It’s the snack that disappears from the Halloween party platter before the crispy bacon-wrapped dates even get a second look. And honestly? That’s exactly the kind of recipe I want in my back pocket for fall.
These Easy Candy Corn Rice Krispie Treats aren’t just a dessert; they’re a little edible memory of that ridiculous, wonderful night. And I think you’re going to love making your own.
Why You’ll Love This Recipe
I’ve made these treats about a dozen times since that first batch at Jenna’s place, tweaking the ratio of marshmallows to butter and testing different brands of candy corn. Here’s why this version is the one you need to save.
- Incredibly Easy: This is a one-pot, 15-minute recipe. No baking, no complicated steps. It’s practically foolproof, even for a brand-new cook.
- Perfect for Fall Holidays: Whether it’s for a Halloween party, a Thanksgiving dessert table, or just a cozy movie night, the colors and flavor scream autumn. It’s the ultimate seasonal crowd-pleaser.
- Simple, Pantry Ingredients: You probably have butter and marshmallows in your kitchen right now. The only special item is a bag of candy corn, which is everywhere from September through November.
- Unbelievably Addictive: The combination of soft, gooey marshmallow, crispy cereal, and that signature candy corn chew is a texture and flavor bomb. I dare you to eat just one.
- Kid-Friendly Fun: This is the perfect recipe to make with little ones. They can help stir, press, and (of course) snack on the candy corn while you work.
This isn’t just another Rice Krispie treat. The candy corn adds a unique, nostalgic sweetness and a pop of color that makes it feel special. It’s the kind of dessert that makes you close your eyes after the first bite—not because it’s gourmet, but because it’s pure, unapologetic comfort food.
What Ingredients You Will Need
This recipe uses a handful of simple ingredients to create a treat that’s bigger than the sum of its parts. Here’s what you’ll need to grab.
- 6 tablespoons unsalted butter – I use unsalted to control the salt level. If you only have salted butter, just skip the extra pinch of salt in the recipe. (Adds richness and helps prevent the treats from being too hard.)
- 1 (10-ounce) bag mini marshmallows – Standard mini marshmallows work best. Don’t use the jumbo ones; they don’t melt as evenly. I usually buy the store brand, but Kraft Jet-Puffed are my go-to for the most consistent melt.
- 1 teaspoon vanilla extract – Pure vanilla extract adds a warmth that complements the sweetness. Imitation works in a pinch, but the real stuff makes a difference here.
- 1/4 teaspoon salt – This is crucial. It balances the intense sweetness of the candy corn and marshmallows. Don’t skip it.
- 6 cups crispy rice cereal – The classic brand is Rice Krispies, but any generic crispy rice cereal works perfectly. I’ve used both and honestly can’t tell the difference.
- 1 1/2 cups candy corn – This is the star of the show. I recommend using a fresh bag for the best texture. Stale candy corn can be rock-hard. Brach’s is the most common brand, but any will do.
Ingredient Substitution Tips: You can easily swap the unsalted butter for a good vegan butter stick (like Earth Balance) to make these dairy-free. The texture will be slightly different, but still delicious. If you want a gluten-free version, double-check your crispy rice cereal—most brands are naturally gluten-free, but it’s always good to verify the label.
Equipment Needed
You don’t need any fancy gadgets for this recipe, which is part of its charm. Here’s what you’ll need.
- Large Pot (4-5 quart): You need a big pot to give the marshmallows and cereal room to mix without spilling everywhere. A Dutch oven or a heavy-bottomed stockpot works great.
- Rubber Spatula or Wooden Spoon: A silicone spatula is my favorite for this job. It’s flexible enough to scrape every bit of the marshmallow mixture out of the pot and sturdy enough to stir in the cereal.
- 9×13-inch Baking Pan: This is the standard size for a thick batch of treats. If you want them extra thick, you can use a 9×9-inch pan.
- Parchment Paper: This is your best friend. Lining the pan with parchment paper (with some overhang on the sides) makes lifting the treats out and cutting them a breeze. No sticky mess.
- Sharp Knife or Bench Scraper: A sharp chef’s knife gives you clean cuts. A bench scraper is also fantastic for cutting through the sticky layers without dragging.
Pro Tip: If you don’t have parchment paper, you can grease the pan generously with butter or cooking spray. It won’t be as easy to lift out, but it will still work.
Preparation Method
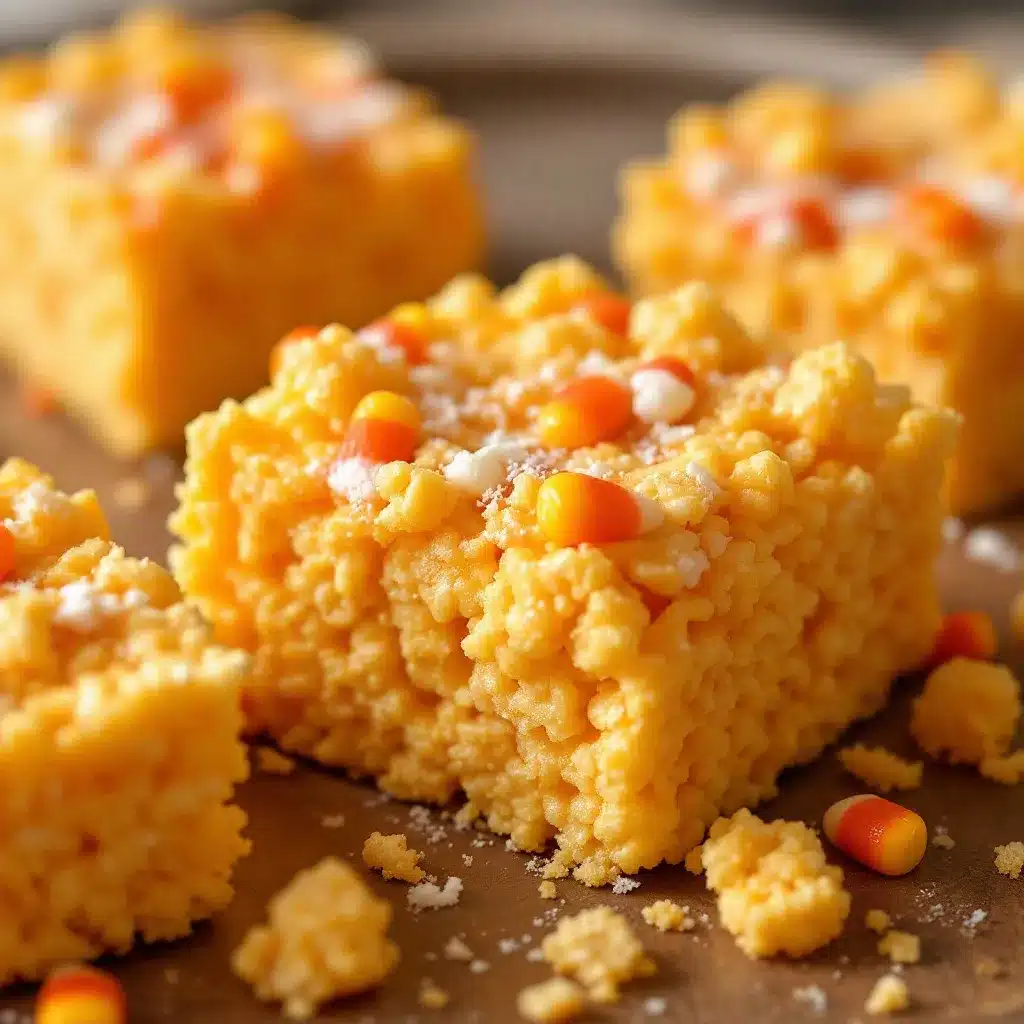
Alright, let’s get to the fun part. This process is quick, so have all your ingredients measured and ready to go before you start.
- Prep the Pan (5 minutes): Line your 9×13-inch baking pan with a sheet of parchment paper, leaving about 2 inches of overhang on two opposite sides. This creates “handles” for lifting the finished treats out of the pan. Lightly spray the parchment with non-stick cooking spray so nothing sticks.
- Melt the Butter (2 minutes): Place your large pot over low heat. Add the 6 tablespoons of unsalted butter and let it melt completely, stirring occasionally. You don’t want it to brown or sizzle—just melt gently. Low heat is key here.
- Melt the Marshmallows (3-4 minutes): Once the butter is fully melted, pour in the entire bag of mini marshmallows. Stir constantly with your rubber spatula until the marshmallows are completely smooth and melted. This should take about 3 to 4 minutes. The mixture will look glossy and silky. Sensory cue: You’ll smell a rich, sweet, buttery aroma.
- Add Vanilla and Salt (30 seconds): Remove the pot from the heat. Stir in the 1 teaspoon of vanilla extract and the 1/4 teaspoon of salt. Mix until they are fully incorporated. The mixture will bubble up a little—that’s normal.
- Add the Cereal (2 minutes): Pour the 6 cups of crispy rice cereal into the pot. Gently fold it into the marshmallow mixture using your spatula. Use a cutting and folding motion—don’t stir too aggressively or you’ll crush the cereal. You want every piece coated, but you also want the treats to have some crunch.
- Fold in the Candy Corn (1 minute): Once the cereal is mostly combined, add 1 cup of the candy corn. Reserve the remaining 1/2 cup for the top. Gently fold the candy corn into the mixture. It will start to melt slightly from the warmth, creating beautiful streaks of orange and yellow. Don’t overmix, or the candy corn will disappear completely.
- Press into the Pan (5 minutes): Scrape the mixture into your prepared pan. Use a second piece of parchment paper or a lightly greased spatula to press it evenly into the corners. Important: Press firmly, but don’t compress it too much, or the treats will be hard and dense. You want them to hold together but still have a light, airy texture.
- Add the Topping (2 minutes): While the mixture is still warm, sprinkle the remaining 1/2 cup of candy corn over the top. Gently press them into the surface so they stick. This gives you those beautiful, visible pieces of candy corn on top.
- Cool and Set (30 minutes): Let the treats cool completely at room temperature. This takes about 30 minutes. Don’t rush this step—if you try to cut them while they’re warm, they’ll be a sticky, gooey mess. Once set, use the parchment paper handles to lift the block out of the pan.
- Cut and Serve (5 minutes): Place the block on a cutting board. Use a sharp knife to cut them into squares or rectangles. I usually get 12 to 16 nice-sized pieces. Sensory cue: You’ll hear a satisfying, clean “snap” as the knife cuts through the set treats.
Cooking Tips & Techniques
I’ve definitely had a few batches go wrong over the years. Here’s what I’ve learned so you don’t have to make the same mistakes.
- Low and Slow is the Rule: Melt the butter and marshmallows over low heat. High heat can scorch the sugar and butter, giving your treats a burnt, bitter taste. Patience is your best tool here.
- Don’t Overmix the Cereal: Once you add the cereal, work quickly but gently. Overmixing will crush the cereal, leading to dense, hard treats instead of light, crispy ones. Stop as soon as everything is combined.
- Use a Timer: The entire process from melting butter to pressing the mixture into the pan takes about 10-12 minutes. If you dawdle, the mixture will start to set in the pot, making it impossible to spread evenly.
- Grease Your Hands (or Spatula): If you’re pressing the mixture into the pan with your hands (which I sometimes do for better control), lightly grease them with butter or cooking spray first. Otherwise, you’ll be picking sticky marshmallow off your fingers for an hour.
- Stale Candy Corn is a Disaster: I once used a bag of candy corn I’d found in the back of my pantry from the previous Halloween. It was rock hard. The treats were edible, but the texture was unpleasant. Always use a fresh, soft bag for the best chew.
Variations & Adaptations
This recipe is a fantastic base for getting creative. Here are a few ways I’ve tweaked it over the years.
- Chocolate Drizzle: After the treats have cooled, melt 1/2 cup of semi-sweet or white chocolate chips with a teaspoon of coconut oil. Drizzle it over the top for a gorgeous, decadent finish. The chocolate cuts the sweetness perfectly.
- Salty-Sweet Twist: Sprinkle a pinch of flaky sea salt (like Maldon) over the top right after you press the mixture into the pan. The salt crystals create a wonderful contrast with the sweet, sticky treat. This is my personal favorite variation.
- Peanut Butter Version: For a richer flavor, melt 1/4 cup of creamy peanut butter into the butter and marshmallow mixture. It adds a savory depth that pairs beautifully with the candy corn. Be sure to stir it in completely until smooth.
- Halloween Mix-In: Swap out 1/2 cup of the candy corn for 1/2 cup of candy pumpkins or autumn-colored M&Ms. This adds more texture and a fun, colorful surprise in every bite.
Serving & Storage Suggestions
These treats are best served at room temperature. The texture is perfectly chewy and soft, not hard or brittle. I love arranging them on a large platter for parties—they always get snapped up quickly.
For Storage: Store any leftovers in an airtight container at room temperature. They will stay fresh for up to 5 days. Place a piece of parchment paper between layers to prevent them from sticking together.
Freezing Instructions: These treats freeze beautifully! Wrap each piece individually in plastic wrap, then place them in a freezer-safe bag or container. They will keep for up to 3 months. To thaw, simply leave them on the counter for about 30 minutes. The texture will be just as good as the day you made them.
Pro Tip: If you find your treats are getting a little hard after a couple of days, pop them in the microwave for 5-7 seconds. It softens them right up and makes them taste freshly made.
Nutritional Information & Benefits
Let’s be real—this is a treat, not a health food. But that’s okay! It’s meant to be enjoyed in moderation as part of a balanced lifestyle.
Estimated Nutritional Info (per serving, based on 12 servings):
- Calories: 280
- Fat: 9g
- Carbohydrates: 50g
- Protein: 2g
- Sugar: 35g
Dietary Considerations: This recipe can easily be made dairy-free by using vegan butter. It is naturally egg-free and nut-free (if you skip the peanut butter variation). Always check the labels on your marshmallows and cereal to ensure they meet your specific dietary needs.
For a festive gathering, these pair wonderfully with a refreshing champagne punch for the adults or a glass of cold milk for the kids. The contrast of the sweet, sticky treat with a bubbly or cold drink is just perfect.
Conclusion
These Easy Candy Corn Rice Krispie Treats are proof that the best recipes don’t have to be complicated. They’re fun, fast, and ridiculously delicious. They capture the spirit of fall in a single, chewy, colorful bite. Whether you’re making them for a Halloween party, a Thanksgiving dessert table, or just because you have a bag of candy corn you need to use up, I promise they will be a hit.
I’d love to see how yours turn out! Feel free to experiment with the variations I shared—maybe try the salty-sweet twist or add that chocolate drizzle. Leave a comment below and let me know your favorite way to make them. Happy snacking, friends!
Frequently Asked Questions
Can I use stale candy corn in this recipe?
I really don’t recommend it. Stale candy corn is hard and dry, which will make the treats have an unpleasant, crunchy texture instead of the soft, chewy bite you want. Always use a fresh, soft bag for the best results.
Why did my Rice Krispie treats turn out hard?
This usually happens for one of two reasons: you over-melted the marshmallows (cooking them too long over high heat) or you pressed the mixture too firmly into the pan. Use low heat and press gently but evenly for soft, chewy treats.
Can I make these treats ahead of time?
Absolutely! They are perfect for making a day ahead. Store them in an airtight container at room temperature, and they will taste just as fresh. You can even freeze them for up to 3 months.
Can I use a different type of cereal?
Yes, you can experiment with other crispy rice cereals like Cocoa Krispies or Fruity Pebbles for a different flavor and color. Just keep the total amount at 6 cups. The texture will be slightly different, but still delicious.
How do I cut these treats without making a sticky mess?
The best trick is to let them cool completely before cutting. Use a sharp knife and wipe it clean with a damp paper towel between each cut. You can also grease the knife lightly with butter or cooking spray to prevent sticking.
Pin This Recipe!
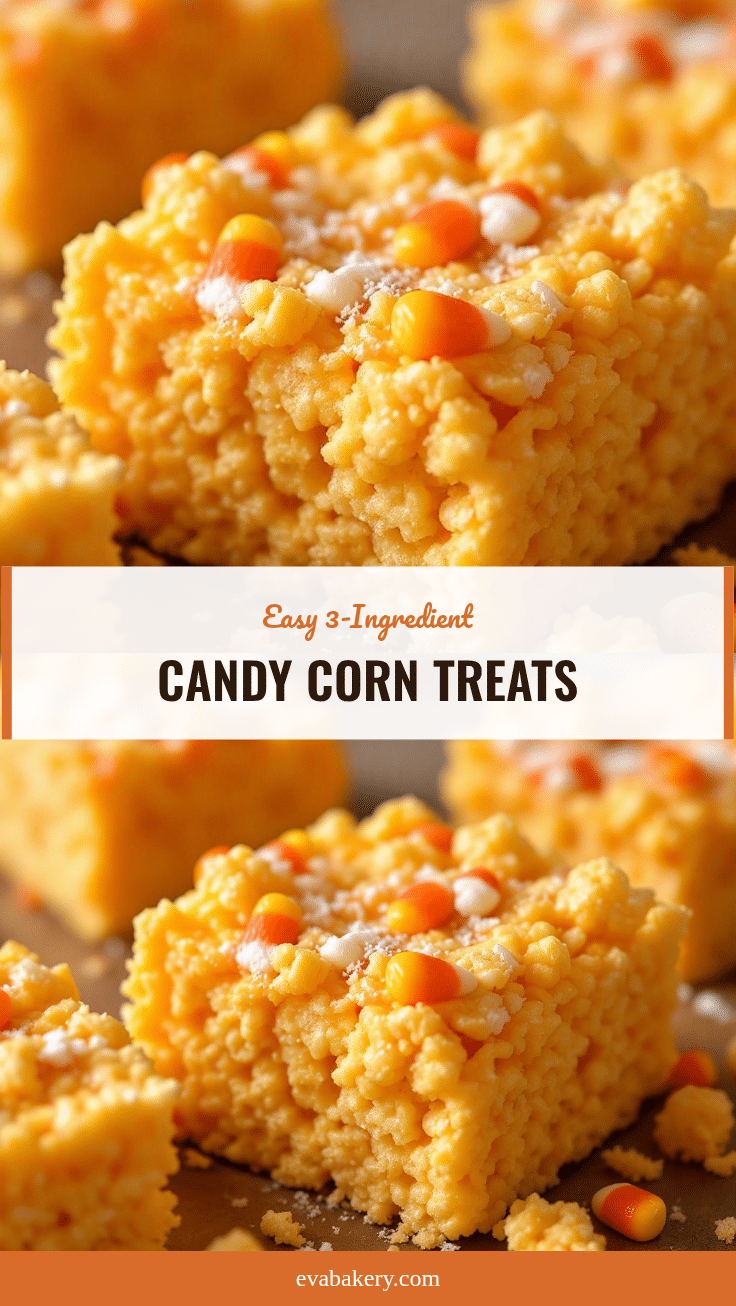
Easy Candy Corn Rice Krispie Treats: Best Fall Dessert
These Easy Candy Corn Rice Krispie Treats are a fun, fast, and festive fall dessert. With a chewy, crispy texture and pops of sweet candy corn, they’re perfect for Halloween parties or cozy autumn nights.
- Prep Time: 15 minutes
- Cook Time: 10 minutes
- Total Time: 25 minutes
- Yield: 12 servings 1x
- Category: Dessert
- Cuisine: American
Ingredients
- 6 tablespoons unsalted butter
- 1 (10-ounce) bag mini marshmallows
- 1 teaspoon vanilla extract
- 1/4 teaspoon salt
- 6 cups crispy rice cereal
- 1 1/2 cups candy corn
Instructions
- Prep the Pan: Line a 9×13-inch baking pan with parchment paper, leaving about 2 inches of overhang on two opposite sides. Lightly spray the parchment with non-stick cooking spray.
- Melt the Butter: Place a large pot over low heat. Add the 6 tablespoons of unsalted butter and let it melt completely, stirring occasionally.
- Melt the Marshmallows: Once the butter is fully melted, pour in the entire bag of mini marshmallows. Stir constantly until the marshmallows are completely smooth and melted, about 3 to 4 minutes.
- Add Vanilla and Salt: Remove the pot from the heat. Stir in the 1 teaspoon of vanilla extract and the 1/4 teaspoon of salt until fully incorporated.
- Add the Cereal: Pour the 6 cups of crispy rice cereal into the pot. Gently fold it into the marshmallow mixture using a cutting and folding motion until every piece is coated.
- Fold in the Candy Corn: Add 1 cup of the candy corn and gently fold it into the mixture. Reserve the remaining 1/2 cup for the top.
- Press into the Pan: Scrape the mixture into the prepared pan. Use a second piece of parchment paper or a lightly greased spatula to press it evenly into the corners. Press firmly but don’t compress too much.
- Add the Topping: While the mixture is still warm, sprinkle the remaining 1/2 cup of candy corn over the top. Gently press them into the surface so they stick.
- Cool and Set: Let the treats cool completely at room temperature, about 30 minutes. Once set, use the parchment paper handles to lift the block out of the pan.
- Cut and Serve: Place the block on a cutting board. Use a sharp knife to cut into squares or rectangles (12 to 16 pieces).
Notes
Use fresh, soft candy corn for the best texture. Melt butter and marshmallows over low heat to avoid scorching. Don’t overmix the cereal to keep treats light and crispy. For dairy-free, use vegan butter. For gluten-free, verify the cereal label.
Nutrition
- Serving Size: 1 square
- Calories: 280
- Sugar: 35
- Sodium: 150
- Fat: 9
- Saturated Fat: 5
- Carbohydrates: 50
- Protein: 2
Keywords: candy corn, rice krispie treats, fall dessert, Halloween treats, easy dessert, no-bake


