My friend Jenna took one bite, stopped mid-sentence, and just pointed at the platter with her fork. That was the moment I knew this Halloween party thing was going to work. I had spent the afternoon layering crispy fries, slow-simmered chili, and a mountain of melted cheese on a big black platter, and honestly, I was half-worried it was too messy for a party. But Jenna didn’t care about mess. She just kept eating and muttering something about “best thing at the table” between mouthfuls.
That’s the thing about this easy loaded chili cheese fries Halloween party platter. It doesn’t try to be fancy. It shows up, does its job, and disappears faster than you’d expect. I made it for a small gathering last October, and by the time I grabbed a plate for myself, there were only a few stray fries left swimming in cheese. People don’t nibble on this. They dig in.
I wanted something that felt festive without requiring me to carve a watermelon skull or spend hours on individual servings. This platter checks every box. It’s shareable, it’s indulgent, and it looks downright spooky when you arrange it right. Plus, it pairs beautifully with a refreshing champagne punch if you want to balance all that savory goodness with something bubbly.
This isn’t one of those recipes you stress over. It’s the kind you throw together while your guests are arriving, and somehow it becomes the star of the night. Trust me on this one.
Why You’ll Love This Recipe
I’ve tested this platter at three different gatherings now, and every single time, someone asks for the recipe. That’s not bragging—it’s just the truth. This easy loaded chili cheese fries Halloween party platter has a way of winning people over without trying too hard.
- Quick & Easy: From start to finish, you’re looking at about 30 minutes of active work. The oven does most of the heavy lifting while you focus on more important things—like figuring out your costume.
- Simple Ingredients: Nothing weird here. Ground beef, canned tomatoes, beans, cheese, and frozen fries. You probably have most of this in your kitchen right now.
- Perfect for Halloween Parties: The black platter, the orange cheese, the spooky garnishes—it all comes together in a way that screams Halloween without being kitschy.
- Crowd-Pleaser: I’ve watched picky eaters, health-conscious friends, and kids all go back for seconds. It’s one of those rare dishes that appeals to everyone.
- Unbelievably Delicious: The crispy fries soak up just enough chili, and the cheese pulls into those perfect stretchy strands. It’s comfort food at its finest.
What makes this different from every other chili cheese fries recipe out there? It’s the layering technique. Instead of dumping everything on top, I build the platter in stages so every fry gets some love. The chili isn’t watery, the cheese melts evenly, and the toppings stay crunchy. It’s not just another version—it’s the version I’d serve to anyone who thinks they’ve had chili cheese fries before.
There’s something about sharing food from a communal platter that changes the energy of a party. People lean in, they talk, they reach across the table. This recipe isn’t just good—it’s the kind that makes you forget you’re at a party and just enjoy being with people.
What Ingredients You Will Need
This recipe uses straightforward ingredients that come together to create something surprisingly complex. You don’t need a specialty grocery store for this one. Most items are pantry staples or easy to find at any supermarket.
For the Chili Base
- 1 pound ground beef (80/20 works best for flavor; drain excess fat if needed)
- 1 medium yellow onion, diced (about 1 cup)
- 3 cloves garlic, minced
- 1 can (15 ounces) diced tomatoes, undrained (I prefer fire-roasted for extra depth)
- 1 can (15 ounces) kidney beans, drained and rinsed
- 2 tablespoons tomato paste
- 1 tablespoon chili powder
- 1 teaspoon ground cumin
- 1/2 teaspoon smoked paprika (adds that subtle smoky note)
- 1/2 teaspoon salt, plus more to taste
- 1/4 teaspoon black pepper
- 1/2 cup beef broth (or water if that’s what you have)
For the Fries Base
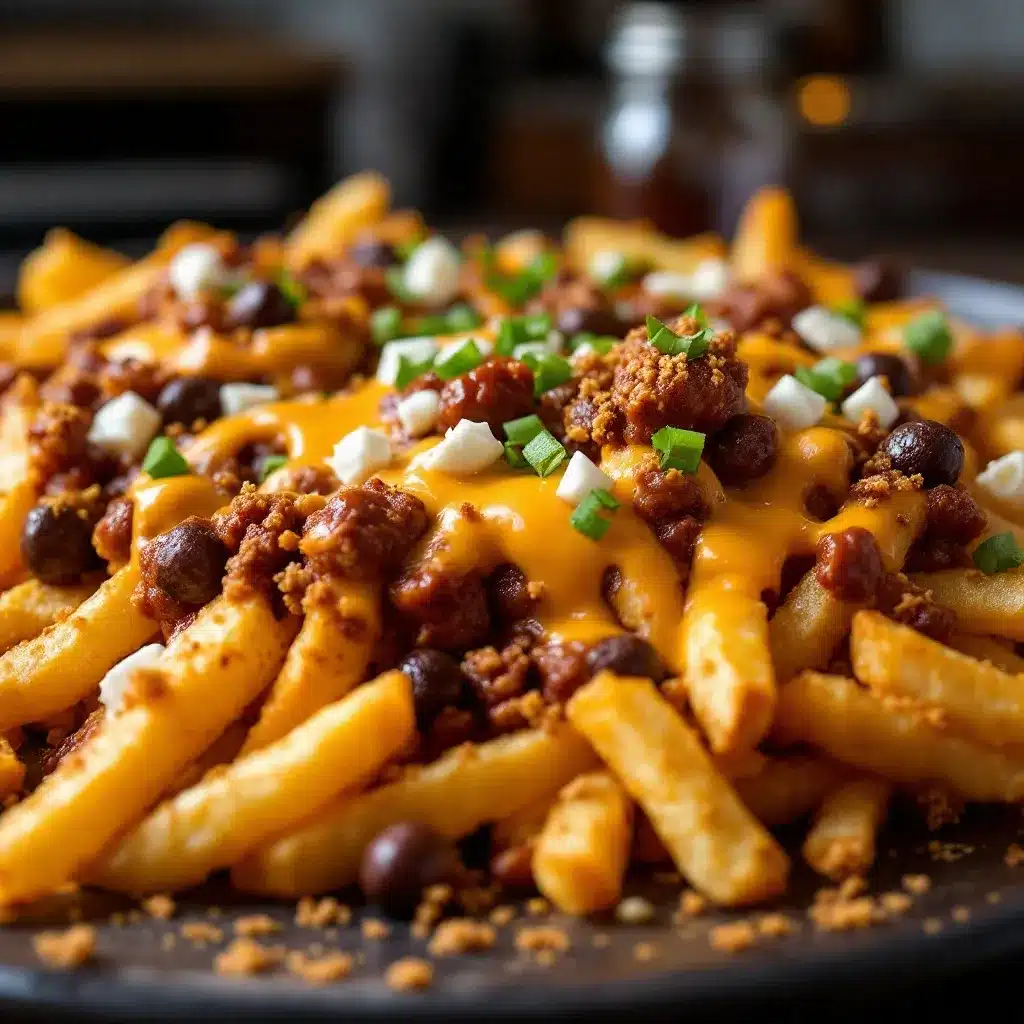
- 1 bag (28 ounces) frozen shoestring fries (or crinkle-cut if you prefer extra crunch)
- 2 tablespoons olive oil
- 1/2 teaspoon garlic powder
- 1/2 teaspoon smoked paprika
For the Cheese Layer
- 2 cups shredded sharp cheddar cheese (freshly shredded melts better than pre-shredded)
- 1 cup shredded Monterey Jack cheese
For Toppings & Garnishes
- 1/2 cup sour cream
- 1/4 cup sliced green onions
- 1/4 cup pickled jalapeños (optional, but highly recommended)
- 1/4 cup chopped fresh cilantro
- Black olives, sliced (for that spooky Halloween look)
- Ghost-shaped tortilla chips (optional, for decoration)
I recommend using Tillamook or Cabot cheddar for the best melt. Pre-shredded cheese has anti-caking agents that prevent it from getting that gooey, stretchy texture you want. Take the extra two minutes to shred it yourself—your taste buds will thank you.
For the beans, kidney beans are classic, but black beans work great too. If you’re feeding a crowd that’s not into beans, you can leave them out entirely. The chili will still be thick and hearty.
Equipment Needed
You don’t need a fancy kitchen to pull this off. Here’s what you’ll actually use:
- Large baking sheet (18×13 inches is ideal for spreading fries in a single layer)
- Large skillet or Dutch oven (for cooking the chili)
- Large serving platter (black looks amazing for Halloween, but any large platter works)
- Cheese grater (box grater or microplane—skip the pre-shredded stuff)
- Wooden spoon or spatula (for breaking up the ground beef)
- Measuring cups and spoons
- Knife and cutting board
- Aluminum foil (for easy cleanup)
If you don’t have a Dutch oven, a deep skillet works fine. Just make sure it’s large enough to hold the chili without splattering everywhere. I’ve made this in a cast iron skillet before, and it actually added a nice depth to the flavor. Budget tip: a basic stainless steel skillet from any kitchen store will do the job perfectly.
For the platter, I found a cheap black serving tray at a dollar store, and it looks fantastic against the orange cheese and red chili. You don’t need anything fancy—just something large enough to hold everything without spills.
Preparation Method
Let’s walk through this step by step. I’ve included time estimates and sensory cues so you know exactly what to look for at each stage.
Step 1: Prep the Fries (20-25 minutes)
Preheat your oven to 425°F (220°C). Line a large baking sheet with aluminum foil for easy cleanup. Spread the frozen fries in a single layer—don’t overcrowd them or they’ll steam instead of getting crispy. Drizzle with olive oil and sprinkle with garlic powder and smoked paprika. Toss to coat evenly.
Bake for 18-22 minutes, flipping halfway through, until golden brown and crispy. The fries should be firm to the touch and make a slight crackling sound when you shake the pan. Don’t undercook them—soggy fries are the enemy of a good platter.
Pro tip: If you’re making these ahead, keep the fries warm in a 200°F oven while you finish the chili.
Step 2: Make the Chili (25-30 minutes)
While the fries are baking, heat a large skillet or Dutch oven over medium-high heat. Add the ground beef and cook for 5-7 minutes, breaking it up with a wooden spoon, until browned and no longer pink. The meat should sizzle when it hits the pan—that’s the Maillard reaction doing its thing.
Add the diced onion and cook for 3-4 minutes until translucent and slightly softened. Stir in the minced garlic and cook for 30 seconds until fragrant. You should smell that garlicky aroma filling your kitchen.
Reduce heat to medium. Stir in the tomato paste, chili powder, cumin, smoked paprika, salt, and pepper. Cook for 1-2 minutes, stirring constantly, until the spices are fragrant and the tomato paste darkens slightly.
Add the diced tomatoes (with their juices), kidney beans, and beef broth. Bring to a simmer, then reduce heat to low. Let it bubble gently for 15-20 minutes, stirring occasionally. The chili should thicken noticeably—it should coat the back of a spoon without being watery. If it looks too thin, let it simmer a few minutes longer. If it’s too thick, add a splash more broth.
Step 3: Assemble the Platter (5-10 minutes)
Arrange the crispy fries on your serving platter in an even layer. Spoon the hot chili evenly over the fries, making sure every fry gets some coverage. Don’t drown them—you want a balance of chili and fry in every bite.
Sprinkle the shredded cheddar and Monterey Jack cheese over the top while the chili is still hot. The residual heat will start melting the cheese immediately. If you want it extra gooey, pop the platter under the broiler for 1-2 minutes—watch it closely so it doesn’t burn.
Step 4: Add Toppings (5 minutes)
Dollop sour cream over the top in small spoonfuls. Sprinkle with sliced green onions, pickled jalapeños, fresh cilantro, and black olives. If you’re using ghost-shaped chips, arrange them around the edges for that Halloween touch.
Serve immediately while everything is hot and the cheese is stretchy. This platter waits for no one.
Cooking Tips & Techniques
I’ve made this recipe enough times to know where things can go wrong. Here’s what I’ve learned the hard way so you don’t have to.
Don’t skip the fry seasoning. Plain fries are fine, but tossing them with garlic powder and smoked paprika before baking transforms them into something special. That extra minute of effort makes a noticeable difference.
Watch your chili consistency. The biggest mistake I see is chili that’s too watery. It turns the fries into a sad, soggy mess. Let that chili simmer until it’s thick enough to hold its shape on a spoon. If you’re short on time, you can cheat by stirring in a tablespoon of tomato paste at the end.
Shred your own cheese. I know I keep saying this, but it matters. Pre-shredded cheese has cellulose and other anti-caking agents that prevent it from melting smoothly. Freshly shredded cheese melts into that glorious, stretchy blanket you’re imagining.
Timing is everything. Start your chili before the fries go in the oven. That way, everything finishes around the same time. Nothing worse than cold chili on hot fries or vice versa.
Layer strategically. Don’t just dump everything in the middle. Spread the fries evenly, spoon the chili in a way that covers most of them, and distribute the cheese across the entire surface. Every bite should have a little bit of everything.
I once tried to rush the chili by cranking the heat too high. It scorched on the bottom and tasted bitter. Low and slow is the way to go. Patience pays off here.
Variations & Adaptations
This recipe is flexible enough to adapt to almost any dietary need or flavor preference. Here are a few variations I’ve tried and loved.
Vegetarian Version: Swap the ground beef for a plant-based crumble or an extra can of black beans. Add a tablespoon of soy sauce or Worcestershire sauce (vegan version) for that umami depth. The texture won’t be identical, but the flavor will still be fantastic.
Spicy Fiesta: If you like heat, add a diced jalapeño with the onions, use hot chili powder instead of regular, and top with fresh serrano slices. My spice-loving friends request this version every time.
Loaded Baked Potato Style: Swap the fries for crispy potato wedges, add crumbled bacon bits to the chili, and top with extra sour cream and chives. It’s a completely different dish but equally addictive.
Keto-Friendly Adaptation: Use zucchini fries or roasted cauliflower florets instead of potato fries. The chili itself is already low-carb if you skip the beans. Top with extra cheese and full-fat sour cream.
Breakfast Version: Top the platter with a fried egg or two and some crumbled breakfast sausage. It sounds weird, but trust me—runny yolk over chili cheese fries is a revelation.
I once made a batch with leftover brisket instead of ground beef. It was incredible. Don’t be afraid to experiment with whatever protein you have on hand.
Serving & Storage Suggestions
This platter is best served immediately, but I’ve learned a few tricks for making it work in different situations.
Serving Temperature: Serve hot, straight from the oven. The cheese should be bubbly and the fries should still have some crunch. If you’re serving at a party, keep the platter on a warming tray or reheat it briefly before guests arrive.
Presentation Tips: Use a black platter for maximum Halloween vibes. Arrange the ghost chips around the edges like they’re guarding the treasure. Sprinkle extra green onions and black olives in a spooky pattern—I like making a spiderweb design with sour cream drizzles.
Complementary Dishes: This platter pairs beautifully with crispy prosciutto-wrapped asparagus bites for a salty contrast, or elegant caviar deviled eggs for something a little more refined. A side of refreshing champagne punch cuts through the richness perfectly.
Storage: If you have leftovers (unlikely, but possible), store the components separately. The fries will get soggy if stored with the chili. Keep the chili in an airtight container in the fridge for up to 4 days. Reheat the fries in a 400°F oven for 5-7 minutes to restore some crunch, then reassemble.
Reheating: Microwave the chili in 30-second bursts, stirring between each. For the full platter experience, reheat everything together in a 350°F oven for 10-15 minutes. The cheese will remelt beautifully.
Flavor Development: The chili actually tastes better the next day. The flavors meld together overnight, making it even richer. If you’re planning ahead, make the chili a day in advance and reheat it before assembling.
Nutritional Information & Benefits
Let’s be honest—this isn’t a health food. But that doesn’t mean it’s devoid of nutritional value. Here’s a rough breakdown per serving (based on 6 servings):
| Nutrient | Amount Per Serving |
|---|---|
| Calories | 520 |
| Protein | 28g |
| Fat | 32g |
| Carbohydrates | 38g |
| Fiber | 6g |
| Sodium | 890mg |
The kidney beans provide a decent amount of fiber and plant-based protein, while the beef offers iron and B vitamins. The cheese adds calcium, and the tomatoes contribute lycopene, an antioxidant linked to heart health. Is it a salad? No. But it’s not empty calories either.
If you’re watching your sodium, use low-sodium canned tomatoes and beans, and go easy on the salt. You can also swap the beef for ground turkey to reduce saturated fat. For a gluten-free option, make sure your fries and broth are certified gluten-free.
Personally, I believe food should be enjoyed without guilt. This platter is a treat—something you make for special occasions. Balance it with lighter meals the rest of the week, and you’re golden.
Conclusion
This easy loaded chili cheese fries Halloween party platter has become my go-to for gatherings, and I think it’s going to become yours too. It’s the kind of recipe that looks impressive without requiring hours in the kitchen, and it feeds a crowd without breaking the bank.
I love how customizable it is. You can make it as mild or as spicy as you want, swap in different proteins, or load it up with whatever toppings your heart desires. The base recipe is solid, but the variations are endless. That’s what makes it so fun to share.
If you make this platter for your Halloween party, I’d love to hear about it. Drop a comment below and tell me how it turned out—did the ghost chips survive? Did anyone fight over the last crispy fry? Share your photos and tag me so I can see your spooky creations. And if you come up with a variation I haven’t tried, definitely let me know. I’m always looking for new ideas.
Go ahead, make this platter. Your guests will thank you, and you’ll wonder why you didn’t try it sooner. Happy Halloween, and happy eating!
Frequently Asked Questions
Can I make the chili ahead of time?
Absolutely. The chili actually tastes better when made a day in advance. Store it in an airtight container in the fridge for up to 4 days, or freeze it for up to 3 months. Reheat gently on the stove before assembling the platter.
What type of fries work best for this recipe?
Shoestring fries are my top choice because they get extra crispy and hold the chili well. Crinkle-cut fries are a close second—they have more surface area for cheese to cling to. Avoid thick steak fries, as they can become soggy before the chili and cheese warm through.
Can I make this vegetarian or vegan?
Yes! Use plant-based ground meat or an extra can of black beans for the protein. For vegan cheese, look for a shreddable brand like Violife or Daiya. Nutritional yeast sprinkled on top adds a cheesy flavor without dairy.
How do I keep the fries crispy?
The key is not to drown them in chili. Spoon the chili over the fries rather than pouring it all at once. Serve immediately after assembling—this platter doesn’t sit well. If you’re worried about sogginess, keep the chili and fries separate and let guests build their own plates.
What if I don’t have a large platter?
No problem. Use two smaller platters or even individual baking dishes. You can also serve the chili and fries separately and let guests assemble their own portions. It’s less dramatic but just as delicious.
Pin This Recipe!
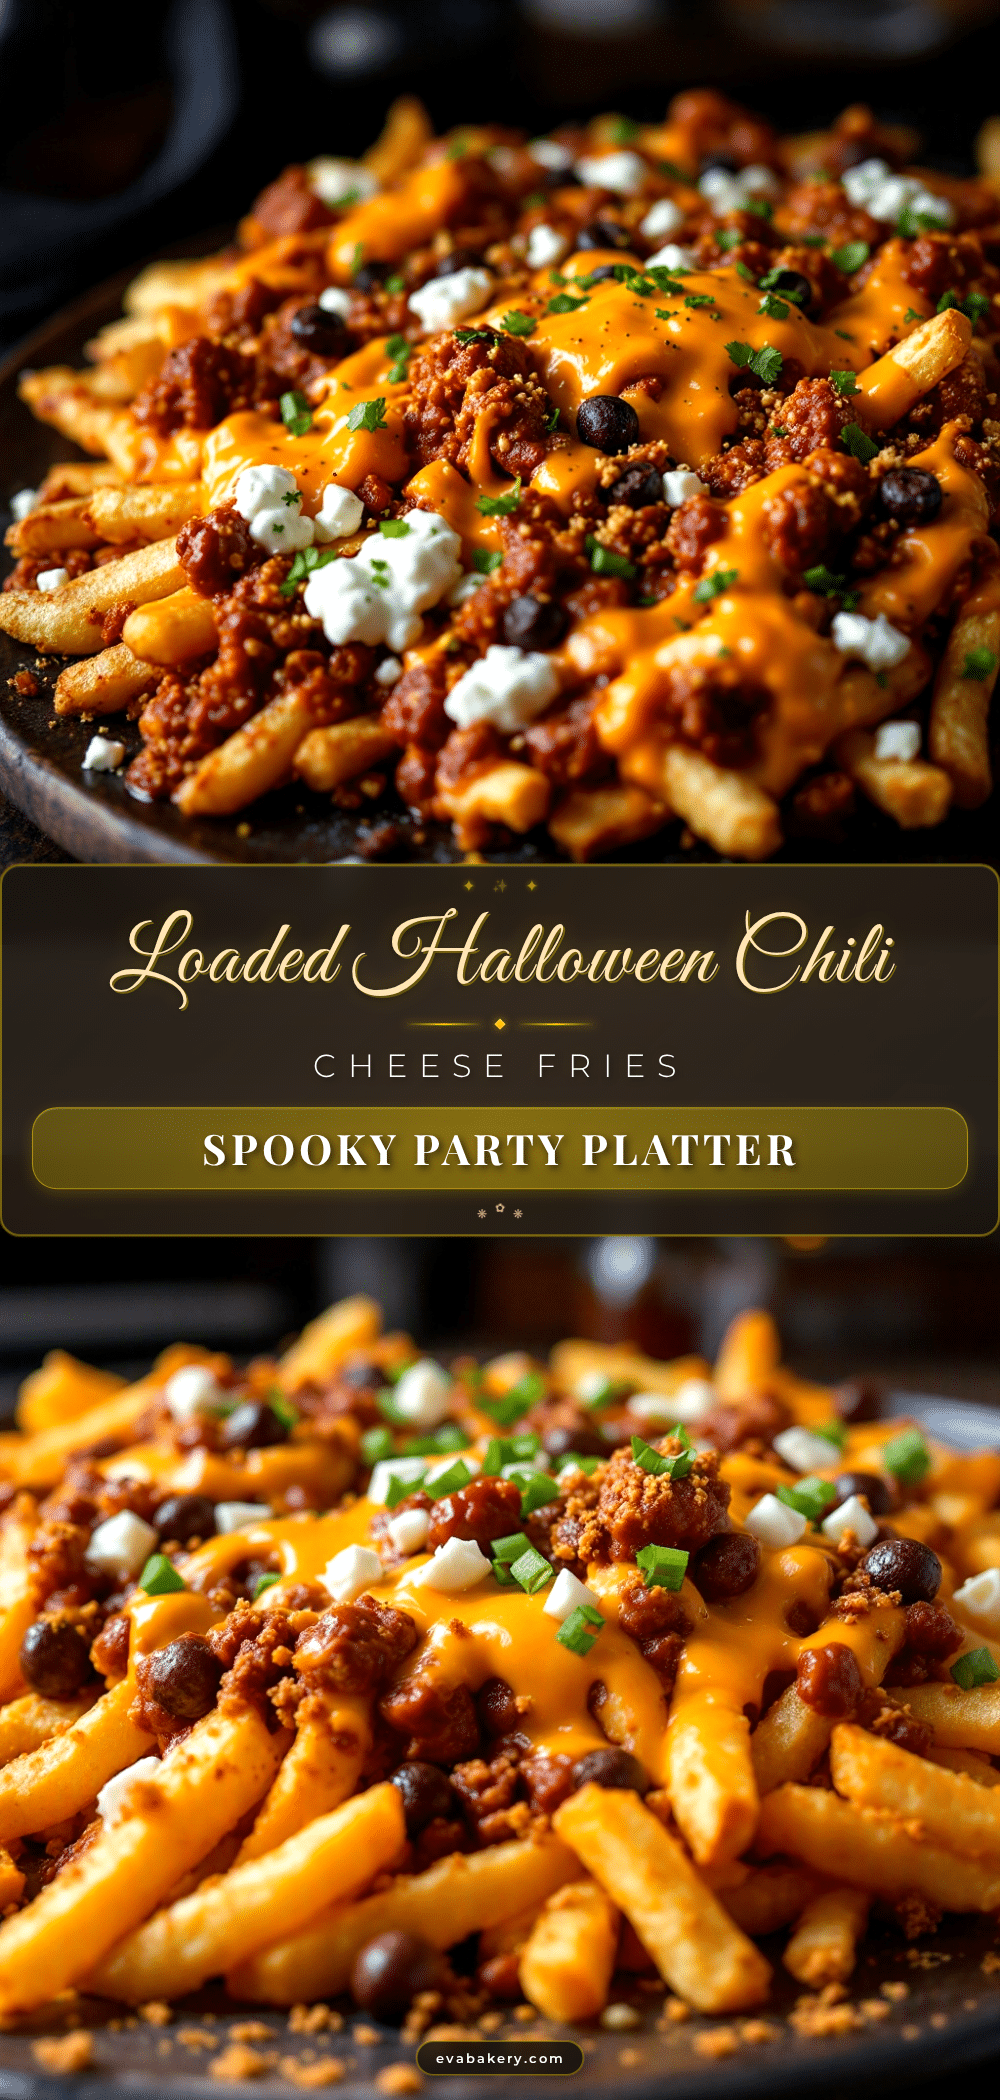
Easy Loaded Chili Cheese Fries: Perfect Halloween Party Treat

This easy loaded chili cheese fries Halloween party platter features crispy fries layered with slow-simmered chili and a mountain of melted cheese, all on a spooky black platter. It’s a shareable, indulgent crowd-pleaser that comes together in about 30 minutes of active work.
- Prep Time: 15 minutes
- Cook Time: 30 minutes
- Total Time: 45 minutes
- Yield: 6 servings 1x
- Category: Appetizer
- Cuisine: American
Ingredients
- 1 pound ground beef (80/20 works best for flavor; drain excess fat if needed)
- 1 medium yellow onion, diced (about 1 cup)
- 3 cloves garlic, minced
- 1 can (15 ounces) diced tomatoes, undrained (fire-roasted preferred)
- 1 can (15 ounces) kidney beans, drained and rinsed
- 2 tablespoons tomato paste
- 1 tablespoon chili powder
- 1 teaspoon ground cumin
- 1/2 teaspoon smoked paprika
- 1/2 teaspoon salt, plus more to taste
- 1/4 teaspoon black pepper
- 1/2 cup beef broth (or water)
- 1 bag (28 ounces) frozen shoestring fries (or crinkle-cut)
- 2 tablespoons olive oil
- 1/2 teaspoon garlic powder
- 1/2 teaspoon smoked paprika
- 2 cups shredded sharp cheddar cheese (freshly shredded)
- 1 cup shredded Monterey Jack cheese
- 1/2 cup sour cream
- 1/4 cup sliced green onions
- 1/4 cup pickled jalapeños (optional)
- 1/4 cup chopped fresh cilantro
- Black olives, sliced
- Ghost-shaped tortilla chips (optional, for decoration)
Instructions
- Preheat oven to 425°F (220°C). Line a large baking sheet with aluminum foil. Spread frozen fries in a single layer. Drizzle with olive oil and sprinkle with garlic powder and smoked paprika. Toss to coat evenly.
- Bake fries for 18-22 minutes, flipping halfway through, until golden brown and crispy. Keep warm in a 200°F oven if needed.
- While fries bake, heat a large skillet or Dutch oven over medium-high heat. Add ground beef and cook for 5-7 minutes, breaking it up, until browned.
- Add diced onion and cook for 3-4 minutes until translucent. Stir in minced garlic and cook for 30 seconds until fragrant.
- Reduce heat to medium. Stir in tomato paste, chili powder, cumin, smoked paprika, salt, and pepper. Cook for 1-2 minutes, stirring constantly.
- Add diced tomatoes (with juices), kidney beans, and beef broth. Bring to a simmer, then reduce heat to low. Let bubble gently for 15-20 minutes, stirring occasionally, until thickened.
- Arrange crispy fries on a serving platter in an even layer. Spoon hot chili evenly over the fries.
- Sprinkle shredded cheddar and Monterey Jack cheese over the top while chili is still hot. Optionally, broil for 1-2 minutes for extra gooeyness.
- Dollop sour cream over the top. Sprinkle with sliced green onions, pickled jalapeños, fresh cilantro, and black olives. Arrange ghost-shaped chips around edges if using.
- Serve immediately while hot and cheese is stretchy.
Notes
Shred your own cheese for best melt. Don’t skip fry seasoning. Watch chili consistency—it should be thick, not watery. Layer strategically so every bite has a bit of everything. Serve immediately for best texture.
Nutrition
- Serving Size: 1 serving (based on
- Calories: 520
- Sugar: 6
- Sodium: 890
- Fat: 32
- Saturated Fat: 12
- Carbohydrates: 38
- Fiber: 6
- Protein: 28
Keywords: loaded chili cheese fries, Halloween party platter, chili cheese fries, easy appetizer, crowd-pleaser, spooky platter


