That first crack of a cheese knife against a walnut, the little crumble of sea salt flakes falling onto a sliver of prosciutto—that sound, the one that says “something good is happening,” still takes me straight to a cramped galley kitchen in a rented beach house, three years ago. I was hosting a small get-together for a few friends, and I’d spent the whole afternoon trying to assemble a proper charcuterie board on a wooden slab that was way too small for my ambitions. Salami kept sliding off the edge, the cheese cubes were sweating, and I was sweating right along with them. It was a mess. A delicious mess, sure, but not the kind of effortless entertaining I had in my head.
That night, after everyone left, I stood over the sink eating the leftover grapes and thought: there has to be a better way. Something that still feels special—cured meats, tangy cheese, a little crunch—but without the anxiety of a board that looks like it lost a fight. Something you can hand to a guest and say, “Here, this is yours.” That’s how these easy mini charcuterie cups were born. They’re not a shortcut. They’re a smarter way to get the same magic, one little cup at a time.
These little cups are my secret weapon for any party now. They solve the problem of the communal board (no more double-dipping, no more awkward reaching) and they let everyone build their own perfect bite. Honestly, they’re the kind of thing that makes you look like you planned everything down to the last detail, when really, you just folded some prosciutto into a cup and called it a day. And that’s exactly the kind of entertaining I can get behind.
Why You’ll Love This Recipe
If you’ve ever spent twenty minutes trying to arrange salami roses while your guests are already three glasses of wine in, you know the struggle. These easy mini charcuterie cups are the answer to that specific kind of party stress. Here’s why they’ve become my go-to for just about every gathering:
- Super Quick to Assemble: We’re talking under 15 minutes from start to finish. No knife skills required, no artistic arrangement needed. Just fill and go.
- Simple Ingredients: You can use whatever you have in the fridge. A block of cheddar, some leftover salami, a handful of almonds—it all works. No fancy grocery trips necessary.
- Perfect for Any Occasion: Game day, book club, birthday parties, holiday brunch, or even a solo movie night. They scale up or down effortlessly.
- Crowd-Pleaser: I’ve served these at parties where people were skeptical at first (a cup of meat and cheese?), and they were the first thing to disappear. Kids love the portability, adults love the customization.
- Unbelievably Delicious: There’s something about having your own little curated cup that makes every bite feel intentional. The combination of salty prosciutto, creamy brie, and a crunchy pistachio is just next-level.
What makes these different from the typical charcuterie board? It’s the portion control and personalization. Each guest gets their own little cup, so there’s no fighting over the last piece of manchego. And let’s be real—there’s no stress about the board looking perfect. You’re just filling cups, and somehow that feels way more manageable than arranging a whole platter. Plus, they’re ridiculously photogenic. You’ll have people asking for the recipe before they even take a bite.
This isn’t just another appetizer. It’s the kind of thing that makes you close your eyes after the first bite and think, “Why didn’t I do this sooner?” It’s comfort food reimagined—elegant, but effortless. Perfect for impressing guests without the stress, or turning a simple snack into something memorable.
What Ingredients You Will Need
This easy mini charcuterie cups recipe uses simple, everyday ingredients to deliver big flavor and satisfying texture without the fuss. The beauty is in the flexibility—you can swap things in and out based on what you have or what’s on sale. But here’s a solid starting point that I’ve tested about a dozen times.
For the Cups (choose 3-4 items from each category):
- Cured Meats:
- Prosciutto (about 4-5 slices per 6 cups) – I like the salty, paper-thin slices from Boar’s Head or Dietz & Watson. They fold beautifully.
- Salami (about 8-10 thin slices) – Genoa salami is classic, but peppered salami adds a nice kick. (use dairy-free milk if needed)
- Pepperoni or soppressata – for a spicier option. (adds richness)
- Cheeses:
- Brie or Camembert (about 2 oz per 6 cups) – cut into small wedges. I recommend President brand for consistent creaminess.
- Cheddar or Gouda (about 2 oz per 6 cups) – cut into small cubes. Sharp white cheddar is my favorite.
- Manchego or Gruyère (about 2 oz per 6 cups) – for a nutty, fancy touch. (look for firm, small-curd cheese for best texture)
- Crunchy Elements:
- Almonds, walnuts, or pistachios (about 1/4 cup total) – I love Marcona almonds for their buttery texture.
- Pita chips, crostini, or crackers (about 6-8 per cup) – I use Milton’s or Mary’s Gone Crackers.
- Pretzel sticks or breadsticks – adds a fun, dippable element.
- Fruits & Spreads:
- Grapes (about 1/4 cup per cup) – red or green, halved if large.
- Dried apricots, figs, or dates (about 2-3 per cup) – adds sweetness.
- Honey, fig jam, or whole-grain mustard (about 1 tsp per cup) – for drizzling or dipping. I love Bonne Maman fig jam.
- Optional Garnishes:
- Fresh rosemary sprigs or thyme – for a pop of green.
- Sea salt flakes – a light sprinkle over prosciutto makes a difference.
- Edible flowers – for a fancy touch (only if you’re feeling extra).
Ingredient Tips: For the best texture, use cheese that’s at room temperature—it’s softer and tastes more flavorful. If you’re using prosciutto, let it sit out for 10 minutes before folding so it doesn’t tear. For a gluten-free option, swap crackers for cucumber rounds or bell pepper strips. And if you’re making these for a crowd, prep everything ahead and assemble right before serving—they hold up beautifully for about an hour at room temperature.
Equipment Needed
You don’t need much for these easy mini charcuterie cups. Here’s what I use:
- Small Cups or Ramekins: I use 6-ounce clear plastic cups for parties (they’re easy to grab and see-through), but any small cup, ramekin, or even a shot glass works. Mason jars are cute too.
- Cheese Knife or Small Paring Knife: For cutting cheese into cubes or wedges. A simple Victorinox paring knife is all you need.
- Cutting Board: A medium-sized wooden or plastic board. I use a John Boos maple board—it’s sturdy and doesn’t slide around.
- Tongs or Small Spoons: For placing ingredients neatly into the cups. I use the OXO Good Grips tongs—they’re spring-loaded and easy to handle.
- Optional but Helpful: A small cookie scoop for portioning nuts or dried fruit. A mini spatula for spreading jam. A serving tray to arrange the cups on.
Budget-Friendly Tip: Don’t have clear cups? Use small paper cups, silicone muffin liners, or even shot glasses. I’ve used everything from espresso cups to mini mason jars—anything small and stable works. Just make sure they’re not too deep, or guests will have to dig around.
Preparation Method
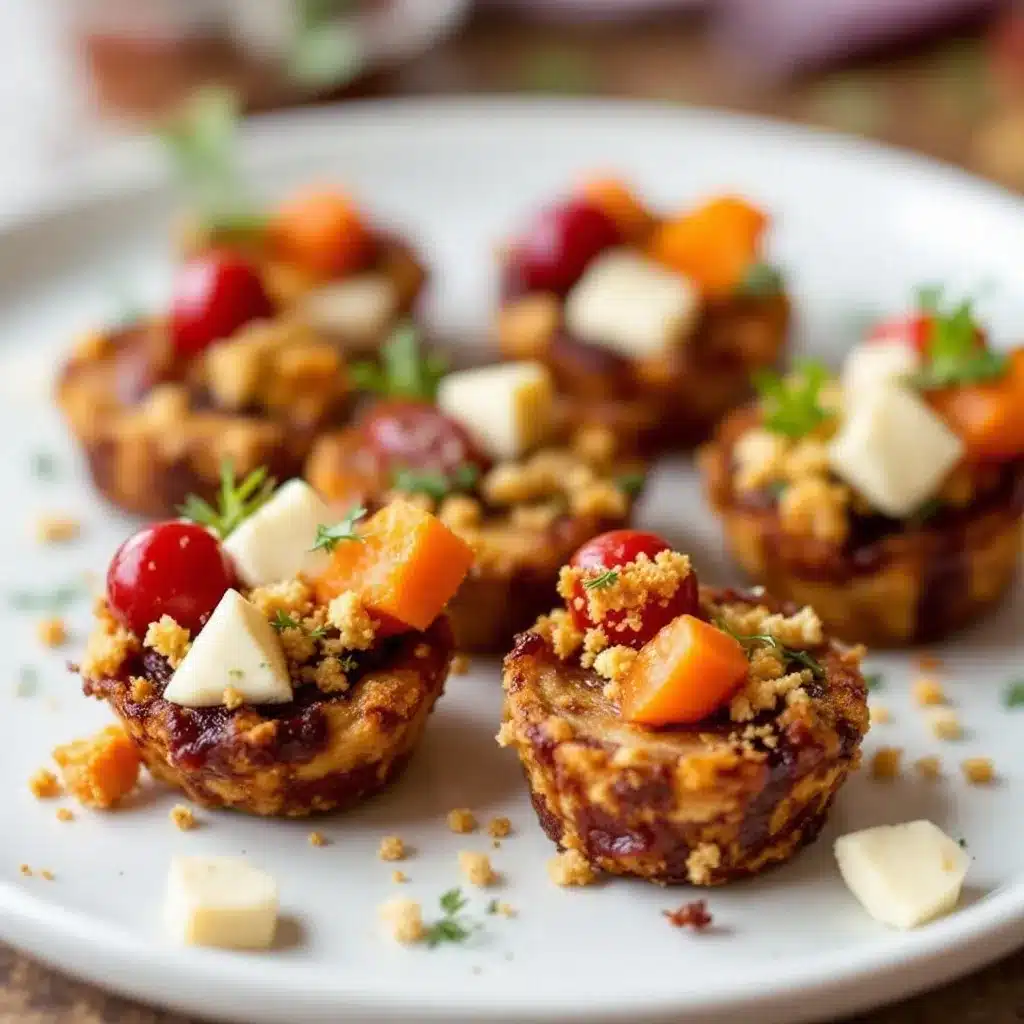
Making these easy mini charcuterie cups is almost embarrassingly simple. Here’s how I do it:
- Prep Your Ingredients (5 minutes):
- Slice your cheese into small cubes (about 1/2-inch) or thin wedges. Aim for 2-3 pieces per cup.
- Fold your prosciutto or salami into small, loose bundles. For prosciutto, I like to fold it in half lengthwise, then fold again into a little ribbon. For salami, fold in half and then roll into a small cone.
- Wash and halve your grapes if they’re large. Dry them well—wet grapes make the cheese slide around.
- Measure out your nuts and dried fruit. About 1 tablespoon of each per cup is plenty.
- If using crackers or crostini, set them aside—you’ll add them last so they stay crunchy.
- Layer the Base (2 minutes):
- Place a small piece of cheese at the bottom of each cup. This acts as a little anchor.
- Add a few nuts or dried fruit on top of the cheese. This creates a stable base for the rest of the ingredients.
- If using a spread (like fig jam or honey), add a small dollop on top of the nuts. This will be a surprise at the bottom—guests love finding it.
- Add the Meats (3 minutes):
- Place one or two folded meat pieces into each cup, tucking them against the sides. You want them to be visible, not buried.
- If using prosciutto, let a little bit hang over the edge for a pretty, ruffled look. It’s okay if it’s messy—that’s part of the charm.
- Add the Cheese & Fruit (3 minutes):
- Place a few more cheese cubes or wedges on top of the meat, spreading them around so they’re visible.
- Add a few grapes or dried fruit pieces. Red and green grapes together look especially nice.
- Top with Crunch (2 minutes):
- Insert a few crackers or crostini upright into the cup, like little flags. This makes them easy to grab and adds height.
- Add a few more nuts on top for texture.
- If using fresh herbs, tuck a small sprig of rosemary or thyme into the side for a pop of green.
- Finish & Serve (1 minute):
- Lightly sprinkle sea salt flakes over the top—just a pinch per cup.
- Arrange the cups on a serving tray or platter. I like to group them in rows of three for a neat look.
- Serve immediately, or refrigerate for up to 30 minutes before serving. (Take them out 10 minutes before guests arrive so the cheese softens.)
Sensory Cues: At the end, you should see a beautiful little landscape of textures—shiny prosciutto, creamy cheese, crunchy nuts, and bright fruit. The cups should look full but not overflowing. If you can see each layer clearly, you’ve done it right. The smell should be a mix of salty meat, tangy cheese, and sweet fruit—exactly what you want at a party.
Personal Tip: I learned the hard way that you need to balance the ingredients. Too much cheese and the cup feels heavy. Too much meat and it’s salty. Aim for a ratio of about 2 parts meat to 2 parts cheese to 1 part crunch to 1 part fruit. That’s the sweet spot.
Cooking Tips & Techniques
These easy mini charcuterie cups are forgiving, but a few tricks make them even better. Here’s what I’ve learned from about a dozen test batches:
Don’t Overfill the Cups. I know it’s tempting to cram everything in, but a crowded cup is hard to eat from. Leave a little space at the top so guests can grab things easily. Think of it like a bouquet—you want it to look full, not stuffed.
Use Room Temperature Cheese. Cold cheese is hard and flavorless. Take your cheese out of the fridge 20-30 minutes before assembling. It’ll be softer, creamier, and way more delicious. I once forgot this step and the brie was like a block of butter—not great.
Layer Strategically. Put the heavier items (like cheese cubes) at the bottom and lighter items (like crackers) on top. This keeps the cup from tipping over and makes it easier to eat. I also like to tuck the prosciutto against the sides so it’s visible—it’s the prettiest part.
Prep Everything First. Chop your cheese, fold your meats, and measure your nuts before you start assembling. It takes 5 minutes and makes the actual assembly feel like a breeze. I’ve done it the other way (cutting as I go) and it takes twice as long.
Use a Variety of Textures. The best cups have a mix of soft (brie), firm (cheddar), crunchy (almonds), and chewy (dried apricots). If everything is the same texture, it gets boring. Aim for at least three different textures per cup.
Watch the Salt. Prosciutto, salami, and cheese are all salty. Don’t go overboard with the sea salt flakes—just a tiny pinch on top. I once salted too heavily and the cups were almost inedible. Learn from my mistake.
Make Ahead Tip: You can assemble these up to 4 hours ahead and keep them in the fridge. Just add the crackers and fresh herbs right before serving so they stay crunchy. If you’re making them the night before, leave out the grapes and add them in the morning—they get soggy overnight.
Variations & Adaptations
These easy mini charcuterie cups are endlessly customizable. Here are a few of my favorite variations:
Mediterranean Version: Swap the prosciutto for roasted red peppers and marinated artichoke hearts. Use feta cheese and kalamata olives instead of brie. Add a drizzle of balsamic glaze on top. This is great for a vegetarian option—I’ve served it at a brunch and everyone loved it.
Sweet & Spicy Version: Use spicy soppressata or pepperoni. Add a slice of fresh jalapeño or a drizzle of hot honey. Pair with sharp cheddar and a few dark chocolate chips for a sweet-spicy-savory combo. This one’s a crowd-pleaser at game day parties.
Low-Carb/Keto Version: Skip the crackers and use cucumber rounds or bell pepper strips instead. Load up on cheese (brie, cheddar, gouda) and meats (prosciutto, salami). Add olives and macadamia nuts for healthy fats. I’ve made this for a friend on keto and she said it was the best party snack she’s had.
Breakfast Charcuterie Cups: Use mini muffins, bacon strips, and cheese cubes. Add a few fresh berries and a dollop of yogurt or honey. Perfect for a brunch spread—I served these at a baby shower and they were gone in 10 minutes.
Kid-Friendly Version: Use mild cheese (like mozzarella or colby jack) and mini pepperoni. Add apple slices (dipped in lemon juice to prevent browning) and pretzel sticks. Skip the nuts if there are allergies. My niece loves these—she calls them “snack cups” and asks for them every time I visit.
Dessert Charcuterie Cups: Use chocolate chips, dried cherries, and shortbread cookies. Add a few mini marshmallows and a drizzle of caramel sauce. Pair with a small piece of brie or goat cheese. This is my personal favorite for movie nights.
Serving & Storage Suggestions
These easy mini charcuterie cups are best served at room temperature, so take them out of the fridge about 10-15 minutes before guests arrive. Arrange them on a large serving tray or wooden board, grouped in rows of three or four. I like to scatter a few extra crackers or nuts around the tray for a more abundant look.
Complementary Dishes: These cups pair beautifully with a refreshing champagne punch for a celebratory vibe. If you’re serving a full spread, try adding some crispy prosciutto-wrapped asparagus bites or a batch of fluffy mini quiches for a heartier option. For drinks, a crisp white wine or a sparkling water with lemon works perfectly.
Storage: If you have leftovers (unlikely, but possible), you can store the cups in the refrigerator for up to 24 hours. Cover them loosely with plastic wrap. The crackers will get soft, but the meat and cheese will be fine. If you want to keep them longer, remove the crackers and fruit, and store the meat and cheese in an airtight container for up to 3 days.
Reheating: These are served cold or at room temperature, so no reheating needed. If the cheese has firmed up in the fridge, let the cups sit at room temperature for 15-20 minutes before serving again.
Flavor Development: The flavors actually meld together nicely after a few hours in the fridge. The prosciutto gets a little more tender, and the cheese absorbs some of the fruit’s sweetness. I actually prefer them after they’ve sat for an hour or two—everything just tastes more cohesive.
Nutritional Information & Benefits
While these easy mini charcuterie cups are more about indulgence than health, they do have some nutritional perks. Here’s a rough estimate for one cup (using a mix of prosciutto, brie, crackers, almonds, and grapes):
- Calories: Approximately 250-300 per cup
- Protein: 12-15 grams (from meat and cheese)
- Fat: 18-22 grams (mostly from cheese and nuts)
- Carbohydrates: 12-15 grams (from crackers, fruit, and nuts)
- Fiber: 2-3 grams (from nuts and fruit)
Health Benefits: The nuts provide healthy fats and protein, which help keep you full. Cheese is a good source of calcium and protein. Grapes and dried fruit offer antioxidants and natural sweetness. Prosciutto and salami are high in protein but also in sodium, so enjoy in moderation.
Dietary Considerations: These cups can be easily adapted for different diets. For a gluten-free option, use gluten-free crackers or cucumber rounds. For a low-carb version, skip the crackers and add extra nuts and cheese. For a vegetarian version, use roasted vegetables and hummus instead of meat. Always check labels for allergens if serving to a crowd.
Personal Note: I don’t count calories when I’m entertaining, but I like knowing that these cups have some redeeming qualities. They’re not just empty carbs—they actually have protein and healthy fats. Plus, the portion control helps people not overdo it. One or two cups is plenty satisfying.
Conclusion
These easy mini charcuterie cups have completely changed the way I entertain. They’re simple enough for a last-minute gathering, but elegant enough for a holiday party. The best part? They make everyone feel special—each guest gets their own little curated cup, and that personal touch makes all the difference.
I love that this recipe is so flexible. You can make it your own by swapping in your favorite meats, cheeses, and fruits. Don’t be afraid to experiment—try a spicy salami with a sweet fig jam, or a creamy brie with a crunchy pistachio. The possibilities are endless, and that’s the fun of it.
I’d love to hear how these turn out for you. Drop a comment below and let me know what combinations you tried, or tag me in your photos if you share them online. And if you’re looking for more party inspiration, check out our full collection of recipes for more effortless entertaining ideas. Happy snacking!
Frequently Asked Questions
Can I make these charcuterie cups ahead of time?
Yes! You can assemble them up to 4 hours ahead and keep them in the fridge. Just add the crackers and fresh herbs right before serving so they stay crunchy. If you’re making them the night before, leave out the grapes and add them in the morning.
What are the best cups to use?
I prefer clear plastic cups (like 6-ounce party cups) because they’re sturdy and let guests see the layers. But you can also use small mason jars, ramekins, shot glasses, or even paper cups. Just make sure they’re stable and not too deep.
Can I make these gluten-free?
Absolutely! Swap the crackers for gluten-free crackers, cucumber rounds, or bell pepper strips. Just check that your meats and cheeses are gluten-free (most are, but always double-check labels).
How many cups should I make per person?
For a party where there are other appetizers, I’d plan on 1-2 cups per person. If these are the main snack, 2-3 cups per person is a good rule of thumb. They’re small but satisfying, so people usually have one or two and then move on.
Can I use different meats and cheeses?
Definitely! That’s the beauty of this recipe. Swap prosciutto for ham, salami for pepperoni, brie for cheddar—whatever you have. Just try to keep a mix of textures and flavors. A soft cheese, a hard cheese, a salty meat, and a sweet fruit is a winning combo.
Pin This Recipe!
Easy Mini Charcuterie Cups: Perfect Party Appetizer

These easy mini charcuterie cups are the perfect party appetizer—quick to assemble, customizable, and mess-free. Each guest gets their own little cup filled with cured meats, cheese, crunchy nuts, and fresh fruit, making entertaining effortless and elegant.
- Prep Time: 15 minutes
- Cook Time: 0 minutes
- Total Time: 15 minutes
- Yield: 6 servings 1x
- Category: Appetizer
- Cuisine: American
Ingredients
- 4–5 slices prosciutto (per 6 cups)
- 8–10 thin slices salami (Genoa or peppered)
- Pepperoni or soppressata (optional, for spicier option)
- 2 oz brie or Camembert (per 6 cups), cut into small wedges
- 2 oz cheddar or Gouda (per 6 cups), cut into small cubes
- 2 oz Manchego or Gruyère (per 6 cups), cut into small cubes
- 1/4 cup almonds, walnuts, or pistachios (total)
- 6–8 pita chips, crostini, or crackers (per cup)
- Pretzel sticks or breadsticks (optional)
- 1/4 cup grapes (per cup), halved if large
- 2–3 dried apricots, figs, or dates (per cup)
- 1 tsp honey, fig jam, or whole-grain mustard (per cup)
- Fresh rosemary sprigs or thyme (for garnish)
- Sea salt flakes (for garnish)
- Edible flowers (optional, for garnish)
Instructions
- Prep your ingredients: Slice cheese into small cubes (about 1/2-inch) or thin wedges (2-3 pieces per cup). Fold prosciutto or salami into small, loose bundles. Wash and halve grapes if large; dry well. Measure out nuts and dried fruit (about 1 tablespoon each per cup). Set aside crackers or crostini.
- Layer the base: Place a small piece of cheese at the bottom of each cup. Add a few nuts or dried fruit on top. If using a spread (fig jam or honey), add a small dollop on top of the nuts.
- Add the meats: Place one or two folded meat pieces into each cup, tucking them against the sides. Let a little prosciutto hang over the edge for a ruffled look.
- Add the cheese and fruit: Place a few more cheese cubes or wedges on top of the meat. Add a few grapes or dried fruit pieces.
- Top with crunch: Insert a few crackers or crostini upright into the cup. Add a few more nuts on top. Tuck a small sprig of rosemary or thyme into the side for garnish.
- Finish and serve: Lightly sprinkle sea salt flakes over the top. Arrange cups on a serving tray. Serve immediately, or refrigerate for up to 30 minutes before serving (take out 10 minutes before guests arrive to soften cheese).
Notes
For best results, use room temperature cheese (take out 20-30 minutes before assembling). Balance ingredients with a ratio of 2 parts meat to 2 parts cheese to 1 part crunch to 1 part fruit. Don’t overfill cups—leave space at the top. Can be assembled up to 4 hours ahead; add crackers and fresh herbs just before serving. For gluten-free, swap crackers for cucumber rounds or bell pepper strips.
Nutrition
- Serving Size: 1 cup
- Calories: 275
- Sugar: 6
- Sodium: 650
- Fat: 20
- Saturated Fat: 8
- Carbohydrates: 13
- Fiber: 2
- Protein: 13
Keywords: mini charcuterie cups, party appetizer, easy appetizer, charcuterie board alternative, individual charcuterie, prosciutto cups, cheese cups, no-cook appetizer


