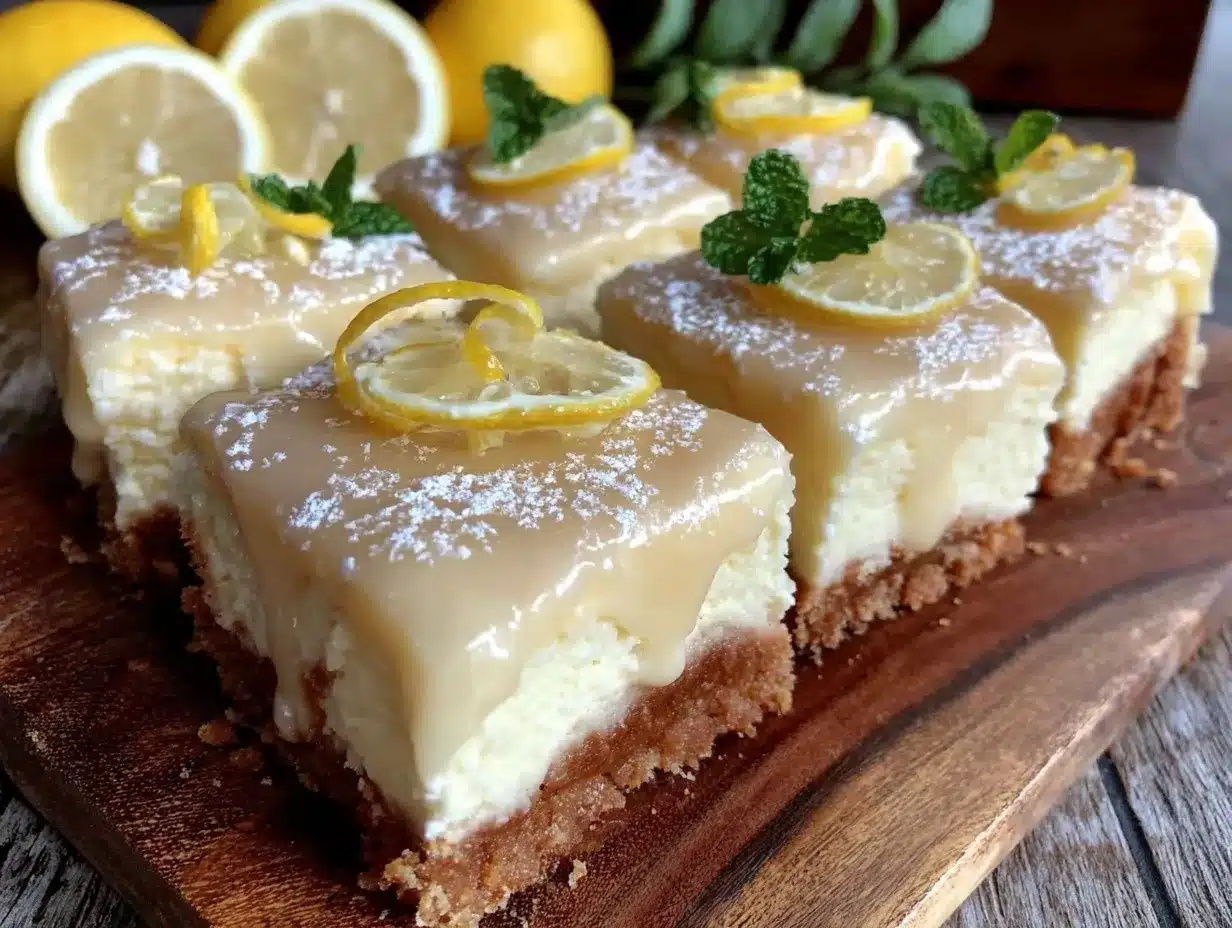
“Could you grab those lemon bars from the fridge?” my friend’s voice called out just as I was about to sink into the couch after a long day. Honestly, I wasn’t expecting much when I whipped up this Easy No-Bake Lemon Cheesecake Bars with Zesty Glaze—just a quick fix for a last-minute hangout. But that first tangy bite, creamy and perfectly balanced with a zesty lemon kick, completely changed the game. It’s funny how sometimes the best recipes sneak up on you, like this one did during a chaotic week when baking felt like an impossible task.
I’ve made these bars a few times since that evening—sometimes late at night when I needed a little sweet reset, other times for casual get-togethers where everyone kept asking for the recipe. The no-bake aspect is a true lifesaver, especially when the kitchen feels like a sauna in the summer. And the glaze? It adds just the right pop of brightness without overpowering the silky cheesecake layer. This recipe stuck with me because it’s the kind of treat that feels fancy but doesn’t demand hours or a million ingredients.
So, if you’re looking for a dessert that’s refreshingly simple yet impressively delicious, this recipe’s quietly waiting to become your new favorite. No fuss, just that perfect lemony zing that makes you pause and savor every bite.
Why You’ll Love This Recipe
Having tested and retested this recipe in my own kitchen (and shared it with plenty of friends), I can say these lemon cheesecake bars bring a lot to the table for such an effortless dessert. Here’s why they’ve become a staple for me:
- Quick & Easy: Comes together in under 30 minutes with no oven time, ideal for busy summer afternoons or unexpected guests.
- Simple Ingredients: No need for specialty stores—most of these are pantry staples or easy to find at any grocery.
- Perfect for Summer: Light, refreshing, and cool—just the right pick-me-up when it’s hot outside.
- Crowd-Pleaser: Kids love it, adults rave about it, and it’s a hit at potlucks or casual dinners.
- Unbelievably Delicious: The creamy texture combined with the bright lemon glaze makes every bite feel indulgent.
What sets this recipe apart is the balance between sweet and tart, plus the no-bake technique that keeps it stress-free. Instead of just dumping lemon juice in, the glaze is carefully whipped up to add that zing without making the bars soggy. It’s a subtle detail I learned after a few trial runs and now wouldn’t skip for anything. Honestly, it’s the kind of cheesecake bar that makes you close your eyes after the first bite—comfort food with a fresh twist.
Besides, if you’re planning a summer gathering, pairing these bars with a sparkling drink like the refreshing champagne punch makes for a delightful combo that’s both festive and fuss-free.
What Ingredients You Will Need
This recipe uses simple, wholesome ingredients to deliver bold flavors and a satisfying texture without any fuss. Most are standard pantry staples, and the lemon elements bring a seasonal brightness that’s easy to swap with fresh or bottled juice depending on what you have.
- For the Crust:
- 1 ½ cups graham cracker crumbs (about 10 full sheets) – I prefer using Honey Maid for a nice balance of sweetness
- 6 tablespoons unsalted butter, melted (adds richness and helps the crust hold together)
- 2 tablespoons granulated sugar (optional, for a touch of extra sweetness)
- For the Cheesecake Layer:
- 16 ounces (450g) cream cheese, softened (room temperature is key here for smooth mixing)
- ½ cup powdered sugar (for sweetness without grit)
- 1 teaspoon vanilla extract (adds depth to the cream cheese flavor)
- 1 cup heavy cream, cold (helps achieve that fluffy, airy texture when whipped)
- 2 tablespoons fresh lemon juice (use Meyer lemons if available for a sweeter, less acidic taste)
- 1 teaspoon lemon zest (finely grated, for that extra punch of lemon aroma)
- For the Zesty Glaze:
- ½ cup powdered sugar
- 2 tablespoons fresh lemon juice
- 1 teaspoon lemon zest
- 1 teaspoon honey or light corn syrup (optional, to give the glaze a nice sheen)
Feel free to swap the heavy cream with coconut cream to make a dairy-free version, or use gluten-free graham crackers if you need a gluten-free dessert option. Also, if fresh lemons aren’t handy, bottled lemon juice works fine—just avoid the ones with added preservatives for the best flavor.
Equipment Needed
- 8×8-inch (20×20 cm) square baking pan – I like using a glass one so you can see the layers, but metal works fine too.
- Mixing bowls – one large for the cream cheese and another for whipping cream.
- Electric mixer or stand mixer – makes whipping the cream and mixing the cheesecake layer much easier and fluffier.
- Spatula – for folding and spreading the layers evenly.
- Zester or fine grater – essential for fresh lemon zest to get that aromatic punch.
- Measuring cups and spoons – for precise ingredient amounts.
If you don’t have an electric mixer, a sturdy whisk works, but it’ll take more elbow grease to get the cream to stiff peaks. For those on a budget, a hand mixer is a great alternative to a stand mixer and takes up less space.
Preparation Method
- Prepare the crust: In a medium bowl, combine 1 ½ cups graham cracker crumbs, 6 tablespoons melted butter, and 2 tablespoons sugar (if using). Stir until the crumbs are evenly coated and resemble wet sand. Press this mixture firmly into the bottom of your 8×8-inch pan, making sure to pack it down well—this helps prevent crumbling later. Pop it in the fridge while you prepare the filling (about 10 minutes).
- Make the cheesecake layer: In a large bowl, beat 16 ounces softened cream cheese with ½ cup powdered sugar and 1 teaspoon vanilla extract until smooth and creamy (about 2-3 minutes). Add 2 tablespoons fresh lemon juice and 1 teaspoon lemon zest, mixing just until blended.
- Whip the cream: In a separate chilled bowl, whip 1 cup cold heavy cream to stiff peaks. This usually takes around 3-5 minutes with an electric mixer on medium-high speed. Be careful not to overwhip, or it’ll become grainy.
- Fold the whipped cream: Gently fold the whipped cream into the cream cheese mixture using a spatula. Go slow and use a light hand so you keep the airy texture intact. The filling should be smooth, fluffy, and spreadable.
- Assemble the bars: Pour the cheesecake layer over the chilled crust and spread evenly with a spatula. Smooth the top and cover the pan with plastic wrap. Refrigerate for at least 4 hours or overnight to let it set properly.
- Prepare the zesty glaze: Whisk together ½ cup powdered sugar, 2 tablespoons fresh lemon juice, 1 teaspoon lemon zest, and 1 teaspoon honey until smooth and glossy. The glaze should be pourable but not runny.
- Glaze and serve: Once the cheesecake layer is firm, drizzle or spread the lemon glaze on top. Return to the fridge for another 15-20 minutes to let the glaze firm up slightly. Cut into 12 squares and serve chilled.
Troubleshooting tip: If your cream cheese has any lumps, beat it a little longer before adding other ingredients. Also, pressing the crust firmly and chilling it well helps avoid a crumbly bottom. The glaze consistency can be adjusted by adding a bit more powdered sugar if too thin or a splash more lemon juice if too thick.
Cooking Tips & Techniques
Getting the texture right in no-bake cheesecake bars can be a bit tricky, but here’s what I’ve learned from countless batches:
- Softened cream cheese is a must: I usually leave mine out for 30-40 minutes before starting. Cold cream cheese will give you lumps and a tough time mixing.
- Whip the cream cold: Chilling the bowl and whisk helps the cream reach stiff peaks faster and improves volume.
- Folding technique matters: Use a gentle folding motion instead of stirring to keep the filling light and airy. You want to keep the air in, not knock it out.
- Chill time is key: Don’t rush the refrigeration. The bars need at least 4 hours to set properly; otherwise, they’ll be too soft to cut cleanly.
- Fresh lemon zest makes a difference: It adds a bright aroma that bottled juice alone can’t provide—definitely worth the extra step.
One time, I tried skipping the glaze, thinking the lemon in the filling was enough, but the bars felt a bit flat. Adding that zesty glaze really brings everything together, like the final puzzle piece. Also, multitasking by prepping the crust and whipping cream simultaneously saves a surprising amount of time.
Variations & Adaptations
This dessert is pretty flexible, so you can tweak it to suit your tastes or dietary needs:
- Berry Twist: Add a layer of fresh blueberries or raspberries on top of the cheesecake layer before chilling for a colorful summer upgrade.
- Gluten-Free Option: Swap graham crackers for gluten-free cookies or almond flour crust for a nutty flavor.
- Dairy-Free Version: Use coconut cream instead of heavy cream and dairy-free cream cheese alternatives. The lemon flavor still shines through beautifully.
- Herbal Note: Add a teaspoon of finely chopped fresh basil or mint to the glaze for an unexpected but delightful herbaceous pop.
Once, I tried a version with a drizzle of champagne glaze on top for a party, and it was an instant crowd favorite—you know, that subtle sparkle that feels celebratory without being over the top.
Serving & Storage Suggestions
These lemon cheesecake bars are best served chilled straight from the fridge, especially on warm days when you want something cool and refreshing. For presentation, a light dusting of powdered sugar or a few thin lemon slices on top adds a pretty touch.
They pair wonderfully with light beverages like iced tea, sparkling lemonade, or even the sparkling champagne punch I mentioned earlier—makes for a perfect summer combo.
To store, cover the bars tightly with plastic wrap or transfer them to an airtight container. They keep well in the fridge for up to 4 days. If you want to keep them longer, you can freeze the unglazed bars for up to 2 months (just thaw overnight in the fridge before glazing and serving).
Reheating isn’t necessary, but if you like a slightly softer texture, let them sit at room temperature for 10-15 minutes before serving. The flavors actually mellow and meld beautifully the next day, so making them ahead is a smart move.
Nutritional Information & Benefits
Each bar is roughly 220 calories, with about 15 grams of fat and 18 grams of carbs. The cream cheese provides a good dose of calcium and protein, while the lemon juice adds vitamin C, which is great for immunity and skin health.
This dessert is naturally gluten-containing unless you swap the crust, and contains dairy. If you’re watching sugar intake, reducing the powdered sugar in the glaze is an easy tweak. The use of fresh lemon juice and zest means you’re getting bright, real citrus flavor without artificial additives.
From a wellness perspective, it’s a treat that feels indulgent but can fit into a balanced diet, especially when enjoyed in moderation during warm weather or special occasions.
Conclusion
The Easy No-Bake Lemon Cheesecake Bars with Zesty Glaze have quietly become my go-to dessert for all those moments when I want something special but can’t be bothered with the oven. Their creamy, tangy charm makes them stand out, and the no-bake method means less stress and more time to relax or entertain.
Feel free to mix things up by adding seasonal fruit, trying dairy-free versions, or even pairing them with a crisp drink like the crispy prosciutto-wrapped asparagus bites for a full summer spread. This recipe is flexible enough to suit your mood and your pantry, which is why it’s stuck with me and why I’m confident it’ll find a spot in your dessert lineup too.
Give it a try, tweak it to your liking, and let me know how your version turns out—I’m always curious how other cooks make it their own!
Frequently Asked Questions
Can I make these lemon cheesecake bars ahead of time?
Absolutely! They actually taste better after chilling overnight. Just cover tightly and keep in the fridge until ready to serve.
What can I use instead of graham cracker crumbs?
You can use digestive biscuits, vanilla wafers, or gluten-free cookie crumbs depending on your preference or dietary needs.
Is it possible to freeze these bars?
Yes, freeze the unglazed bars wrapped well for up to 2 months. Thaw in the fridge overnight before adding the glaze and serving.
Can I use bottled lemon juice instead of fresh?
While fresh lemon juice and zest give the best flavor, bottled lemon juice works in a pinch. Just choose a high-quality, preservative-free brand.
How do I get the cheesecake filling extra smooth?
Make sure your cream cheese is fully softened before mixing, and beat it thoroughly to break up lumps. Also, gently fold in whipped cream instead of stirring vigorously to keep it light and creamy.
Pin This Recipe!

Easy No-Bake Lemon Cheesecake Bars with Zesty Glaze
A quick and refreshing no-bake lemon cheesecake bars recipe featuring a creamy cheesecake layer and a bright, zesty lemon glaze—perfect for summer and easy entertaining.
- Prep Time: 20 minutes
- Cook Time: 0 minutes
- Total Time: 4 hours 20 minutes
- Yield: 12 servings 1x
- Category: Dessert
- Cuisine: American
Ingredients
- 1 ½ cups graham cracker crumbs (about 10 full sheets)
- 6 tablespoons unsalted butter, melted
- 2 tablespoons granulated sugar (optional)
- 16 ounces cream cheese, softened
- ½ cup powdered sugar
- 1 teaspoon vanilla extract
- 1 cup heavy cream, cold
- 2 tablespoons fresh lemon juice
- 1 teaspoon lemon zest
- ½ cup powdered sugar (for glaze)
- 2 tablespoons fresh lemon juice (for glaze)
- 1 teaspoon lemon zest (for glaze)
- 1 teaspoon honey or light corn syrup (optional, for glaze)
Instructions
- Prepare the crust: In a medium bowl, combine graham cracker crumbs, melted butter, and sugar (if using). Stir until crumbs are evenly coated and resemble wet sand. Press firmly into the bottom of an 8×8-inch pan. Refrigerate for about 10 minutes.
- Make the cheesecake layer: Beat softened cream cheese with powdered sugar and vanilla extract until smooth and creamy (2-3 minutes). Add lemon juice and lemon zest, mixing until blended.
- Whip the cream: In a separate chilled bowl, whip cold heavy cream to stiff peaks (3-5 minutes).
- Fold the whipped cream gently into the cream cheese mixture until smooth and fluffy.
- Assemble the bars: Pour cheesecake layer over chilled crust and spread evenly. Cover with plastic wrap and refrigerate for at least 4 hours or overnight.
- Prepare the zesty glaze: Whisk powdered sugar, lemon juice, lemon zest, and honey until smooth and glossy.
- Glaze and serve: Drizzle or spread glaze over the set cheesecake layer. Refrigerate for another 15-20 minutes to firm up. Cut into 12 squares and serve chilled.
Notes
Use softened cream cheese for smooth mixing. Chill the bowl and whisk for whipping cream to stiff peaks. Fold whipped cream gently to keep airy texture. Refrigerate bars at least 4 hours to set properly. Adjust glaze consistency by adding powdered sugar or lemon juice as needed. Coconut cream and dairy-free cream cheese can be used for a dairy-free version. Gluten-free graham crackers can be substituted for gluten-free option.
Nutrition
- Serving Size: 1 bar (1/12th of rec
- Calories: 220
- Fat: 15
- Carbohydrates: 18
Keywords: no-bake, lemon cheesecake bars, summer dessert, easy dessert, lemon glaze, cheesecake bars, no oven dessert


