The container was empty before I even walked through the door. My kid, who usually picks at their food, had scraped the last bit of cream cheese off the tortilla edge. That was the third time that week. They didn’t just ask for the recipe; they demanded it be made again the very next day. I was honestly surprised. I’ve made my fair share of packed lunches over the years, and most end up in the trash or traded for a granola bar. But these pinwheels are different. They’ve become the holy grail of our afternoon snack routine.
It started because I was tired. Tired of the daily lunchbox puzzle. Tired of watching food get soggy by 2 PM. I needed something that looked cute, tasted good, and didn’t require a culinary degree to assemble. I grabbed some thin tortillas, sliced turkey, and whatever cheese was left in the fridge. I rolled it up, chilled it, and sliced it. Simple.
Now, it’s the only thing they ask for. I don’t know if it’s the spiral shape or just the combo of salty turkey and mild cheddar, but it works. It’s a small win in a chaotic household. And honestly, that’s all I’m aiming for these days. Just a little bit of peace, wrapped in a tortilla.
Why You’ll Love This Recipe
Let’s face it, packing lunch is hard work. You want it to be nutritious, but you also want it to be fun. These easy turkey and cheese pinwheel lunchbox wraps hit that sweet spot perfectly. I’ve tested this recipe with different cheeses and meats for months, and this specific combination is the winner. It’s not just about taste; it’s about the practical side of feeding humans who are always in a rush.
Here is why this recipe stays in the rotation:
- Quick & Easy: This comes together in under 5 minutes. Seriously. I’m not exaggerating. It’s perfect for busy weeknights or last-minute cravings when you realize you forgot to prep lunch the night before.
- Simple Ingredients: No fancy grocery trips needed. You likely already have everything in your kitchen. Tortillas, deli meat, cheese, and a spread. That’s it. No obscure spices or hard-to-find items.
- Perfect for Lunchboxes: Great for school lunches, office snacks, or picnic days. They hold up well and don’t make a mess like loose sandwiches do.
- Crowd-Pleaser: Always gets rave reviews from kids and adults alike. Even my pickiest eater, who refuses to eat anything green, devours these.
- Unbelievably Delicious: The texture and flavor combo is next-level comfort food. The cream cheese adds a creamy richness that ties the salty turkey and sharp cheese together beautifully.
What makes this different from a regular roll-up? It’s the presentation. The spiral looks festive and fun, which makes eating it feel like a treat rather than a chore. It’s comfort food reimagined—simple, fast, but with the same soul-soothing satisfaction. It’s perfect for impressing guests without stress, or turning a simple meal into something memorable. I’ve tried adding veggies, but sometimes less is more. This version is reliable.
What Ingredients You Will Need
This recipe uses simple, wholesome ingredients to deliver bold flavor and satisfying texture without the fuss. The beauty of these pinwheels is that they are a canvas. You can swap ingredients based on what you have, but the core components remain the same. I recommend using high-quality deli turkey for better flavor, as some cheaper brands can be overly salty or dry.
Here is what you need to gather:
- Flour Tortillas (8-inch): You need thin, flexible tortillas. Large flour tortillas are best because they roll easier without cracking. I prefer brands like La Tortilla Factory for their softness. If you need gluten-free options, look for rice-based tortillas, but be careful as they can be brittle.
- Sliced Turkey Breast: Go for roasted turkey breast. It has a better texture than fried turkey. Aim for about 8 to 10 slices. Make sure they are thin enough to layer evenly. If the slices are too thick, the roll will be too bulky.
- Shredded Cheddar Cheese: Sharp cheddar adds the best flavor punch. Mild cheddar is good for kids, but sharp keeps it interesting. About one cup of shredded cheese is perfect. Pre-shredded cheese works, but block cheese shredded at home melts and sticks better.
- Cream Cheese: This is the secret weapon. It acts as the glue and adds creaminess. Use full-fat softened cream cheese for the best spreadability. Light cream cheese can be crumbly and hard to spread evenly.
- Butter (Optional): A tiny bit of softened butter mixed with the cream cheese adds richness. It’s not mandatory, but it elevates the flavor profile slightly.
- Herbs (Optional): Fresh chives or dried dill add a nice touch. If you have them, sprinkle a little on top. If not, skip it. The basic version is still great.
You can substitute the turkey with chicken or ham if you prefer. For the cheese, Swiss or provolone work well too. Just keep in mind that stronger cheeses might overpower the mild turkey. The key is balance. Keep the ingredients fresh and at room temperature before assembling to ensure a smooth roll.
Equipment Needed
You don’t need much to make these, which is part of the appeal. Here is what you’ll need to have on hand:
- Sharp Chef’s Knife: This is crucial. A dull knife will squish the tortilla and tear the fillings. You want a clean cut to get nice, tight spirals. I use my 8-inch chef’s knife for this. Keep it sharp.
- Cutting Board: A large, stable cutting board is helpful. If your board is too small, the tortilla will hang off the edge, making slicing difficult. Plastic boards are easy to clean, but wood is gentler on knives.
- Plastic Wrap: You need plastic wrap to roll the tortilla tightly. This step is non-negotiable for getting clean slices. Without it, the pinwheels will unravel in the fridge. Use standard cling film.
- Bowl for Spreading: A small mixing bowl to soften the cream cheese. If you don’t have one, you can soften it on the counter for 15 minutes.
- Refrigerator: You need space in the fridge to chill the rolls. This takes at least 30 minutes, so plan accordingly. If you’re in a huge rush, you can freeze them for 15 minutes, but the fridge is better.
If you don’t have a sharp knife, ask your local butcher to sharpen it or buy a new one. It’s worth the investment. For the plastic wrap, any brand works. I usually keep a roll in the fridge door for easy access. No special gadgets are needed here. Keep it simple.
Preparation Method
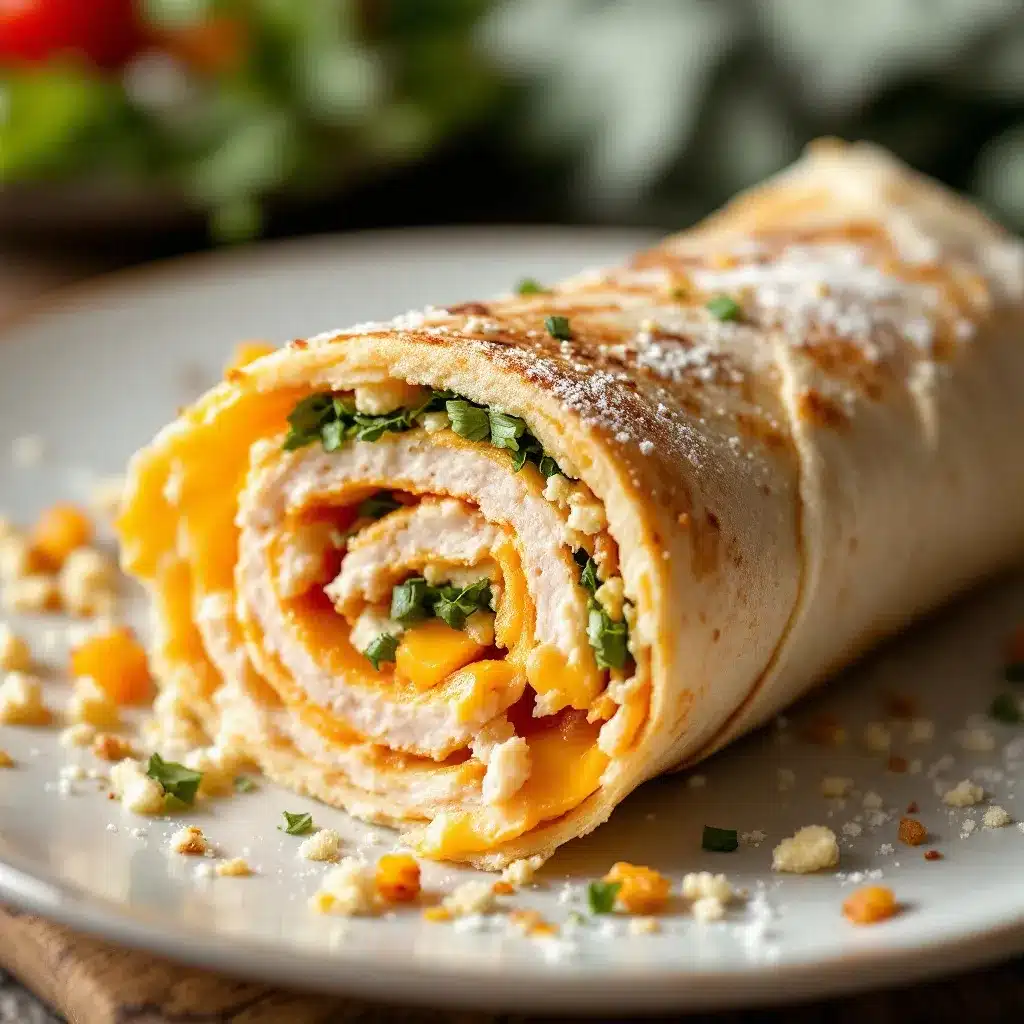
Making these pinwheels is straightforward, but technique matters. Follow these steps carefully to ensure you get perfect spirals every time.
- Soften the Cream Cheese: Take your cream cheese out of the fridge. Let it sit on the counter for about 15 minutes until it is soft enough to spread. If you microwave it, do so in short bursts to avoid melting it completely. You want it pliable, not liquid. This takes about 15 minutes of prep time.
- Lay Out the Tortillas: Place a tortilla on your cutting board. If you are making multiple, lay them side by side. Make sure the surface is clean and dry. Any moisture will make the tortilla soggy. Take your time here.
- Spread the Cream Cheese: Using a butter knife or small spatula, spread a thin, even layer of cream cheese over the entire tortilla. Leave a small border at the very edge so it doesn’t ooze out when rolling. The layer should be about 1/8 inch thick. This takes about 2 minutes.
- Layer the Turkey: Place the turkey slices over the cream cheese. Overlap them slightly so there are no gaps. You want full coverage. If the slices are large, you can trim them to fit. This step takes about 3 minutes.
- Add the Cheese: Sprinkle the shredded cheddar cheese evenly over the turkey. Don’t go overboard with the cheese, or it will be hard to slice. A light, even dusting is best. This takes about 1 minute.
- Roll Tightly: Start from one edge and roll the tortilla up tightly. Use your fingers to tuck the fillings in as you roll. It should feel firm. Once rolled, use plastic wrap to wrap the log tightly. Twist the ends like a candy wrapper. This is the most important step. It takes about 2 minutes.
- Chill: Place the wrapped rolls in the fridge. Let them chill for at least 30 minutes. This firms up the cream cheese and makes slicing much easier. Do not skip this step. You can chill them for up to 24 hours.
- Slice: Remove the plastic wrap. Using a sharp knife, slice the roll into 1-inch thick pinwheels. Wipe the knife between cuts if needed to keep the shapes clean. This takes about 3 minutes.
Total time is about 10 minutes of active work plus chilling time. The result is neat, tidy, and delicious.
Cooking Tips & Techniques
There are a few tricks I’ve learned over time to make these pinwheels even better. First, don’t overload the tortilla. It’s tempting to pile on the ingredients, but too much filling will cause the roll to burst open. Less is more.
Another tip is to use a serrated knife if your chef’s knife isn’t sharp enough. The teeth can grip the tortilla better. But a sharp chef’s knife is ideal. I’ve ruined many a roll with a dull blade, and it’s frustrating. Always test your knife on a piece of bread if you’re unsure.
Timing is everything. If you slice the pinwheels too soon after rolling, they will be messy. Patience pays off. Let them chill until they are firm to the touch. If you’re short on time, put them in the freezer for 15 minutes. The freezer works faster than the fridge, but watch them closely so they don’t freeze solid.
For consistency, try to keep the thickness of each slice uniform. This ensures they cook (if you’re heating them) or look uniform in the lunchbox. I usually measure with my eye, but you can use a ruler if you want to be precise. It’s not necessary, but it helps with presentation.
Also, consider the humidity. If you live in a humid area, your tortillas might be softer. In that case, use a bit less cream cheese to prevent sogginess. Conversely, in dry climates, your tortillas might crack. In that case, microwave them for 10 seconds to soften them before rolling. These small adjustments can make a big difference.
Variations & Adaptations
While the basic turkey and cheese version is a classic, you can twist this recipe to suit different tastes or dietary needs. Here are a few variations I’ve tried:
- Veggie-Packed: Add thin slices of cucumber, bell peppers, or spinach. The veggies add crunch and freshness. Just make sure to pat them dry first to avoid watery pinwheels. This is great for adding nutrients.
- Spicy Kick: Swap the cheddar for pepper jack cheese. Add a slice of jalapeño or a dash of hot sauce to the cream cheese. This is perfect for those who like a bit of heat. It changes the flavor profile completely.
- Herb-Infused: Mix chopped fresh herbs like dill, chives, or parsley into the cream cheese. This adds a fresh, aromatic flavor that pairs well with the turkey. It’s a subtle change but makes a big impact.
- Gluten-Free: Use gluten-free tortillas. Look for ones that are flexible and don’t crack when rolled. Rice-based or almond flour tortillas work well. Just be gentle when rolling.
I’ve also tried using leftover roast beef or ham instead of turkey. Both work well, but turkey is the lightest option. For a vegetarian version, swap the turkey for hummus and roasted vegetables. The possibilities are endless. Just keep the core technique the same.
Serving & Storage Suggestions
These pinwheels are best served chilled. They are perfect for lunchboxes, picnics, or party platters. Arrange them on a platter with a side of mustard or ranch dressing for dipping. They look beautiful when arranged in a circle or scattered randomly.
For storage, keep them in an airtight container in the fridge. They will stay fresh for up to 3 days. If you make a large batch, you can freeze the whole rolls. Wrap them tightly in plastic wrap and then in foil. They can be frozen for up to 1 month. Thaw them in the fridge overnight before slicing.
When reheating, these are best eaten cold. If you want them warm, microwave them for 10-15 seconds. Be careful not to overheat, or the tortilla will become chewy. They are not meant to be toasted.
The flavors develop over time, so they taste even better the next day. The cream cheese melds with the turkey and cheese, creating a more cohesive flavor. This is why they are so popular for meal prep. They improve with age, unlike some dishes that get stale.
Nutritional Information & Benefits
These pinwheels are a balanced snack. They provide protein from the turkey and calcium from the cheese. The tortillas offer carbohydrates for energy. Here is an approximate nutritional breakdown per pinwheel:
- Calories: 80-100 kcal
- Protein: 4-5g
- Carbohydrates: 6-8g
- Fat: 4-5g
They are a good source of protein, which helps keep you full. The cheese provides calcium for bone health. If you use whole wheat tortillas, you get added fiber. This is a great option for kids who need a quick energy boost.
For those watching their sodium, choose low-sodium turkey and cheese. The cream cheese can be high in sodium, so use it in moderation. Overall, this is a healthy, convenient option. It’s better than processed snacks like chips or candy.
Conclusion
These easy turkey and cheese pinwheel lunchbox wraps are a game-changer. They are simple, delicious, and practical. I love them because they solve the daily lunch problem without stress. You can customize them to fit your family’s tastes, and they always turn out well.
I encourage you to try this recipe. Start with the basic version, then experiment with different fillings. You might discover a new favorite. Don’t be afraid to make mistakes. Cooking is about learning.
If you make this, let me know how it goes. Share your variations in the comments. I love hearing about your kitchen experiments. This recipe is a staple for a reason. It works. And it brings a little joy to the lunchbox routine.
Try it today. Your lunchbox will thank you.
Frequently Asked Questions
Can I make these ahead of time?
Yes, you can make them up to 24 hours in advance. Just keep them wrapped tightly in the fridge. They hold up well and taste fresh the next day.
What kind of tortillas work best?
Thin flour tortillas are best. They are flexible and don’t crack when rolled. Avoid thick or corn tortillas, as they are harder to roll tightly.
Can I freeze the pinwheels?
Yes, you can freeze the whole rolls. Wrap them tightly in plastic wrap and foil. They can be frozen for up to 1 month. Thaw in the fridge before slicing.
How do I prevent the pinwheels from unraveling?
Roll them tightly and use plastic wrap to secure the shape. Chill them thoroughly before slicing. This helps the cream cheese set and hold the roll together.
Can I use different types of cheese?
Absolutely. Try Swiss, provolone, or mozzarella. Just make sure the cheese is shredded finely so it spreads evenly. Sharp cheddar is my personal favorite for flavor.
Pin This Recipe!

Easy Turkey and Cheese Pinwheel Lunchbox Wraps

A quick and easy 5-minute lunchbox wrap featuring thin tortillas spread with cream cheese, layered with sliced turkey and shredded cheddar, then rolled, chilled, and sliced into festive pinwheels.
- Prep Time: 10 minutes
- Cook Time: 0 minutes
- Total Time: 40 minutes
- Yield: 12-16 pinwheels 1x
- Category: Lunch
- Cuisine: American
Ingredients
- 8-inch flour tortillas (thin, flexible)
- 8–10 slices roasted turkey breast
- 1 cup shredded sharp cheddar cheese
- 4 oz full-fat cream cheese, softened
- 1 tbsp butter, softened (optional)
- Fresh chives or dried dill (optional)
Instructions
- Soften the cream cheese by letting it sit at room temperature for 15 minutes or microwaving in short bursts until pliable.
- Lay a tortilla flat on a clean cutting board.
- Spread a thin, even layer of cream cheese (about 1/8 inch thick) over the tortilla, leaving a small border at the edge.
- Layer turkey slices over the cream cheese, overlapping slightly to ensure full coverage.
- Sprinkle shredded cheddar cheese evenly over the turkey.
- Roll the tortilla tightly from one edge, tucking in fillings as you go.
- Wrap the rolled tortilla tightly in plastic wrap, twisting the ends like a candy wrapper.
- Chill in the refrigerator for at least 30 minutes (or up to 24 hours) to firm up.
- Remove plastic wrap and slice into 1-inch thick pinwheels using a sharp knife.
Notes
Ensure tortillas are at room temperature to prevent cracking. Use a sharp knife for clean cuts. For a gluten-free version, use rice-based or almond flour tortillas. Pinwheels can be frozen for up to 1 month if wrapped tightly in plastic and foil.
Nutrition
- Serving Size: 1-2 pinwheels per se
- Calories: 90
- Sugar: 1
- Sodium: 350
- Fat: 4.5
- Saturated Fat: 2.5
- Carbohydrates: 7
- Fiber: 0.5
- Protein: 4.5
Keywords: turkey wraps, cheese pinwheels, lunchbox ideas, quick lunch, kid-friendly snacks, meal prep, easy appetizers


