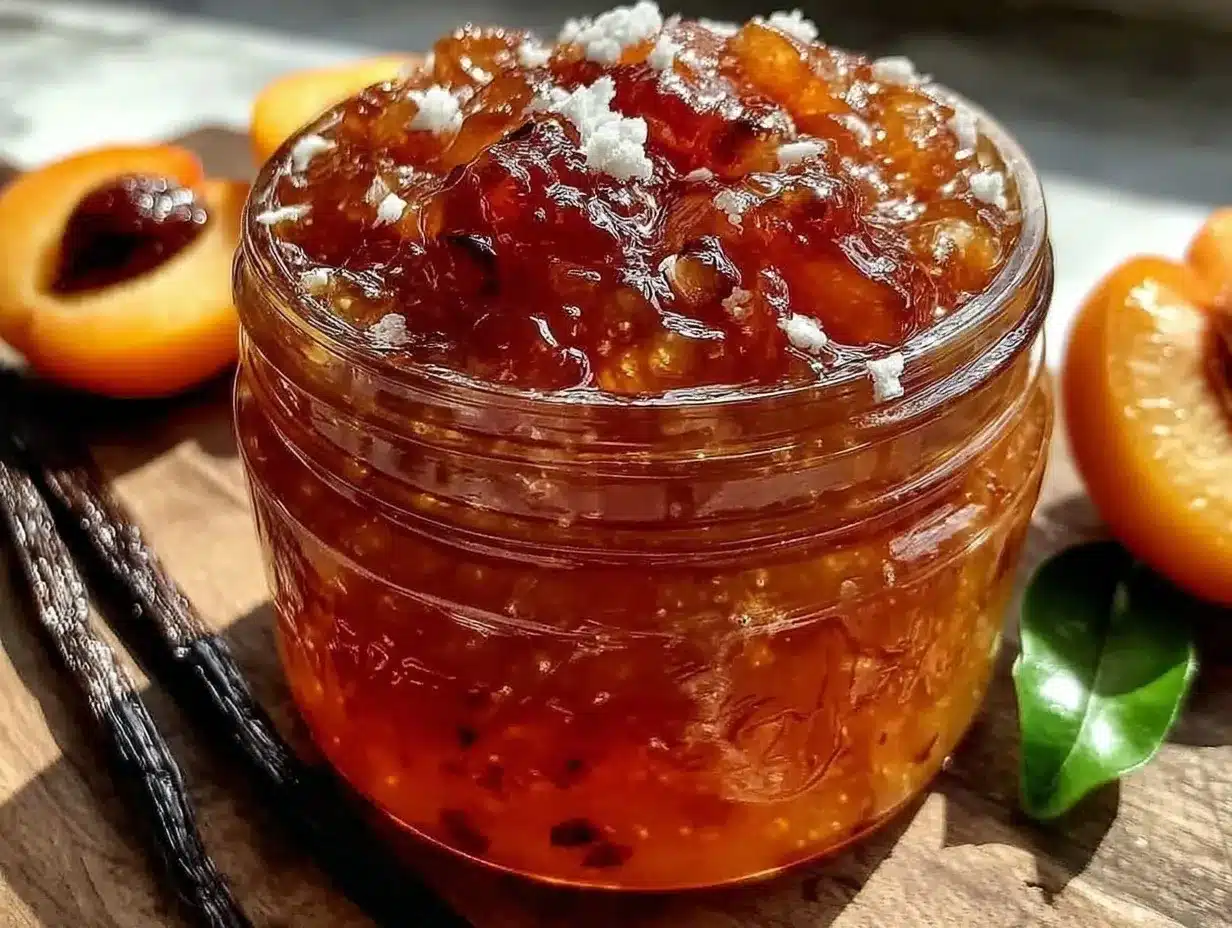
That sticky, golden jar sitting on my kitchen counter wasn’t part of a grand plan. Honestly, it began on an afternoon when I found a basket of apricots that were just a tad too ripe to ignore. I was in the middle of prepping a simple snack when the sweet, sun-warmed scent of those apricots took over the room. It reminded me of the old jam jars my grandmother used to keep in her pantry—rich, fragrant, and comforting. I figured, why not try making apricot jam myself? The twist came when I pulled out a vanilla bean from the fridge, leftover from a baking project. The idea of adding creamy vanilla to fresh apricot jam felt a bit indulgent but promising.
As the jam simmered gently on the stove, filling the house with a warm, buttery aroma, I sensed this recipe would be one I’d return to again and again. It’s the kind of jam that feels like a little moment of calm, the perfect companion for a sleepy Sunday morning or a spontaneous gathering. What’s funny is how this simple mix of apricots and vanilla bean turned into a pantry staple that friends started asking about during brunches (which reminds me—I once paired it with a batch of fluffy mini quiches for a lazy weekend spread).
In a way, this recipe stuck with me because it’s not just about the jam itself, but the feeling it brings—like catching a bit of late summer’s sweetness and holding onto it a little longer. If you’re someone who loves simple recipes with a touch of elegance and a dash of comfort, this apricot jam with creamy vanilla bean might just become your next kitchen favorite.
Why You’ll Love This Recipe
After making this fresh homemade apricot jam with creamy vanilla bean multiple times over the season, I’ve learned it’s one of those recipes that checks so many boxes for busy cooks and flavor seekers alike. Here’s why it stands out:
- Quick & Easy: The jam comes together in under 45 minutes, making it perfect for those last-minute fruit baskets or weekend projects.
- Simple Ingredients: No need for fancy or hard-to-find items. Just ripe apricots, sugar, lemon juice, and a vanilla bean—easy pantry staples or local farmer’s market finds.
- Perfect for Gifting or Brunch: Whether you’re making a batch for holiday treats or a casual brunch with friends, the vanilla bean adds a gourmet touch without extra fuss.
- Crowd-Pleaser: Every time I bring this jar out, it disappears fast. Kids love the smooth sweetness, and adults appreciate the subtle vanilla complexity.
- Unbelievably Delicious: The balance of tart apricot and creamy vanilla creates a silky texture that’s both comforting and fresh.
This isn’t just another fruit jam recipe. The secret is slow-cooking the apricots just enough to keep some chunkiness while blending in the vanilla bean’s fragrant seeds. That little step makes all the difference—the jam tastes homemade in the best way possible, like something you’d be proud to spoon over a warm croissant or dollop on creamy yogurt.
If you’ve ever wondered how to make a jam that feels both special and approachable, this recipe is a solid answer. It’s straightforward, rewarding, and just a bit indulgent without going overboard.
What Ingredients You Will Need
This recipe uses simple, wholesome ingredients to deliver bold flavor and a wonderfully smooth texture without any fuss. Most are pantry staples or easy to find at your local market.
- Fresh apricots (about 3 pounds / 1.4 kg, pitted and chopped) – ripe but firm apricots work best for the perfect jam consistency
- Granulated sugar (2 cups / 400 g) – balances the tartness; you can reduce slightly if you prefer less sweet
- Lemon juice (2 tablespoons / 30 ml, freshly squeezed) – adds brightness and helps with natural preservation
- Vanilla bean (1 whole bean, split and seeds scraped) – the star ingredient for that creamy, aromatic note
- Water (1/4 cup / 60 ml) – just a splash to help dissolve the sugar and prevent sticking
Ingredient tips: I usually reach for California apricots when in season—they have a lovely balance of sweet and tart. For the vanilla bean, I recommend grabbing a Madagascar vanilla pod for its rich, warm aroma. If vanilla beans aren’t available, a teaspoon of pure vanilla extract is a decent fallback, but the texture won’t be quite the same.
If you want a natural jam without refined sugar, you can experiment with honey or coconut sugar, but keep in mind it might alter the flavor and setting time.
Equipment Needed
- Heavy-bottomed saucepan (at least 3-quart / 3-liter) – helps prevent scorching during simmering
- Wooden spoon or heat-resistant silicone spatula – for stirring gently without damaging the fruit
- Sharp paring knife – to pit and chop apricots
- Measuring cups and spoons – accuracy is key for sugar and lemon juice
- Glass jars with lids (sterilized) – for storing your jam safely; I prefer mason jars as they’re reusable and reliable
- Fine mesh strainer or ladle (optional) – if you want an ultra-smooth finish without fruit chunks
If you don’t have a heavy-bottomed pan, just keep a close eye on the jam and stir often to avoid burning. I’ve also used a digital candy thermometer to check the jam’s setting point, but it’s not necessary if you’re comfortable with visual cues and the spoon test.
Preparation Method
- Prepare the apricots: Rinse the apricots under cool water. Using a sharp paring knife, carefully pit and chop them into roughly 1/2-inch (1.2 cm) pieces. This size helps keep some texture in your jam. Set aside. (10 minutes)
- Scrape the vanilla bean: Lay your vanilla bean flat and split it lengthwise with a knife. Use the back of the knife to scrape out the tiny seeds. Set seeds aside and keep the pod for the pot. (5 minutes)
- Combine ingredients in the saucepan: Add chopped apricots, sugar, lemon juice, vanilla seeds, vanilla pod, and water to the heavy-bottomed saucepan. Stir gently to mix everything evenly. (5 minutes)
- Cook the jam: Place the pan over medium heat and bring the mixture to a simmer. Stir frequently to prevent sticking or burning. Once simmering, reduce heat to low and continue cooking gently for 30-40 minutes. The mixture should thicken and reduce, with the apricots breaking down slightly but still retaining some shape.
- Check consistency: To test if the jam is ready, place a small spoonful on a chilled plate and tilt it. If it wrinkles and holds shape, it’s done. If not, continue simmering a few more minutes and test again.
- Remove vanilla pod: Before bottling, fish out the vanilla pod and discard it. (This step avoids a bitter bite.)
- Spoon into jars: Carefully ladle the hot jam into sterilized glass jars, leaving about 1/4-inch (0.6 cm) headspace. Wipe rims clean, seal with lids, and let cool to room temperature. (15 minutes)
- Store or refrigerate: Once cooled, jars can be stored in the fridge for up to 3 weeks or processed in a water bath canner for longer shelf life.
Pro tip: Stir gently but consistently during simmering to avoid burning the bottom. I once got a scorched batch (not fun), so patience here pays off. The smell when it’s nearly done is irresistible—you’ll know it’s time to wrap up by the thickened syrup and deepened apricot color.
Cooking Tips & Techniques
Making apricot jam with vanilla bean sounds straightforward, but a few tricks make a big difference:
- Choose ripe but firm apricots: Overripe fruit can turn the jam too watery, while underripe ones won’t soften properly.
- Use fresh lemon juice: Bottled lemon juice won’t give the same brightness and can affect the pectin setting.
- Simmer low and slow: Rushing the process at high heat risks burning and uneven cooking. Slow simmering lets flavors meld beautifully.
- Don’t skip the vanilla pod: Scraping the seeds releases the best flavor, but the pod itself adds depth during cooking. Just remember to remove it before bottling.
- Test your jam’s set: The plate test is more reliable than timing alone—jam can vary based on fruit water content.
- Clean jars thoroughly: Sterilize your glass containers by boiling or baking to prevent spoilage.
- Watch the sugar ratio: Too little sugar might cause your jam not to set well or spoil faster, but you can tweak it slightly to taste.
Honestly, the first time I made this, I underestimated how much attention the simmering stage needs. Now, I always keep the wooden spoon handy and stir regularly, which stops the jam from sticking and helps keep the vanilla bean evenly infused.
Variations & Adaptations
This apricot jam recipe is a great base to customize depending on your taste or dietary needs.
- Low-sugar option: Use a natural pectin like Pomona’s and reduce sugar to half, adjusting cooking time accordingly. Just expect a less thick jam.
- Spiced version: Add a cinnamon stick or a few cardamom pods during cooking for a warm twist.
- Fruit blend: Stir in fresh peaches or nectarines in equal parts for more complexity and a juicier jam.
- Vanilla extract substitute: If you can’t find vanilla beans, use 1 teaspoon of pure vanilla extract added off heat right before bottling.
- Vegan adaptation: This jam is naturally vegan, but for a silky topping, pair it with coconut yogurt or vegan cream cheese instead of dairy.
One time, I tried adding a splash of sparkling champagne punch to the jam after cooking to give it an adult-friendly fizz in cocktails—it was surprisingly delightful!
Serving & Storage Suggestions
This homemade apricot jam is best served slightly chilled or at room temperature. It’s divine on warm toast, fresh biscuits, or stirred into creamy yogurt. For a simple dessert, try spooning it over vanilla ice cream or alongside a cheese board (brie pairs wonderfully).
When serving for brunch, I’ve paired it with buttery quiches like the fluffy mini quiches, which balances savory and sweet beautifully.
Store your jam in airtight jars in the refrigerator for up to 3 weeks. For longer storage, water bath canning will keep it fresh for several months. When reheating, warm gently on the stove or microwave to bring back that spreadable texture without cooking it again.
Over time, the flavors meld and become more rounded, so don’t be surprised if your jam tastes even better a day or two after making it.
Nutritional Information & Benefits
One tablespoon (about 20g) of this apricot jam contains roughly:
- Calories: 50–60
- Carbohydrates: 13–15g (mostly natural sugars)
- Fiber: 0.5g
- Vitamin A and C: Apricots are rich in these antioxidants, supporting skin and immune health.
- Minimal fat and protein
The vanilla bean adds flavor without calories or additives. Using fresh fruit means you’re getting some natural vitamins and minerals, unlike store-bought jams that often contain preservatives.
This recipe is naturally gluten-free and dairy-free, making it suitable for many dietary preferences. Just be mindful of sugar intake if you’re watching carbs.
Conclusion
Fresh homemade apricot jam with creamy vanilla bean is a recipe that’s as rewarding as it is simple. With just a handful of ingredients and a little patience, you create a jar full of sunshine that brightens breakfasts, snacks, and desserts alike. I love how the vanilla bean adds that subtle depth, making it feel like a special treat without complicating things.
Feel free to tweak the sugar, spices, or even mix in other fruits to make it your own. This jam is forgiving and versatile, perfect for anyone who loves homemade goodness without fuss. If you try it, I’d love to hear how you enjoy it or what variations you came up with—sharing recipes is part of the joy.
Here’s to sweet mornings and cozy moments filled with apricot vanilla bliss.
Frequently Asked Questions
Can I use frozen apricots for this jam?
Yes, frozen apricots work well if fresh aren’t available. Just thaw and drain excess liquid before cooking to avoid a watery jam.
How long does homemade apricot jam last?
Refrigerated jam will keep for about 3 weeks. For longer storage, water bath canning seals the jars and extends shelf life to several months.
Can I make this jam without a vanilla bean?
Absolutely. Use 1 teaspoon of pure vanilla extract added off heat before bottling, though the texture and aroma will be less intense.
Is this jam suitable for a low-sugar diet?
You can reduce sugar and use natural pectin, but the texture may be less firm. It’s best to experiment with small batches to find your preferred balance.
What’s the best way to sterilize jars for jam making?
Boil glass jars and lids in water for 10 minutes or run them through a hot dishwasher cycle just before filling.
Pin This Recipe!
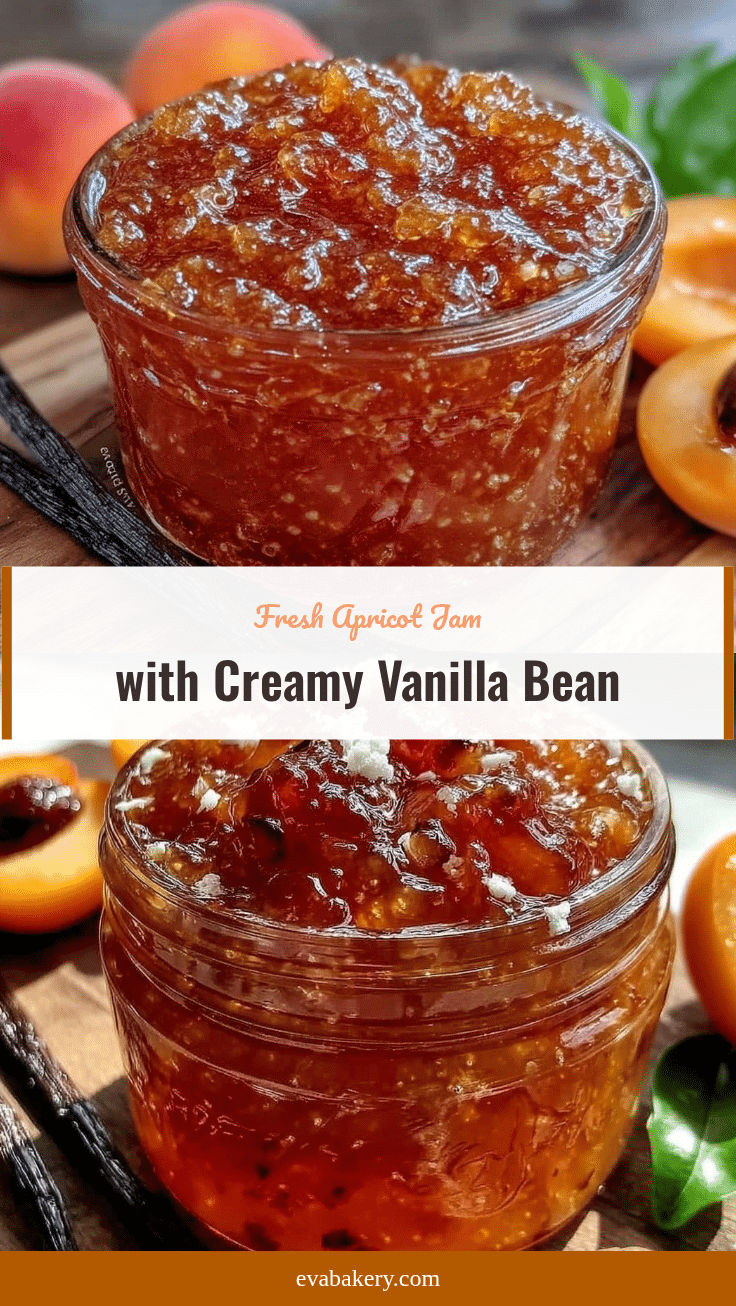
Fresh Homemade Apricot Jam Recipe with Creamy Vanilla Bean – Easy & Delicious
A simple and delicious apricot jam infused with creamy vanilla bean, perfect for breakfast, gifting, or brunch. This jam balances tart apricots with a silky vanilla aroma for a comforting homemade treat.
- Prep Time: 20 minutes
- Cook Time: 35 minutes
- Total Time: 55 minutes
- Yield: About 4 cups (approximately 8 servings) 1x
- Category: Preserves
- Cuisine: American
Ingredients
- 3 pounds (1.4 kg) fresh apricots, pitted and chopped
- 2 cups (400 g) granulated sugar
- 2 tablespoons (30 ml) freshly squeezed lemon juice
- 1 whole vanilla bean, split and seeds scraped
- 1/4 cup (60 ml) water
Instructions
- Rinse the apricots under cool water. Using a sharp paring knife, carefully pit and chop them into roughly 1/2-inch (1.2 cm) pieces. Set aside. (10 minutes)
- Lay your vanilla bean flat and split it lengthwise with a knife. Use the back of the knife to scrape out the tiny seeds. Set seeds aside and keep the pod for the pot. (5 minutes)
- Add chopped apricots, sugar, lemon juice, vanilla seeds, vanilla pod, and water to a heavy-bottomed saucepan. Stir gently to mix everything evenly. (5 minutes)
- Place the pan over medium heat and bring the mixture to a simmer. Stir frequently to prevent sticking or burning. Once simmering, reduce heat to low and continue cooking gently for 30-40 minutes until thickened and apricots break down slightly but retain some shape.
- Test the jam’s consistency by placing a small spoonful on a chilled plate and tilting it. If it wrinkles and holds shape, it’s done. If not, continue simmering a few more minutes and test again.
- Remove the vanilla pod before bottling to avoid bitterness.
- Carefully ladle the hot jam into sterilized glass jars, leaving about 1/4-inch (0.6 cm) headspace. Wipe rims clean, seal with lids, and let cool to room temperature. (15 minutes)
- Store jars in the refrigerator for up to 3 weeks or process in a water bath canner for longer shelf life.
Notes
Stir gently but consistently during simmering to avoid burning. Use ripe but firm apricots for best texture. Test jam set with the chilled plate method. Remove vanilla pod before bottling to prevent bitterness. For a smoother jam, strain before bottling. Refrigerate for up to 3 weeks or water bath can for longer storage.
Nutrition
- Serving Size: 1 tablespoon (about
- Calories: 55
- Sugar: 13
- Carbohydrates: 14
- Fiber: 0.5
Keywords: apricot jam, homemade jam, vanilla bean jam, easy jam recipe, fruit preserves, breakfast spread, gift jam


