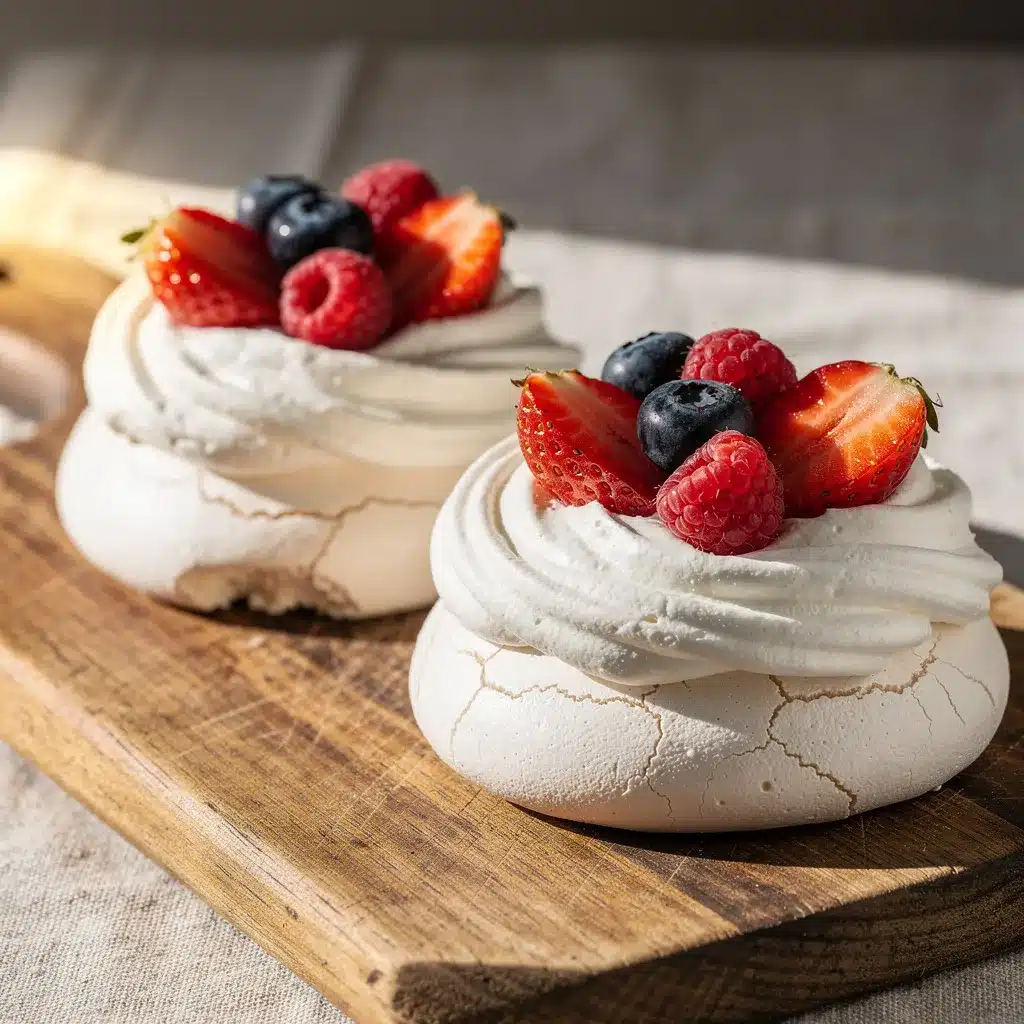
“Are you sure these little things won’t crack the moment I pick them up?” That was my skeptical thought the first time I attempted these light mini pavlova nests—those delicate, crisp meringue shells holding a cloud of cream and fresh berries. Honestly, I wasn’t expecting much. I had a busy afternoon, a fridge full of eggs about to expire, and not much time to fuss. But something about the airy sweetness of pavlova always sounded like a treat worth trying. What started as a bit of a gamble quickly turned into a full-on obsession. Within a week, I’d made these light mini pavlova nests three times, each batch better than the last.
The first batch came out with just the right crunch on the outside and a soft, marshmallowy center. I remember sitting in the quiet kitchen, the scent of toasted sugar hanging in the air, and realizing these simple little nests could brighten any day. Plus, topping them with fresh berries and a swirl of cream made them feel both fancy and homey at the same time. It became my go-to dessert for casual get-togethers and those moments when I just needed a sweet pick-me-up without feeling weighed down.
These mini pavlova nests stuck because they’re not just another sugary dessert—they’re light, airy, and just the right size to satisfy a craving without overdoing it. Plus, they’re downright charming on the plate, perfect for sharing or enjoying solo. I often find myself thinking about how nicely they’d pair with a glass of sparkling wine, maybe something like the champagne punch I tried last summer. Honestly, they remind me that sometimes, the simplest ingredients can make the most memorable desserts.
Why You’ll Love This Light Mini Pavlova Nests Recipe
After testing this recipe multiple times (and sharing it with friends who kept asking for the details), I’m convinced it’s one of the best you’ll find for a light, fresh dessert. Here’s why:
- Quick & Easy: The meringue base comes together in about 15 minutes of active prep, and the baking is mostly hands-off. Perfect when you want something sweet but don’t want to spend hours in the kitchen.
- Simple Ingredients: Eggs, sugar, cream, and berries—nothing fancy or hard to find. You probably have most of these in your pantry and fridge.
- Perfect for Entertaining: These mini nests make a stunning presentation for brunches, afternoon teas, or holiday tables. They’re fancy enough to impress but easy enough to whip up last minute.
- Crowd-Pleaser: Kids adore the light sweetness and fresh berries, while adults appreciate the balance of textures and flavors.
- Unbelievably Delicious: The crisp outer shell with a marshmallow-soft center, topped with whipped cream and tangy berries, is pure magic.
What sets this recipe apart? The little twist of folding the beaten egg whites just right and baking at a lower temperature to get that perfect, crack-free shell with a soft inside. Plus, I like to add a touch of vanilla to the cream for an extra layer of flavor. It’s not just another pavlova—this is the best mini pavlova nests recipe I’ve found and tested in my own kitchen.
Honestly, after the first bite, you’ll find yourself closing your eyes, savoring the light sweetness and fresh fruit. It’s like a little celebration in every bite—comfort food but with a refined, airy feel. And if you ever want to make a full brunch spread, pairing these with some fluffy mini quiches (like my buttery crust mini quiches) could be a game changer.
What Ingredients You Will Need
This recipe relies on simple, wholesome ingredients to achieve that light, airy texture and fresh, bright flavor. Most of these are pantry staples or easy to find in any grocery store.
- Egg Whites: 4 large egg whites (room temperature for better volume)
- Granulated Sugar: 1 cup (200 grams) – I prefer caster sugar because it dissolves more easily, but regular granulated sugar works fine too.
- Cornstarch: 1 teaspoon – helps create that soft marshmallow center
- White Vinegar or Lemon Juice: 1 teaspoon – adds stability to the meringue
- Vanilla Extract: 1 teaspoon – for a subtle, rich flavor
- Heavy Whipping Cream: 1 cup (240 ml) – chilled, for whipping
- Powdered Sugar: 2 tablespoons – to sweeten the whipped cream
- Fresh Berries: 1 ½ cups (about 225 grams) – a mix of strawberries, blueberries, raspberries, and blackberries gives a great balance of sweetness and tartness
If you want to switch things up a bit, you can swap out vinegar for lemon juice, or use coconut cream instead of heavy cream for a dairy-free option. I usually grab my eggs from a local farm when possible—fresh eggs really do make a difference in meringue volume. And for berries, in the winter, frozen berries work surprisingly well when thawed gently.
Equipment Needed
- Mixing Bowls: Large, clean, and completely grease-free bowls are essential for beating egg whites properly.
- Electric Mixer or Stand Mixer: A must-have for whipping the egg whites to stiff peaks. You can do it by hand, but it’s a workout!
- Baking Sheet: Lined with parchment paper to prevent sticking.
- Spoon or Small Ice Cream Scoop: For portioning out the mini nests evenly.
- Whisk: For whipping the cream (a handheld electric whisk speeds things up).
- Cooling Rack: Helps the pavlova nests cool evenly and maintain crispness.
If you don’t have a stand mixer, a handheld electric mixer works just fine. I’ve also tried whipping the cream by hand, but it takes a bit longer and you risk overwhipping. For parchment paper, make sure it’s flat on the baking sheet to keep the nests uniform. A silicone baking mat can be an alternative if you prefer a reusable option.
Preparation Method
- Preheat your oven to 250°F (120°C). Line a baking sheet with parchment paper.
- Separate your eggs carefully, making sure no yolk gets into the whites. Let the whites sit at room temperature for about 20 minutes to whip better.
- Beat the egg whites: In a clean, dry bowl, use an electric mixer to beat the egg whites on medium speed until soft peaks form (about 2-3 minutes).
- Add the sugar gradually: Increase mixer speed to high and add sugar one tablespoon at a time, beating well after each addition. This slow addition is key for a glossy, stable meringue. Continue until stiff, glossy peaks form and sugar feels dissolved (about 7-10 minutes).
- Fold in cornstarch, vinegar, and vanilla: Using a spatula, gently fold in the cornstarch, vinegar (or lemon juice), and vanilla extract. Be careful not to deflate the meringue—it should stay light and airy.
- Shape the nests: Scoop out small mounds (about 2 tablespoons each) onto the parchment-lined baking sheet. Use the back of a spoon to create a slight well in the center of each mound to hold the cream and berries.
- Bake low and slow: Place the baking sheet in the oven and bake for 1 hour and 15 minutes. The meringues should be crisp on the outside but still a bit soft inside. Turn off the oven and leave the nests inside for another 30 minutes to dry out gently.
- Cool completely: Transfer the meringue nests to a cooling rack once fully cooled to room temperature.
- Whip the cream: Just before serving, whip the heavy cream with powdered sugar until soft peaks form. Be careful not to overwhip or it turns grainy.
- Assemble the nests: Spoon or pipe the whipped cream into each pavlova nest, then top with fresh berries. Serve immediately for best texture.
If you notice your meringue cracking, it’s usually from oven temperature being too high or rapid cooling. Keeping a close eye on your oven thermometer can help. And if your egg whites don’t whip up well, double-check that your bowl was grease-free and your whites are at room temperature.
Cooking Tips & Techniques
Making perfect mini pavlova nests is all about patience and precision, but with a few tips, you’ll get the hang of it quickly.
- Egg whites at room temperature: This helps them whip up larger volume and creates a lighter meringue.
- Gradual sugar addition: Adding sugar slowly while beating prevents graininess and helps achieve that glossy sheen.
- Low and slow baking: Baking at a low temperature for a longer time dries out the nests without browning or cracking.
- Don’t skip the resting period in the oven: Turning off the oven and letting the pavlovas sit helps them dry out fully and stay crisp on the outside.
- Use cornstarch and acid: The cornstarch softens the inside, while vinegar or lemon juice stabilizes the meringue structure.
- Avoid humidity: On humid days, pavlova can absorb moisture and become sticky. Try to make these on a dry day, or store them in an airtight container.
Once, I made the mistake of opening the oven door too early, and the nests collapsed—lesson learned! Also, whipping cream can be tricky; watching it turn from soft to stiff peaks quickly means you should stop just before it gets too firm. If you want a smooth, elegant look, try piping the cream with a star tip.
Variations & Adaptations
This recipe is a great canvas for creativity, so feel free to tweak it based on what you like or what’s in season.
- Flavor twists: Add lemon zest or a splash of almond extract to the meringue for a subtle flavor change.
- Fruit swaps: Instead of berries, top with sliced kiwi, mango, or passionfruit for a tropical vibe.
- Chocolate lovers: Sprinkle mini chocolate chips inside the nests before baking or drizzle melted dark chocolate over the cream when assembling.
- Diet-friendly: Use coconut cream whipped with a bit of maple syrup to make it dairy-free and vegan-friendly.
I once tried a version with rose water in the cream and pistachio nuts sprinkled on top—an elegant twist that wowed my guests. If you want to serve these at a party, they also pair beautifully with a sparkling drink like the sparkling New Year’s sangria I shared a while back.
Serving & Storage Suggestions
These mini pavlova nests are best enjoyed fresh, right after assembling, while the shells hold their crisp texture.
- Serving temperature: Serve at room temperature or slightly chilled. The contrast between the cool cream and crisp pavlova is delightful.
- Presentation tips: Arrange the nests on a pretty platter, add a few extra berries around the edges, and maybe a light dusting of powdered sugar for that “wow” factor.
- Storage: Store the baked meringue shells in an airtight container at room temperature for up to 2 days. Avoid the fridge, or they’ll soften.
- Leftover cream: Keep whipped cream refrigerated and use within 24 hours. Re-whip lightly if it starts to separate.
- Reheating: Avoid reheating pavlova nests as they lose their crispness. Instead, bake a fresh batch and assemble right before serving.
- Flavor development: The shells keep their delicate sweetness and texture best when assembled just before eating, so plan accordingly.
Nutritional Information & Benefits
Each mini pavlova nest is a relatively light dessert option, especially compared to heavy cakes or rich pastries.
| Nutrient | Per Serving (1 nest) |
|---|---|
| Calories | 120-140 kcal |
| Protein | 3 g |
| Fat | 7 g (mostly from cream) |
| Carbohydrates | 15 g (mainly from sugar and berries) |
| Sugar | 12 g |
Key ingredients bring benefits too: egg whites provide protein without fat, while fresh berries add antioxidants, vitamins, and fiber. Using fresh cream gives a dose of calcium and vitamin A. This dessert can fit well into gluten-free diets since it contains no flour or gluten. Just keep in mind the sugar content if you’re watching your intake.
From a wellness perspective, I find this dessert hits a sweet spot—it’s indulgent but not heavy, making it easier to enjoy without feeling overly full or sluggish afterward.
Conclusion
These light mini pavlova nests with fresh berries and cream have become a staple in my recipe box for good reason. They’re simple, elegant, and just the right balance of sweet and fresh—perfect for those times when you want something special without much fuss. The recipe offers plenty of room to make it your own, whether you want to swap in different fruits, add a flavor twist, or keep it classic.
What I love most is how these nests bring a little bit of joy to everyday moments. They’re the kind of dessert you make when you want to impress yourself, your family, or your guests—without stress. If you try them, I’d love to hear how you make them your own.
And hey, if you’re planning a full celebration spread, these pavlova nests pair beautifully with savory bites like the crispy prosciutto-wrapped asparagus bites, creating a balance that keeps everyone coming back for more.
FAQs
Can I make pavlova nests ahead of time?
Yes, you can bake the meringue nests up to 2 days before serving. Store them in an airtight container at room temperature. Assemble with cream and berries right before serving to keep them crisp.
What if my meringue cracks during baking?
Cracking usually happens if the oven temperature is too high or the nests cool too quickly. Try baking at a lower temperature and leave them in the turned-off oven to cool slowly.
Can I use frozen berries instead of fresh?
Yes, but thaw them first and drain excess liquid to prevent the cream from becoming watery. Fresh berries are best for texture and flavor.
Is this recipe gluten-free?
Absolutely! Pavlova nests contain no flour or gluten, making them safe for gluten-free diets.
How do I store leftover pavlova nests with cream?
Once assembled, pavlova nests are best eaten immediately. Leftovers can be refrigerated for a few hours but may lose crispness. Store components separately for longer freshness.
Pin This Recipe!
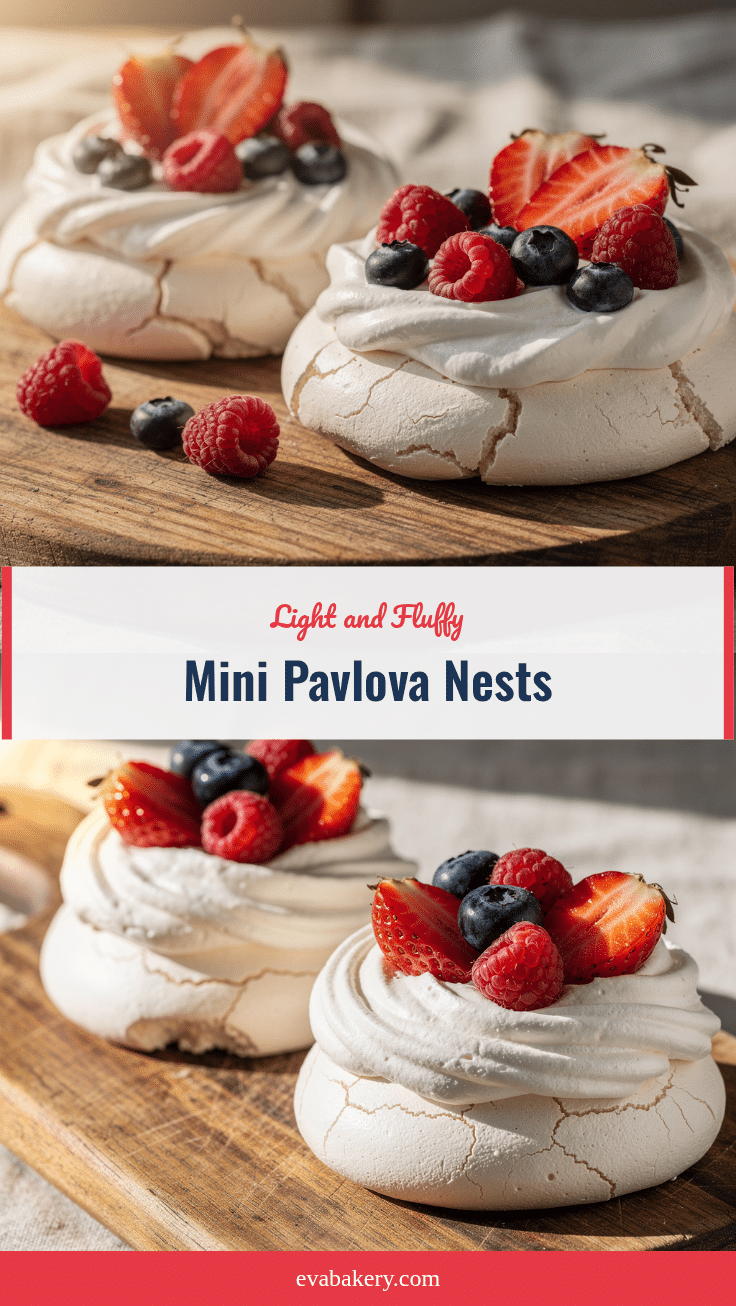
Light Mini Pavlova Nests Recipe Easy Homemade Berries and Cream Dessert

Delicate, crisp mini pavlova nests with a marshmallow-soft center, topped with whipped cream and fresh berries. A light, airy dessert perfect for casual get-togethers or elegant occasions.
- Prep Time: 15 minutes
- Cook Time: 1 hour 45 minutes
- Total Time: 2 hours
- Yield: 12 mini pavlova nests 1x
- Category: Dessert
- Cuisine: Australian/New Zealand
Ingredients
- 4 large egg whites (room temperature)
- 1 cup (200 grams) granulated sugar (caster sugar preferred)
- 1 teaspoon cornstarch
- 1 teaspoon white vinegar or lemon juice
- 1 teaspoon vanilla extract
- 1 cup (240 ml) heavy whipping cream, chilled
- 2 tablespoons powdered sugar
- 1 ½ cups (about 225 grams) fresh berries (strawberries, blueberries, raspberries, blackberries)
Instructions
- Preheat your oven to 250°F (120°C). Line a baking sheet with parchment paper.
- Separate your eggs carefully, ensuring no yolk gets into the whites. Let the whites sit at room temperature for about 20 minutes.
- Beat the egg whites in a clean, dry bowl with an electric mixer on medium speed until soft peaks form (2-3 minutes).
- Gradually add sugar one tablespoon at a time while increasing mixer speed to high, beating well after each addition until stiff, glossy peaks form and sugar dissolves (7-10 minutes).
- Gently fold in cornstarch, vinegar (or lemon juice), and vanilla extract using a spatula, being careful not to deflate the meringue.
- Scoop out small mounds (about 2 tablespoons each) onto the parchment-lined baking sheet. Use the back of a spoon to create a slight well in the center of each mound.
- Bake for 1 hour and 15 minutes until crisp on the outside but soft inside. Turn off the oven and leave the nests inside for another 30 minutes to dry out gently.
- Cool the meringue nests completely on a cooling rack to room temperature.
- Whip the heavy cream with powdered sugar until soft peaks form, being careful not to overwhip.
- Spoon or pipe the whipped cream into each pavlova nest, then top with fresh berries. Serve immediately.
Notes
Use room temperature egg whites for better volume. Add sugar gradually to avoid graininess and achieve glossy peaks. Bake at low temperature to prevent cracking. Let nests rest in the turned-off oven to dry out fully. Avoid humidity when making or storing pavlova. Store baked nests in an airtight container at room temperature for up to 2 days. Assemble with cream and berries just before serving to maintain crispness.
Nutrition
- Serving Size: 1 mini pavlova nest
- Calories: 130
- Sugar: 12
- Sodium: 10
- Fat: 7
- Saturated Fat: 4.5
- Carbohydrates: 15
- Fiber: 1
- Protein: 3
Keywords: pavlova, mini pavlova nests, meringue dessert, berries and cream, light dessert, easy pavlova recipe, gluten-free dessert


