I was mid-conversation with my niece when she blurted out that question, eyes wide and full of curiosity. It caught me off guard because, honestly, witches and pastel colors aren’t the first pair that come to mind on Halloween. But the idea stuck with me, and before I knew it, I was sketching out these quirky Perfect Pastel Halloween Witch Hat Shortbread Cookies on a napkin while the kettle boiled. There’s something charming about mixing the spooky with the sweet and soft, don’t you think?
These cookies grew from a simple whim to create something that felt both festive and unexpectedly gentle—like a whisper of Halloween magic with a pastel twist. The shortbread base is buttery and tender, the kind that melts in your mouth, while the pastel colors add a playful vibe that’s just a little less scary and a lot more fun. Plus, shaping them like witch hats makes them the perfect little bite-size charmers for a party or a quiet afternoon treat with a cup of tea.
What surprised me the most was how these cookies brought out a new kind of Halloween spirit in my kitchen. The pastel icing wasn’t just pretty; it was a conversation starter, a flashback to childhood craft tables, and a sweet break from the usual orange and black palette. Somehow, these pastel witch hats made me realize that Halloween treats can be both nostalgic and fresh, silly and sophisticated all at once.
So yeah, that question my niece asked ended up making my October baking a little brighter—and softer. And if you’re up for something that’s delightfully different yet perfectly cozy, these pastel witch hat cookies might just become your new favorite Halloween tradition.
Why You’ll Love This Recipe
This Perfect Pastel Halloween Witch Hat Shortbread Cookies recipe has been through plenty of kitchen tests, and I can say it’s truly a keeper for a bunch of reasons:
- Quick & Easy: Ready in under an hour from mixing to decorating, so you can whip these up even on a busy Halloween eve.
- Simple Ingredients: No weird or hard-to-find stuff here. You probably already have most of these in your pantry and fridge.
- Perfect for Parties & Gifting: These pastel hats are eye-catching and festive, making them ideal for school events, potlucks, or as a cute homemade gift.
- Crowd-Pleaser: Kids love the shape and colors, and adults appreciate the buttery, melt-in-your-mouth texture.
- Uniquely Charming: Unlike typical Halloween cookies, these combine the classic shortbread crunch with a soft pastel palette that stands out beautifully.
What really sets this recipe apart is the way the shortbread dough stays tender and crumbly without being dry. I use a trick I picked up from a professional baker—blending in a bit of cornstarch for that signature melt-in-your-mouth feel. Then, the pastel icing uses just the right balance of sweetness and color, made with natural food coloring, so it tastes as good as it looks. Honestly, the first time I dipped these hats in lavender and mint shades, I knew they’d be a Halloween hit without the usual sugar overload.
So, if you want Halloween treats that bring a little whimsy and nostalgia to your table, while still being easy to make and downright delicious, these pastel witch hat cookies are where it’s at. Plus, they pair surprisingly well with a warm drink—like the sparkling champagne punch I tried last Halloween for a grown-up twist.
What Ingredients You Will Need
This recipe uses simple, wholesome ingredients to deliver bold flavor and that satisfying buttery texture without any fuss. Here’s what you’ll gather before your baking adventure:
- For the Shortbread Dough:
- 1 cup (226g) unsalted butter, softened (I like using Plugrá butter for its richness)
- 1/2 cup (60g) powdered sugar, sifted (gives a smooth, tender crumb)
- 2 cups (240g) all-purpose flour (for a gluten-free option, try almond flour but expect a slightly different texture)
- 1/4 cup (30g) cornstarch (the secret to that melt-in-your-mouth feel)
- 1/4 teaspoon salt
- 1 teaspoon vanilla extract (pure, not imitation!)
- For the Pastel Icing:
- 2 cups (240g) powdered sugar, sifted
- 2–3 tablespoons milk or water (adjust for consistency)
- 1 teaspoon vanilla extract or almond extract (for a subtle flavor twist)
- Natural food coloring gels in pastel shades (lavender, mint green, soft pink, buttery yellow)
- For Decoration:
- Mini chocolate chips or edible glitter (optional, adds a touch of sparkle)
These ingredients are pantry staples for most home bakers, and the natural food coloring keeps things vibrant without that artificial bite. If you’re shopping, look for firm, quality butter and fresh vanilla extract—those subtle details really bump up the flavor. For the icing, I recommend starting with a small amount of coloring and building up slowly to get that perfect pastel without turning it into a neon nightmare.
Equipment Needed
- Mixing bowls (preferably glass or stainless steel for easy cleanup)
- Electric hand mixer or stand mixer (makes creaming butter and sugar a breeze)
- Measuring cups and spoons (accuracy is key for shortbread)
- Rolling pin (a smooth, medium-weight one works best)
- Witch hat-shaped cookie cutter or a small triangle cutter plus a circle cutter to make the brim (I sometimes freehand the shapes with a sharp knife, but cutters speed things up)
- Baking sheet lined with parchment paper or a silicone baking mat
- Cooling rack (helps cookies cool evenly without sogginess)
- Small bowls or piping bags for icing (piping bags give you more control for decorating)
If you don’t have a cookie cutter for witch hats, no worries—using a knife to cut triangles and circles works just fine. I once baked a whole batch freehand because my cutter went missing, and it actually added some charming rustic vibes. For budget-friendly options, parchment paper and a hand mixer can be found reasonably priced at most stores. Keeping your tools clean and dry, especially your rolling pin, makes rolling the dough a smoother process.
Preparation Method
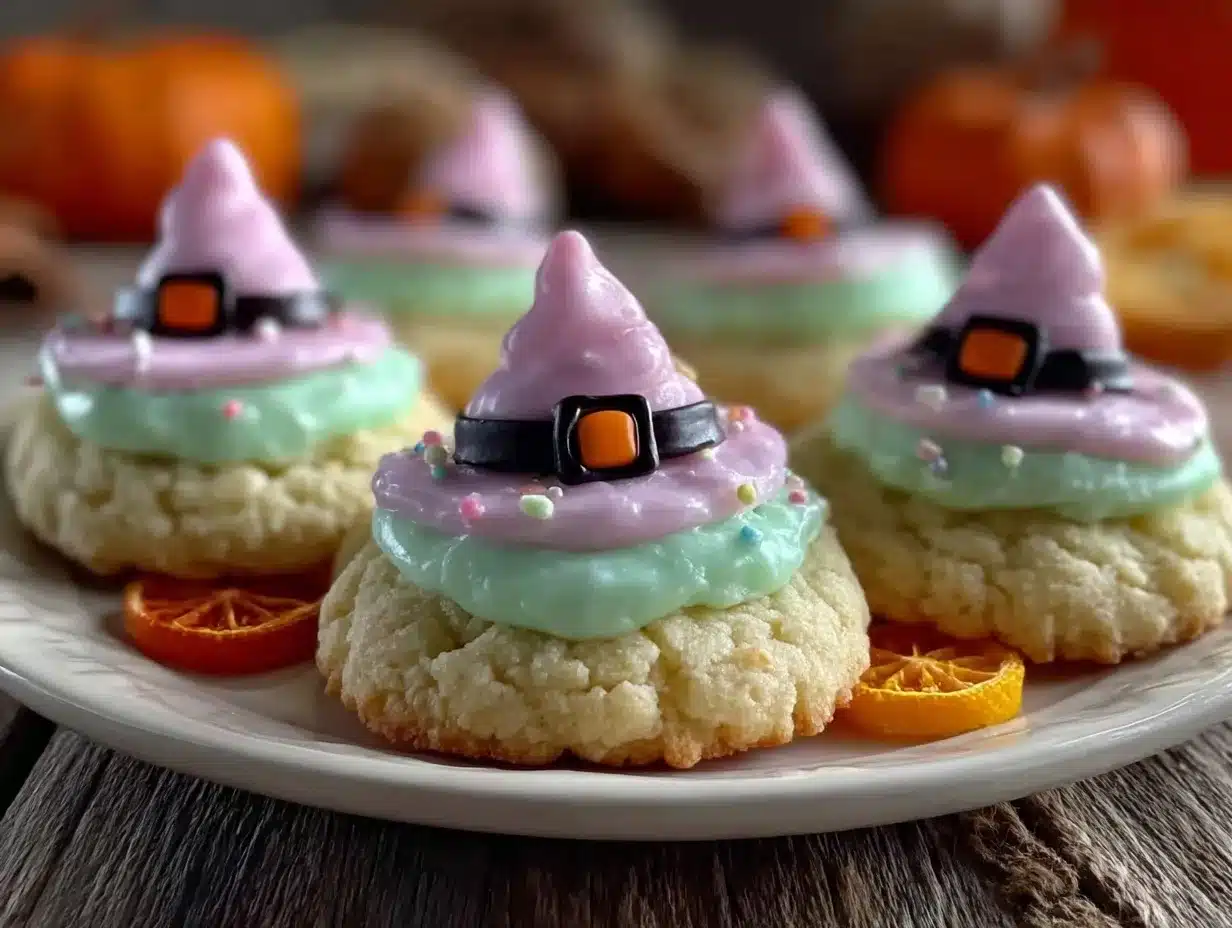
- Cream the Butter and Sugar (5–7 minutes): In a large mixing bowl, beat the softened unsalted butter and powdered sugar together until the mixture is light, fluffy, and pale in color. This step is crucial because it traps air that helps the shortbread stay tender rather than dense. You’ll notice the texture change from grainy to smooth and creamy—that’s your cue to move on.
- Add Vanilla Extract: Mix in the vanilla extract until just combined. The scent will start to fill the kitchen, making it feel like something special is underway.
- Whisk Dry Ingredients Separately: In another bowl, sift together the all-purpose flour, cornstarch, and salt. Sifting prevents lumps and ensures the shortbread’s delicate crumb.
- Combine Wet and Dry: Gradually add the flour mixture to the butter mixture, stirring gently with a spatula or on low speed with your mixer. The dough will start to come together but avoid overmixing—it should still be soft and pliable, not tough.
- Chill the Dough (at least 30 minutes): Wrap the dough in plastic wrap and refrigerate. Chilling firms it up, making it easier to roll out and helping the cookies hold their shape while baking.
- Preheat Oven and Prepare Baking Sheet: Preheat your oven to 325°F (163°C). Line your baking sheet with parchment paper or a silicone mat to prevent sticking and promote even baking.
- Roll Out and Cut Shapes: On a lightly floured surface, roll out the dough to about 1/4 inch (6 mm) thickness. Use your witch hat cookie cutter or freehand cut triangles and circles for the brim. Transfer cookies carefully to the baking sheet.
- Bake the Cookies (15–18 minutes): Bake until the edges just start to turn golden. The cookies will still feel soft but firm up as they cool. Overbaking will dry them out, so keep a close eye near the end.
- Cool Completely: Let the cookies cool on the baking sheet for 5 minutes, then transfer to a wire rack to cool fully. This step prevents soggy bottoms and keeps the texture just right.
- Prepare the Icing: In a small bowl, whisk powdered sugar, milk (or water), and extract until smooth and pourable but not too runny. Divide into separate bowls for each pastel color, stirring in food coloring slowly until you get soft pastel shades.
- Decorate: Use a small spoon or piping bag to carefully ice the cookie tops and brims. Decorate with mini chocolate chips or edible glitter if you want to add a little sparkle to your witch hats. Let icing set at room temperature until firm—usually about 1–2 hours.
Pro tip: If your dough feels sticky while rolling, pop it back in the fridge for 10 minutes. And when coloring the icing, remember a little goes a long way. I once painted a batch bright pink by accident, and it definitely wasn’t the “pastel” look I was going for!
Cooking Tips & Techniques
Making these pastel witch hat cookies is fun, but there are a few things I learned the hard way that you might want to keep in mind:
- Don’t Skip the Cornstarch: It’s the secret ingredient that gives the shortbread its delicate, crumbly texture rather than a dense bite.
- Chill That Dough: Shortbread dough can be a bit soft; chilling makes it easier to roll and helps cookies keep their shapes during baking.
- Use Quality Butter: I’ve tried cheaper brands, and the flavor difference is noticeable. Butter quality really shines in simple recipes like this.
- Work Quickly with the Icing: Once you mix icing, it starts to thicken. If it gets too stiff, add a tiny splash of milk or water to loosen it back up.
- Keep an Eye on Baking Time: Shortbread can go from perfectly golden to overdone in minutes. Set a timer and check a few minutes early.
- Try Edible Glitter for a Festive Touch: It adds a magical sparkle that’s perfect for Halloween but feels elegant too.
- Batch Decorating: I usually bake the cookies one day and decorate the next. It gives the cookies time to cool fully and the icing time to set without rushing.
One time, I skipped chilling the dough because I was in a hurry. The cookies spread out too much, and I ended up with these odd-shaped “hat blobs.” Not my best moment, but it taught me patience is key here. Also, multitasking helps—while cookies bake, I prep icing for smooth transitions during decorating.
Variations & Adaptations
These Perfect Pastel Halloween Witch Hat Shortbread Cookies are pretty flexible, so you can put your own spin on them:
- Flavor Twists: Add a teaspoon of almond or peppermint extract to the dough for a subtle change that pairs beautifully with the pastel icing.
- Dietary Swaps: Use almond flour or gluten-free flour blend for a gluten-free version. Swap butter for coconut oil for a dairy-free option, but expect a slight shift in texture and flavor.
- Seasonal Colors: Instead of pastels, use autumnal tones like burnt orange, deep purple, and forest green for a more traditional Halloween vibe.
- Alternative Decorations: Try using royal icing for more detailed designs or sprinkle crushed freeze-dried berries on top for a natural pop of color and tartness.
- Different Shapes: If witch hats aren’t your thing, try pumpkins or ghosts using similar dough and pastel icing for a cute twist.
Personally, one year I swapped the vanilla for lavender extract and colored the icing a soft lilac. The subtle floral note paired surprisingly well with the buttery cookie and felt like a whimsical Halloween secret. If you want a more grown-up pairing, these cookies go great with a crisp drink like the sparkling New Year’s sangria I adore.
Serving & Storage Suggestions
These pastel witch hat cookies are best served at room temperature when their buttery texture shines through. For a fun presentation, arrange them on a tiered cake stand or scatter edible glitter dust for that extra sparkle at a Halloween gathering.
They pair delightfully with hot tea, coffee, or even a cold milk glass for the kids. For grown-up gatherings, a lightly spiced cider or a sparkling punch adds a festive flair—think about how nicely they’d complement a refreshing champagne punch.
To store, keep the cookies in an airtight container at room temperature for up to 5 days. If you want to keep them longer, freeze un-iced cookies wrapped tightly in plastic wrap and placed in a freezer bag for up to 3 months. When ready to enjoy, thaw at room temperature and then decorate. Icing on frozen cookies tends to crack, so it’s best to freeze before decorating.
Reheating isn’t really necessary, but if you want that fresh-baked warmth, pop them in a 300°F (150°C) oven for 3–5 minutes just before serving. Flavors tend to mellow and deepen after a day, so if you can wait, these cookies get better with a little time.
Nutritional Information & Benefits
Each cookie (based on 24 cookies per batch) contains approximately:
| Calories | Fat | Carbohydrates | Protein |
|---|---|---|---|
| 120 kcal | 7g | 14g | 1g |
The key ingredients like butter and all-purpose flour provide energy and a satisfying mouthfeel. Using natural food colorings means you avoid artificial dyes, making these cookies a slightly cleaner treat for kids. If you swap to almond flour, you add a bit of protein and healthy fats, which is a nice bonus.
Do note these cookies contain dairy and gluten, so they’re not suitable for those with allergies to milk or wheat. For a dairy-free or gluten-free version, see the adaptations section. From a wellness perspective, I like these cookies as an occasional indulgence made with simple ingredients—perfect for sharing without the guilt of overly processed snacks.
Conclusion
These Perfect Pastel Halloween Witch Hat Shortbread Cookies are more than just a seasonal treat—they’re a little slice of fun and nostalgia wrapped in buttery, pastel-colored charm. Whether you’re baking with kids, prepping a Halloween party spread, or just craving a sweet break, this recipe offers something unique and satisfying.
Feel free to tweak the colors, flavors, or shapes to match your mood or occasion. I’ve loved how these cookies brought a fresh vibe to my Halloween baking, and I hope you find the same joy in making and sharing them. If you try them out, I’d love to hear how you decorated your witch hats or what twists you added!
Happy baking, and here’s to sweet moments with a little sprinkle of magic.
Frequently Asked Questions
Can I make these cookies ahead of time?
Yes! You can bake the shortbread cookies up to 3 days ahead and store them in an airtight container. Decorate just before serving for the freshest look.
What if I don’t have a witch hat cookie cutter?
No worries! Use a small triangle cutter for the hat and a circle cutter for the brim, or carefully cut shapes freehand with a sharp knife.
How do I get the pastel colors without artificial dyes?
Use natural food coloring gels made from vegetable or fruit extracts, adding small amounts gradually to achieve soft shades.
Can I freeze these cookies?
Yes, freeze un-iced cookies wrapped tightly in plastic wrap and stored in a freezer bag for up to 3 months. Thaw before decorating.
What’s the best way to store iced cookies?
Keep them in an airtight container at room temperature for up to 5 days. Avoid stacking to prevent icing damage.
Pin This Recipe!
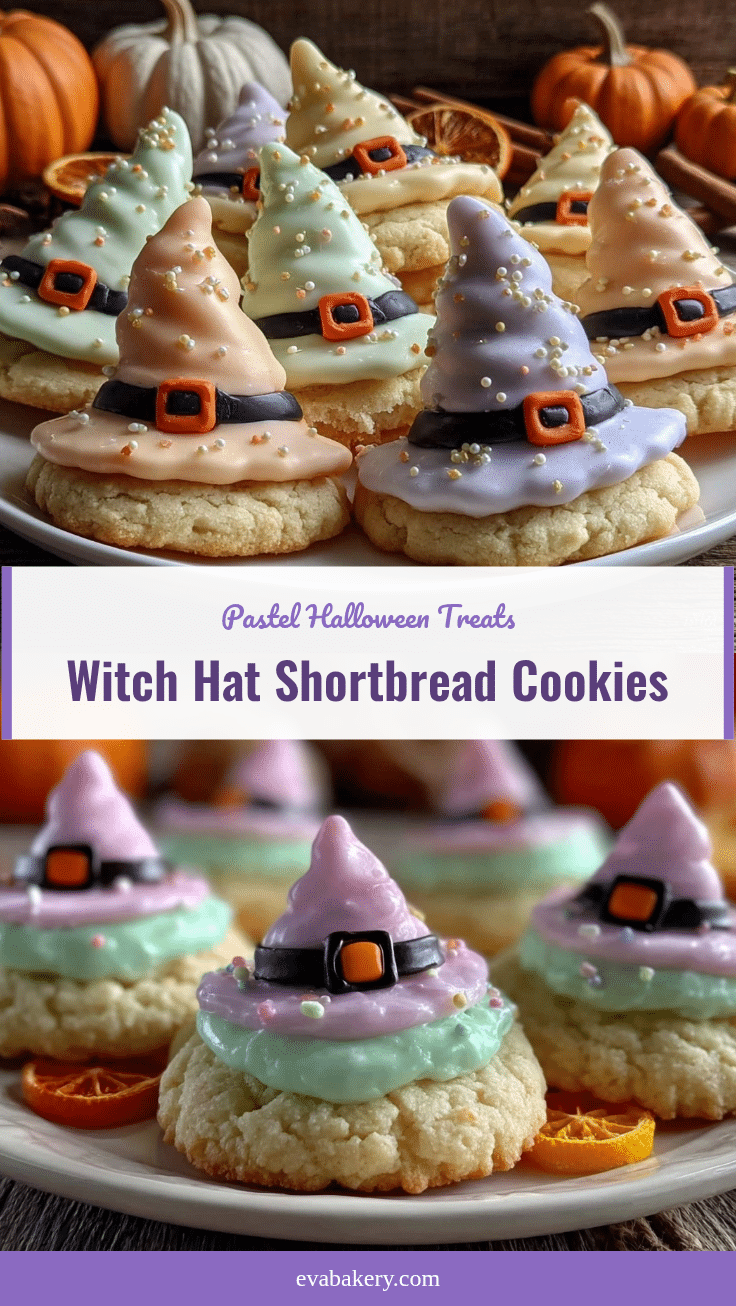
Perfect Pastel Halloween Witch Hat Shortbread Cookies
These pastel witch hat shortbread cookies combine a buttery, tender shortbread base with playful pastel icing, creating a festive and charming Halloween treat that’s quick and easy to make.
- Prep Time: 15 minutes
- Cook Time: 15–18 minutes
- Total Time: 50–55 minutes
- Yield: 24 cookies 1x
- Category: Dessert
- Cuisine: American
Ingredients
- 1 cup (226g) unsalted butter, softened
- 1/2 cup (60g) powdered sugar, sifted
- 2 cups (240g) all-purpose flour
- 1/4 cup (30g) cornstarch
- 1/4 teaspoon salt
- 1 teaspoon vanilla extract
- 2 cups (240g) powdered sugar, sifted (for icing)
- 2–3 tablespoons milk or water (for icing)
- 1 teaspoon vanilla extract or almond extract (for icing)
- Natural food coloring gels in pastel shades (lavender, mint green, soft pink, buttery yellow)
- Mini chocolate chips or edible glitter (optional, for decoration)
Instructions
- Cream the softened unsalted butter and powdered sugar together in a large mixing bowl until light, fluffy, and pale in color (5–7 minutes).
- Mix in the vanilla extract until just combined.
- In another bowl, sift together the all-purpose flour, cornstarch, and salt.
- Gradually add the flour mixture to the butter mixture, stirring gently until the dough comes together but remains soft and pliable.
- Wrap the dough in plastic wrap and refrigerate for at least 30 minutes to chill.
- Preheat the oven to 325°F (163°C). Line a baking sheet with parchment paper or a silicone baking mat.
- Roll out the chilled dough on a lightly floured surface to about 1/4 inch (6 mm) thickness.
- Use a witch hat cookie cutter or freehand cut triangles and circles for the brim. Transfer cookies to the prepared baking sheet.
- Bake for 15–18 minutes until edges just start to turn golden. Avoid overbaking.
- Let cookies cool on the baking sheet for 5 minutes, then transfer to a wire rack to cool completely.
- Prepare the icing by whisking powdered sugar, milk or water, and extract until smooth and pourable.
- Divide icing into separate bowls and add natural food coloring gels slowly to achieve pastel shades.
- Decorate the cooled cookies using a spoon or piping bag. Add mini chocolate chips or edible glitter if desired.
- Allow icing to set at room temperature for 1–2 hours before serving.
Notes
Do not skip the cornstarch for a tender, crumbly texture. Chill dough to make rolling easier and to help cookies hold shape. Use quality butter for best flavor. Work quickly with icing as it thickens over time; add milk or water to loosen if needed. Keep an eye on baking time to avoid overbaking. For festive sparkle, add edible glitter. Cookies can be baked a day ahead and decorated later. Freeze un-iced cookies for up to 3 months; thaw before decorating.
Nutrition
- Serving Size: 1 cookie
- Calories: 120
- Fat: 7
- Carbohydrates: 14
- Protein: 1
Keywords: Halloween cookies, pastel cookies, witch hat cookies, shortbread cookies, Halloween treats, easy Halloween recipe, festive cookies, buttery cookies