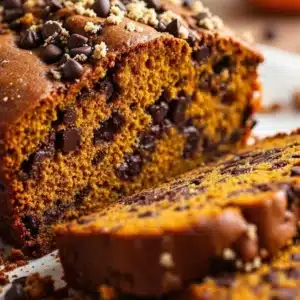
“Wait, you can make sourdough taste like pumpkin pie?” My sister-in-law, a self-proclaimed pumpkin spice skeptic, said that the first time she walked into my kitchen on a rainy October afternoon. I had a loaf cooling on the rack, and the whole house smelled like Thanksgiving had exploded in the best way possible. She didn’t even wait for me to slice it—she just stood there, sniffing the air like she was trying to commit the scent to memory.
I have to admit, I was skeptical too, at first. I mean, sourdough has that tangy, sharp personality, right? And pumpkin spice is all warm and cozy and sweet. They seemed like they’d argue in the bowl. But then I thought about it more. Sourdough is just fermented flour and water. It’s a blank canvas that happens to be a little moody. And pumpkin spice? That’s just a blend of cinnamon, ginger, nutmeg, and cloves. They’re both humble ingredients that, when treated with a little patience, can do something genuinely surprising together. (Honestly, I think my starter, Betty, was the most excited about it—she bubbles like crazy whenever I mix in the pumpkin.)
This loaf isn’t trying to be a dessert bread. It’s not a quick bread, and it’s certainly not a pumpkin pie in disguise. It’s a real, honest-to-goodness sandwich loaf that just happens to carry the flavor of fall in every slice. The sourdough tang doesn’t disappear—it mellows out, playing a quiet bass note underneath the warm spices. The pumpkin keeps the crumb soft and tender, almost velvety, without making it heavy. It toasts like a dream, and the smell alone is enough to make you forget about store-bought bread forever.
I didn’t set out to create the perfect fall sandwich bread. I just wanted to see if my starter could handle a little seasonal adventure. Turns out, it could. And now, I’m pretty sure this is the only loaf I’ll be baking until the leaves fall off the trees.
Why You’ll Love This Recipe
This isn’t just another pumpkin bread recipe you’ll find on the internet. This is a loaf that actually works for sandwiches, toast, and even French toast without falling apart or tasting like a muffin. Let me tell you why I think it’s worth every minute of the process.
- Real Sourdough Tang, Not Overpowering : The fermentation process gives this bread a subtle, pleasant tang that perfectly balances the sweetness of the pumpkin and spices. It’s not sour like a classic San Francisco loaf—it’s more like a gentle reminder that this bread was made with intention.
- Soft Enough for Sandwiches, Sturdy Enough for Toast : The pumpkin puree adds moisture without making the crumb gummy. You can slice it thin for a turkey and cranberry sandwich or slice it thick for a generous smear of butter and honey. It holds up beautifully either way.
- No Special Equipment Required : You don’t need a stand mixer, a bread machine, or any fancy gadgets. Just a bowl, a spoon, your hands, and a loaf pan. (And an active sourdough starter, which I’ll help you with if you’re new to this.)
- Perfect for Fall Baking Without the Sugar Rush : Unlike pumpkin quick breads that are loaded with sugar, this loaf has just enough sweetness to complement the spices. It’s a breakfast bread, a lunch bread, and a snack bread all in one.
- It Makes Your House Smell Unbelievable : I’m not exaggerating. The combination of sourdough baking and pumpkin spice filling your kitchen is the closest thing to a fall-scented candle that actually tastes as good as it smells.
I’ve tested this recipe about six times now. The first loaf was too dense. The second one didn’t rise enough. The third one was actually perfect, but I changed the spice ratio anyway because I’m a perfectionist. This version? This is the one I keep coming back to. It’s the one I make for weekend brunches, for holiday gatherings, and for lazy Sunday afternoons when I just want to bake something that feels like a hug.
What Ingredients You Will Need
This recipe uses simple, wholesome ingredients that you probably already have in your pantry. The key is treating each ingredient with a little respect—measure accurately, use room temperature ingredients, and don’t skip the fermentation step. Here’s what you’ll need:
For the Sourdough Base
- Active Sourdough Starter (100g) – Make sure it’s bubbly and has been fed within the last 4-6 hours. A hungry starter won’t give you the rise you need. I use a 100% hydration starter (equal parts flour and water by weight).
- Bread Flour (400g, about 3 cups) – Bread flour has higher protein content, which gives the loaf structure and a nice chewy crumb. All-purpose flour works in a pinch, but the texture won’t be quite as good.
- Whole Wheat Flour (100g, about ¾ cup) – This adds a little nuttiness and depth that pairs beautifully with the pumpkin and spices. You can use all bread flour if you prefer a lighter loaf.
- Water (250g, about 1 cup) – Use filtered or room temperature water. Chlorinated tap water can slow down fermentation.
- Fine Sea Salt (10g, about 1½ teaspoons) – Salt is crucial for flavor and for controlling fermentation. Don’t skip it.
For the Pumpkin & Spice Addition
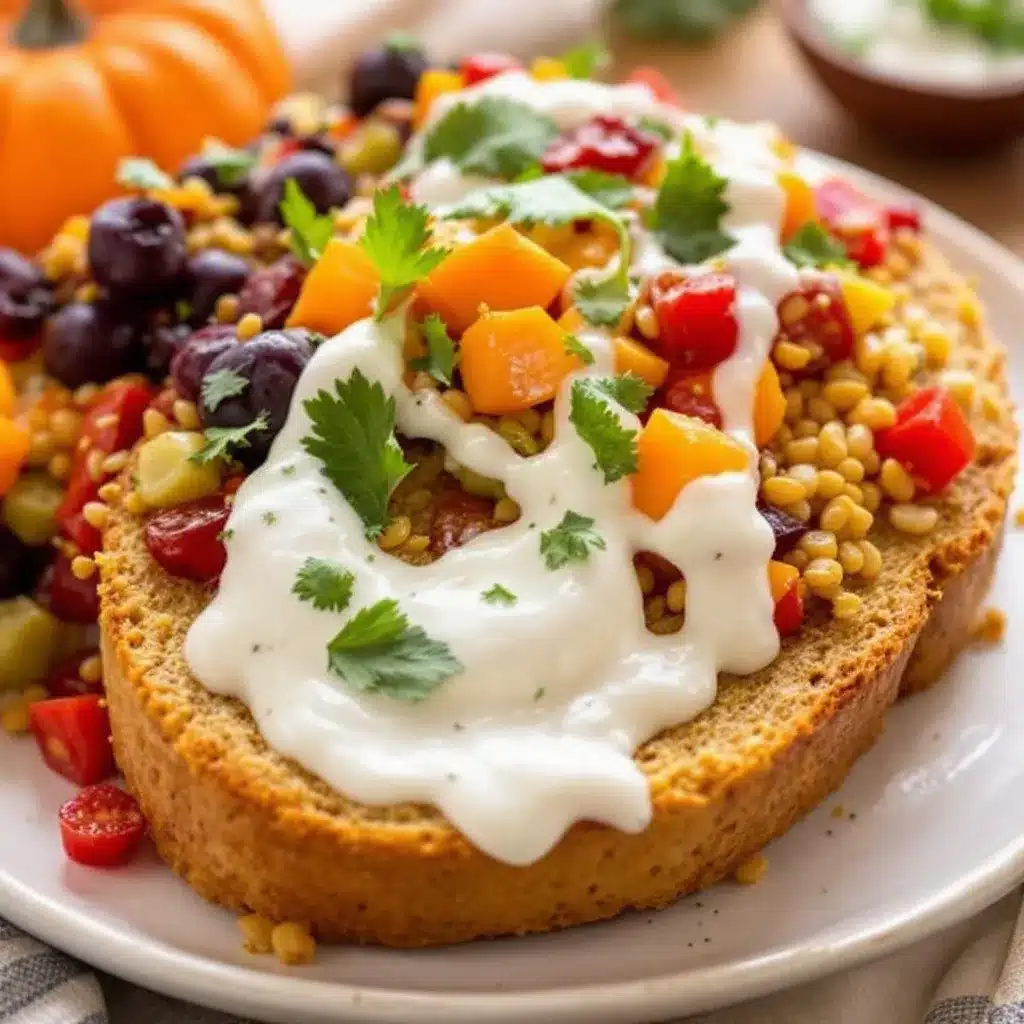
- Pumpkin Puree (150g, about ⅔ cup) – Make sure it’s 100% pure pumpkin, not pumpkin pie filling. I prefer Libby’s brand for consistent texture and moisture content. (I learned the hard way that homemade pumpkin puree can be too watery—drain it if you use fresh.)
- Pumpkin Pie Spice (2 teaspoons) – You can use store-bought or make your own: 1 teaspoon cinnamon, ½ teaspoon ginger, ¼ teaspoon nutmeg, ¼ teaspoon cloves, and a pinch of allspice. (I always make my own—it’s fresher and I can adjust the ratios.)
- Ground Cinnamon (1 teaspoon, extra for dusting) – Because you can never have too much cinnamon in a fall recipe.
- Brown Sugar (50g, about ¼ cup, packed) – This adds a subtle sweetness and helps with browning. You can use coconut sugar or maple syrup (reduce water slightly if using syrup).
- Unsalted Butter (30g, about 2 tablespoons, melted) – This enriches the dough and keeps the crumb tender. You can substitute with coconut oil for a dairy-free version.
Optional Add-Ins
- Pepitas (Pumpkin Seeds) (¼ cup) – For a little crunch on top or folded into the dough.
- Dried Cranberries (¼ cup) – Adds a tart pop that contrasts nicely with the warm spices.
- Orange Zest (from 1 orange) – Brightens up the flavor and makes the bread feel even more festive.
Equipment Needed
You don’t need a professional bakery setup to make this loaf. Here’s what I use and what you can substitute if needed:
- Digital Kitchen Scale – I know, I know, measuring by volume is easier. But for sourdough, weight is way more accurate. A $15 scale from Amazon will change your baking life. (I use my OXO scale every single day.)
- Large Mixing Bowl – Any bowl works, but a wide, shallow bowl makes it easier to stretch and fold the dough.
- Bench Scraper or Dough Scraper – This little tool is a game-changer for handling sticky dough. I have a plastic one that cost $4 and it’s one of my most-used kitchen tools.
- Loaf Pan – A standard 9×5-inch loaf pan is perfect. I prefer a light-colored metal pan for even browning. Dark pans can cause the crust to brown too quickly.
- Plastic Wrap or a Shower Cap – For covering the dough during bulk fermentation. A reusable shower cap is actually perfect for this—it’s stretchy and fits right over the bowl.
- Parchment Paper – Lining the loaf pan makes removal a breeze. Trust me, you don’t want to fight with a stuck loaf.
- Instant-Read Thermometer – Optional, but helpful for checking the internal temperature of the baked loaf (should be around 200°F or 93°C).
Preparation Method
This recipe takes a little time, but most of it is hands-off. The active work is maybe 20 minutes total. The rest is just waiting for the magic of fermentation to happen.
Step 1: Mix the Dough (Day 1, Morning)
In a large mixing bowl, combine the active sourdough starter, water, and pumpkin puree. Stir until the starter is mostly dissolved—it doesn’t have to be perfect. Add the bread flour and whole wheat flour. Mix with your hands or a wooden spoon until a shaggy dough forms. It will look rough and slightly sticky. That’s normal. Cover the bowl with plastic wrap and let it rest for 30 minutes. This is called the autolyse, and it gives the flour time to absorb the liquid and start developing gluten.
Step 2: Add the Remaining Ingredients
After the rest, sprinkle the salt, pumpkin pie spice, cinnamon, and brown sugar over the dough. Pour the melted butter over the top. Now, use your fingers to pinch and squeeze the dough until everything is incorporated. It will feel messy at first, but keep going. After about 3-4 minutes, the dough will start to come together. It should feel soft, slightly tacky, and very pliable. If it feels too dry, add a teaspoon of water. If it’s too sticky, add a tablespoon of flour.
Step 3: Bulk Fermentation with Stretch and Folds (3-4 hours)
This is where the magic happens. Leave the dough in the bowl, cover it, and let it rest for 30 minutes. Then, perform your first stretch and fold. Wet your hand slightly to prevent sticking. Reach under one side of the dough, stretch it up as far as it will go without tearing, and fold it over the top. Rotate the bowl a quarter turn and repeat. Do this four times total (all four sides). Cover and rest for another 30 minutes. Repeat this stretch and fold process 3-4 times total, every 30 minutes. After the last fold, let the dough rest, covered, for another 1-2 hours. The dough should be puffy, slightly domed, and have visible bubbles on the surface. It won’t double in size like yeasted bread, but it should look noticeably larger and feel airy.
Step 4: Shape the Loaf (Afternoon)
Lightly flour your work surface. Turn the dough out gently—try not to deflate it too much. Pat it into a rough rectangle, about 8×10 inches. If you’re adding dried cranberries or pepitas, sprinkle them over the surface now. Fold the top third down to the center, then fold the bottom third up like a letter. Pinch the seams to seal. Gently roll the dough into a log, seam side down. Cup your hands around the dough and pull it toward you on the counter to create surface tension. It should form a tight, smooth oval.
Step 5: Final Proof (Overnight in the Fridge)
Place the shaped dough into a parchment-lined loaf pan, seam side down. Cover the pan loosely with plastic wrap or a reusable bag. Place it in the refrigerator for 12-18 hours. This slow, cold fermentation develops the flavor and makes the bread easier to handle. Don’t rush this step—it’s what gives the sourdough its signature tang and complex flavor profile.
Step 6: Bake (Day 2, Morning)
Preheat your oven to 425°F (220°C) with a rack in the middle. Remove the loaf from the fridge and let it sit at room temperature while the oven preheats (about 20 minutes). The dough should have risen slightly in the pan. If you’d like, brush the top with a little milk or egg wash (optional) and sprinkle with pepitas or a dusting of cinnamon. Bake for 20 minutes at 425°F, then reduce the temperature to 375°F (190°C) and bake for another 25-30 minutes. The loaf should be deep golden brown and sound hollow when tapped on the bottom. If you have a thermometer, the internal temperature should read 200°F (93°C).
Step 7: Cool Completely (The Hardest Part)
Remove the loaf from the pan immediately and transfer it to a wire rack. Let it cool completely—at least 2 hours—before slicing. I know it’s tempting to cut into it while it’s warm, but the crumb needs time to set. Cutting too early will result in a gummy, squished loaf. (I learned this the hard way with my first attempt. It was still delicious, but the texture was sad.)
Cooking Tips & Techniques
I’ve made this loaf enough times to know exactly where things can go wrong. Here are the things I wish someone had told me when I started baking sourdough:
Your Starter Needs to Be Active : This is the number one reason sourdough loaves fail. If your starter isn’t bubbly and doubled in size within 4-6 hours of feeding, it’s not ready to bake. Feed it a few times over a couple of days until it’s consistently vigorous. A lazy starter makes a flat, dense loaf.
Don’t Skip the Stretch and Folds : I know it feels repetitive, but those folds are what build the gluten structure that traps the gas bubbles. Without them, your loaf will be flat and dense. Set a timer and make it a habit. I usually do my folds while I’m cleaning up the kitchen or waiting for my coffee to brew.
Temperature Matters More Than You Think : Sourdough is a living thing, and it responds to temperature. If your kitchen is cold (below 70°F), the fermentation will be slow. You can place the dough in a slightly warm spot, like near a sunny window or on top of the refrigerator. If it’s hot, the dough will ferment faster, so keep an eye on it. I’ve had loaves over-proof in the summer in just 3 hours.
The Pumpkin Can Make the Dough Sticky : Pumpkin puree adds moisture, which is great for the crumb but can make the dough feel wetter than you’re used to. Resist the urge to add too much extra flour. A sticky dough is a hydrated dough, and hydration equals a soft, tender loaf. Just use wet hands for the folds and a little flour on your work surface for shaping.
Cold Proofing Is Your Friend : I always recommend an overnight cold proof for this recipe. It makes the dough easier to handle, develops deeper flavor, and fits perfectly into a busy schedule. Mix the dough in the morning, shape it in the afternoon, and bake it the next day. It’s practically effortless.
Variations & Adaptations
One of the best things about this recipe is how flexible it is. Here are a few ways I’ve adapted it depending on my mood, the season, or what’s in my pantry:
Vegan Version : Replace the butter with coconut oil or a vegan butter substitute. Use a plant-based milk for the wash (if using). The texture will be slightly different—slightly less tender—but still delicious. I’ve made this for a vegan friend and she couldn’t tell the difference.
Gluten-Free Option : I won’t lie, this is a tricky one. Sourdough relies on gluten for structure. But I’ve had success using a high-quality gluten-free bread flour blend (like Cup4Cup or Bob’s Red Mill) and adding 1 teaspoon of xanthan gum. The texture is more like a dense, moist quick bread than a traditional sandwich loaf, but the flavor is spot-on.
Extra Spicy Version : If you like your pumpkin spice with a kick, double the ginger and add ¼ teaspoon of cayenne pepper. It sounds weird, but the heat plays beautifully with the sweetness of the pumpkin and the tang of the sourdough. I made this for a fall potluck and it was the first thing to disappear.
Sweet Breakfast Loaf : Increase the brown sugar to 75g (about ⅓ cup) and add ½ cup of chocolate chips or dried cherries. This version is perfect for French toast or just toasted with a pat of butter. It’s dangerously good.
Savory Pumpkin Sourdough : Skip the brown sugar and pumpkin pie spice. Instead, add 1 teaspoon of dried rosemary, ½ teaspoon of black pepper, and ½ cup of grated Parmesan cheese. The pumpkin keeps the bread moist while the herbs and cheese make it perfect for serving alongside a bowl of soup or a hearty stew. I’ve served this with a creamy tomato soup and it was a match made in heaven.
Serving & Storage Suggestions
This loaf is incredibly versatile. Here’s how I like to serve it and how to keep it fresh:
Serving Suggestions : Toast slices and spread with salted butter, cream cheese, or a dollop of honey. It makes an incredible base for a turkey and cranberry sandwich (especially the day after Thanksgiving). For a sweet treat, use thick slices to make pumpkin spice French toast—just dip in a mixture of eggs, milk, and a little cinnamon. It’s also fantastic served alongside a warm bowl of chili or a hearty winter soup. Honestly, I’ve even used it as the base for a savory bread pudding and it was phenomenal.
Storage : Store the cooled loaf in a bread bag or wrapped tightly in beeswax wrap at room temperature for up to 3 days. Do not refrigerate—it will dry out the bread. If you live in a humid climate, the crust might soften after a day or two. Just pop slices in the toaster to revive them.
Freezing : This loaf freezes beautifully. Slice it first, then wrap the slices individually in plastic wrap and place them in a freezer-safe bag. They’ll keep for up to 3 months. Toast directly from frozen—no need to thaw. I always keep a few slices in the freezer for busy mornings when I want a taste of fall without the effort.
Reheating : For the best texture, toast slices in a toaster or under the broiler for 2-3 minutes per side. If you’re reheating a whole loaf, wrap it in foil and warm it in a 350°F oven for 10-15 minutes.
Nutritional Information & Benefits
While I’m not a nutritionist, I can tell you that this loaf is made with real, whole ingredients. Here’s a rough estimate per slice (based on 12 slices):
- Calories : ~180
- Carbohydrates : 34g
- Protein : 5g
- Fat : 3g
- Fiber : 2g
- Sugar : 5g
The fermentation process in sourdough makes the nutrients more bioavailable, meaning your body can actually absorb them better. The pumpkin puree is packed with vitamin A, fiber, and antioxidants. The whole wheat flour adds extra fiber and minerals. And the spices? Cinnamon is known for its anti-inflammatory properties, and ginger is great for digestion. So while this is still bread (and should be enjoyed in moderation), it’s a far cry from the processed, preservative-laden stuff you buy at the store. It’s real food, made with patience and love.
Conclusion
This Perfect Pumpkin Spice Sourdough Sandwich Loaf has become my go-to fall bake for a reason. It’s not the fastest recipe in my collection, and it’s not the easiest. But it is the most rewarding. There’s something deeply satisfying about pulling a golden, fragrant loaf out of the oven and knowing that you coaxed it into existence from nothing more than flour, water, and a little patience. It tastes like fall, it smells like comfort, and it makes even the simplest sandwich feel like a special occasion.
I hope you give this recipe a try. Don’t be intimidated by the sourdough process—it’s more forgiving than you think. And if your first loaf isn’t perfect? That’s okay. Mine wasn’t either. But it was still delicious, and that’s what matters. Bake it for yourself, for your family, or just because you want your kitchen to smell like pumpkin spice and warmth. You won’t regret it.
If you make this loaf, I’d love to hear about it. Leave a comment below, share a photo on Pinterest, or tag me in your creations. And if you have questions about the process, don’t hesitate to ask. I’m here to help you bake the best bread of your fall season.
Frequently Asked Questions
Can I use all-purpose flour instead of bread flour?
Yes, you can. The loaf will be slightly less chewy and a little more tender, but it will still work. If you use all-purpose flour, you might need to reduce the water by about 10-15g since it absorbs less liquid than bread flour.
My dough isn’t rising. What went wrong?
The most common culprit is an inactive starter. Make sure your starter is bubbly and doubled in size within 4-6 hours of feeding. If it’s not, feed it a few more times over a couple of days until it’s consistently active. Temperature also matters—if your kitchen is cold, the fermentation will be slow. Try placing the dough in a warmer spot.
Can I skip the overnight cold proof?
You can, but the flavor won’t be as developed. The cold proof allows the sourdough to ferment slowly, which builds that signature tangy flavor. If you’re in a rush, let the shaped loaf proof at room temperature for 2-3 hours until it’s puffy and has risen slightly in the pan. Then bake immediately.
How do I know when the bread is fully baked?
The best way is to use an instant-read thermometer. The internal temperature should be around 200°F (93°C). If you don’t have a thermometer, tap the bottom of the loaf—it should sound hollow. The crust should be deep golden brown and feel firm to the touch.
Can I make this recipe without a sourdough starter?
This recipe is specifically designed for sourdough, but you can adapt it using commercial yeast. Replace the 100g of starter with 100g of water and 100g of flour, and add 1 teaspoon of active dry yeast to the water and starter mixture. The fermentation time will be much shorter—about 1-2 hours for bulk fermentation and 1 hour for final proof. The flavor won’t be as complex, but it will still be delicious.
Pin This Recipe!
Perfect Pumpkin Spice Sourdough Sandwich Loaf: Easy & Best Fall Recipe

This pumpkin spice sourdough sandwich loaf combines the tangy complexity of sourdough with warm fall spices and tender pumpkin crumb. It’s perfect for sandwiches, toast, or French toast, and fills your kitchen with an incredible autumn aroma.
- Prep Time: 20 minutes
- Cook Time: 45 minutes
- Total Time: 14 hours 5 minutes (includes fermentation and cooling)
- Yield: 12 servings 1x
- Category: Bread
- Cuisine: American
Ingredients
- 100g active sourdough starter (bubbly, fed within 4–6 hours)
- 400g bread flour (about 3 cups)
- 100g whole wheat flour (about ¾ cup)
- 250g water (about 1 cup, filtered or room temperature)
- 10g fine sea salt (about 1½ teaspoons)
- 150g pumpkin puree (about ⅔ cup, 100% pure, not pie filling)
- 2 teaspoons pumpkin pie spice
- 1 teaspoon ground cinnamon (plus extra for dusting)
- 50g brown sugar (about ¼ cup, packed)
- 30g unsalted butter (about 2 tablespoons, melted)
- ¼ cup pepitas (pumpkin seeds, optional)
- ¼ cup dried cranberries (optional)
- Zest of 1 orange (optional)
Instructions
- Mix the Dough: In a large bowl, combine active sourdough starter, water, and pumpkin puree. Stir until starter is mostly dissolved. Add bread flour and whole wheat flour. Mix with hands or a wooden spoon until a shaggy dough forms. Cover and let rest for 30 minutes (autolyse).
- Add Remaining Ingredients: Sprinkle salt, pumpkin pie spice, cinnamon, and brown sugar over the dough. Pour melted butter on top. Use fingers to pinch and squeeze until everything is incorporated (about 3-4 minutes). Dough should be soft, slightly tacky, and pliable. Adjust with a teaspoon of water or tablespoon of flour if needed.
- Bulk Fermentation with Stretch and Folds: Cover dough and let rest 30 minutes. Perform first stretch and fold: wet hand, reach under one side, stretch up, fold over top. Rotate bowl a quarter turn and repeat for all four sides. Cover and rest 30 minutes. Repeat stretch and fold process 3-4 times total, every 30 minutes. After last fold, let rest covered for another 1-2 hours until puffy, slightly domed, with visible bubbles.
- Shape the Loaf: Lightly flour work surface. Gently turn out dough. Pat into rough 8×10 inch rectangle. If adding dried cranberries or pepitas, sprinkle over surface. Fold top third down to center, then bottom third up like a letter. Pinch seams to seal. Gently roll into a log, seam side down. Cup hands around dough and pull toward you to create surface tension, forming a tight smooth oval.
- Final Proof: Place shaped dough into parchment-lined 9×5-inch loaf pan, seam side down. Cover loosely with plastic wrap. Refrigerate for 12-18 hours for cold fermentation.
- Bake: Preheat oven to 425°F (220°C) with rack in middle. Remove loaf from fridge and let sit at room temperature while oven preheats (about 20 minutes). Optional: brush top with milk or egg wash, sprinkle with pepitas or cinnamon. Bake at 425°F for 20 minutes, then reduce temperature to 375°F (190°C) and bake for another 25-30 minutes until deep golden brown and hollow when tapped. Internal temperature should reach 200°F (93°C).
- Cool: Remove loaf from pan immediately and transfer to wire rack. Cool completely, at least 2 hours, before slicing.
Notes
Ensure sourdough starter is active and bubbly. Do not skip stretch and folds—they build gluten structure. Cold proofing overnight develops flavor and makes dough easier to handle. Let loaf cool completely before slicing to avoid gummy texture. For vegan version, replace butter with coconut oil. For gluten-free, use high-quality gluten-free bread flour blend with 1 tsp xanthan gum.
Nutrition
- Serving Size: 1 slice
- Calories: 180
- Sugar: 5
- Sodium: 210
- Fat: 3
- Saturated Fat: 1.5
- Carbohydrates: 34
- Fiber: 2
- Protein: 5
Keywords: pumpkin spice sourdough, sourdough sandwich loaf, fall sourdough bread, pumpkin sourdough, sourdough bread recipe, pumpkin spice bread, sourdough sandwich bread, fall baking