I didn’t actually mean to make this the centerpiece of every summer gathering for the next five years. The first time I made a red, white, and blue layered berry trifle, I was rushing—like, truly rushing—to throw something together for a last-minute Fourth of July barbecue my neighbor guilt-tripped me into attending. I grabbed a bag of frozen mixed berries, a tub of whipped topping I normally wouldn’t touch, and some day-old angel food cake I’d bought on a whim. I layered it all in a glass bowl, crossed my fingers, and walked out the door.
And honestly? It was the first thing to disappear. People stood around the bowl with their plates, scraping the sides. Someone asked for the recipe before I’d even sat down. I mumbled something about “a little of this, a little of that” because I was too embarrassed to admit I’d winged it with convenience-store ingredients. But here’s the thing—I’ve been making it properly ever since. Not because I had to, but because I genuinely couldn’t stop thinking about how good those simple layers tasted together. The tart berries cutting through the sweet cream, the soft cake soaking up all that juice. It’s not fancy. It’s not complicated. But it is, without question, the dessert that makes people close their eyes and go quiet for a second. That’s the one you keep.
Why You’ll Love This Recipe
Let me tell you why this red, white, and blue layered berry trifle has become my most-requested recipe for every patriotic holiday, summer potluck, and casual backyard dinner. It’s not just because it looks like a flag in a glass—though honestly, that doesn’t hurt.
- Quick & Easy: This comes together in about 20 minutes of active time. No baking required if you use store-bought cake. You can literally make it while the grill is heating up.
- Simple Ingredients: You need six ingredients. Maybe seven if you count the vanilla extract. Everything is available at any grocery store, any time of year.
- Perfect for Celebrations: Memorial Day, Fourth of July, Labor Day, or just a Tuesday that feels like it deserves some color. It’s the dessert equivalent of sparklers.
- Crowd-Pleaser: I’ve watched kids bypass a full dessert table to come back for thirds of this trifle. Adults do the same thing, just with more subtlety.
- Unbelievably Delicious: The texture is what gets you. Soft cake, creamy pudding, juicy berries, and that little bit of crunch from the pecans if you add them. It’s comfort food in a glass.
What makes this version different from all the other trifle recipes out there? Two things. First, I use a homemade vanilla pudding instead of instant mix. It takes five extra minutes and makes the whole thing taste like something from a bakery. Second, I layer the berries in a specific way so they don’t bleed into the cream and turn everything pink before you serve it. That little trick is worth its weight in gold when you want those clean red, white, and blue stripes.
This is the dessert you bring when you want to impress people without stressing yourself out. It’s forgiving, flexible, and somehow always the star of the show.
What Ingredients You Will Need
This recipe uses simple, honest ingredients to create something that feels much greater than the sum of its parts. Most of these are pantry staples or easy to find in the produce section.
- Angel food cake (1 store-bought loaf or 1 homemade 9-inch cake, cut into 1-inch cubes) — I prefer store-bought for convenience, but day-old homemade works beautifully too. The slight dryness actually helps it absorb the berry juice without turning to mush.
- Fresh strawberries (2 cups, hulled and sliced) — Look for deep red, fragrant berries. If strawberries aren’t in season, frozen sliced strawberries work, but thaw and drain them first.
- Fresh blueberries (2 cups) — Small to medium berries hold up better than giant ones. I use wild blueberries when I can find them because they’re sweeter.
- Fresh raspberries (1 cup) — Optional but highly recommended for extra color and tartness. They add that deep red pop between the strawberry layers.
- Whole milk (2 cups) — Don’t use skim here. The fat is what makes the pudding silky. I’ve tested it with 2% and it works, but whole milk is noticeably better.
- Granulated sugar (¾ cup, divided) — Some goes into the pudding, some gets macerated with the berries. I use organic cane sugar but regular white sugar works fine.
- Egg yolks (4 large) — These thicken the pudding and give it that rich, custard-like texture. Save the egg whites for omelets or freeze them for later.
- Vanilla extract (2 teaspoons, pure not imitation) — I’m a loyal fan of Nielsen-Massey Madagascar vanilla. It’s pricey but worth it for desserts where vanilla is the main flavor.
- Cornstarch (2 tablespoons) — This stabilizes the pudding so it sets properly without scrambling the eggs.
- Heavy cream (1½ cups, cold) — For the whipped cream layer. Make sure it’s very cold or it won’t whip properly. I recommend Organic Valley or local cream if available.
- Powdered sugar (3 tablespoons) — Just enough to sweeten the whipped cream without making it heavy.
- Toasted pecans (½ cup, chopped) — Totally optional, but I love the crunch they add. Toast them in a dry pan for 3 minutes until fragrant.
Substitution notes: If you’re avoiding dairy, use full-fat oat milk for the pudding and coconut cream for the whipped layer. For a gluten-free version, use a gluten-free vanilla cake or pound cake instead of angel food. And if you’re short on time, high-quality store-bought vanilla pudding and whipped topping work in a pinch—I won’t tell anyone.
Equipment Needed
You don’t need much for this recipe, which is part of why I love it. Here’s what you’ll want to have on hand:
- Large trifle bowl or glass serving dish (3-4 quart capacity) — A clear glass bowl is ideal because you can see the layers. I use a 4-quart trifle dish I found at a thrift store for $4. If you don’t have one, a large glass mixing bowl works just fine.
- Medium saucepan — For making the pudding. Go with heavy-bottomed to prevent scorching.
- Whisk — A good balloon whisk is essential for smooth pudding. I’ve ruined batches with a fork in a pinch, don’t recommend it.
- Electric mixer or stand mixer — For whipping the cream. You can do it by hand with a whisk but your arm will hate you. I use my KitchenAid stand mixer because I’m lazy.
- Sharp chef’s knife and cutting board — For hulling strawberries and cutting cake.
- Mixing bowls — At least two medium bowls for macerating berries and holding ingredients.
- Rubber spatula — For scraping every last bit of pudding out of the saucepan. I’m a big fan of the GIR spatulas, they’re heat-resistant and don’t melt.
- Measuring cups and spoons — Precise measurements matter more in pudding than you’d think.
If you don’t have a trifle dish, honestly, use a wide-mouth mason jar for individual servings. They’re adorable and people love having their own little trifle. I’ve done it for parties and it eliminates the awkward scooping situation.
Preparation Method
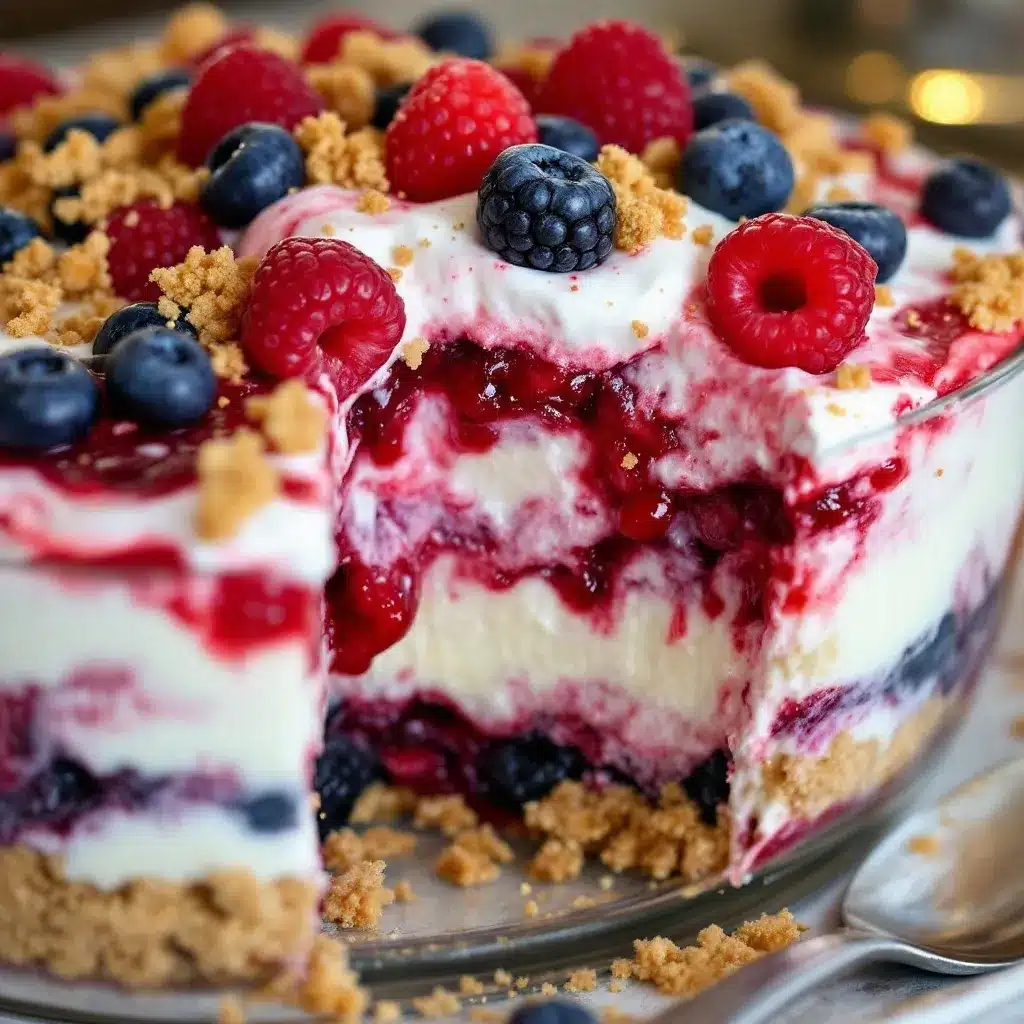
Let’s build this beautiful thing. I’m going to walk you through every step, including the little things I’ve learned from making this probably thirty times.
Step 1: Macerate the Berries (15 minutes)
In a medium bowl, combine the sliced strawberries, blueberries, and raspberries. Sprinkle ¼ cup of the granulated sugar over them and gently toss to coat. Let them sit for 15 minutes at room temperature. This draws out their natural juices and creates that gorgeous ruby syrup that soaks into the cake. Don’t skip this step—I’ve tried, and the trifle ends up dry and sad.
Step 2: Make the Vanilla Pudding (10 minutes active, 30 minutes chilling)
In a medium saucepan, whisk together the remaining ½ cup sugar, cornstarch, and a pinch of salt. In a separate bowl, whisk the egg yolks and ½ cup of the milk until smooth. Pour the egg mixture into the saucepan and whisk to combine. Place the saucepan over medium heat and slowly pour in the remaining 1½ cups milk, whisking constantly. Cook for 5-7 minutes, whisking nonstop, until the mixture thickens and just begins to bubble. Remove from heat, stir in the vanilla extract. Pour through a fine-mesh strainer into a clean bowl to catch any lumps. Press plastic wrap directly onto the surface to prevent a skin from forming. Refrigerate for at least 30 minutes or up to 3 days.
Step 3: Whip the Cream (5 minutes)
In the bowl of a stand mixer or a large mixing bowl, combine the cold heavy cream and powdered sugar. Beat on medium-high speed until soft peaks form—about 3-4 minutes. You want peaks that hold their shape but are still soft and billowy. If you over-whip, you’ll get butter. I’ve done it. It’s not the end of the world, but it’s not ideal.
Step 4: Assemble the Trifle (10 minutes)
This is where the magic happens. Start with a layer of cake cubes at the bottom of your trifle dish—about one-third of the cake. Spoon about half of the macerated berries and their juice over the cake. Spread half of the chilled pudding over the berries. Add another layer of cake, the remaining berries, and the rest of the pudding. Top with the final layer of cake. Spoon the whipped cream over the top and spread it gently to cover completely. If you’re using pecans, sprinkle them over the whipped cream.
Step 5: Chill and Serve (2 hours minimum, overnight is better)
Cover the trifle loosely with plastic wrap and refrigerate for at least 2 hours. This allows the cake to absorb the berry juices and pudding, creating that soft, spoonable texture. Overnight is genuinely better—the flavors meld and deepen. When you’re ready to serve, you can garnish with extra berries and mint leaves if you want to be fancy.
A note on layering: I’ve learned the hard way that pressing the cake down too firmly makes the trifle dense and soggy. Just place the cubes gently. And don’t stir the layers together—that’s a trifle, not a parfait. The distinct layers are the whole point.
Cooking Tips & Techniques
I’ve made this trifle enough times to have a few hard-won lessons. Here are the ones that actually matter.
Don’t over-macerate the berries. Fifteen minutes is perfect. If you let them sit for an hour, they release too much liquid and the bottom layer of cake becomes soup. I learned this when I made the trifle three hours before a party and the bottom was practically drinkable.
Temperature matters for the pudding. When you’re cooking the pudding, keep the heat at medium, not high. High heat scrambles the eggs before the cornstarch has a chance to thicken. You’ll end up with sweetened scrambled egg milk, which is not a good look. If you see any lumps forming, whisk faster and lower the heat immediately.
Chill the bowl and beaters for the cream. I put my mixer bowl and whisk attachment in the freezer for 10 minutes before whipping cream. It makes the cream whip faster and hold its shape longer. On hot summer days, this is non-negotiable.
Layer strategically for presentation. Press the cake cubes that will be visible against the glass wall slightly so they stay put. Otherwise, they float up into the cream and your perfect stripes get wonky. Not the end of the world, but if you’re photographing it for Instagram, it matters.
Make it ahead. This is actually better made a day ahead. The cake absorbs the flavors, the pudding sets completely, and the whole thing becomes this cohesive, luscious dessert. I’ve served it immediately and I’ve served it after 24 hours, and the 24-hour version wins every time.
Variations & Adaptations
One of the best things about this trifle is how adaptable it is. Here are some variations I’ve tried and loved.
Patriotic Berry and Lemon Trifle: Replace the vanilla pudding with lemon curd mixed with an equal amount of whipped cream. The tartness of the lemon cuts through the sweetness of the berries and cake beautifully. I made this for a Memorial Day party and someone asked if I’d cater their wedding.
Chocolate Lover’s Trifle: Use chocolate pound cake instead of angel food, and make a chocolate pudding instead of vanilla. The berries still work—the tartness balances the chocolate. My husband, who claims not to like fruit desserts, ate half of one of these before I could stop him.
Dairy-Free/Vegan Version: Use a store-bought vegan vanilla cake, coconut cream for the whipped layer (chill two cans of full-fat coconut milk overnight, scoop out the solid cream, and whip with powdered sugar), and a plant-based vanilla pudding. I’ve tested this with oat milk pudding and it works surprisingly well.
Individual Mason Jar Trifles: Layer everything in 8-ounce mason jars for individual servings. They’re perfect for picnics or parties where people are standing. You can make them a day ahead and just grab and go.
Summer Berry Trifle with Fresh Mint: Add a layer of fresh mint leaves between the berries and the pudding. The mint brightens everything and makes it taste even more summery. I grow mint in my garden specifically for this.
Serving & Storage Suggestions
This trifle is best served cold, straight from the refrigerator. I like to let it sit at room temperature for about 10 minutes before serving—it takes the chill off and lets the flavors open up.
Presentation: Serve in the trifle dish so everyone can see the layers. Use a large spoon or a flat serving spoon to scoop from the top down, getting a bit of each layer in every serving. Garnish with a few fresh berries and a sprig of mint on top for color.
Complementary dishes: This trifle pairs beautifully with refreshing champagne punch for a sparkling celebration, or with sparkling New Year’s sangria for a festive touch. If you’re serving it as part of a larger spread, it goes well with savory appetizers like crispy prosciutto-wrapped asparagus bites or elegant caviar deviled eggs for a balanced menu.
Storage: Cover the trifle tightly with plastic wrap or transfer to an airtight container. It will keep in the refrigerator for up to 3 days. The texture changes over time—the cake gets softer and the flavors meld more—but it’s still delicious. I actually prefer it on day two.
Freezing: I don’t recommend freezing this trifle. The cream and pudding separate when thawed, and the berries become mushy. If you want to prep ahead, make the pudding and macerate the berries separately, then assemble the day you’re serving.
Reheating: This is a cold dessert, so no reheating needed. If you’ve refrigerated it and the cream seems a bit stiff, let it sit at room temperature for 15-20 minutes before serving.
Nutritional Information & Benefits
Per serving (based on 12 servings, approximate values): Calories 320, Fat 14g, Saturated Fat 8g, Cholesterol 95mg, Sodium 210mg, Carbohydrates 44g, Fiber 3g, Sugar 32g, Protein 5g.
This trifle isn’t health food, but it does have some redeeming qualities. Berries are packed with antioxidants, vitamin C, and fiber. Blueberries in particular are known for their brain health benefits. The eggs in the pudding provide protein and healthy fats. And angel food cake is lower in calories and fat than most other cakes.
If you’re watching your sugar intake, you can reduce the sugar in the macerated berries to 2 tablespoons and use a sugar substitute in the pudding. I’ve used Swerve in the pudding and it worked fine, though the texture was slightly less silky.
For a lighter version, use low-fat milk in the pudding and skip the whipped cream layer. The trifle will be less rich but still delicious. I’ve done this when I wanted dessert without the full commitment.
Conclusion
This red, white, and blue layered berry trifle has become my signature summer dessert for a reason. It’s beautiful enough for a holiday table, simple enough for a weekday treat, and forgiving enough for a beginner cook. The first time I made it, I was embarrassed by how thrown-together it was. Now I’m proud of how intentional it feels—every layer has a purpose, every ingredient earns its place.
I hope you make this and find your own favorite variation. Maybe you’ll add lemon zest to the cream like my friend Sarah does. Maybe you’ll use blackberries instead of blueberries like my neighbor prefers. Or maybe you’ll keep it exactly as written and discover that sometimes the simplest things really are the best.
If you make this trifle, I’d love to hear about it. Leave a comment below and tell me how it turned out, what you changed, or just say hello. And if you’re looking for more festive desserts, check out our full recipe collection for more inspiration. Happy cooking, friends!
Frequently Asked Questions
Can I use frozen berries instead of fresh?
Yes, but thaw and drain them thoroughly first. Frozen berries release more liquid than fresh, so you’ll want to pat them dry with paper towels after thawing to prevent the trifle from becoming too watery. I’ve used frozen mixed berries in a pinch and it worked fine, just adjust the sugar slightly since frozen berries can be more tart.
How far in advance can I make this trifle?
You can make it up to 24 hours in advance. In fact, I recommend it—the flavors meld and the texture becomes perfect. Any longer than 24 hours and the cake starts to break down too much. If you need to prep further ahead, make the pudding and macerate the berries separately, then assemble the day before serving.
Can I use a different type of cake?
Absolutely. Pound cake, vanilla sponge cake, lemon cake, or even shortbread cookies work beautifully. Just avoid anything too dense or oily, like a butter cake, because it won’t absorb the berry juices as well. I’ve used gluten-free vanilla cake with great success.
Why did my pudding turn out lumpy?
Lumpy pudding usually means the heat was too high or you stopped whisking. Always cook pudding over medium heat and whisk constantly. If you do get lumps, pour the pudding through a fine-mesh strainer before chilling. It won’t be perfectly smooth, but it will be salvageable.
How do I get clean, distinct layers?
Use a clear glass dish so you can see what you’re doing. Spread each layer gently and evenly without pressing down. For the whipped cream layer, spoon it on and spread it carefully rather than dumping it all at once. And chill the trifle for at least 2 hours before serving—the layers will settle and become more defined as it chills.
Pin This Recipe!

Perfect Red White and Blue Layered Berry Trifle

This stunning red, white, and blue layered berry trifle is the ultimate patriotic dessert. With layers of angel food cake, homemade vanilla pudding, fresh berries, and whipped cream, it’s a simple yet impressive treat perfect for summer celebrations.
- Prep Time: 20 minutes
- Cook Time: 10 minutes
- Total Time: 2 hours 30 minutes (includes chilling)
- Yield: 12 servings 1x
- Category: Dessert
- Cuisine: American
Ingredients
- 1 store-bought angel food cake loaf or 1 homemade 9-inch cake, cut into 1-inch cubes
- 2 cups fresh strawberries, hulled and sliced
- 2 cups fresh blueberries
- 1 cup fresh raspberries (optional)
- 2 cups whole milk
- 3/4 cup granulated sugar, divided
- 4 large egg yolks
- 2 teaspoons pure vanilla extract
- 2 tablespoons cornstarch
- 1 1/2 cups cold heavy cream
- 3 tablespoons powdered sugar
- 1/2 cup toasted pecans, chopped (optional)
Instructions
- Macerate the berries: In a medium bowl, combine sliced strawberries, blueberries, and raspberries. Sprinkle 1/4 cup of the granulated sugar over them and gently toss to coat. Let sit for 15 minutes at room temperature.
- Make the vanilla pudding: In a medium saucepan, whisk together the remaining 1/2 cup sugar, cornstarch, and a pinch of salt. In a separate bowl, whisk the egg yolks and 1/2 cup of the milk until smooth. Pour the egg mixture into the saucepan and whisk to combine. Place over medium heat and slowly pour in the remaining 1 1/2 cups milk, whisking constantly. Cook for 5-7 minutes, whisking nonstop, until thickened and just beginning to bubble. Remove from heat, stir in vanilla extract. Pour through …
- Whip the cream: In the bowl of a stand mixer or large mixing bowl, combine cold heavy cream and powdered sugar. Beat on medium-high speed until soft peaks form, about 3-4 minutes.
- Assemble the trifle: In a large trifle dish or glass serving bowl, layer one-third of the cake cubes. Spoon half of the macerated berries and their juice over the cake. Spread half of the chilled pudding over the berries. Add another layer of cake, the remaining berries, and the rest of the pudding. Top with the final layer of cake. Spoon the whipped cream over the top and spread gently to cover completely. If using, sprinkle toasted pecans over the whipped cream.
- Chill and serve: Cover loosely with plastic wrap and refrigerate for at least 2 hours, preferably overnight. Garnish with extra berries and mint leaves if desired before serving.
Notes
For best results, make the trifle a day ahead to allow flavors to meld. Do not over-macerate the berries (15 minutes is perfect). Chill the bowl and beaters for whipping cream. For clean layers, press cake cubes against the glass slightly and spread each layer gently without pressing down. If you don’t have a trifle dish, use a large glass mixing bowl or individual mason jars.
Nutrition
- Serving Size: 1 serving (1/12 of r
- Calories: 320
- Sugar: 32
- Sodium: 210
- Fat: 14
- Saturated Fat: 8
- Carbohydrates: 44
- Fiber: 3
- Protein: 5
Keywords: red white and blue trifle, berry trifle, patriotic dessert, Fourth of July dessert, summer dessert, layered dessert, angel food cake trifle


