Scrambling around the kitchen with a half-empty bag of graham crackers and the clock ticking down to the neighborhood July 4th barbecue, I realized dessert was MIA. Honestly, I wasn’t even sure I had the right ingredients to pull off anything fancy. But hey, when you’re staring down the barrel of hungry kids and a crowd expecting something festive, you learn to improvise fast. This is where my Perfect Red White Blue Cheesecake Bars were born—right in the middle of last-minute chaos, with a little dash of creativity and a whole lot of red, white, and blue pride.
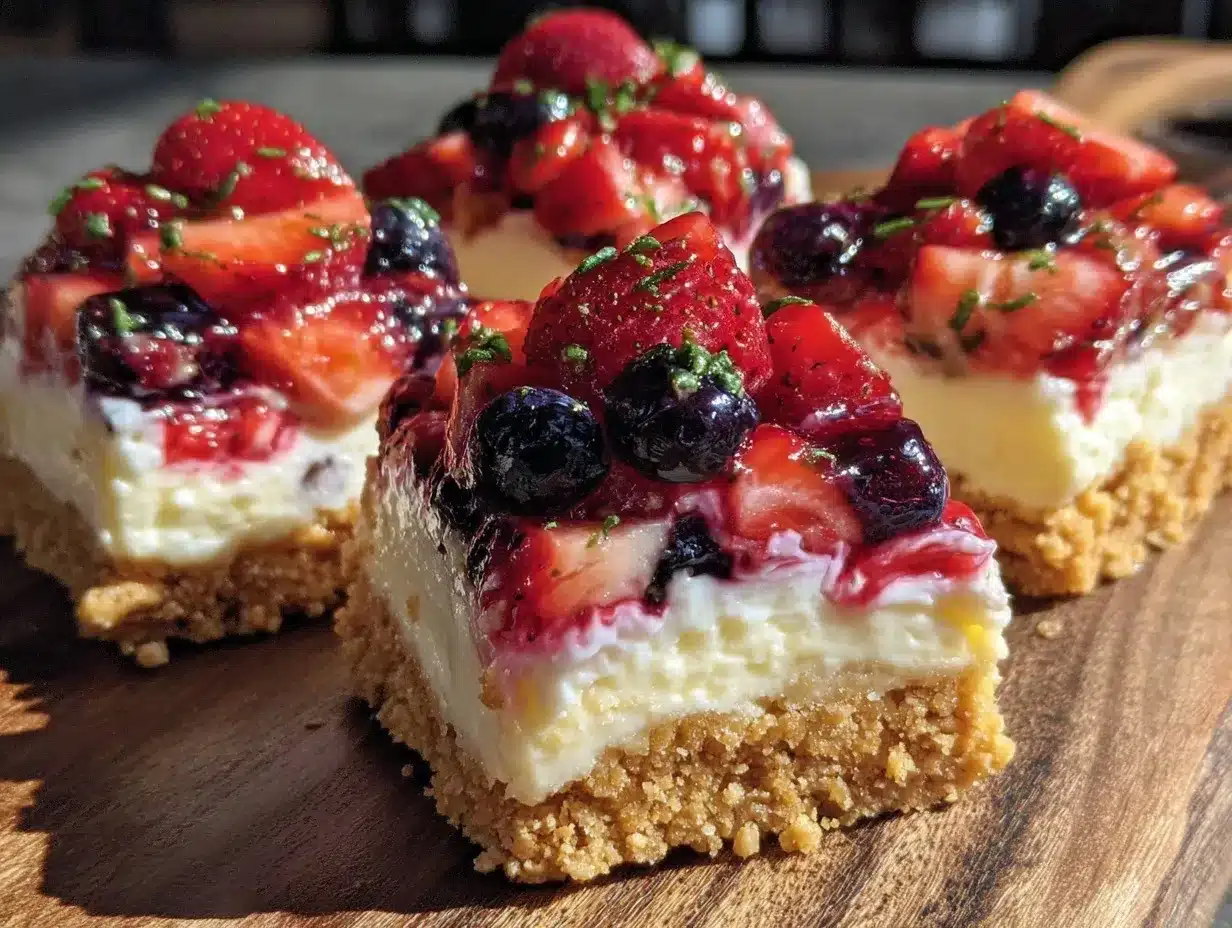
The smell of fresh berries mixing with sweet cream cheese filling while the buttery crust baked in the oven became a quiet moment of calm amid the madness. That first bite was like a mini celebration on its own—cool, tangy, and just sweet enough to make you pause and smile. These cheesecake bars quickly became my go-to for patriotic gatherings, not just because they look stunning but because they taste like summer happiness captured in every bite. There’s something about the combination of creamy cheesecake, crunchy crust, and juicy berries that just feels right for those sunny afternoons spent outdoors with friends and family.
What really sticks with me about this recipe is how forgiving it is. Whether you’re juggling kids, guests, or just want an easy-to-make dessert that brings a festive pop to the table, these bars won’t let you down. I’ve made them for everything from casual picnics to more formal get-togethers, and they always get devoured fast. Plus, they pair beautifully with a refreshing drink—like the champagne punch I whipped up last summer. Honestly, once you try these, they might just become your signature patriotic dessert, too.
Why You’ll Love This Recipe
Let me tell you, I’ve tested a fair share of cheesecake bars over the years, and these red, white, and blue beauties hold a special place in my recipe box. They’re not just pretty faces—they’ve got substance, and here’s why they stand out:
- Quick & Easy: Ready in under 45 minutes (plus chilling time), perfect for last-minute celebrations or when you want dessert with minimal fuss.
- Simple Ingredients: No weird stuff here—just pantry staples and fresh berries you can usually find at your local store.
- Perfect for Patriotic Holidays: Whether it’s Independence Day, Memorial Day, or Labor Day, these bars add a festive flair that’s totally on point.
- Crowd-Pleaser: Kids, adults, picky eaters—they all love the creamy texture and vibrant berry topping.
- Unbelievably Delicious: The creamy cheesecake filling is silky smooth, with a graham cracker crust that’s buttery and crisp, and the fresh fruit adds that perfect burst of natural sweetness.
What makes this recipe different? Well, I blend the cream cheese just enough to keep it smooth but still a little rustic—no overmixing here—that way, the texture stays rich without being dense. The triple-layer berry topping is another special touch: fresh strawberries, blueberries, and a light dusting of powdered sugar give it that true red, white, and blue vibe without artificial colors. I’ve also found that using a combination of cream cheese and a touch of sour cream makes the filling just tangy enough to balance the sweetness, which keeps things interesting bite after bite.
Honestly, this recipe feels like a little slice of summer joy every time I make it. It’s the kind of dessert that makes you pause, savor, and maybe even close your eyes for a second—because sometimes, you just need that moment.
What Ingredients You Will Need
This recipe uses simple, wholesome ingredients to deliver bold flavor and satisfying texture without the fuss. Most are pantry staples, with fresh berries adding that seasonal, colorful finish.
- For the Crust:
- 1 1/2 cups graham cracker crumbs (about 10 full sheets) – I like using Honey Maid for a perfectly sweet, crunchy base
- 6 tablespoons unsalted butter, melted (adds richness and helps bind)
- 1/4 cup granulated sugar (balances the buttery flavor)
- For the Cheesecake Filling:
- 16 oz (450 g) cream cheese, softened (full-fat for best creaminess)
- 1/2 cup granulated sugar
- 1 large egg, room temperature
- 1 teaspoon vanilla extract (pure, if you can get it—makes a big difference)
- 2 tablespoons sour cream (adds a subtle tang and silkiness)
- For the Topping:
- 1 cup fresh strawberries, hulled and sliced (in summer, ripe berries make all the difference)
- 1 cup fresh blueberries
- Powdered sugar for dusting (optional, for that pretty white sparkle)
If you want to switch things up: use almond flour for a gluten-free crust, or swap sour cream with plain Greek yogurt for a lighter tang. Frozen berries work in a pinch, but fresh always wins for texture and color.
Equipment Needed
- 8×8 inch (20×20 cm) square baking pan – a standard size that gives perfect bar thickness; you can line it with parchment paper for easy removal
- Mixing bowls – one large for crust, another for the filling
- Electric mixer or handheld mixer – makes cream cheese blending smooth and fast
- Measuring cups and spoons – precise measurements are key for cheesecake texture
- Spatula – for scraping the bowl and smoothing the filling
- Knife and cutting board – for prepping the strawberries
If you don’t have an electric mixer, no worries—a sturdy whisk and some patience will do. For budget-friendly options, silicone spatulas and glass baking dishes work just fine. Keeping your cream cheese at room temperature before mixing is a little trick I learned that makes the filling silky smooth without lumps.
Preparation Method
- Preheat your oven to 325°F (160°C). Line your 8×8 inch pan with parchment paper, leaving some overhang for easy lifting later. This little step saved me tons of cleanup time.
- Make the crust: In a bowl, combine 1 1/2 cups graham cracker crumbs, 6 tablespoons melted butter, and 1/4 cup sugar. Mix until the crumbs are evenly coated and look like wet sand. Press the mixture firmly into the bottom of the pan, packing it down with the back of a spoon or your fingers. This ensures a solid base that won’t crumble apart later.
- Bake the crust for 10 minutes. This step helps set the crust so it holds up under the creamy filling. Let it cool for a bit while you prepare the cheesecake layer.
- Prepare the cheesecake filling: In a large bowl, beat 16 oz softened cream cheese with 1/2 cup sugar until smooth and creamy but don’t overmix—stop as soon as it’s lump-free. Add 1 large egg, 1 teaspoon vanilla extract, and 2 tablespoons sour cream, mixing just enough to combine. The batter should be thick and glossy.
- Pour the filling over the cooled crust and smooth it evenly with a spatula. Give the pan a gentle shake to release any air bubbles.
- Bake for 25-30 minutes, or until the edges are set but the center still has a slight jiggle. Overbaking will cause cracks, and honestly, nobody wants that.
- Cool the bars completely at room temperature, then refrigerate for at least 3 hours or overnight. I’ve learned that chilling is key for clean slicing and that perfect creamy texture.
- Add the topping: Just before serving, arrange 1 cup sliced strawberries and 1 cup blueberries on top of the chilled cheesecake bars. Dust lightly with powdered sugar if you want that extra festive look.
- Slice into squares and enjoy! Use a sharp knife wiped clean between cuts for the best presentation.
Pro tip: If you find the crust a little crumbly, press it down firmly before baking and don’t skip the bake step. Also, I sometimes swirl in a tiny bit of lemon zest into the filling for a fresh zing—totally optional but adds a nice touch.
Cooking Tips & Techniques
Cheesecake bars can be a little intimidating at first, but a few tricks make all the difference.
- Room Temperature Ingredients: Always bring your cream cheese and egg to room temperature to avoid lumps and cracking.
- Don’t Overmix: Beat just until smooth. Overmixing can whip excess air into the filling, leading to cracks when baking.
- Use a Water Bath (Optional): For extra creamy bars, you can bake the pan sitting in a shallow water bath to prevent cracking, but I usually skip this for ease and haven’t had issues.
- Cool Gradually: Let the cheesecake cool in the oven with the door slightly open for 10 minutes after baking to reduce temperature shock, which helps keep the surface smooth.
- Chill Thoroughly: Patience here pays off—cold cheesecake slices cleaner and tastes better.
- Berry Prep: Make sure berries are dry before topping to avoid soggy bars.
I once forgot to chill the bars overnight (rookie mistake), and slicing turned into a crumbly mess. Since then, the fridge is my best friend for cheesecake success. Also, sharpening your knife right before slicing helps keep those clean edges everyone loves.
Variations & Adaptations
You can easily switch up this recipe to suit different tastes or dietary needs.
- Fruit Variations: Swap berries for cherries, raspberries, or a tropical mix like mango and kiwi for a different patriotic spin or seasonal twist.
- Gluten-Free Crust: Use almond flour or gluten-free graham crumbs instead of regular graham crackers for those avoiding gluten.
- Dairy-Free Option: Substitute cream cheese with a vegan cream cheese alternative and use coconut yogurt instead of sour cream.
- Chocolate Twist: Add mini chocolate chips to the filling or swirl melted dark chocolate through the crust before baking.
Personally, I’ve tried adding a hint of fresh mint to the berry topping for a refreshing pop that surprised everyone at a summer party. If you prefer a less sweet dessert, reduce the sugar in the filling by a tablespoon or two without losing creaminess.
Serving & Storage Suggestions
These cheesecake bars are best served chilled, straight from the fridge. The cool creaminess against the fresh berry topping is a lovely contrast on a warm day.
For presentation, I like to dust extra powdered sugar just before serving and garnish with a sprig of fresh mint or a few whole berries on each square. They’re the perfect sweet finish after a savory spread of finger foods, like the crispy prosciutto-wrapped asparagus bites I often bring to potlucks.
Store leftovers tightly covered in the refrigerator for up to 4 days. You can freeze the bars individually wrapped for up to 2 months—just thaw overnight in the fridge before serving. Reheating isn’t recommended as these are best cold, but letting them sit at room temperature for 15 minutes makes them easier to slice.
The flavors actually deepen after a day or two, making these bars a great make-ahead dessert for busy celebrations.
Nutritional Information & Benefits
Each cheesecake bar (assuming 12 bars per pan) contains approximately:
| Calories | 220 |
|---|---|
| Fat | 14g |
| Carbohydrates | 20g |
| Protein | 4g |
These bars provide a source of calcium and protein from the cream cheese and egg. The fresh berries add antioxidants and vitamin C, making this dessert a little more wholesome than your average sweet treat. Using full-fat cream cheese keeps the texture rich but also means these bars should be enjoyed in moderation. The recipe is naturally gluten-free if you opt for almond flour crust, and you can adjust sugar levels to suit low-sugar diets.
From a wellness perspective, I appreciate how this dessert balances indulgence with fresh fruit, making it feel less guilty and more satisfying.
Conclusion
The Perfect Red White Blue Cheesecake Bars have become my reliable go-to when I want something that looks festive, tastes incredible, and comes together without drama. They’ve saved me from dessert disasters more than once and brought smiles to countless celebrations.
Feel free to tweak the berries, crust, or topping to fit your taste, but don’t skip that chilling time—it’s the secret to perfectly sliceable bars. I love this recipe because it’s a reminder that even in chaos, a little creativity plus simple ingredients can bring everyone together around something delicious.
If you try these, I’d love to hear how you customize them or what celebrations they brighten up. Sharing your twists keeps the recipe alive and joyful!
Frequently Asked Questions
Can I make these cheesecake bars ahead of time?
Absolutely! They actually taste better after chilling overnight. Just store them covered in the fridge until ready to serve.
What can I use instead of graham crackers for the crust?
Almond flour or gluten-free graham cracker crumbs work great for a gluten-free option. You could also try crushed digestive biscuits.
Can I freeze the cheesecake bars?
Yes, wrap individual bars tightly and freeze for up to 2 months. Thaw in the fridge overnight before serving.
Why did my cheesecake bars crack?
Cracking usually happens from overbaking or mixing too much air into the batter. Be gentle when mixing and watch the bake time closely.
Can I use frozen berries for the topping?
While fresh berries are best for texture and appearance, thawed frozen berries can work in a pinch. Just drain excess juice to avoid soggy bars.
Pin This Recipe!
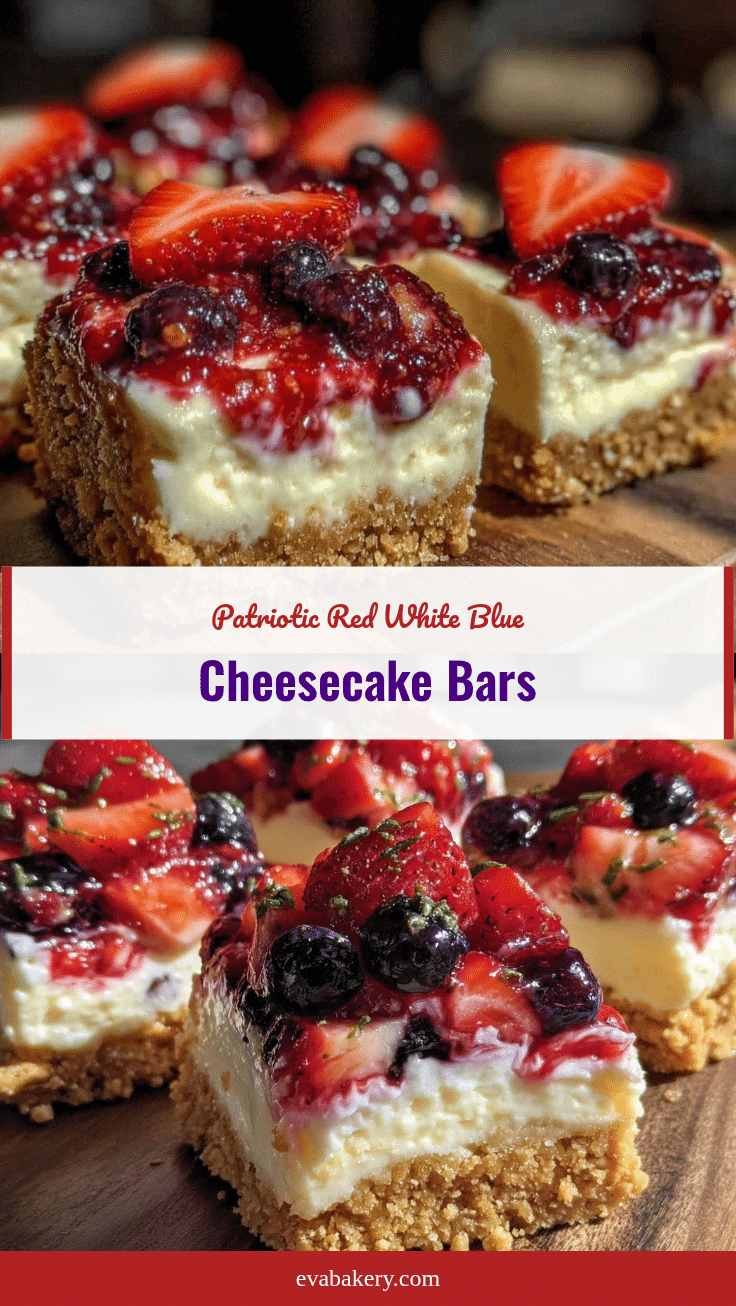
Perfect Red White Blue Cheesecake Bars
These easy patriotic cheesecake bars feature a buttery graham cracker crust, creamy tangy filling, and a fresh red, white, and blue berry topping—perfect for summer celebrations.
- Prep Time: 15 minutes
- Cook Time: 40 minutes
- Total Time: 3 hours 55 minutes
- Yield: 12 servings 1x
- Category: Dessert
- Cuisine: American
Ingredients
- 1 1/2 cups graham cracker crumbs (about 10 full sheets)
- 6 tablespoons unsalted butter, melted
- 1/4 cup granulated sugar
- 16 oz (450 g) cream cheese, softened
- 1/2 cup granulated sugar
- 1 large egg, room temperature
- 1 teaspoon vanilla extract
- 2 tablespoons sour cream
- 1 cup fresh strawberries, hulled and sliced
- 1 cup fresh blueberries
- Powdered sugar for dusting (optional)
Instructions
- Preheat your oven to 325°F (160°C). Line an 8×8 inch pan with parchment paper, leaving some overhang for easy lifting.
- Make the crust: In a bowl, combine graham cracker crumbs, melted butter, and sugar. Mix until crumbs are evenly coated and look like wet sand. Press firmly into the bottom of the pan.
- Bake the crust for 10 minutes. Let it cool while preparing the filling.
- Prepare the cheesecake filling: Beat softened cream cheese with sugar until smooth but not overmixed. Add egg, vanilla extract, and sour cream, mixing just to combine.
- Pour the filling over the cooled crust and smooth evenly. Shake the pan gently to release air bubbles.
- Bake for 25-30 minutes until edges are set but center has a slight jiggle. Avoid overbaking to prevent cracks.
- Cool completely at room temperature, then refrigerate for at least 3 hours or overnight.
- Before serving, arrange sliced strawberries and blueberries on top. Dust with powdered sugar if desired.
- Slice into squares using a sharp knife wiped clean between cuts and enjoy.
Notes
Bring cream cheese and egg to room temperature before mixing to avoid lumps and cracking. Do not overmix the filling to prevent cracks. Chill bars thoroughly for clean slicing. Press crust firmly before baking and bake crust to set it. Fresh berries are preferred for topping to avoid soggy bars. Optional: swirl lemon zest into filling for fresh zing. Use almond flour for gluten-free crust or vegan cream cheese and coconut yogurt for dairy-free option.
Nutrition
- Serving Size: 1 bar (1/12th of rec
- Calories: 220
- Fat: 14
- Carbohydrates: 20
- Protein: 4
Keywords: cheesecake bars, patriotic dessert, red white blue dessert, July 4th dessert, easy cheesecake bars, berry cheesecake bars


