“Are those… eyes? On the hot dogs?”
My niece stood frozen in the doorway, her Halloween costume half-tied, staring at the baking sheet with genuine horror. It was 6:45 PM on October 31st. The house was loud, the pumpkin carving was a mess, and I had exactly twelve minutes before the doorbell rang for our last trick-or-treat drop-off. I hadn’t planned a centerpiece. I hadn’t even planned a snack that didn’t involve cheese sticks.
But then I looked closer. The crescent dough had puffed up just right. The slits I’d cut with a knife were deep enough to show the sausage but shallow enough to hold it together. And those olives? They weren’t just eyes. They were judgmental, wide-eyed stares that turned a boring lunch meat into something that looked like it had crawled out of a haunted basement.
She didn’t scream. She grabbed one. She took a bite, cheese stretching and dough crunching, and immediately asked for three more. That was the moment I realized that spooky doesn’t have to mean complicated. Honestly, it just means a little creativity and a lot of patience with your oven timer.
These Spooky Mummy Hot Dogs with Crescent Wraps became our annual tradition. They aren’t fancy. They aren’t gourmet. But they are the kind of snack that stops the chaos for five minutes. You know how it is when the kids are running around like wild things? You need food that is fun, fast, and slightly terrifying. This recipe gives you exactly that. It’s not just about the taste, though the buttery dough is incredible. It’s about the look on their faces when they realize dinner is a little monster. And let’s face it, that’s worth every minute of prep.
Why You’ll Love This Recipe
I’ve made hundreds of Halloween snacks over the years. Some are beautiful, some are delicious, and some are just plain confusing. This recipe sits in that sweet spot where fun meets flavor. It’s not just another version of a hot dog in dough; it’s a specific technique that creates a texture you can’t get from frozen appetizers.
- Quick & Easy: These come together in under 15 minutes of prep. You’re looking at about 20 minutes in the oven. That is perfect for busy weeknights or last-minute Halloween parties when you realize you bought too many candy bars and not enough savory snacks.
- Simple Ingredients: No fancy grocery trips needed. You likely already have hot dogs, crescent rolls, and olives in your kitchen. It’s three ingredients, maybe four if you count the egg wash. It’s pantry-staple cooking at its finest.
- Perfect for Halloween Parties: Great for trick-or-treat drop-offs, school parties, or cozy dinners. They are finger food, which means no plates, no forks, and less cleanup. Who doesn’t love less cleanup?
- Crowd-Pleaser: Always gets rave reviews from kids and adults alike. The “spooky” factor gets them to try it, but the savory, buttery taste keeps them coming back. Even the pickiest eaters usually give this a thumbs up because it feels like a treat.
- Unbelievably Delicious: The texture and flavor combo is next-level comfort food. The saltiness of the hot dog contrasts with the sweet, buttery dough. It’s savory, it’s warm, and it’s satisfying.
What makes this different from the rest? It’s the wrapping technique. Most people just wrap the dough around once. I use a specific crisscross method that creates those “mummy bandages” while leaving gaps for the eyes to peek through. It’s a small detail, but it makes the difference between a hot dog and a character. This isn’t just hot dogs in pastry; it’s edible theater.
It’s the kind of snack that makes you close your eyes after the first bite and just enjoy the warmth. It’s comfort food reimagined for the season. It’s fast, it’s fun, and it’s the kind of thing that turns a simple evening into a memorable Halloween tradition.
What Ingredients You Will Need
This recipe relies on simple, wholesome ingredients to deliver bold flavor and satisfying texture without the fuss. The beauty of the Spooky Mummy Hot Dogs with Crescent Wraps is that you don’t need a specialty store to find what you need. Everything is standard fare, but the combination is what makes it magic.
- Hot Dogs (8-10 count): Standard beef or pork hot dogs work best. Look for brands with a good snap, like Applegate or Nathan’s, if you want a premium feel. You can use turkey dogs for a lighter option, but the texture will be softer. Size matters here—standard size fits the crescent triangles perfectly. If you use jumbo dogs, you might need two dough triangles per dog.
- Refrigerated Crescent Roll Dough: One standard can (usually 11-17 oz, depending on the brand). I recommend Pillsbury or a store-brand equivalent that has good rise. The dough needs to be flaky and buttery. Avoid the “cookie dough” style; you want the savory biscuit-like texture. Let it come to room temperature for 10 minutes before opening; cold dough tears easily.
- Black Olives: Sliced black olives are essential for the eyes. You need two slices per mummy. Look for pitted slices to save time. If you can’t find sliced, you can chop ring-shaped olives, but slices are faster. For a different look, you can use pepperoni slices for a red-eye effect, but black is classic.
- Yellow Mustard: Just a small squeeze. This acts as the “glue” for the olives. It adds a tiny tang that cuts through the richness of the dough. You can skip this if you’re worried about kids being messy, but it really helps the olives stick during baking.
- Egg Wash (Optional): One egg beaten with a tablespoon of water. This gives the mummies a beautiful golden-brown shine. If you want a softer, paler look, skip this. For a crispier crust, brush generously.
- Sesame Seeds or Poppy Seeds (Optional): A sprinkle on top adds texture and makes them look even more like bandages. It’s a nice touch for presentation.
For sourcing, stick to what you know. I’ve tried generic brands, and sometimes the dough is too thin and tears when wrapping. If your dough tears, patch it with a small piece—it still tastes the same. Seasonal variations? In the summer, you might swap hot dogs for chicken sausages for a lighter snack. In the winter, use bratwurst for a heartier bite. Substitutions are easy: use gluten-free crescent dough if needed, though the texture will be slightly denser. Dairy-free margarine can be used in the dough if you buy a specific DF brand, but most standard crescent rolls contain butter.
Equipment Needed
You don’t need a fancy kitchen to make these. Here is what you actually need:
- Baking Sheet: A standard half-sheet pan. Line it with parchment paper for easy cleanup. I prefer parchment over foil because the dough doesn’t stick as much, and the edges stay crisp.
- Paring Knife: A small, sharp knife is best for cutting the slits for the eyes. You don’t need a chef’s knife here; you need precision. A dull knife will crush the hot dog.
- Cutting Board: Any size will do. Just make sure it’s stable so you don’t slip.
- Pastry Brush: For the egg wash. A silicone brush is easier to clean than a bristle one. If you don’t have one, you can use your finger, but it’s messier.
- Measuring Spoons: Not strictly necessary for this recipe since you’re using whole ingredients, but good to have if you’re adding optional seeds.
If you don’t have a baking sheet, you can use a large skillet, but the results won’t be as even. A mini-muffin tin is another option for bite-sized versions, but you’ll need to adjust the cooking time. For maintenance, keep your knives sharp. A sharp knife is safer than a dull one. Budget-friendly? This whole recipe costs less than $5 to make. The most expensive item is the hot dogs, and you can stretch that by using smaller sausages.
Preparation Method
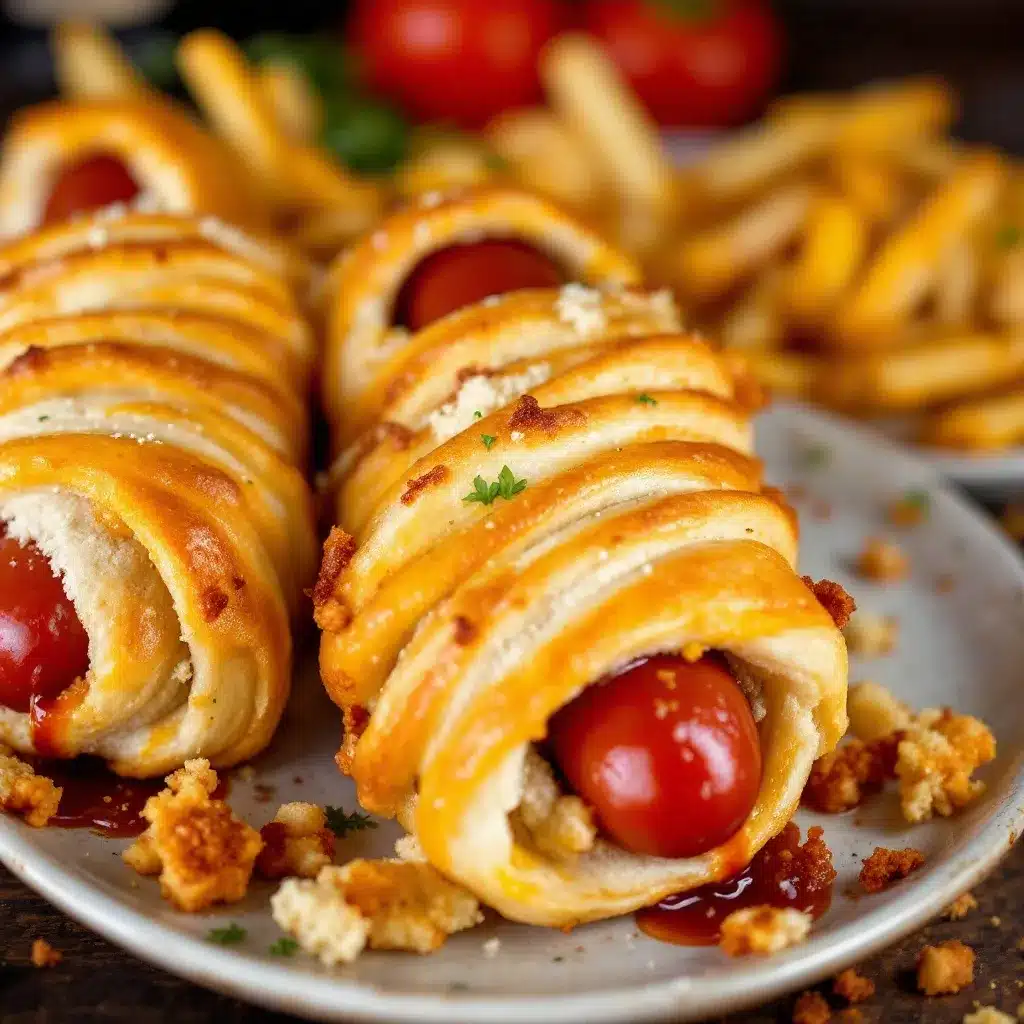
Let’s get into the nitty-gritty. Here is how you make these spooky treats step-by-step. Pay attention to the details; they make the difference between a soggy mess and a crispy masterpiece.
- Prep the Oven and Pan (5 minutes): Preheat your oven to 375°F (190°C). This is a standard temperature for crescent dough. Line your baking sheet with parchment paper. If you don’t have parchment, grease the pan lightly with butter or cooking spray. Make sure there is enough space between each mummy; they will expand slightly as they bake.
- Prepare the Hot Dogs (10 minutes): Take your hot dogs and pat them dry with a paper towel. This is crucial. Moisture is the enemy of crisp dough. If the hot dogs are wet, the dough will slide off. Use a paring knife to cut two small slits near one end of each hot dog. These are for the eyes. Don’t cut all the way through; just deep enough to hold the olive. Place the hot dogs on your cutting board, ready for wrapping.
- Open the Dough (2 minutes): Carefully unroll the crescent dough. You should have triangles. If your dough has seams, press them together to seal. If the dough is too cold, let it sit out for 5 minutes. Cold dough tears. Warm dough stretches. You want that sweet spot.
- Wrap the Mummies (15 minutes): This is the fun part. Take a triangle of dough. Place a hot dog at the wide end. Roll it up tightly, leaving the very tip of the hot dog exposed at the top (this is the “nose” or top of the head). Then, take the remaining dough and wrap it around the body in a crisscross pattern. You want to leave small gaps so the hot dog shows through. It should look like bandages. Don’t wrap it too tightly, or the dough will burst. Don’t wrap it too loosely, or it will fall apart. Aim for a snug but gentle wrap. Repeat for all hot dogs.
- Add the Eyes (5 minutes): Squeeze a tiny dot of mustard where you cut the slits. Press a slice of black olive into each dot. The mustard acts as glue. If the olives are slippery, press them in firmly. You want them to stay put during baking. If you’re using pepperoni, just press it on; it’s sticky enough.
- Egg Wash and Bake (15-20 minutes): Beat the egg with water. Brush the tops of the mummies lightly. This gives them that bakery shine. Sprinkle with sesame seeds if you like. Bake for 15-20 minutes, or until the dough is golden brown and puffed. Keep an eye on them after 15 minutes; ovens vary. You want the dough to be firm, not soft.
- Cool and Serve (5 minutes): Let them cool on the pan for 2 minutes. They will be very hot inside. The cheese (if using cheese dogs) or the meat juices will be lava-hot. Serve warm. They are best eaten fresh, but they reheat well.
Personal tip: If you are making a large batch, do it in two waves. The oven gets crowded, and the dough needs air circulation to crisp up. Don’t stack them. Give them space.
Cooking Tips & Techniques
I’ve made these so many times that I’ve learned a few things the hard way. Here is how to avoid the common pitfalls.
Don’t Overwrap: The biggest mistake I see is wrapping the dough too thickly. If you use too much dough, the center stays doughy while the outside burns. You want thin layers. Think “bandage,” not “burrito.”
Watch the Oven: Every oven is different. Mine runs hot. I check at 15 minutes. If they are browning too fast, cover them loosely with foil. If they are pale, give them 2-3 more minutes. The goal is golden brown, not dark brown.
Moisture Control: I mentioned this before, but it bears repeating. Pat those hot dogs dry. If you are using fresh brats, prick them with a fork to let steam escape. Otherwise, the pressure can burst the dough.
Multitasking: While the mummies bake, make a quick dipping sauce. Ketchup mixed with a little BBQ sauce is perfect. Or, if you want to get fancy, a ranch dip. The kids love dipping.
Crispiness Secret: If you want extra crispiness, brush the bottom of the mummies with a little melted butter before putting them in the oven. It helps the bottom brown evenly.
Consistency: Try to make all the mummies the same size. If one is huge and one is tiny, they will cook at different rates. Uniformity ensures even baking.
Variations & Adaptations
Once you master the basic mummy, you can get creative. Here are some variations I love.
Cheese Stuffed Mummies: Before wrapping, slice a hot dog lengthwise (not all the way through) and stuff it with a stick of string cheese. Wrap the dough around it. When you bite in, the cheese pulls. It’s a game-changer.
Vegetarian Option: Use veggie dogs or even large mushrooms. Wrap a mushroom in dough and add an olive for an eye. It’s a cute, meat-free option that still feels like a treat.
Spicy Mummies: Use jalapeño cheese dogs. The heat comes through the dough and adds a kick. Great for older kids or adults who like a little fire.
Mini Mummies: Use cocktail sausages or mini corn dogs. Wrap them in small pieces of dough. These are perfect for appetizers at parties. They cook faster, so check them at 10 minutes.
Allergen-Free: Use gluten-free crescent dough and gluten-free hot dogs. The texture might be slightly different, but they still taste great. Just be careful not to overwork the GF dough, as it’s more fragile.
Seasonal Twist: For Thanksgiving, use turkey sausages and add a sprinkle of sage on top. For Christmas, use red and green olives for eyes. It’s the same technique, just different flavors.
Serving & Storage Suggestions
These are best served warm, right out of the oven. The dough is crispiest then. If you are serving them at a party, keep them in a slow cooker on the “warm” setting. They stay soft and warm for hours. Just be careful not to overcook them in the warmer; they can get dry.
Pairings: These go great with a spooky punch. I like a red drink that looks like blood—maybe a cranberry punch with a lime wedge. Or, for a non-alcoholic option, a sparkling apple cider. They also pair well with chips and salsa on the side.
Storage: Leftovers? Rare, but if you have any, store them in an airtight container in the fridge for up to 3 days. The dough will soften, but the flavor remains.
Reheating: To reheat, use an air fryer or a conventional oven at 350°F for 5-7 minutes. The microwave will make the dough soggy, so avoid it if you can. You want that crisp back.
Freezing: You can freeze the unbaked mummies. Place them on a baking sheet and freeze until solid, then transfer to a bag. Bake from frozen, adding 5 minutes to the cook time. This is great for meal prep.
Nutritional Information & Benefits
Let’s talk numbers. These are indulgent snacks, so enjoy them in moderation. One mummy (one hot dog wrapped in dough) contains approximately 250-300 calories, depending on the size of the hot dog and the amount of dough used. They are high in protein from the hot dog and carbohydrates from the dough. They contain sodium, so if you are watching your salt intake, choose low-sodium hot dogs.
Benefits: They are a good source of quick energy for active kids. The cheese stuffing adds calcium. While not a “health food,” they are better than processed candy for a savory craving. They provide satisfaction without the sugar crash.
Allergens: Contains gluten, dairy, and eggs (in the wash). Hot dogs often contain soy or corn derivatives. Always check labels. For nut-free parties, this recipe is safe, as it contains no tree nuts or peanuts.
Wellness Perspective: I believe in balance. Halloween is about fun, and these snacks fit into that fun. You don’t need to make every bite a salad. Enjoying a warm, savory treat with family is good for the soul.
Conclusion
Spooky Mummy Hot Dogs with Crescent Wraps are more than just a snack; they are a memory maker. They are easy, affordable, and undeniably fun. I love this recipe because it takes something simple and turns it into something magical. It’s the kind of thing that brings people together around the kitchen table.
I encourage you to try it. Customize it with your favorite fillings or toppings. Make it your own. And when you do, I’d love to hear about it. Share your photos, your variations, and your stories. Did your kids love them? Did they scare their friends? Let me know in the comments below.
Happy Halloween, and happy cooking. May your oven be warm and your snacks be spooky.
Frequently Asked Questions
Can I make these ahead of time?
Yes! You can assemble them and freeze them unbaked. When you’re ready to cook, bake them from frozen, adding 5-7 minutes to the baking time. Do not refrigerate them for more than a few hours before baking, as the dough can get soggy.
What if I don’t have black olives?
You can use pepperoni slices, green olive slices, or even small pieces of black licorice for a non-food eye (for decoration only). For edible alternatives, small pieces of cooked bacon or chopped chives work well too.
Can I use gluten-free dough?
Yes, but handle it gently. GF dough is more fragile and tears easily. You may need to use two pieces of dough per hot dog to ensure full coverage. The taste will still be great.
How do I keep them crispy?
The key is not overcrowding the baking sheet. Give them space. Also, brush them with egg wash and bake until golden. If storing, reheat in an air fryer or oven, not a microwave.
Are these safe for toddlers?
Yes, but supervise them. The olives can be a choking hazard if not chewed properly. For younger toddlers, consider using smaller mini-dogs and removing the olives or cutting them into smaller pieces.
Pin This Recipe!
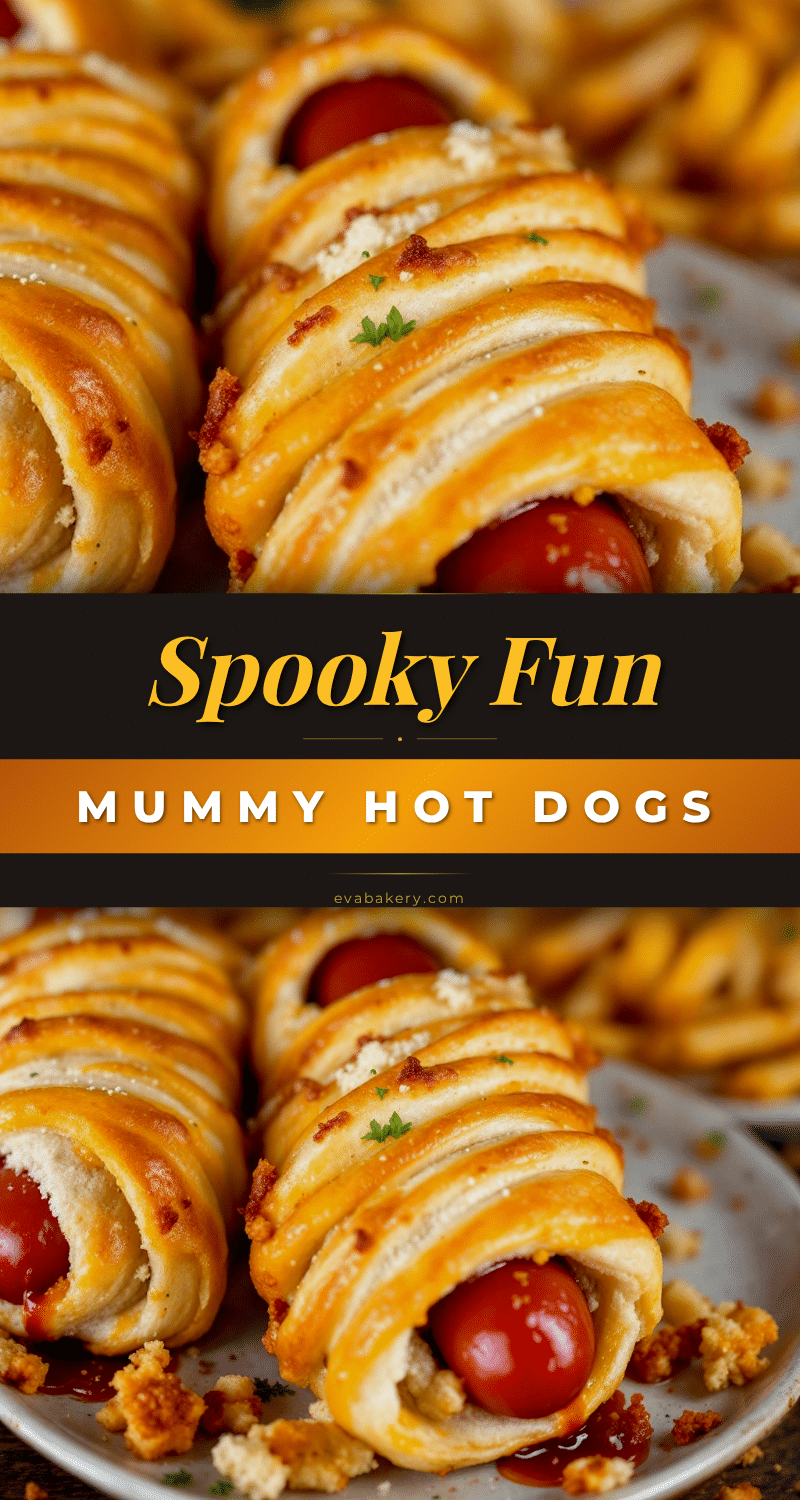
Spooky Mummy Hot Dogs: Easy 3-Ingredient Halloween Snack

A fun and fast Halloween snack featuring hot dogs wrapped in crescent roll dough with olive eyes. These spooky mummies are easy to make, crowd-pleasing, and perfect for parties or trick-or-treat drop-offs.
- Prep Time: 15 minutes
- Cook Time: 20 minutes
- Total Time: 35 minutes
- Yield: 8-10 servings 1x
- Category: Appetizer
- Cuisine: American
Ingredients
- 8–10 standard beef or pork hot dogs
- 1 can (11-17 oz) refrigerated crescent roll dough
- Sliced black olives (2 slices per mummy)
- Yellow mustard (for gluing olives)
- 1 egg beaten with 1 tablespoon water (for egg wash, optional)
- Sesame seeds or poppy seeds (optional, for topping)
Instructions
- Preheat oven to 375°F (190°C). Line a baking sheet with parchment paper.
- Pat hot dogs dry with a paper towel to ensure crisp dough. Cut two small slits near one end of each hot dog for the eyes.
- Unroll crescent dough triangles. If seams exist, press them together. Let dough sit for 5 minutes if too cold to prevent tearing.
- Place a hot dog at the wide end of a dough triangle. Roll tightly, leaving the tip exposed. Wrap remaining dough around the body in a crisscross pattern to create ‘bandages’, leaving small gaps.
- Squeeze a tiny dot of mustard into the slits and press olive slices into the mustard to create eyes.
- Brush tops with egg wash and sprinkle with seeds if desired.
- Bake for 15-20 minutes until dough is golden brown and puffed. Cool for 2 minutes before serving.
Notes
Pat hot dogs dry before wrapping to prevent soggy dough. Do not wrap dough too thickly to avoid a doughy center. If making a large batch, bake in two waves to ensure air circulation. For extra crispiness, brush bottoms with melted butter. Reheat in an air fryer or oven to maintain texture; avoid microwaving.
Nutrition
- Serving Size: 1 mummy hot dog
- Calories: 275
- Sugar: 2
- Sodium: 650
- Fat: 18
- Saturated Fat: 5
- Carbohydrates: 20
- Fiber: 1
- Protein: 8
Keywords: Halloween snacks, mummy hot dogs, crescent roll recipes, easy party food, kid-friendly snacks, spooky treats, 3-ingredient recipes


