My brother-in-law, a man who proudly claims his culinary expertise peaks at operating a can opener, took one look at my spread and said, “You’re really going through all that trouble for nachos?” He had a point, in a way. Most nacho experiences I’d had were sad affairs—a pile of chips suffocated under a lava flow of neon cheese sauce, topped with maybe three pieces of jalapeño if you were lucky. I was determined to change that narrative, but I wasn’t sure I could. The chips always got soggy, the cheese never melted evenly, and the toppings ended up in a sad, segregated pile. This Ultimate Loaded Nacho Bar with Ground Beef was my personal challenge to prove that homemade nachos could be spectacular, not just a concession to convenience.
It took a few trial runs (and a few sad, soggy chip disasters) to figure out the system. I learned the hard way that layering is an art, not a suggestion, and that pre-shredded cheese has no business on a truly great nacho. Honestly, I almost gave up after the second attempt when the entire middle of the tray turned into a gluey, cheesy paste. But that third time? The chips stayed crunchy, the seasoned beef was perfectly salty and smoky, and every single chip had something good on it. It was the kind of tray that gets passed around a room in reverent silence, broken only by the occasional crunch and a muffled “oh, this is good.”
This recipe isn’t about being fancy. It’s about building a better nacho, one that respects the chip and celebrates the toppings. It’s the kind of dish that turns a casual hangout into an event, where everyone can build their own perfect bite. And honestly, it’s the only way I make nachos now. I don’t think my brother-in-law has used a can opener since.
Why You’ll Love This Recipe
This isn’t just another nacho recipe you’ll find online. I’ve spent more time than I care to admit perfecting the balance of textures and flavors here. The goal was simple: create a nacho bar that delivers restaurant-quality results without the stress or the frills.
- Perfectly Seasoned Ground Beef: The beef is the backbone of this dish. I use a blend of chili powder, cumin, garlic, and a touch of smoked paprika that builds deep, savory flavor. It’s not just meat; it’s the kind of seasoned beef that makes you want to eat it by the spoonful.
- Never Soggy Chips: This is the holy grail of nacho-making. The secret is a two-step process: a quick bake to dry out the chips slightly, followed by a strategic layering of cheese and toppings that prevents moisture from seeping in. Your chips will stay shatteringly crisp.
- Build-Your-Own Fun: A nacho bar is the ultimate party food. Everyone gets to customize their plate with their favorite toppings—from creamy guacamole and tangy sour cream to spicy jalapeños and fresh salsa. It’s interactive, fun, and guarantees no one is picking off ingredients they don’t like.
- Simple, Real Ingredients: No canned cheese sauces or mystery ingredients here. This recipe uses real cheddar, fresh veggies, and pantry staples you likely already have. It’s comfort food you can feel good about serving.
- Crowd-Pleasing Champion: I’ve brought this to game days, birthday parties, and casual get-togethers. It disappears every single time. Kids and adults alike go back for seconds (and thirds). It’s the kind of dish that makes you the hero of the party without spending all day in the kitchen.
This recipe is different because it’s built on a foundation of tested techniques. It’s not just about throwing ingredients on a tray; it’s about understanding how heat, moisture, and timing work together to create something truly special. And when you take that first bite, with the crunch of the chip, the warmth of the seasoned beef, and the coolness of the toppings, you’ll understand why this is the only nacho recipe you’ll ever need.
What Ingredients You Will Need
This recipe relies on a handful of quality ingredients to create a flavor-packed experience. Most of these are pantry staples, which makes this a great go-to for impromptu gatherings or a fun weeknight dinner.
- For the Seasoned Ground Beef:
- 1 lb ground beef (80/20): The 80/20 blend provides enough fat for flavor and moisture without making the nachos greasy. You can use leaner beef, but you might need to add a tablespoon of oil to the pan.
- 1 tbsp olive oil: For sautéing the aromatics.
- 1/2 cup yellow onion, finely diced: Adds a savory base note. (about 1/2 a medium onion)
- 3 cloves garlic, minced: Fresh garlic is a must here for the best punch of flavor.
- 1 tbsp chili powder: The backbone of the taco seasoning. I prefer a mild chili powder for a warm, earthy flavor.
- 1 tsp ground cumin: Adds a warm, slightly nutty depth.
- 1/2 tsp smoked paprika: This is my secret weapon. It adds a subtle smoky flavor that mimics the taste of grilled meat.
- 1/2 tsp dried oregano: A touch of Mexican oregano if you have it, but regular works fine.
- 1/2 tsp salt: For seasoning the meat.
- 1/4 tsp black pepper: Freshly ground is best.
- 1/2 cup beef broth or water: This helps create a slightly saucy texture that coats the chips beautifully.
- For the Nacho Base:
- 1 large bag (13-16 oz) restaurant-style tortilla chips: Look for sturdy, thick chips that can hold up to the toppings. Avoid thin, fragile chips that will break easily.
- 3 cups shredded sharp cheddar cheese: Shred it yourself from a block! Pre-shredded cheese contains anti-caking agents that prevent it from melting smoothly. Sharp cheddar provides the best flavor.
- 1 cup shredded Monterey Jack cheese: This adds a creamy, mild melt that balances the sharp cheddar.
- For the Toppings Bar (choose your favorites):
- 1 cup pico de gallo or fresh salsa: For a bright, fresh element.
- 1 cup guacamole: Store-bought or homemade. (I have a great recipe for easy homemade guacamole if you need one!)
- 1/2 cup sour cream or Mexican crema: For a cool, tangy finish.
- 1 (15 oz) can black beans, drained and rinsed: Adds fiber and heartiness.
- 1/2 cup pickled jalapeños: For heat and acidity.
- 1/4 cup fresh cilantro, chopped: For a pop of color and freshness.
- 1/2 cup sliced black olives: A classic, briny topping.
- 1 lime, cut into wedges: For squeezing over the finished nachos.
Equipment Needed
You don’t need any fancy gadgets to make this happen. Most of these items are standard kitchen equipment.
- Large Rimmed Baking Sheet: A half-sheet pan (18×13 inches) is ideal for making a large batch of nachos. A rimmed sheet is crucial to prevent any cheese or toppings from dripping onto your oven floor.
- Large Skillet: For browning the ground beef and cooking the aromatics. A cast-iron or stainless steel skillet works best.
- Chef’s Knife & Cutting Board: For prepping your onions, garlic, and fresh toppings.
- Measuring Spoons & Cups: For accurate seasoning and ingredient portions.
- Box Grater: For shredding your own cheese. Trust me, the extra minute of effort is worth it for the melt.
- Spatula or Wooden Spoon: For breaking up the ground beef as it cooks.
- Small Serving Bowls: For setting up your toppings bar. Ramekins or small prep bowls work perfectly.
If you don’t have a large baking sheet, you can use a 9×13 inch casserole dish, but you’ll need to be more careful with layering to ensure even coverage. A pizza pan also works in a pinch, just make sure it has a lip to catch any drips.
Preparation Method
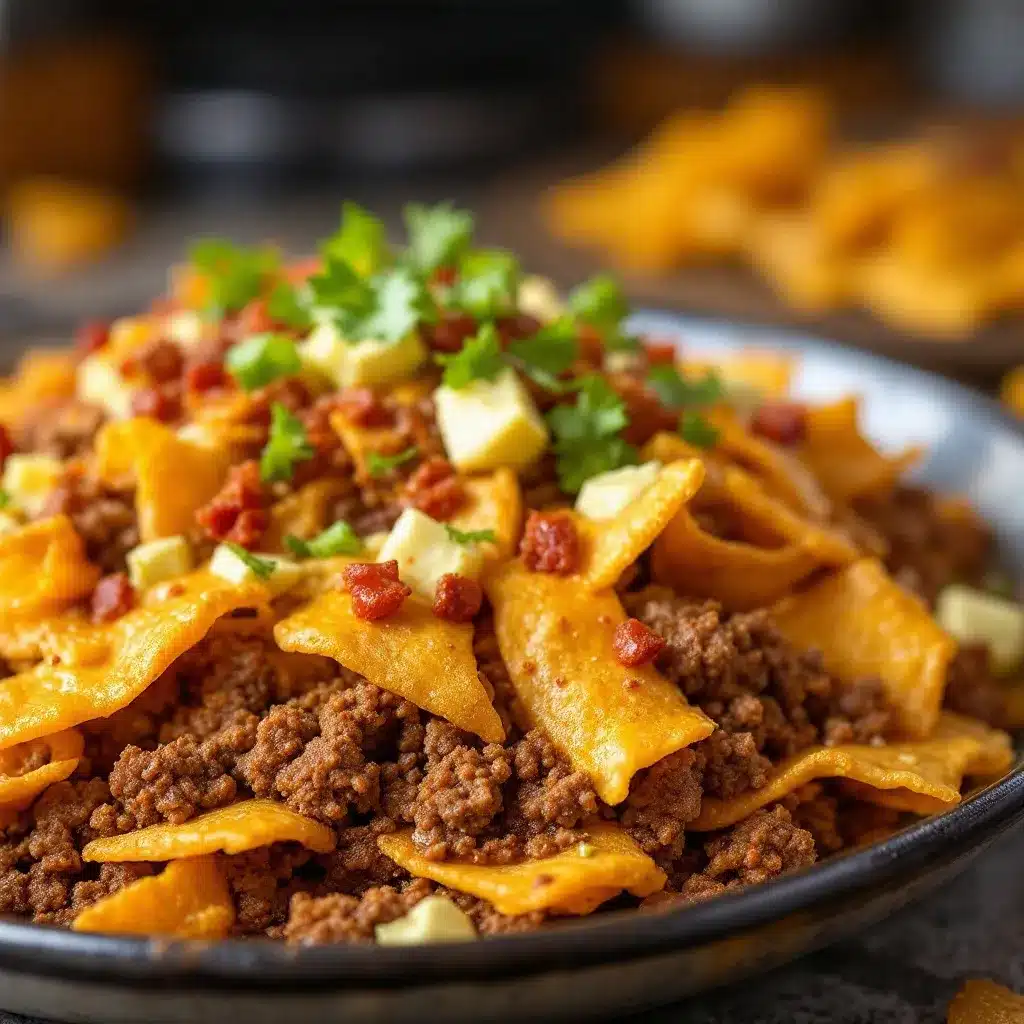
This is where the magic happens. Follow these steps, and you’ll be rewarded with the best nachos of your life. I’ve broken it down into manageable stages so you can multitask like a pro.
Step 1: Prepare the Toppings
Before you even think about turning on the oven, get all your toppings ready. This is the key to a stress-free assembly. Dice your onions, chop your cilantro, drain your beans, and set out your sour cream, salsa, and guacamole in small bowls. This way, when the hot nachos come out of the oven, you can just let everyone build their own plate.
Step 2: Make the Seasoned Ground Beef
Place a large skillet over medium-high heat and add the olive oil. Once it shimmers, add the diced onion and cook for 3-4 minutes until softened and translucent. Add the minced garlic and cook for another 30 seconds until fragrant. Add the ground beef, breaking it up with your spatula. Cook for 5-7 minutes, until fully browned and no longer pink. Drain off any excess fat (if using 80/20, you might have about a tablespoon—leave a little for flavor). Reduce the heat to medium-low. Sprinkle the chili powder, cumin, smoked paprika, oregano, salt, and pepper over the beef. Stir to coat everything evenly. Pour in the beef broth and let it simmer for 2-3 minutes, scraping up any browned bits from the bottom of the pan. The liquid should mostly evaporate, leaving you with a beautifully seasoned, slightly saucy beef mixture. Set it aside.
Step 3: Prep the Chips (The Secret Step)
Preheat your oven to 375°F (190°C). Spread your tortilla chips in a single, even layer on your large rimmed baking sheet. Don’t pile them too high—you want a single layer with a few overlapping edges. Pop the baking sheet into the oven for 5 minutes. This dries out the chips slightly, making them less likely to absorb moisture and turn soggy later. It’s a small step that makes a huge difference.
Step 4: First Layer of Cheese and Beef
Remove the baking sheet from the oven. Sprinkle about half of your shredded sharp cheddar and Monterey Jack cheese evenly over the chips. Then, spoon about half of your seasoned ground beef over the cheese. This first layer ensures that every chip gets a little bit of everything.
Step 5: Second Layer and Final Bake
Add a second, slightly more scattered layer of chips on top of the first layer. You want to cover any bare spots, but don’t worry about making it perfect. Sprinkle the remaining cheese over the top, followed by the rest of the ground beef. If you’re using black beans, scatter them over the top now. Return the baking sheet to the oven and bake for another 8-10 minutes, or until the cheese is fully melted, bubbly, and just starting to brown at the edges. Watch it closely—you don’t want the chips to burn.
Step 6: Garnish and Serve Immediately
Remove the nachos from the oven. Let them rest for exactly 2 minutes. This allows the cheese to set slightly so it doesn’t slide off the chips. Then, immediately top with your fresh ingredients: a generous drizzle of sour cream, spoonfuls of pico de gallo, dollops of guacamole, scattered pickled jalapeños, and a shower of fresh cilantro. Finish with a squeeze of fresh lime juice. Serve the baking sheet directly on the table (on a trivet!) for the ultimate communal experience.
Cooking Tips & Techniques
I’ve made a lot of mistakes in the kitchen so you don’t have to. Here are the hard-won lessons I’ve learned about making the perfect loaded nachos.
- The Pre-Bake is Non-Negotiable: I know it seems like an extra step, but it’s the single most important thing you can do for crunchy chips. Skipping this step is why most homemade nachos end up soggy. The dry heat of the oven creates a moisture barrier on the chip’s surface.
- Shred Your Own Cheese: I cannot stress this enough. The pre-shredded bags are coated in cellulose (a fancy word for wood pulp) to prevent clumping. This coating prevents the cheese from melting into a cohesive, gooey blanket. A block of cheddar and a box grater take two minutes and the result is infinitely better.
- Don’t Overload the Tray: It’s tempting to pile everything on at once, but too many chips stacked on top of each other will result in a steamy, soggy middle layer. Stick to two layers maximum, and make sure each chip has some contact with the heat of the pan.
- Serve Immediately: Nachos are a race against time. Once they come out of the oven, the clock is ticking. The cheese will start to cool and stiffen, and the moisture from the fresh toppings will slowly work its magic on the chips. This is a dish to be devoured, not admired. Set them out and let the feeding frenzy begin.
- Use a Meat Thermometer: If you’re unsure if your ground beef is fully cooked, use an instant-read thermometer. It should register at least 160°F (71°C). This is a simple way to ensure food safety without overcooking the meat.
Variations & Adaptations
This recipe is a fantastic canvas for your own creativity. Here are a few of my favorite ways to change it up, depending on the occasion or what I have in the fridge.
- Spicy Chorizo & Black Bean Nachos: Swap the ground beef for 1 lb of Mexican chorizo. Cook it in the skillet until browned and crumbly, then proceed with the recipe. The spicy, smoky flavor of the chorizo pairs beautifully with black beans and a dollop of cool crema.
- Vegetarian Fiesta Nachos: Omit the meat entirely. Sauté a large bell pepper (diced) and a zucchini (diced) with the onion and garlic. Add a can of black beans and a can of corn (drained) to the skillet along with the spices. This creates a hearty, flavorful vegetable filling that’s just as satisfying.
- BBQ Chicken Nachos: Replace the ground beef with 2 cups of shredded, cooked chicken (rotisserie chicken is perfect for this). Toss the chicken with 1/2 cup of your favorite BBQ sauce. Layer it as you would the beef. Swap the sharp cheddar for a smoked gouda or a pepper jack cheese for a different flavor profile.
- Breakfast Nachos: This is a fun twist for a lazy weekend brunch. Use the ground beef as a base, but add a layer of crispy bacon or breakfast sausage. After the cheese melts, top the nachos with a couple of fried or scrambled eggs, a drizzle of hot sauce, and some fresh avocado.
My personal favorite variation is the Smoky Chipotle Beef Nachos. I add 1-2 finely chopped chipotle peppers in adobo sauce to the ground beef along with the other spices. It adds a deep, smoky heat that’s absolutely addictive. Just be careful—a little goes a long way!
Serving & Storage Suggestions
These nachos are best enjoyed fresh from the oven, but here’s how to handle them if you have leftovers (it rarely happens at my house).
Serving: Serve the nachos directly on the hot baking sheet. This keeps them warm longer and encourages a fun, shareable dining experience. Set out your small bowls of toppings so everyone can customize their plate. The contrast between the hot, cheesy nachos and the cool, fresh toppings is what makes this dish so craveable. For a full party spread, these nachos pair perfectly with a Refreshing Champagne Punch or a Sparkling New Year’s Sangria for a festive touch. If you’re looking for other appetizers to round out the menu, these are fantastic alongside some Crispy Prosciutto-Wrapped Asparagus Bites or Crispy Bacon-Wrapped Dates.
Storage: If you have leftover nachos, the magic is mostly gone, but you can still salvage them. Let the leftover nachos cool completely on the baking sheet. Transfer the chips and toppings to an airtight container, separating the hot components (beef, cheese) from the cold ones (sour cream, guacamole, salsa) as much as possible. Store in the refrigerator for up to 2 days.
Reheating: The best way to reheat leftover nachos is in the oven or an air fryer. Spread them on a baking sheet and bake at 350°F (175°C) for 5-7 minutes, or until the cheese is bubbly and the chips are mostly crisp again. The microwave will turn them into a sad, chewy mess, so avoid it at all costs. The fresh toppings should be added after reheating, not before.
Nutritional Information & Benefits
While this is an indulgent party dish, it does have some redeeming qualities! Here’s a general nutritional breakdown per serving (about 1/6 of the full recipe, including a moderate amount of toppings).
| Nutrient | Amount (approx.) |
|---|---|
| Calories | 550-650 |
| Total Fat | 35-40g |
| Saturated Fat | 15-18g |
| Cholesterol | 80-100mg |
| Sodium | 900-1100mg |
| Total Carbohydrates | 35-45g |
| Dietary Fiber | 5-7g |
| Sugars | 4-6g |
| Protein | 25-30g |
Health Benefits: The ground beef provides a good source of protein and iron. The black beans add fiber and plant-based protein, which helps with satiety. The fresh toppings like pico de gallo, avocado, and cilantro are packed with vitamins, antioxidants, and healthy fats. The jalapeños contain capsaicin, which can boost metabolism. While not a health food, this recipe is a more wholesome version of the classic, using real ingredients and no processed cheese sauces.
Dietary Considerations: This recipe is naturally gluten-free (check your chip and spice labels). For a lower-carb option, you can serve the seasoned beef, cheese, and toppings over a bed of lettuce or cauliflower rice instead of chips. To make it dairy-free, use a high-quality vegan cheddar shred and a dairy-free sour cream.
Conclusion
This Ultimate Loaded Nacho Bar with Ground Beef isn’t just a recipe; it’s a blueprint for a great time. It’s the dish that turns a simple Tuesday into a mini celebration and a game day into an unforgettable feast. The combination of crunchy chips, perfectly seasoned beef, and a mountain of your favorite toppings is simply unbeatable. It’s comfort food at its most interactive and delicious.
I hope you give this recipe a try and make it your own. Don’t be afraid to play with the toppings—that’s the whole fun of it! Whether you load it up with everything or keep it simple, I promise you’ll be amazed at how much better homemade nachos are than anything you can get from a restaurant.
I’d love to hear how it turns out for you! Drop a comment below and let me know your favorite topping combination, or tag me in your photos on social media. Happy cooking, and enjoy every single crunchy, cheesy bite!
Frequently Asked Questions
Can I make the ground beef ahead of time?
Absolutely! This is a great way to save time on party day. Cook the seasoned ground beef according to the recipe, let it cool completely, and store it in an airtight container in the refrigerator for up to 3 days. When you’re ready to assemble the nachos, simply reheat it in a skillet over medium heat, adding a splash of water or broth to loosen it up if needed.
What’s the best way to keep nachos warm for a party?
The best method is to bake them in batches. Assemble one baking sheet and bake it while guests are eating the first one. You can keep the first batch warm in a 200°F (95°C) oven for about 10-15 minutes, but any longer and the chips will start to soften. Alternatively, you can set up a chafing dish or a warming tray on your buffet table to keep the finished nachos warm.
Can I use ground turkey or chicken instead of beef?
Yes, you can easily swap the ground beef for ground turkey or chicken. Since these are leaner meats, you’ll want to add a tablespoon of olive oil to the pan before cooking to prevent them from drying out. The seasoning will still be delicious, and you’ll end up with a slightly lighter dish.
My cheese always clumps together and doesn’t melt smoothly. What am I doing wrong?
This is almost always caused by using pre-shredded cheese. As I mentioned in the tips, those bags are coated with anti-caking agents that prevent smooth melting. The solution is simple: buy a block of cheese and shred it yourself on a box grater. It takes just a couple of minutes and guarantees a perfectly gooey, creamy melt every single time.
Can I add other proteins like shrimp or carnitas?
Definitely! This nacho bar is incredibly versatile. For shrimp, toss peeled, raw shrimp with chili powder, cumin, and a little oil, then sauté for 2-3 minutes per side until pink and cooked through. For carnitas, use leftover shredded pork or buy pre-cooked carnitas from the store and crisp it up in a skillet before adding it to the nachos. The possibilities are endless!
Pin This Recipe!
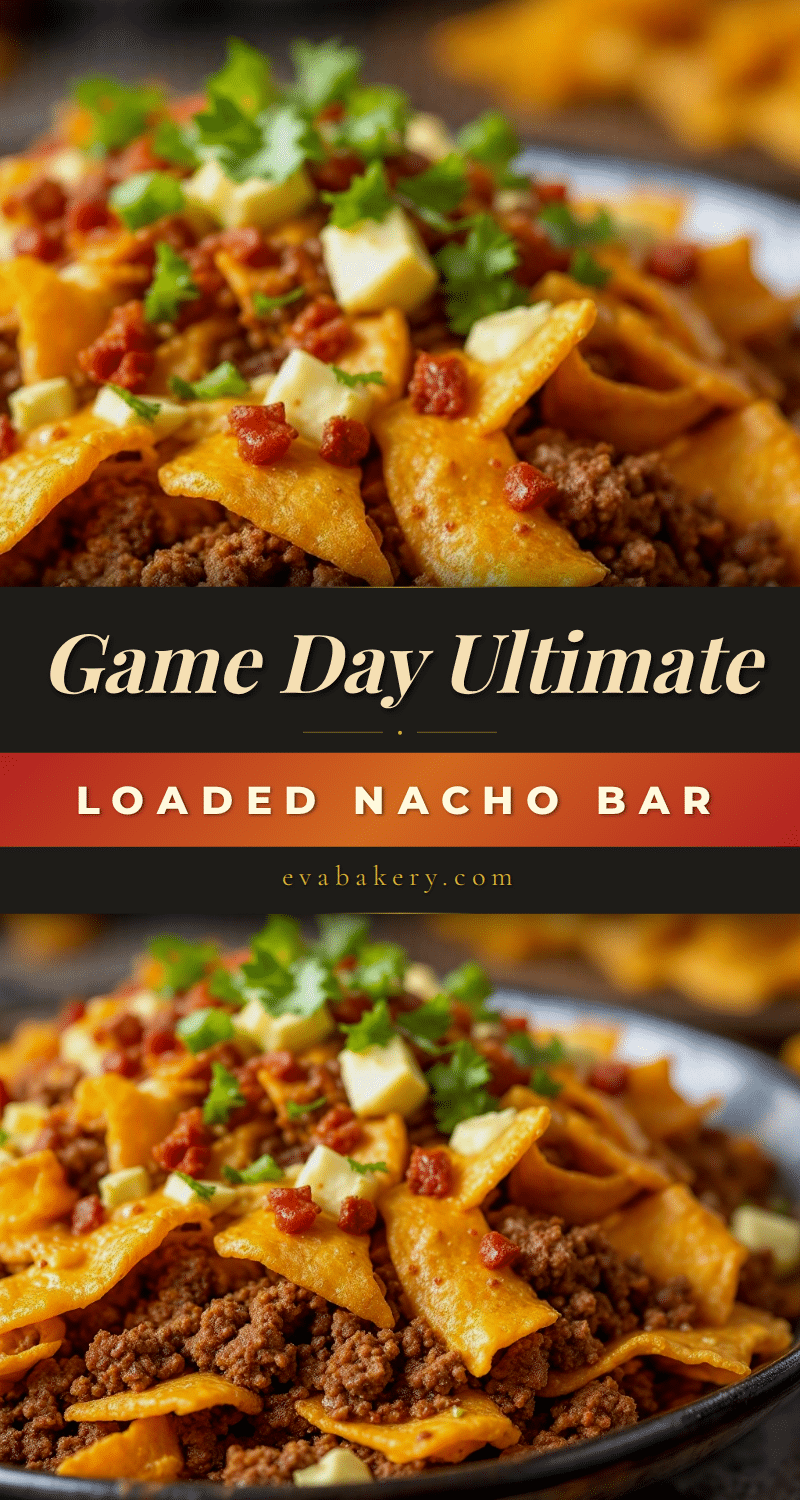
Ultimate Loaded Nacho Bar with Ground Beef – Easy Party Appetizer

This Ultimate Loaded Nacho Bar with Ground Beef is the perfect party appetizer, featuring perfectly seasoned beef, never-soggy chips, and a build-your-own toppings bar. It’s a crowd-pleasing, interactive dish that turns any gathering into a celebration.
- Prep Time: 15 minutes
- Cook Time: 25 minutes
- Total Time: 40 minutes
- Yield: 6 servings 1x
- Category: Appetizer
- Cuisine: Mexican-American
Ingredients
- 1 lb ground beef (80/20)
- 1 tbsp olive oil
- 1/2 cup yellow onion, finely diced
- 3 cloves garlic, minced
- 1 tbsp chili powder
- 1 tsp ground cumin
- 1/2 tsp smoked paprika
- 1/2 tsp dried oregano
- 1/2 tsp salt
- 1/4 tsp black pepper
- 1/2 cup beef broth or water
- 1 large bag (13–16 oz) restaurant-style tortilla chips
- 3 cups shredded sharp cheddar cheese
- 1 cup shredded Monterey Jack cheese
- 1 cup pico de gallo or fresh salsa
- 1 cup guacamole
- 1/2 cup sour cream or Mexican crema
- 1 (15 oz) can black beans, drained and rinsed
- 1/2 cup pickled jalapeños
- 1/4 cup fresh cilantro, chopped
- 1/2 cup sliced black olives
- 1 lime, cut into wedges
Instructions
- Prepare all toppings: dice onions, chop cilantro, drain beans, and set out sour cream, salsa, and guacamole in small bowls.
- Make the seasoned ground beef: Heat olive oil in a large skillet over medium-high heat. Add diced onion and cook for 3-4 minutes until softened. Add minced garlic and cook for 30 seconds. Add ground beef, breaking it up, and cook for 5-7 minutes until browned. Drain excess fat. Reduce heat to medium-low. Stir in chili powder, cumin, smoked paprika, oregano, salt, and pepper. Pour in beef broth and simmer for 2-3 minutes until liquid mostly evaporates. Set aside.
- Preheat oven to 375°F (190°C). Spread tortilla chips in a single even layer on a large rimmed baking sheet. Bake for 5 minutes to dry out chips.
- Remove baking sheet from oven. Sprinkle half of the shredded cheddar and Monterey Jack cheese over chips. Spoon half of the seasoned ground beef over the cheese.
- Add a second layer of chips on top. Sprinkle remaining cheese and ground beef over the top. Scatter black beans if using. Return to oven and bake for 8-10 minutes until cheese is melted and bubbly.
- Remove from oven and let rest for 2 minutes. Top with sour cream, pico de gallo, guacamole, pickled jalapeños, cilantro, and black olives. Squeeze fresh lime juice over the top. Serve immediately.
Notes
Pre-baking the chips is crucial for preventing sogginess. Always shred your own cheese for the best melt. Serve immediately for optimal crunch. For variations, try chorizo, BBQ chicken, or vegetarian options.
Nutrition
- Serving Size: 1/6 of recipe
- Calories: 600
- Sugar: 5
- Sodium: 1000
- Fat: 38
- Saturated Fat: 17
- Carbohydrates: 40
- Fiber: 6
- Protein: 28
Keywords: loaded nachos, ground beef nachos, nacho bar, party appetizer, game day food, easy nachos, homemade nachos


