The platter was clean. Not just mostly gone, but actually wiped down with a crusty piece of cookie to get the last crumbs. I stood there holding the tray, waiting for someone to complain about the almond nails looking too realistic, or the dough being too thick. Nobody said a word. They just reached for another one.
It was the third Halloween party I’d hosted this year, and honestly, I expected these to be the leftovers that nobody touched. You know how it goes. The fancy appetizers disappear first, then the savory stuff. The sweet treats usually sit there gathering dust until I sneak them home for myself. But not this time.
My friend Sarah actually asked for the recipe before she left. She didn’t even wait for the coffee to brew. She just grabbed her keys and said, “Send me the link. I need to make these for my kid’s class party.” That’s the moment you know you’ve nailed it. It’s not about the recipe card; it’s about the reaction.
I started making these crispy witch finger cookies because I wanted something spooky but actually delicious. Most Halloween treats are too sweet or just look cool but taste like cardboard. I wanted that perfect snap when you bite into the cookie, followed by the slight chew of the almond nail. It’s a texture thing. People love texture.
The secret isn’t in the ingredients. It’s in the rolling and the chilling. You have to treat the dough right. Let it get firm. Let it get cold. That’s how you get those wrinkles that look like old, creepy skin. I’ve made these for office potlucks, for neighborhood kids, and for my own family. They always win.
There’s something satisfying about turning simple pantry staples into something that looks like it came from a wizard’s kitchen. It’s playful, it’s a little weird, and it’s incredibly fun to eat. Once you see how easy it is to shape the fingers and add those almond nails, you’ll probably start making them all year round. Seriously, they’re just that good.
Why You’ll Love This Recipe
Let’s be real for a second. Halloween baking can be a lot of work. You want something that looks impressive, something that screams “look at me,” but you also don’t want to spend your entire evening in the kitchen. These crispy witch finger cookies solve that problem. They are the perfect balance of spooky aesthetics and actual comfort food flavor.
Here is why these cookies always show up on my top list:
* **Quick & Easy**: The dough comes together in about 15 minutes. The shaping takes a bit of time, but it’s meditative, not stressful. You can do this while watching a movie.
* **Simple Ingredients**: You likely have everything in your kitchen right now. Flour, sugar, butter, eggs, and almonds. No weird specialty stores needed.
* **Perfect for Parties**: Whether it’s a Halloween party, a spooky themed birthday, or just a Tuesday night craving, these fit anywhere. They are easy to pick up with one hand, which is crucial for party snacks.
* **Crowd-Pleaser**: Kids love the visual. Adults love the buttery, shortbread-like texture. It’s a rare cookie that appeals to all age groups without compromise.
* **Unbelievably Delicious**: The crispiness is key. Unlike soft sugar cookies, these have a snap. The almond nail adds a savory, nutty contrast that keeps you from getting sugar fatigue.
What makes this recipe different from the rest? It’s the texture profile. Many witch finger recipes use a soft dough that stays soft. These are baked until they are golden and crisp. The wrinkles don’t just look good; they create more surface area for that crunch. I’ve tested dozens of variations, and this specific ratio of butter to flour gives you that perfect shortbread consistency. It’s not cakey. It’s not chewy. It’s crisp.
Plus, the almond nail isn’t just decorative. It adds a tiny bit of protein and a nice crunch that breaks up the sweetness. It’s a small detail, but it makes the whole cookie feel more sophisticated. You’re not just feeding kids sugar; you’re giving them a well-balanced treat.
This recipe is the kind that makes you feel like a pro baker, even if you’re just starting out. It’s foolproof because the dough is forgiving. If a finger looks a little weird, it just looks more like a real witch finger. The imperfections are part of the charm. It’s comfort food with a side of spookiness, and that’s a combination that always works.
What Ingredients You Will Need
This recipe relies on high-quality basics. Since there aren’t many ingredients, each one plays a huge role in the final texture and flavor. You want butter that is truly softened, not melted. You want eggs that are room temperature so the dough emulsifies properly. And you need good slivered almonds for those nails.
Here is exactly what you need to get started:
* **Unsalted Butter (1 cup / 226g)**: Use high-quality butter. I prefer European-style butter for its higher fat content, which makes the cookies richer and crisper. Let it sit on the counter for an hour until it’s soft enough to leave an indent but still holds its shape.
* **Granulated Sugar (1 cup / 200g)**: This provides the structure and the slight crunch on the outside. Don’t substitute with brown sugar here; you want that crisp edge, not a chewy center.
* **Large Eggs (2 large)**: Room temperature eggs are crucial. Cold eggs can cause the butter to seize up, leading to a grainy dough. Crack them early and let them warm up.
* **Vanilla Extract (2 teaspoons)**: Use pure vanilla extract, not imitation. The flavor needs to be strong to balance the saltiness of the almonds.
* **All-Purpose Flour (3 cups / 375g)**: This is the main structure. Don’t use cake flour; you need the protein in all-purpose flour to create that crisp snap. Sift it if your flour is clumpy.
* **Baking Powder (1/2 teaspoon)**: Just a tiny bit helps the cookies hold their shape slightly without puffing up too much.
* **Salt (1/2 teaspoon)**: Essential for bringing out the flavor of the butter and balancing the sweetness.
* **Slivered Almonds (for nails)**: Look for natural, raw slivered almonds. I recommend buying them in bulk from a store like Costco or a local bulk food store. They are cheaper and you get more consistent shapes.
* **Powdered Sugar (for dusting)**: Optional, but it adds a nice “dusty” look, like the cookies have been rolling around in a graveyard.
One tip for the almonds: If you can’t find slivered almonds, you can cut almond slices in half lengthwise. But slivered is best because they look like fingernails naturally. If you have a nut allergy, you can skip the nails or use pretzel sticks cut to size, though the texture won’t be the same.
The butter is the most important part. If your butter is too soft, the cookies will spread too much. If it’s too cold, they won’t mix well. Aim for that perfect soft-peak consistency. It’s the same texture you want for creaming butter and sugar for other cookies, but slightly firmer.
Equipment Needed
You don’t need anything fancy to make these cookies. Most of what you need is already in your kitchen drawer.
* **Large Mixing Bowl**: A sturdy bowl that can handle the thick dough. Glass or ceramic is nice because it doesn’t get cold, but stainless steel works too.
* **Electric Hand Mixer or Stand Mixer**: While you can mix by hand, it takes a lot of elbow grease. A mixer makes creaming the butter and sugar much easier and ensures a smooth dough.
* **Baking Sheets**: Standard half-sheet pans. Make sure they are flat and not warped. Warped pans lead to uneven baking.
* **Parchment Paper**: Line your baking sheets with parchment. This prevents sticking and makes cleanup a breeze. You don’t need to grease the parchment.
* **Pastry Brush**: Optional, but helpful for adding a little egg wash or water to help the almond nails stick.
* **Sharp Knife or Kitchen Shears**: You’ll use this to trim the almond nails to the right size and to cut small slits for the “dirt” under the nails.
* **Cooling Rack**: Essential for letting the cookies cool completely. If you leave them on the hot pan, they will continue to cook and might break.
If you don’t have a mixer, you can use a wooden spoon, but be prepared for a workout. The dough gets thick once you add the flour. A stand mixer with a paddle attachment is ideal if you have one.
Also, make sure you have enough baking sheets. This recipe makes a lot of cookies. You’ll need to bake them in batches. Having multiple sheets ready with parchment paper lined up saves time and keeps the workflow smooth.
Preparation Method
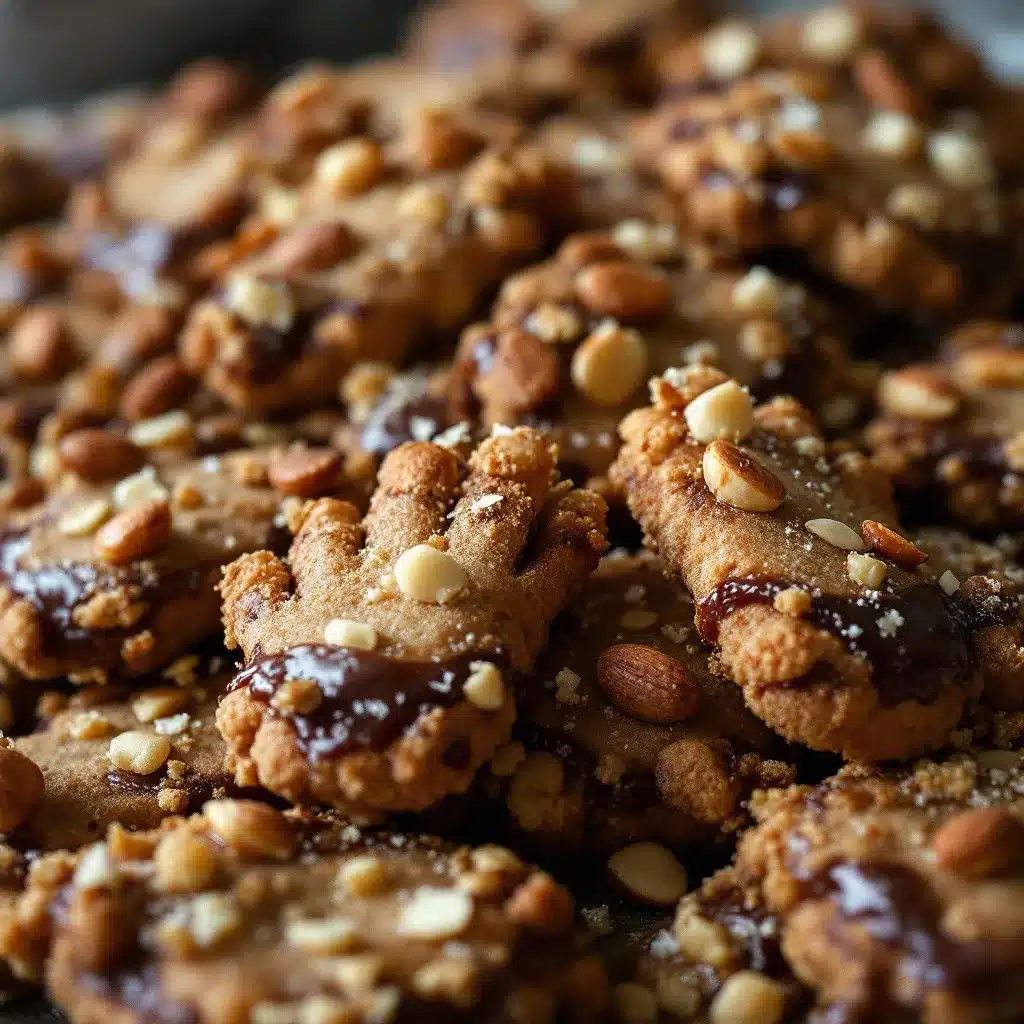
Making these cookies is straightforward if you follow the steps carefully. The key is patience with the dough temperature.
1. **Prep Your Station**: Preheat your oven to 350°F (175°C). Line two large baking sheets with parchment paper. Set out your slivered almonds.
2. **Cream the Butter and Sugar**: In a large bowl, beat the softened butter and granulated sugar together on medium-high speed for about 3-4 minutes. The mixture should look pale and fluffy. This step is crucial for texture. If you skip this, the cookies will be dense.
3. **Add Eggs and Vanilla**: Beat in the eggs one at a time, mixing well after each addition. Add the vanilla extract and mix until combined. The mixture might look slightly curdled; that’s okay. It will come together when you add the flour.
4. **Mix Dry Ingredients**: In a separate bowl, whisk together the flour, baking powder, and salt. This ensures the baking powder is evenly distributed so you don’t get bitter spots.
5. **Combine Wet and Dry**: Gradually add the dry ingredients to the wet mixture. Mix on low speed until just combined. Do not overmix. Overmixing develops gluten, which makes cookies tough instead of crisp. The dough should be thick and slightly crumbly at first, then come together into a ball.
6. **Chill the Dough**: Cover the bowl with plastic wrap and refrigerate for at least 30 minutes. This step is non-negotiable. Cold dough is easier to shape and holds its wrinkles better. If you skip this, the cookies will spread into flat discs.
7. **Shape the Fingers**: Take a small piece of dough, about 1 tablespoon. Roll it into a log shape. Taper one end to make it look like a finger. Use the back of a knife or a toothpick to press wrinkles into the dough. This is where the magic happens. Make the wrinkles deep and realistic.
8. **Add the Almond Nail**: Press a slivered almond into the rounded end of the finger. If it doesn’t stick, add a tiny drop of water or egg wash. Use a knife to cut a small slit under the almond to simulate the nail bed. This adds realism.
9. **Bake**: Place the cookies on the prepared baking sheets, leaving about 2 inches between them. Bake for 12-15 minutes, or until the edges are golden brown. The centers might still look soft, but they will firm up as they cool.
10. **Cool**: Let the cookies cool on the baking sheet for 5 minutes, then transfer them to a wire rack to cool completely. This prevents them from breaking.
11. **Dust (Optional)**: Once cool, you can dust them lightly with powdered sugar for a spooky, dusty look.
Take your time with the shaping. It’s the most fun part. Don’t worry if they aren’t perfect. The more they look like actual fingers, the better. If a cookie breaks during shaping, just press it back together. It’s still delicious.
Cooking Tips & Techniques
I’ve made these cookies enough times to know what goes wrong and how to fix it. Here are some pro tips to ensure success.
* **Dough Temperature**: If your dough gets too soft while you’re shaping, pop it back in the fridge for 10 minutes. Warm hands can melt the butter in the dough, causing the shapes to lose definition.
* **Wrinkle Depth**: Don’t be shy with the knife. Press deep into the dough to create wrinkles. Shallow wrinkles won’t look realistic and won’t provide that extra crunch.
* **Even Baking**: Rotate your baking sheets halfway through the bake time. Ovens often have hot spots, and rotating ensures even browning.
* **Almond Placement**: Make sure the almond is secure. If it falls off during baking, you’ll have a cookie with a bare nail. A tiny dot of egg wash helps glue it in place.
* **Cooling Completely**: This is the hardest part. Wait until they are completely cool before dusting with powdered sugar. If they are warm, the sugar will melt and become sticky.
One mistake I used to make was rolling the dough too thin. Keep them thick enough so they have a substantial bite. You want a cookie that feels like a treat, not a wafer.
Also, pay attention to the color. You want golden edges, not dark brown. If they get too dark, they will taste burnt. They should look pale gold overall with darker edges.
If you are making these for a large party, you can shape them and freeze them on a baking sheet before baking. Once frozen, transfer them to a bag. Bake from frozen, adding 1-2 minutes to the bake time. This is a great time-saver.
Variations & Adaptations
While the classic version is my favorite, there are fun ways to twist this recipe.
* **Chocolate Dipped**: Dip the bottom of the cooled cookies in melted dark chocolate. It looks like the finger is buried in dirt. This adds a rich, fudgy contrast to the crisp cookie.
* **Spiced Version**: Add a pinch of cinnamon or nutmeg to the dough. It adds a warm, autumnal flavor that pairs well with the almonds.
* **Gluten-Free**: Swap the all-purpose flour for a 1:1 gluten-free flour blend. The texture will be slightly more tender, but still crisp.
* **Vegan**: Use vegan butter and a flax egg (1 tablespoon ground flaxseed mixed with 3 tablespoons water per egg). The cookies might spread a bit more, so chill the dough longer.
* **Colorful Nails**: Use food coloring to tint the almonds. Red for blood, green for poison, or black for a darker look. It’s a fun way to customize for different themes.
I once made these with white chocolate chips mixed into the dough. It was a nice surprise, adding pockets of sweetness. But the classic version remains the best for its simplicity and texture.
Serving & Storage Suggestions
These cookies are best served at room temperature. Cold cookies can feel hard, and warm cookies can be too soft. Room temp is the sweet spot.
Pair them with a glass of milk or a spooky cocktail. I like serving them with a dark coffee or a hot cider to balance the sweetness. They are also great for photo ops. The lighting makes the wrinkles pop, so take your photos before they disappear.
For storage, keep them in an airtight container at room temperature for up to 5 days. If you live in a humid climate, add a piece of bread to the container to absorb moisture. They will stay crisp for days.
You can also freeze the baked cookies. Place them in a single layer in a freezer-safe container. They will last for up to 3 months. Thaw them at room temperature before serving.
The flavors develop over time. Letting them sit for a day or two allows the flavors to meld. The almond taste becomes more pronounced, and the cookie texture stabilizes.
Nutritional Information & Benefits
These cookies are a treat, so enjoy them in moderation. Each cookie contains approximately 120 calories. They are made with real butter and almonds, which provide healthy fats and protein.
The almonds offer a good source of vitamin E and magnesium. The butter provides fat-soluble vitamins. While they are high in sugar, the protein from the almonds helps balance the glycemic impact slightly.
They are not gluten-free unless you use a gluten-free flour blend. They contain dairy and nuts, so be mindful of allergies.
I like that these cookies use simple, whole ingredients. There are no artificial colors or weird preservatives. It’s just real food, made to look spooky. That’s a win in my book.
Conclusion
These crispy witch finger cookies are a Halloween staple for a reason. They are easy to make, fun to shape, and incredibly delicious. They strike the perfect balance between spooky and sweet, making them a hit with kids and adults alike.
I love that you can customize them to your liking. Whether you stick to the classic version or try a chocolate dip, they are always a success. They are the kind of recipe that brings people together, sharing laughs over the creation process and enjoying the results.
Give them a try. You might be surprised at how easy they are. And don’t forget to share your creations online. I’d love to see how yours turn out.
Frequently Asked Questions
Can I make the dough ahead of time?
Yes, you can make the dough up to 3 days in advance. Store it in the fridge, wrapped tightly in plastic wrap. Let it come to room temperature slightly before shaping.
Why did my cookies spread too much?
This usually happens if the butter was too soft or the dough wasn’t chilled enough. Make sure your butter is softened but not melted, and chill the dough for at least 30 minutes before shaping.
Can I use almond slices instead of slivered almonds?
Yes, but you’ll need to cut them in half lengthwise to get the right shape. Slivered almonds are thinner and look more like fingernails.
How do I keep the cookies crisp?
Store them in an airtight container at room temperature. Avoid storing them in the fridge, as moisture can make them soft. If they lose their crispness, you can reheat them in the oven for 5 minutes.
Are these cookies safe for kids to make?
Yes, kids love shaping the fingers. Just supervise them with the knife for the wrinkles and the oven for the baking. It’s a great family activity.
Pin This Recipe!
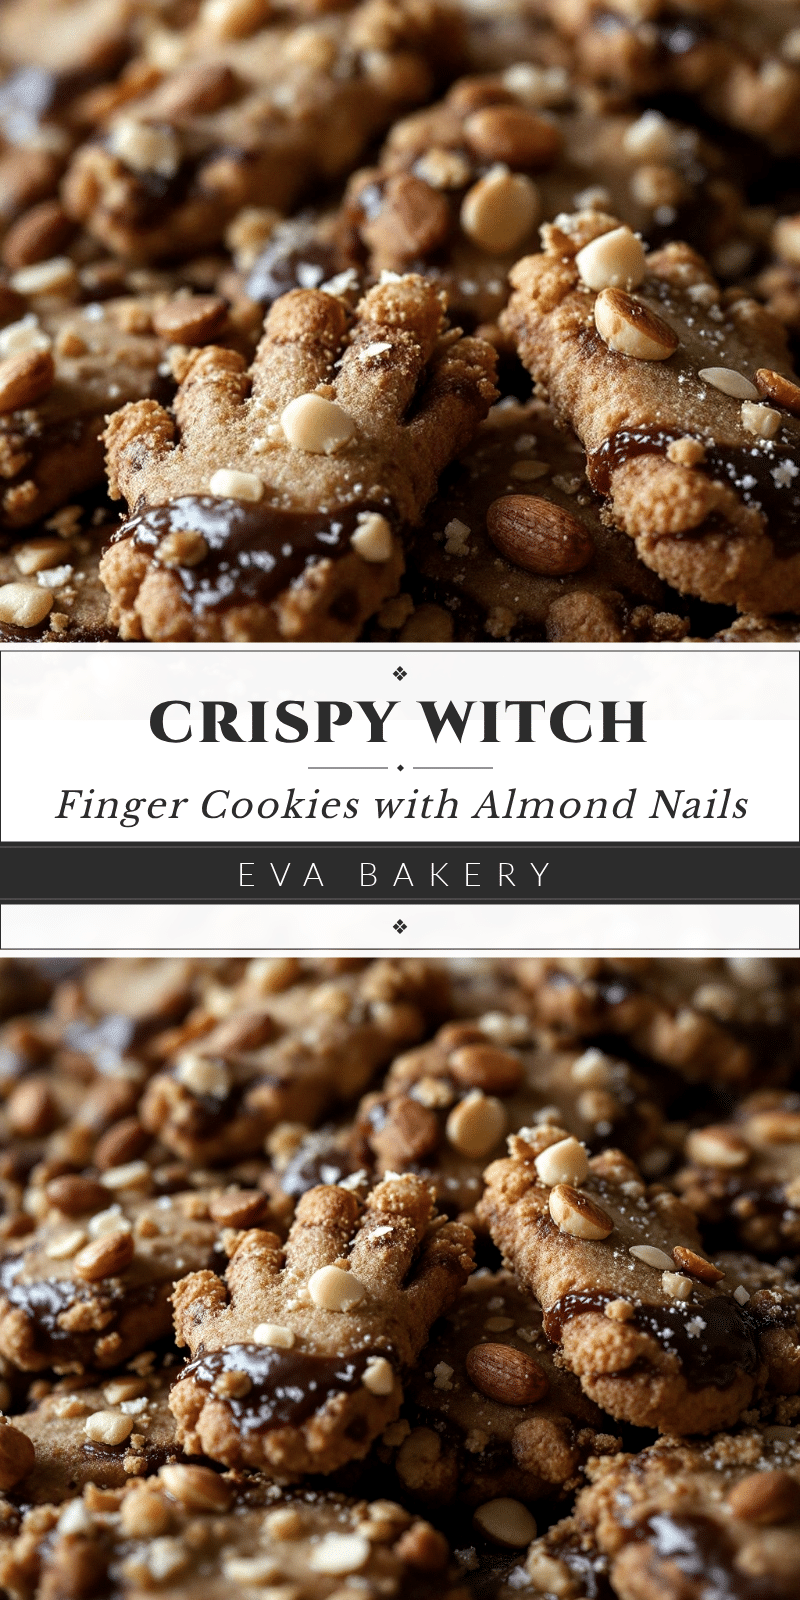
Crispy Witch Finger Cookies: Easy Halloween Treat
These spooky yet delicious crispy witch finger cookies are a perfect Halloween treat. Featuring a shortbread-like texture with realistic almond nails, they are easy to make, crowd-pleasing, and fun to shape.
- Prep Time: 15 minutes
- Cook Time: 12-15 minutes
- Total Time: 45 minutes
- Yield: Approximately 24 cookies 1x
- Category: Dessert
- Cuisine: American
Ingredients
- 1 cup (226g) unsalted butter, softened
- 1 cup (200g) granulated sugar
- 2 large eggs, room temperature
- 2 teaspoons pure vanilla extract
- 3 cups (375g) all-purpose flour
- 1/2 teaspoon baking powder
- 1/2 teaspoon salt
- Slivered almonds (for nails)
- Powdered sugar (for dusting, optional)
Instructions
- Preheat oven to 350°F (175°C). Line two large baking sheets with parchment paper.
- In a large bowl, beat softened butter and granulated sugar on medium-high speed for 3-4 minutes until pale and fluffy.
- Beat in eggs one at a time, then add vanilla extract and mix until combined.
- In a separate bowl, whisk together flour, baking powder, and salt.
- Gradually add dry ingredients to wet mixture on low speed until just combined. Do not overmix.
- Cover dough and refrigerate for at least 30 minutes.
- Take a 1-tablespoon piece of dough and roll into a log, tapering one end to resemble a finger.
- Use the back of a knife or toothpick to press deep wrinkles into the dough.
- Press a slivered almond into the rounded end to create a nail. Add a tiny drop of water or egg wash if needed to secure it.
- Cut a small slit under the almond to simulate the nail bed.
- Place cookies on prepared baking sheets, leaving 2 inches between them.
- Bake for 12-15 minutes until edges are golden brown.
- Let cookies cool on the baking sheet for 5 minutes, then transfer to a wire rack to cool completely.
- Dust lightly with powdered sugar if desired.
Notes
Ensure butter is softened but not melted. Chill dough thoroughly to prevent spreading and maintain shape. Rotate baking sheets halfway through baking for even browning. Cookies can be frozen unbaked or baked for up to 3 months.
Nutrition
- Serving Size: 1 cookie
- Calories: 120
- Sugar: 10
- Sodium: 50
- Fat: 6
- Saturated Fat: 4
- Carbohydrates: 15
- Fiber: 0.5
- Protein: 2
Keywords: Halloween cookies, witch finger cookies, crispy cookies, easy Halloween treats, shortbread cookies, almond nails, spooky baking


