I thought making a cheesecake had to be this complicated, oven-fired affair with a crust that crumbled under the weight of its own ambition. It took about two tries and a stubbornly soft kitchen counter for me to realize that the easiest way to that creamy, dreamy texture was to skip the baking drama altogether. Honestly, the first time I whipped up this Easy Creamy No-Bake Oreo Cheesecake, I was skeptical — no heat involved, no waiting for the oven, just a fridge and a little patience. But the results? Let’s just say the creamy filling settled perfectly, the Oreos held their crunch where they mattered, and the whole thing came together faster than I expected.
The cool thing was how simple it felt, yet it tasted like I’d been fussing over it for hours. The crumbly Oreo crust gave way to a silky, luscious filling that had just the right balance of sweet and slightly tangy notes. You know when a dessert makes you pause after the first bite? This was that kind of cheesecake for me. No fancy equipment, no weird ingredients — just a handful of Oreos, cream cheese, and a few pantry staples. It stuck with me because it’s the dessert that always saves the day when I’m running short on time but want something impressive enough for friends or family.
What surprised me the most was how forgiving this recipe is — a little more cream cheese here, a bit less sugar there, and it still turns out wonderful. And the best part? You don’t have to wait forever to enjoy it. After a few hours chilling, it’s ready to steal the show at any get-together or just to treat yourself on a quiet night. This cheesecake has become my go-to indulgence for when life feels a little too hectic but dessert can’t be skipped.
Why You’ll Love This Recipe
I’ve tested this Easy Creamy No-Bake Oreo Cheesecake more times than I can count, and it has never let me down. If you’re like me, juggling busy schedules but craving something indulgent, this recipe is a gem. Here’s why it’s a keeper:
- Quick & Easy: Comes together in under 20 minutes, perfect for last-minute dessert emergencies or spontaneous parties.
- Simple Ingredients: No need to hunt down anything exotic. Most of these staples, like cream cheese and Oreos, are probably sitting in your pantry right now.
- Perfect for Parties: Whether it’s a birthday bash, casual get-together, or holiday celebration, this cheesecake always disappears fast.
- Crowd-Pleaser: Kids, adults, picky eaters — everyone seems to love the creamy texture paired with crunchy cookie bits.
- Unbelievably Delicious: The filling is rich but never heavy, maintaining a smooth mouthfeel that melts in your mouth.
This isn’t just another Oreo cheesecake recipe — the trick is the balance of whipped cream folded gently into the cream cheese mixture, creating that perfect fluffiness without sacrificing creaminess. Plus, instead of a typical crushed Oreo base, I use a bit of melted butter to bind the crust just right, so it holds without becoming soggy. It’s the kind of dessert that feels indulgent but is surprisingly light, so you can enjoy a slice (or two) without that weighed-down feeling.
For me, this recipe is about fuss-free satisfaction. It’s the kind of treat that makes you close your eyes after the first bite and say, “Yeah, this was worth skipping the oven.”
What Ingredients You Will Need
This Easy Creamy No-Bake Oreo Cheesecake uses simple, wholesome ingredients that create a bold flavor and satisfying texture without the fuss. Here’s the rundown, grouped by function:
- For the Crust:
- 24 Oreo cookies (about 1 ½ cups crushed) – I prefer the classic Oreo for the authentic flavor
- 5 tablespoons unsalted butter, melted (adds richness and binds the crust)
- For the Filling:
- 16 ounces (450 g) cream cheese, softened (use full-fat for best texture)
- ½ cup (60 g) powdered sugar, sifted (adjust sweetness to taste)
- 1 teaspoon pure vanilla extract (quality matters here, I love Nielsen-Massey)
- 1 cup (240 ml) heavy whipping cream, cold (whipped to soft peaks)
- 12 Oreo cookies, roughly chopped (folded into the filling for texture)
Ingredient tips: You can swap the heavy cream with coconut cream for a dairy-free option, though the texture will be slightly different. If you want a gluten-free crust, almond flour crusts work, but you’ll lose the Oreo crunch. For seasonal flair, try adding fresh berries on top once chilled.
Equipment Needed
- 9-inch (23 cm) springform pan – makes it easy to unmold the cheesecake without damage
- Electric mixer or stand mixer – necessary for whipping the cream and beating the cream cheese smooth
- Mixing bowls – one for crust, one for filling
- Food processor or plastic bag and rolling pin – for crushing the Oreos
- Spatula – for folding ingredients gently without deflating the whipped cream
- Measuring cups and spoons – accuracy helps with sweetness and texture
If you don’t have a springform pan, a regular pie dish works, but unmolding will be trickier. I’ve used a 9-inch glass pie plate before, just served it straight from the dish. For crushing Oreos, a food processor is my go-to, but smashing them in a sealed plastic bag with a rolling pin works just fine (and gives you a bit of stress relief).
Preparation Method
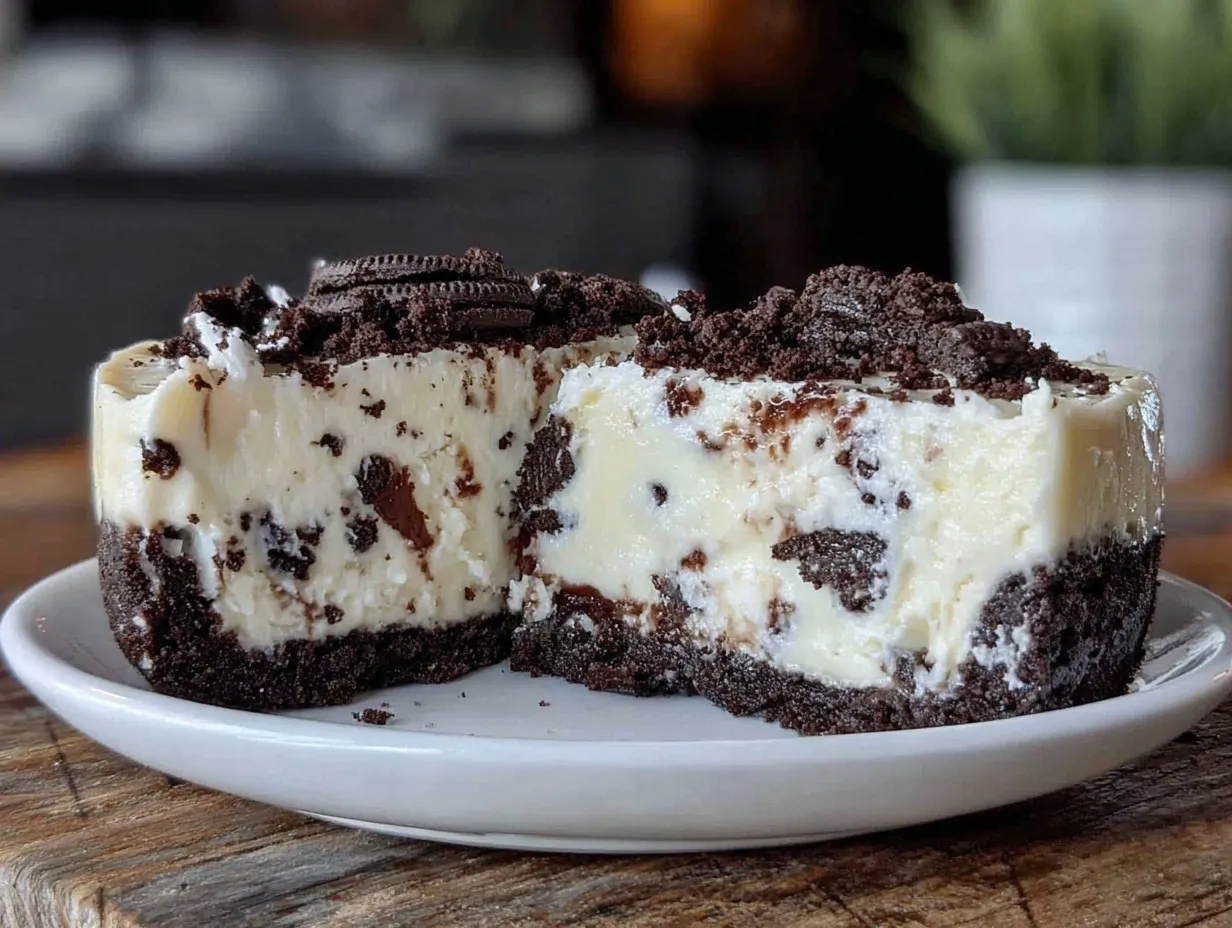
- Prepare the crust: Crush 24 Oreo cookies into fine crumbs using a food processor or rolling pin. In a bowl, combine the crumbs with 5 tablespoons melted butter until evenly moistened. Press the mixture firmly into the bottom of your 9-inch springform pan. Use the back of a spoon or a flat-bottomed glass for an even layer. Chill in the fridge while you make the filling (about 10 minutes).
- Make the filling base: In a large bowl, beat 16 ounces softened cream cheese with ½ cup powdered sugar and 1 teaspoon vanilla extract until smooth and creamy. This usually takes about 3-4 minutes on medium speed. Scrape down the sides so everything blends evenly.
- Whip the cream: In a separate chilled bowl, whip 1 cup cold heavy cream until soft peaks form. Watch closely—overwhipping turns it grainy. This step is crucial for that light, airy texture.
- Combine filling components: Gently fold the whipped cream into the cream cheese mixture in batches, using a spatula. Take your time to preserve the airiness—no rushing here. Once folded, fold in 12 roughly chopped Oreo cookies for texture.
- Assemble and chill: Pour the filling over the chilled crust, smoothing the top with your spatula. Cover tightly with plastic wrap and refrigerate for at least 4 hours, preferably overnight. This chilling time allows the filling to set beautifully.
- Serve: Release the springform pan sides carefully before slicing. Use a hot, wet knife for clean slices (wipe between cuts). Serve chilled and enjoy!
Pro tip: If the filling seems a bit soft after chilling, an extra hour in the fridge usually does the trick. Also, don’t skip softening the cream cheese — lumps are the enemy here.
Cooking Tips & Techniques
Making the perfect no-bake cheesecake is more about technique than fancy ingredients. Here are some tips from my kitchen trials:
- Softening the cream cheese: Let it sit out for at least 30 minutes before mixing. Cold cream cheese leads to lumps and uneven texture.
- Whipping cream perfectly: Chill your bowl and beaters for 10 minutes before whipping. This helps the cream whip up faster and hold its shape.
- Folding gently: Use a rubber spatula and fold the whipped cream into the cream cheese mixture by cutting through the center and sweeping around the bowl. This keeps the filling light and fluffy.
- Crust secrets: Don’t overdo the butter or the crust gets greasy; too little butter and it crumbles. Aim for a texture like damp sand.
- Chilling time: Patience pays off here. The cheesecake needs time to firm up, or it will be too soft to slice nicely.
Once, I rushed the chilling step (because, honestly, who has time sometimes?), and the cheesecake was more like a quivering pudding. Lesson learned: the fridge is your friend. Also, I’ve found that letting the cheesecake sit at room temperature for about 10 minutes before serving really helps the flavor and texture shine.
Variations & Adaptations
This recipe is pretty flexible, which is why it’s become a staple in my kitchen. Here are a few ways to make it your own:
- Chocolate Lovers: Add ½ cup melted dark chocolate to the filling for a rich twist. You can also swap the Oreos for chocolate sandwich cookies for a deeper cocoa flavor.
- Fruit Toppings: Fresh strawberries, raspberries, or a berry compote on top add a bright contrast to the creamy filling.
- Dairy-Free Version: Use dairy-free cream cheese and coconut cream instead of heavy cream. The texture changes slightly but remains delicious.
- Nutty Crust: Mix finely chopped nuts (like pecans or almonds) into the crust for added crunch and flavor.
- Individual Servings: Make mini cheesecakes in ramekins or mason jars for a cute party presentation.
I once swapped half the Oreos for crushed peppermint cookies during the holidays — the minty crunch was a hit. And if you happen to enjoy a bit of sparkle with your dessert, pairing this cheesecake with a refreshing drink like the champagne punch or sparkling sangria from Eva Bakery adds a festive touch.
Serving & Storage Suggestions
This cheesecake is best served chilled, straight from the fridge, with a smooth, clean slice. For presentation, I like to garnish with extra Oreo crumbs or whole mini Oreos on top — it adds a nice visual cue of what’s inside.
Pairing it with a light coffee or a sparkling beverage really rounds out the experience. It’s a perfect dessert after a rich dinner or a sweet surprise at a casual brunch. For a savory-sweet combo, try it alongside easy appetizers like the crispy prosciutto-wrapped asparagus bites.
Storage: Keep the cheesecake covered in the fridge for up to 4 days. It holds its texture nicely but might absorb fridge odors if left uncovered.
For longer storage, you can freeze the cheesecake (without the plastic wrap, just an airtight container) for up to one month. Thaw overnight in the fridge before serving. The texture softens slightly after freezing but remains tasty.
Interestingly, the flavors tend to deepen after a day or two, so if you can wait, it’s actually better the next day.
Nutritional Information & Benefits
Per serving (based on 12 slices), this cheesecake provides approximately:
| Calories | 320 |
|---|---|
| Fat | 22 g |
| Carbohydrates | 25 g |
| Protein | 5 g |
| Sugar | 18 g |
The cream cheese offers a good source of calcium and protein, while Oreos add sugar and carbs, making this a treat best enjoyed in moderation. Using full-fat cream cheese and heavy cream contributes to the creamy texture but also to the richness, so it’s definitely a dessert to savor slowly.
If you’re watching carbs, consider a low-carb crust alternative or smaller portions. The recipe is gluten-free if you use gluten-free Oreos, which are available in many stores now.
Conclusion
This Easy Creamy No-Bake Oreo Cheesecake has become a dessert I trust to deliver every single time — no oven, no stress, just satisfying results. I love how it’s so adaptable, forgiving, and downright delicious without any complicated steps.
Feel free to tweak it to your taste, whether that means adding more Oreos, experimenting with toppings, or making mini versions for entertaining. This cheesecake is a reminder that sometimes the simplest recipes are the ones that stick with us — comforting, easy, and crowd-pleasing.
Give it a try, and I’d love to hear how you make it your own!
Frequently Asked Questions
Can I use a different type of cookie for the crust?
Absolutely! Graham crackers, chocolate wafers, or gluten-free cookies work well. Just make sure to adjust the butter amount for binding.
How long does it take for the cheesecake to set?
Chilling for at least 4 hours is ideal, but overnight yields the best texture and flavor.
Can I make this cheesecake ahead of time?
Yes, it’s perfect for making a day or two in advance. Just keep it covered in the fridge.
What’s the best way to prevent the crust from getting soggy?
Press the crust firmly and chill it before adding the filling. This helps it hold its shape and stay crisp.
Is this recipe suitable for beginners?
Definitely! It’s straightforward with no baking required, making it perfect even if you’re new to cheesecake.
Pin This Recipe!
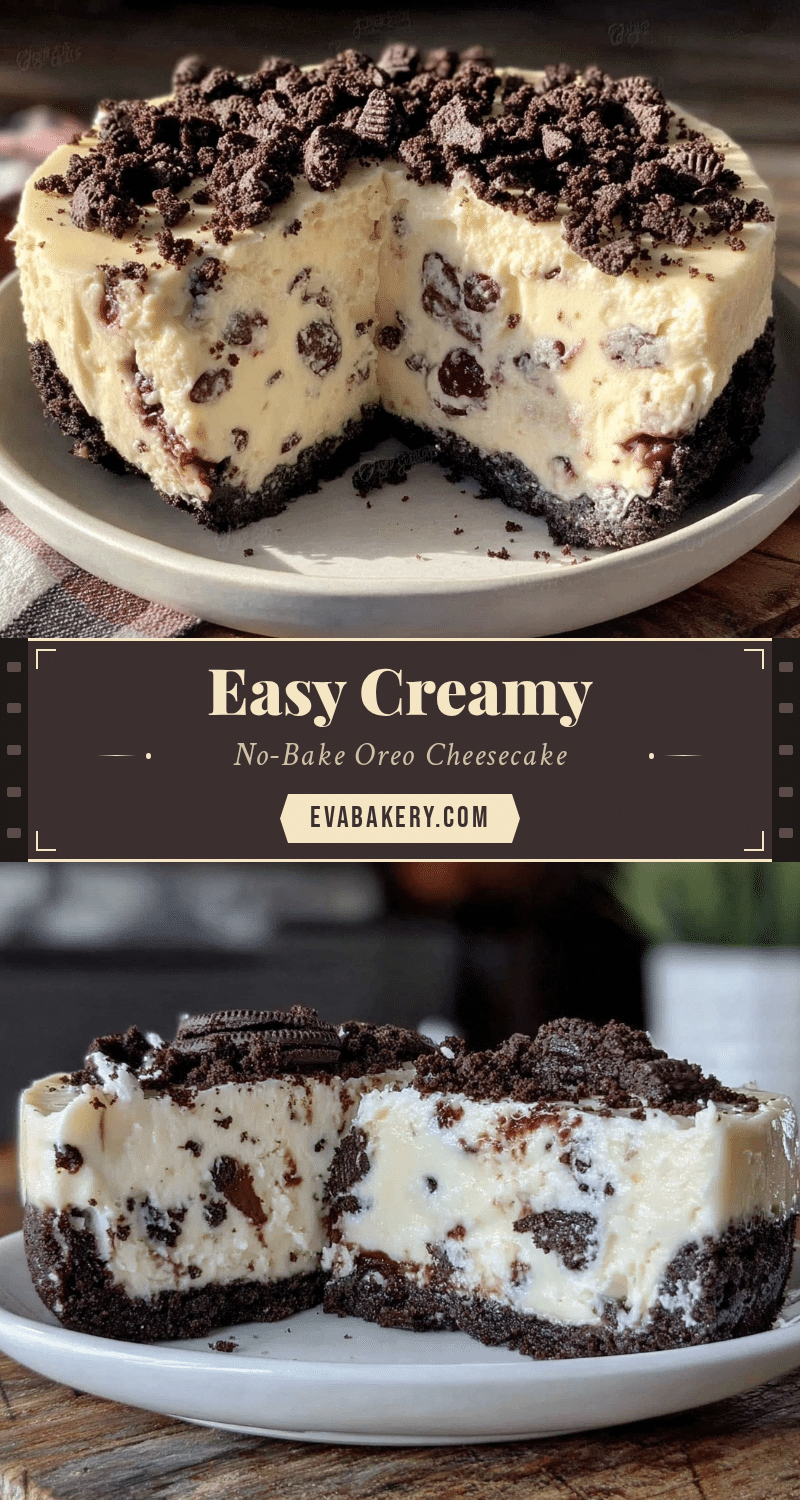
Easy Creamy No-Bake Oreo Cheesecake Recipe Perfect for Parties
A quick and easy no-bake Oreo cheesecake with a creamy filling and crunchy Oreo crust, perfect for parties and last-minute desserts.
- Prep Time: 15 minutes
- Cook Time: 0 minutes
- Total Time: 4 hours 15 minutes
- Yield: 12 servings 1x
- Category: Dessert
- Cuisine: American
Ingredients
- 24 Oreo cookies (about 1 ½ cups crushed)
- 5 tablespoons unsalted butter, melted
- 16 ounces (450 g) cream cheese, softened
- ½ cup (60 g) powdered sugar, sifted
- 1 teaspoon pure vanilla extract
- 1 cup (240 ml) heavy whipping cream, cold
- 12 Oreo cookies, roughly chopped
Instructions
- Crush 24 Oreo cookies into fine crumbs using a food processor or rolling pin.
- In a bowl, combine the crumbs with 5 tablespoons melted butter until evenly moistened.
- Press the mixture firmly into the bottom of a 9-inch springform pan. Chill in the fridge for about 10 minutes.
- In a large bowl, beat 16 ounces softened cream cheese with ½ cup powdered sugar and 1 teaspoon vanilla extract until smooth and creamy.
- In a separate chilled bowl, whip 1 cup cold heavy cream until soft peaks form.
- Gently fold the whipped cream into the cream cheese mixture in batches, then fold in 12 roughly chopped Oreo cookies.
- Pour the filling over the chilled crust, smooth the top, cover tightly with plastic wrap, and refrigerate for at least 4 hours or overnight.
- Release the springform pan sides carefully before slicing. Use a hot, wet knife for clean slices. Serve chilled.
Notes
Soften cream cheese for at least 30 minutes before mixing to avoid lumps. Chill bowl and beaters before whipping cream. Fold whipped cream gently to keep filling airy. Press crust firmly and chill before adding filling to prevent sogginess. If filling is soft after chilling, refrigerate for an extra hour. Let cheesecake sit at room temperature for 10 minutes before serving for best flavor and texture.
Nutrition
- Serving Size: 1 slice (1/12 of che
- Calories: 320
- Sugar: 18
- Fat: 22
- Carbohydrates: 25
- Protein: 5
Keywords: no-bake cheesecake, Oreo cheesecake, easy cheesecake, party dessert, creamy cheesecake, no oven dessert