Sunday afternoon, the clock ticking past 3 PM, and I’m staring at a half-empty fridge wondering how the week got away from me again. The kids have that specific kind of hungry that turns into whining if I don’t move fast. Lunchboxes need packing for tomorrow, and honestly, I just need something I can make now, stash in the fridge, and forget about until the morning scramble. That’s when these mini turkey meatball cups were born—out of necessity, a pound of ground turkey, and a muffin tin I almost donated last spring.
They started as an experiment, honestly. I wanted something my kids would actually eat cold, straight from a lunchbox, without that sad microwaved-at-school texture. And I wanted it to feel like a treat, not a chore. The first batch came out a little dry—okay, a lot dry. But I tweaked, added a secret ingredient (grated zucchini, don’t tell anyone), and suddenly these little cups became the most requested item in our house. They’re not fancy. They’re not trying to be. They’re just good, reliable, and exactly what you need when the lunchbox packing fatigue hits.
There’s something about making food that works double-duty—dinner one night, lunch the next—that feels like winning at adulting. These mini turkey meatball cups do exactly that. They’re protein-packed, kid-approved, and they freeze like a dream. I’ve made them for school lunches, road trips, and even as a quick after-school snack that doesn’t require negotiation. If you’ve ever stood in your kitchen at 9 PM wondering what to pack for tomorrow, this recipe is for you. It’s the kind of thing that makes you feel like you’ve got it together, even when you definitely don’t.
Why You’ll Love This Recipe
Let me tell you why these little guys have become my lunchbox MVP. I’ve tested this recipe more times than I care to admit, and each batch taught me something. Here’s what makes them stand out:
- Quick & Easy : From start to finish, you’re looking at about 30 minutes. That’s less time than it takes to argue about what’s for lunch.
- Simple Ingredients : Nothing weird here. Ground turkey, breadcrumbs, an egg, some seasonings, and a veggie or two. You probably have most of this already.
- Perfect for Meal Prep : Make a batch on Sunday, and you’ve got lunches covered for the whole week. They’re the kind of recipe that keeps on giving.
- Crowd-Pleaser : I’ve served these to picky eaters, grown-ups who “don’t like turkey,” and kids who survive on air alone. They disappear every time.
- Unbelievably Delicious : The texture is the real star here. Moist on the inside, slightly golden on the outside, with that perfect bite-sized shape that makes everything more fun.
What makes these different from every other meatball recipe out there? It’s the combination of the muffin tin method (no rolling, no fuss) and that sneaky grated zucchini that keeps everything juicy without tasting like vegetables. I’ve tested this with different binders, different fats, and different cooking times. This version is the one that works every single time, whether you’re a seasoned cook or someone who barely knows which end of the knife to hold.
These aren’t just good for lunchbox food. They’re the kind of recipe that makes you feel like you’ve hacked the system. You know that moment when your kid opens their lunchbox and actually smiles? That’s what we’re going for here. No sad sandwiches, no soggy leftovers. Just protein-packed, flavorful cups that taste as good cold as they do warm. Honestly, I’ve eaten them straight from the fridge at 11 PM and felt zero shame about it.
What Ingredients You Will Need
This recipe uses simple, wholesome ingredients to deliver bold flavor and satisfying texture without the fuss. Most of these are pantry staples, and the ones that aren’t are easy to find at any grocery store.
- Ground turkey (1 lb / 450g) – I prefer 93% lean for the best balance of moisture and flavor. Too lean (99%) and they get dry. Too fatty and they might fall apart. Look for ground turkey that’s not pre-seasoned so you control the flavor.
- Breadcrumbs (1/2 cup / 60g) – Plain or Italian-style both work. Panko gives a lighter texture, while regular breadcrumbs make them a bit denser. I’ve used gluten-free breadcrumbs with excellent results too.
- Grated zucchini (1/2 cup, squeezed dry / about 60g) – This is my secret weapon. It adds moisture without changing the flavor. Don’t skip squeezing out the excess water or your meatballs will be soggy.
- Egg (1 large) – Acts as the binder. If you’re making a double batch, use one egg per pound of meat. Room temperature egg mixes in more evenly.
- Grated Parmesan cheese (1/4 cup / 25g) – Adds saltiness and helps with browning. I use the stuff in the green can for convenience, but freshly grated melts more smoothly.
- Garlic (2 cloves, minced) – Fresh is best here. The pre-minced stuff in a jar works in a pinch, but you’ll want to use a bit more.
- Dried oregano (1 teaspoon) – Gives that classic Italian-ish flavor. You can swap for Italian seasoning if that’s what you have.
- Salt (1/2 teaspoon) – I use fine sea salt. If you’re using kosher salt, you might need a bit more.
- Black pepper (1/4 teaspoon) – Freshly ground if you can. It makes a difference, I swear.
- Olive oil (1 tablespoon, for greasing) – Or cooking spray. Whatever you’ve got.
- Optional: Marinara sauce for dipping (1/2 cup / 120ml) – Not necessary for the recipe itself, but highly recommended for serving. My kids love dipping these in ranch too, which is apparently a thing.
I recommend using ground turkey from a brand you trust. I’ve had good luck with [Butterball] and [Jennie-O], but honestly, any fresh ground turkey from the refrigerated section works. Just check the sell-by date and make sure it smells fresh—no funky odors.
For the breadcrumbs, I’ve tested this with homemade breadcrumbs made from stale bread, and it works beautifully. Just pulse a couple of slices in the food processor until fine. If you’re watching your carb intake, almond flour works as a substitute, though the texture will be slightly different.
The zucchini is non-negotiable in my book. I know it sounds weird, but trust me on this. I’ve made batches without it, and they were noticeably drier. If you don’t have zucchini, finely grated carrot works too. Just squeeze out the moisture the same way.
Equipment Needed
You don’t need a fancy kitchen to make these. Here’s what you’ll actually use:
- Muffin tin (12-cup standard size) – This is the whole point of the recipe. No rolling meatballs by hand. If you don’t have one, you can use a mini muffin tin for even smaller cups (just reduce the cooking time by 5-7 minutes).
- Large mixing bowl – For combining everything. Any bowl works, but a wide one makes mixing easier.
- Box grater or food processor – For grating the zucchini. A box grater is cheaper and easier to clean. If you’re using a food processor, use the grating disc.
- Clean kitchen towel or cheesecloth – For squeezing the water out of the zucchini. Paper towels work in a pinch, but they tend to tear.
- Measuring cups and spoons – Standard set. Nothing fancy.
- Cookie scoop or spoon – For portioning the meat mixture evenly. A 2-tablespoon scoop is perfect for filling each muffin cup.
- Cooling rack – Optional but helpful. Lets the meatball cups cool evenly so they don’t get soggy on the bottom.
If you don’t have a muffin tin, you can shape these into regular meatballs and bake them on a sheet pan. Just roll them into 1.5-inch balls and bake at 400°F for 15-18 minutes. But honestly, the muffin tin method is what makes these so easy. No rolling, no mess, and they come out perfectly uniform every time.
I picked up my muffin tin at a thrift store for $3, and it’s been going strong for years. You don’t need non-stick or fancy. Just give it a good spray with oil and you’re golden.
Preparation Method
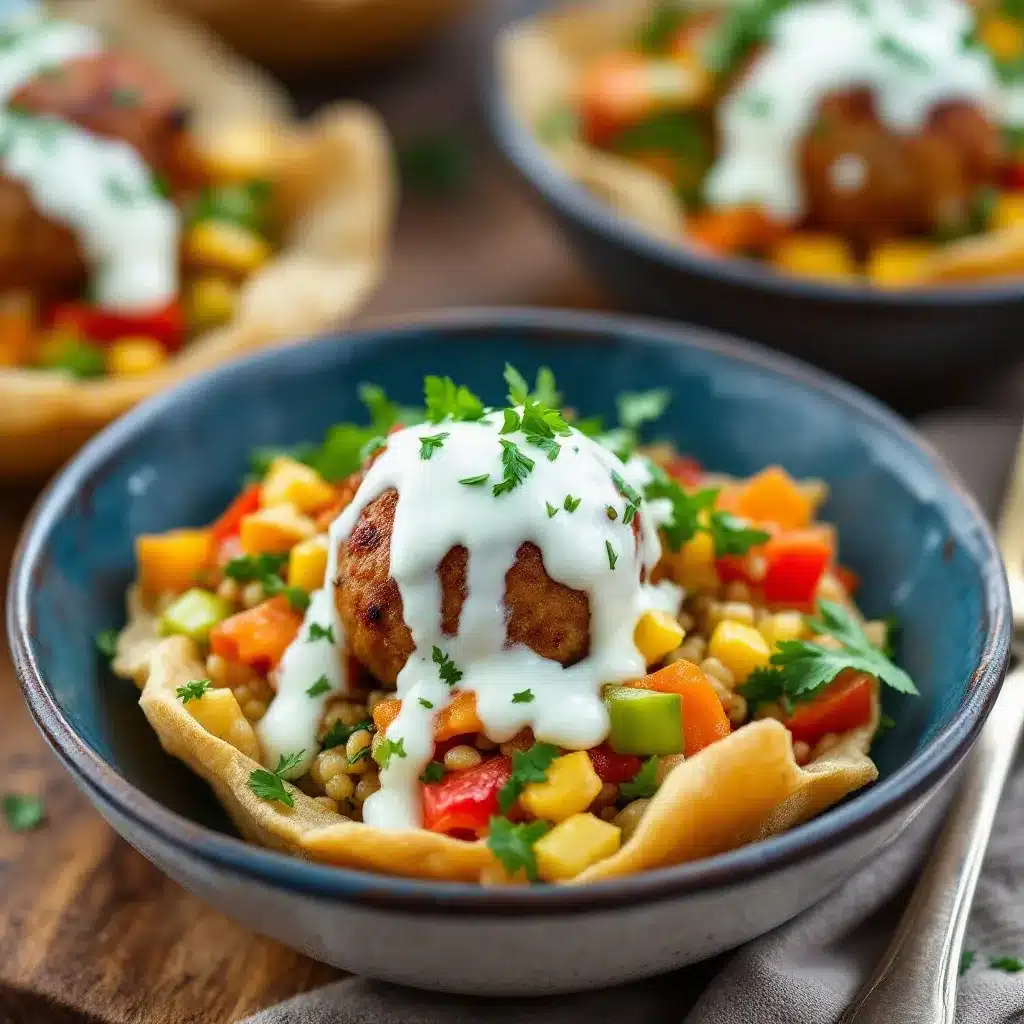
Let’s get cooking. This whole process takes about 30 minutes, and most of that is hands-off baking time.
- Preheat your oven to 400°F (200°C). Give it a full 10-15 minutes to come to temperature. A properly preheated oven ensures even cooking and that nice golden exterior.
- Prepare the zucchini. Grate 1 medium zucchini using the large holes of a box grater. You should end up with about 1/2 cup of grated zucchini. Place the grated zucchini in the center of a clean kitchen towel and twist it tightly over the sink. Squeeze until no more liquid comes out. This step is crucial—if you skip it, your meatball cups will be watery and won’t hold together. I learned this the hard way on my first attempt. The batch was a disaster, and I nearly gave up on the recipe entirely.
- Grease the muffin tin. Use olive oil, cooking spray, or even butter to generously coat each of the 12 cups. Don’t be shy here. A well-greased tin means the meatball cups will pop right out without sticking.
- Combine the ingredients. In a large mixing bowl, add the ground turkey, squeezed zucchini, breadcrumbs, grated Parmesan, beaten egg, minced garlic, oregano, salt, and pepper. Use your hands to mix everything together. I know it’s messy, but your hands do the best job here. A spatula or spoon doesn’t incorporate everything as evenly. Mix just until everything is combined—overmixing can make the meat tough. You should see the ingredients evenly distributed with no streaks of raw egg or pockets of breadcrumbs.
- Portion the mixture. Using a 2-tablespoon cookie scoop or a regular spoon, divide the mixture evenly among the 12 muffin cups. Each cup should be filled to the top but not overflowing. If you don’t have a scoop, just eyeball it—they don’t have to be perfect. The mixture should make exactly 12 cups if you’re portioning correctly.
- Shape the cups. With slightly damp fingers (this prevents sticking), gently press down on each portion to flatten it slightly. You want them to be about 1/2 inch thick and even across the top. This helps them cook evenly.
- Bake for 18-20 minutes. Place the muffin tin on the middle rack of your preheated oven. Bake until the tops are golden brown and the internal temperature reaches 165°F (74°C) when checked with a meat thermometer. If you don’t have a thermometer, cut one open—there should be no pink inside, and the juices should run clear.
- Let them rest. Remove the muffin tin from the oven and let the meatball cups cool in the tin for 5 minutes. This resting time allows them to set and makes them easier to remove. After 5 minutes, run a butter knife around the edges of each cup and gently lift them out. Transfer to a cooling rack if you have one.
- Cool completely before storing. If you’re packing these for lunches, let them cool completely on the rack before transferring to an airtight container. Putting warm meatball cups in a container creates condensation, which can make them soggy. Patience here pays off.
A note on timing: While the meatball cups are baking, I usually clean up the kitchen. The whole process from start to finish (including cleanup) takes about 45 minutes. That’s less time than a trip to the drive-through, and the results are way better for you.
Cooking Tips & Techniques
After making these probably fifty times (I’ve lost count), here’s what I’ve learned the hard way so you don’t have to.
The Zucchini Squeeze Is Non-Negotiable
I cannot stress this enough. The first time I made these, I thought, “Eh, a little extra moisture won’t hurt.” Wrong. The meatball cups turned out more like meaty pudding than meatballs. They fell apart, they were soggy, and my kids looked at me like I’d lost my mind. Squeeze that zucchini until your hands hurt. You want it dry. Really dry. Like, desert dry.
Don’t Overmix the Meat
Mix just until everything comes together. If you keep working it, the proteins in the turkey tighten up, and you end up with dense, tough meatball cups. Think of it like making pancakes—you want everything combined, but you don’t want to develop the gluten. Same principle here, even though there’s no gluten involved.
Use a Meat Thermometer
I know, I know. Extra equipment, extra step. But ground turkey needs to reach 165°F (74°C) to be safe, and it’s really easy to overcook it trying to make sure it’s done. A thermometer takes the guesswork out. I use an instant-read one, and it’s saved countless batches from the dry zone.
Let Them Rest in the Pan
Those 5 minutes of resting time aren’t just for your convenience. The meatball cups continue cooking from residual heat, and the juices redistribute throughout the meat. If you try to take them out immediately, they might fall apart. Let them set up, and they’ll hold their shape perfectly.
Make a Double Batch
These freeze beautifully, so if you’re already going through the effort, double the recipe. I make 24 at a time, freeze half, and have lunches ready for two weeks. It’s the same amount of work for twice the payoff. Just make sure to cool them completely before freezing, and layer them between pieces of parchment paper so they don’t stick together.
Variations & Adaptations
One of the best things about this recipe is how flexible it is. Here are some variations I’ve tried and loved:
Cheesy Italian Version
Add 1/4 cup of finely chopped sun-dried tomatoes and swap the Parmesan for mozzarella. The sun-dried tomatoes add a tangy sweetness, and the mozzarella makes them extra gooey. My husband’s favorite version by far.
Spicy Southwest Style
Replace the oregano with 1 teaspoon of cumin and 1/2 teaspoon of chili powder. Add 2 tablespoons of finely chopped cilantro and a small diced jalapeño (seeds removed if you don’t want heat). Serve with salsa for dipping. This version is fantastic for taco night too.
Gluten-Free Adaptation
Use gluten-free breadcrumbs or crushed rice crackers instead of regular breadcrumbs. I’ve tested this with both, and the texture is nearly identical. Just make sure your breadcrumbs are finely ground so they distribute evenly. Also check your grated Parmesan—some brands add anti-caking agents that contain gluten.
Dairy-Free Version
Skip the Parmesan or use a dairy-free alternative. I’ve used nutritional yeast (about 2 tablespoons) for a cheesy flavor without the dairy. It’s not exactly the same, but it’s pretty close. You might need to add an extra tablespoon of breadcrumbs to compensate for the missing moisture from the cheese.
Picky Eater Friendly
If your kids are suspicious of anything green, grate the zucchini extra fine so it disappears into the meat. You can also swap the zucchini for finely grated carrot. Same moisture-boosting effect, zero vegetable visibility. I’ve been doing this for years, and my kids still don’t know.
Serving & Storage Suggestions
These mini turkey meatball cups are incredibly versatile when it comes to serving. Here’s how I handle them:
Serving Temperature
They’re delicious warm, room temperature, or cold straight from the fridge. For lunchboxes, I pack them cold and they’re perfectly fine by lunchtime. If you’re serving them for dinner, let them rest for 5 minutes after baking, then serve with your favorite dipping sauce. Marinara, ranch, honey mustard, or even barbecue sauce all work great.
What to Serve With
For a complete lunchbox, I pair 3-4 meatball cups with some cheese cubes, a handful of cherry tomatoes, and maybe some crackers. For dinner, serve them alongside roasted vegetables, pasta, or a simple salad. They’re also great on a slider bun with a smear of pesto for a fun twist on a meatball sub.
Storage Instructions
Store cooled meatball cups in an airtight container in the refrigerator for up to 5 days. Layer them between pieces of parchment paper to prevent sticking. I like to use a glass container so I can see how many are left without opening the lid.
Freezing Instructions
To freeze, arrange the cooled meatball cups in a single layer on a baking sheet and freeze for 1-2 hours until solid. Then transfer them to a freezer-safe bag or container. They’ll keep for up to 3 months. When you’re ready to use them, thaw overnight in the refrigerator or reheat directly from frozen in the microwave for 30-45 seconds.
Reheating Tips
For best results, reheat in a 350°F (175°C) oven for 5-7 minutes if they’re thawed, or 10-12 minutes if frozen. The microwave works too—about 30 seconds for a few cups—but the texture won’t be quite as good. For lunchboxes, I don’t reheat at all. They’re fantastic cold.
Flavor Development
Honestly, these taste even better the next day. The flavors meld together overnight, and the texture firms up perfectly. If you can resist eating them all right away, make them a day ahead for the best results.
Nutritional Information & Benefits
Here’s the nutritional breakdown per serving (3 meatball cups, without dipping sauce):
| Nutrient | Amount |
|---|---|
| Calories | 245 |
| Protein | 28g |
| Carbohydrates | 12g |
| Fiber | 2g |
| Fat | 10g |
| Saturated Fat | 3g |
| Sodium | 480mg |
These meatball cups are packed with lean protein from the turkey, which helps keep you full and satisfied. The zucchini adds a serving of vegetables (sneaky, I know) along with vitamin C and potassium. The Parmesan provides calcium and a little extra protein boost.
This recipe is naturally gluten-free if you use gluten-free breadcrumbs, and it’s easy to make dairy-free by skipping the cheese. It’s also low-carb friendly—each serving has just 12g of carbs, most of which come from the breadcrumbs and zucchini.
Potential allergens include eggs and dairy (from the Parmesan). If you’re serving a crowd with allergies, just make the appropriate substitutions mentioned in the variations section.
From a wellness perspective, I love that these meatball cups give me control over what goes into my family’s lunchboxes. No preservatives, no weird additives, no mystery ingredients. Just real food that tastes good and makes you feel good.
Conclusion
These easy mini turkey meatball lunchbox cups have genuinely changed the way I approach meal prep. They’re the kind of recipe that makes you feel like you’ve got your life together, even on the days when you definitely don’t. They’re forgiving, flexible, and they make lunchbox packing feel less like a chore and more like a small act of love.
I hope you’ll try them and make them your own. Maybe you’ll add a different spice blend, swap in ground chicken, or find a new dipping sauce that becomes your family’s favorite. That’s the beauty of a simple recipe—it leaves room for your own creativity.
If you make these, I’d love to hear how they turned out. Drop a comment below and let me know if your kids gave them the thumbs up, or if you came up with a variation I haven’t tried yet. And if you’re looking for more lunchbox inspiration, check out some of my other favorite recipes like these fluffy mini quiches or these crispy bacon-wrapped dates for a fun snack alternative.
Happy cooking, friends. Your lunchboxes are about to get a whole lot more interesting.
Frequently Asked Questions
Can I use ground chicken instead of turkey?
Absolutely. Ground chicken works perfectly as a substitute. Just make sure it’s not too lean—look for ground chicken thigh or a blend for the best moisture. The cooking time remains the same.
How do I prevent the meatball cups from sticking to the muffin tin?
Generously grease each cup with oil or cooking spray before adding the meat mixture. Let them rest in the tin for 5 minutes after baking, then run a butter knife around the edges before lifting them out. If you’re still having trouble, try using silicone muffin cups—they pop right out with zero effort.
Can I make these ahead of time for a party or gathering?
Yes! They’re perfect for entertaining. Make them up to 2 days in advance and store in the refrigerator. Reheat in a 350°F oven for 5-7 minutes just before serving. They’re also great at room temperature, so they work well on a buffet table.
My meatball cups turned out dry. What went wrong?
Most likely, you either overmixed the meat or overcooked them. Mix just until combined and use a meat thermometer to check for doneness at 165°F. Also make sure you’re using ground turkey with at least 7% fat—the 99% lean versions are notoriously dry. The zucchini helps too, so don’t skip it.
Can I add other vegetables to the mixture?
Definitely. Finely grated carrot, finely chopped spinach (squeezed dry), or even grated apple work well. Just keep the total vegetable addition to about 1/2 cup and make sure to squeeze out excess moisture. I’ve also added finely chopped mushrooms for extra umami flavor.
Pin This Recipe!

Easy Mini Turkey Meatball Lunchbox Cups

These mini turkey meatball cups are protein-packed, kid-approved, and perfect for meal prep. Made in a muffin tin with a secret ingredient (grated zucchini) for moisture, they’re delicious warm or cold and freeze beautifully.
- Prep Time: 15 minutes
- Cook Time: 20 minutes
- Total Time: 35 minutes
- Yield: 4 servings (3 meatball cups per serving) 1x
- Category: Main Course
- Cuisine: American
Ingredients
- 1 lb (450g) ground turkey (93% lean)
- 1/2 cup (60g) breadcrumbs (plain or Italian-style)
- 1/2 cup (about 60g) grated zucchini, squeezed dry
- 1 large egg
- 1/4 cup (25g) grated Parmesan cheese
- 2 cloves garlic, minced
- 1 teaspoon dried oregano
- 1/2 teaspoon fine sea salt
- 1/4 teaspoon black pepper
- 1 tablespoon olive oil (for greasing)
- Optional: 1/2 cup (120ml) marinara sauce for dipping
Instructions
- Preheat your oven to 400°F (200°C).
- Grate 1 medium zucchini using the large holes of a box grater. Place the grated zucchini in a clean kitchen towel and twist tightly over the sink to squeeze out as much liquid as possible.
- Generously grease a 12-cup standard muffin tin with olive oil or cooking spray.
- In a large mixing bowl, combine the ground turkey, squeezed zucchini, breadcrumbs, Parmesan, beaten egg, minced garlic, oregano, salt, and pepper. Mix with your hands just until everything is combined—do not overmix.
- Using a 2-tablespoon cookie scoop or spoon, divide the mixture evenly among the 12 muffin cups, filling each to the top.
- With slightly damp fingers, gently press down on each portion to flatten slightly to about 1/2 inch thick.
- Bake on the middle rack for 18-20 minutes, until the tops are golden brown and the internal temperature reaches 165°F (74°C).
- Remove from the oven and let the meatball cups rest in the tin for 5 minutes. Run a butter knife around the edges and gently lift them out. Transfer to a cooling rack to cool completely before storing.
Notes
Squeeze the zucchini very dry to avoid soggy meatballs. Do not overmix the meat. Let the meatball cups rest in the pan for 5 minutes after baking. These taste even better the next day. Freeze for up to 3 months.
Nutrition
- Serving Size: 3 meatball cups
- Calories: 245
- Sugar: 2
- Sodium: 480
- Fat: 10
- Saturated Fat: 3
- Carbohydrates: 12
- Fiber: 2
- Protein: 28
Keywords: mini turkey meatball cups, lunchbox meatballs, turkey meatball muffins, meal prep meatballs, kid-friendly meatballs, healthy lunchbox ideas


